
This is a recording of a recent live teleclass I did with thousands of kids from all over the world. I've included it here so you can participate and learn, too!
Discover how to detect magnetic fields, learn about the Earth's 8 magnetic poles, and uncover the mysterious link between electricity and magnetism that marks one of the biggest discoveries of all science…ever.
Materials:
Please login or register to read the rest of this content.
Discover how to detect magnetic fields, learn about the Earth's 8 magnetic poles, and uncover the mysterious link between electricity and magnetism that marks one of the biggest discoveries of all science…ever.
Materials:
- Box of paperclips
- Two magnets (make sure one of them ceramic because we're going to break it)
- Compass
- Hammer
- Nail
- Sandpaper or nail file
- D cell battery
- Rubber band
- Magnet Wire
- Nine ½” (12 mm) ball bearings
- Toilet paper tube or paper towel tube
- Ruler with groove down the middle
- Eight strong rubber bands
- Scissors
Please login or register to read the rest of this content.
 Doing science is exciting, fun, and full of big ideas! Why bother with writing when you could be mixing up chemicals, blasting rockets, or shattering laser beams?
Because all your "great ideas" are worth nothing if you can't tell others about what you're doing. Scientists write in journals to let others know the latest news with their experiments, announce their new discoveries, or to simply keep track of their progress.
Keeping a science journal doesn't have to be flashy or fancy, just accurate. Science is already hard enough without the added chaos of not knowing what you did yesterday. I'm going to show you the three easy steps to keeping a journal.
You don't have to write a novel - just keep track of what you're doing along with any questions that come up. It's a lot easier to do a couple pages a day for a month rather than trying to pound out a hundred pages in a day! This is something you're going to use throughout the program doing just a little bit at a time, At the end of the month or year, you'll be surprised to see how much science you've covered!
You don't have to write a novel - just keep track of what you're doing along with any questions that come up. It's a lot easier to do a couple pages a day for a month rather than trying to pound out a hundred pages in a day! This is something you're going to use throughout the program doing just a little bit at a time, At the end of the month or year, you'll be surprised to see how much science you've covered!
Here is a quick and easy way to handle the documentation issue minimal fuss and hassle. This method will even score you points toward your science curriculum requirements along with setting up a life-long habit, which will serve your child even greater in the future, which is really what we're after.
There are three simple steps to this process:
Grab, Title, and Record
Step 1:Grab a notebook.
You don't need a fancy quad-ruled, glossy bound, gold-letter-embossed notebook, either. Just find a regular spiral-bound notebook from the store and scribble your child's name across the top. (You can even staple ten blank pages together and call it a notebook if you really want to.)
Step 2: Title the top of a fresh page with the name of the lesson or experiment.
For example, from Unit 1, you'd write: Gravity. Easy so far, right? Add the date and time to the top corner and number your pages (in case you need to reference them later on. Trust me - it's a lot easier to number as you go).Step 3: Record by describing what you're doing.
 If you're reading about gravity, jot down a few notes about what you picked up. This is where you want to capture your Ah-HA! moments. If getting your child to write is harder than changing a car transmission in a snowstorm, then grab a video camera and record them as they work and talk their way through the experiment. Just have them describe what they are doing as they do it (you can probe them along with questions if they get stuck for words). For shyer kids, don't have them look at the camera - in fact, if you focus the camera only on their hands as they work through an experiment, their shyness usually will vanish.
A lot of scientists and engineers carry around a voice recorder, so when they have a GREAT IDEA, they can quickly capture it with words by hitting the 'record' button (even while driving!). This allows them to quickly capture and talk about the idea without fussing with the slowness of a pencil and paper. They later play it back and jot down notes and expand it when they have more time.
If you love to write and draw, simply write down the experiment or reading bullet points and illustrate with pictures, describing it with real words that make sense to you. Don't worry about it not being 'formal' or 'correct' - this is your journal, not for anyone else.
For example, if you're launching the potato cannon (which we'll actually be doing later on), and you finally figured out how it worked, we'd rather see you write: "I shoved the stick in, which squashed the air, and POP!"
instead of "...as the lowermost potato slug was moved in an upward direction, the pressure increased as the volume decreased until the structural integrity of the uppermost potato was breached, at which time the..." Use words that really speak to you in your own terms. You are not writing a textbook, but rather capturing the essence of the experience you're having as you learn science. Got it?
 Also, if you have any questions that pop up along the way (especially ones that require more time to search for the answers), write them down here as well. Highlight or *star* each question so you remember to go back and get them answered when you have more time.
If you're recording your progress on a science experiment, get your picture taken as you are doing the experiment and paste it in the notebook. Add a caption about what you are doing, what you found, etc. Most scientists will also record any data they took for the experiment alongside the picture of their set up so it's all in one place.
An excellent idea many families have reported using is at the end of the unit, the parents will become the student and the kids teach the lesson back to the parent until the parent gets it. This may take a bit of work of the kid's part, but most of the time, you'll find kids are determined and creative at getting their point across because they are so excited and passionate about what they have just learned. (Don't believe us? Try faking ignorance and see what your child comes up with.)
And that's it! Do you think this is something you can do?
If so, you've just boosted yourself to the top 10% of the students worldwide that actually take the time to capture and record their work. If you just hear or read something only one time, you will only remember 12% of it after about a week. However, when you capture and record notes about what you're doing, the retention after a week shoots up to over 65%. When you take it one step further and teach it to others, you're now over 85% retention after the first month.Turning your Science Journal into Homework You Can Hand In
Once you've mastered the basic steps to keeping a science journal, you can easily match it with your state's requirements for science, provide it as a writing sample with your college application (especially if it contains photos of you taking data), or show it it to your adviser.
By documenting your work in this way, you are setting one of the corner foundations of being a real scientist.
Your experiments aren't going to be useful if you can't tell other people about it. There's a standard format that most scientists follow, and that's what we're going to cover here. When you practice these essential steps, your child will be light-years ahead of the game when they hit college. Your kids will not just know the steps on an intellectual level, but it will become built into their nervous system through habit and be a guide as they work through their homework for years to come.
When you use this approach when working through the activities, projects, and experiments in the eScience program, you will have a rock-solid documentation that will pass any curriculum adviser, college-entrance examiner, or state required documentation. And it will be organized, easy to use, and rewarding to flip through years later.
Your experiments aren't going to be useful if you can't tell other people about it. There's a standard format that most scientists follow, and that's what we're going to cover here. When you practice these essential steps, your child will be light-years ahead of the game when they hit college. Your kids will not just know the steps on an intellectual level, but it will become built into their nervous system through habit and be a guide as they work through their homework for years to come.
Writing a Rock-Solid Science Journal Report
Once you've gotten into the habit of Grab, Title, and Record, now it's time to put a little more structure into the 'Record' section. I'm going to share with you how we teach engineering students to keep their lab books at the University. This is the same techniques used by astronomers, automotive designers, nuclear engineers, and NASA scientists.When you use this approach when working through the activities, projects, and experiments in the eScience program, you will have a rock-solid documentation that will pass any curriculum adviser, college-entrance examiner, or state required documentation. And it will be organized, easy to use, and rewarding to flip through years later.
By documenting your work in this way, you are setting one of the corner foundations of being a real scientist. Your experiments aren't going to be useful if you can't tell other people about it. There's a standard format that most scientists follow, and that's what we're going to cover here. When you practice these essential steps, your child will be light-years ahead of the game when they hit college. Your kids will not just know the steps on an intellectual level, but it will become built into their nervous system through habit and be a guide as they work through their homework for years to come.
Writing a Rock-Solid Science Journal Report
Once you've gotten into the habit of Grab, Title, and Record, now it's time to put a little more structure into the 'Record' section. I'm going to share with you how we teach engineering students to keep their lab books at the University. This is the same techniques used by astronomers, automotive designers, nuclear engineers, and NASA scientists.
When you use this approach when working through the activities, projects, and experiments in the eScience program, you will have a rock-solid documentation that will pass any curriculum adviser, college-entrance examiner, or state required documentation. And it will be organized, easy to use, and rewarding to flip through years later.
Step 1: Title
The first thing you need is a title. Something that says what you did in ten words or less and describes the main idea. If you ever wanted to transform your experiment into a lab report, your title would have an entire page to itself. In this case, your title area needs to have the title of the experiment, your name (and the names of any helpers that assisted you during your experiment), and the date you performed the experiment (or date range, if your experiment happened over more than a day). For example:
Effects of Antenna Wire Length on Crystal Radio Reception Aurora Lipper November 23, 2010
Step 2: Introduction (Purpose)
In your science journal, save a half-page to write this later. You won't be able to write it beforehand, as it includes your hypothesis, background information, and summary of how the experiment went. Just leave a spot so you can jot it in later. Keep it simple, straightforward, and only one paragraph. The best thing to include in this section is why you did the experiment. For example:
Which antenna length gives the best radio signal? After researching the electromagnetic spectrum, frequency, wavelength, quartz crystals, and radios, I realized I had all the basics for picking up AM radio stations using simple electrical equipment. But which antenna length would produce the clearest, strongest radio signal in my crystal radio? This radio detects in the AM band that have been traveling from stations (transmitters) thousands of miles away. One of the biggest challenges with detecting low-power radio waves is that there is no amplifier on the radio to boost the signal strength. When designing the experiment, I had to take into account the finer details, such as the width of the wire, whether to use magnet or plastic-insulated wire, the type of diode, and the tube diameter. In addition, I also needed to find an adequate grounding source (I used a metal water pipe) and have enough space to spread out my antenna, which ranged from 10’ to 100’.
Step 3: Materials
What did you use to do your project? Make sure you list everything you used, even equipment you measured with (rulers, stopwatch, etc.) If you need specific amounts of materials, make sure you list those, too! Check with your school to see which unit system you should use. (Metric or SI = millimeters, meters, kilograms. English or US = inches, feet, pounds.) For example:
- Toilet paper tube
- Magnet wire
- Germanium diode (1N34A)
- Telephone handset or get a crystal earphone
- Alligator clip test leads
- 100’ stranded insulated wire (for the antenna)
- Camera to document project
- Composition or spiral-bound notebook to take notes
- Display board (the three-panel kind with wings), about 48” wide by 36” tall
- Paper for the printer (and photo paper for printing out your photos from the camera)
- Computer and printer
Step 4: Procedure
This is the place to write a highly detailed description of what you did to perform your experiment. Write this as if you were telling someone else how to do your exact experiment and reproduce the same results you achieved. If you think you’re overdoing the detail, you’re probably just at the right level. Diagrams, photos, etc. are a great addition (NOT a substitution) to writing your description. For example:
First, I became familiar with the experiment and setup. After raiding Radio Shack for magnet wire, diodes and earphones, I created a simple crystal radio that could detect AM radio waves without the use of a battery. I ran ten trials varying the length of the antenna and estimated the signal strength.
I made myself a data logger in my science journal. I placed the crystal radio in a spot clear from noise, obstructions, and interference from nearby transmitters and connected the ground wire to the metal pipe and strung the antenna along the ground. I then listened to on the earphone and connected up different antenna lengths to get a better feel for judging the scale for signal strength from 1 to 5. Once I finished the pre-tests, I ran ten trials, varying the antenna length in increments of 10’, recording the signal strength with each trial run.
Step 5: Results
This is the data you logged during your experiment. You can leave a page or two to include a chart or graph – whichever suits your data the best, or both if that works for you. Use a scatter or bar graph, label the axes with units, and title the graph with something more descriptive than “Y vs. X or Y as a function of X”. On the vertical (y-axis) goes your dependent variable (the one you recorded), and the horizontal (x-axis) holds the independent variable (the one you changed).
NOTE: The numbers above are NOT real! 
| Crystal Radio Data Sheet | |||
| Name | Aurora Lipper | Antenna wire gauge | 24g |
| Date | Nov. 28, 2009 | Tube wire gauge | 28g magnet |
| Time | 12:45pm | Diode type | germanium |
| Trial # | Antenna Length | Signal Strength | |
| (feet) | (Min = 1, Max =5) | ||
| 1 | 10 | 1 | |
| 2 | 20 | 2 | |
| 3 | 30 | 2 | |
| 4 | 40 | 3 | |
| 5 | 50 | 4 | |
| 6 | 60 | 4.5 | |
| 7 | 70 | 5 | |
| 8 | 80 | 5 | |
| 9 | 90 | 5 | |
| 10 | 100 | 5 | |
|
Step 6: Conclusion
Conclusions are the place to state what you found. Compare your results with your initial hypothesis or question – do your results support or not support your hypothesis? Avoid using the words “right”, “wrong”, and “prove” here. Instead, focus on what problems you ran into as well as why (or why not) your data supported (not supported) your initial hypothesis. Are there any places you may have made mistakes or not done a careful job? How could you improve this for next time? Don’t be shy – let everyone know what you learned! For example:
I found that my initial hypothesis (the longer the antenna, the stronger the signal in the crystal radio) was supported by the data, but not in the way I had expected. My best guess was that an antenna of 100’ would produce a clear enough signal to hear distinct words and songs. I found that an antenna length of 60’ and above all gave clear, strong signal results.
For further study, I recommend running an experiment to test the various gauges of wire, tube diameter, and types of grounding sources. This experiment was a lot of fun!
Step 7: References
Every source of information you collected and used for your project gets listed here. Most of the time, people like to see at least five sources of information listed, with a maximum of two being from the internet. If you’re short on sources, don’t forget to look through magazines, books, encyclopedias, journals, newsletters… and you can also list personal interviews. For example: (The first four are book references, and the last one is a journal reference.)
Fox, McDonald, Pritchard. Introduction to Fluid Mechanics, Wiley, 2005.
Hickam, Homer. Rocket Boys, Dell Publishing, 1998.
Gurstelle, William. Backyard Ballistics, Chicago Review Press, 2001.
Turner, Martin. Rocket and Spacecraft Propulsion. Springer Praxis Books, 2001.
Eisfeld, Rainer. "The Life of Wernher von Braun." Journal of Military History Vol 70 No. 4. October 2006: 1177-1178.
 Step 1: Title: Effects of Antenna Wire Length on Crystal Radio Reception, by Aurora Lipper, November 23, 2010. This goes at the top of the page.
Whew! So to recap...
Step 1: Title: Effects of Antenna Wire Length on Crystal Radio Reception, by Aurora Lipper, November 23, 2010. This goes at the top of the page. Step 2: Introduction (Question/Hypothesis/Intro):
What effect does antenna length have on an AM band crystal radio? After researching the electromagnetic spectrum, frequency, quartz crystals, wavelength, radio circuitry, sonic vibrations, and how the human ear detects sound, I realized I had all the basics for building a small radio. But which antenna length would produce the best signal? I hypothesized that the longest antenna would give strongest and clearest radio signals. This takes a half page (one paragraph maximum), and is written last.
Step 3: Materials: List everything you used in your experiment here. Leave a page for this in case you have to add to it later.
Step 4: Procedure/Experiment: After a quick trip to Radio Shack, I built a crystal radio to test. I ran ten trials varying the type of radio and estimated the signal strength using a sound scale from 1 to 5. Leave two pages for this, one for drawing your experiment out (or snap a photo and insert it here), and the second for writing out what you did and how you set it up.
Step 5: Results: Record your data and analyze any numbers. You can add a discussion about what went on during your experiment. Leave a page or two (depending on how many trials you're running) in table form. Test only one thing at a time (the antenna length, in our example), and record what you found.
Step 6: Conclusion/Recommendations: I found that my initial hypothesis (the longer the antenna, the stronger the signal in the crystal radio) was supported by the data, but not in the way I had expected. I found that an antenna length of 60’ and above all gave clear, strong signal results. For further study, I recommend running an experiment to test the various gauges of wire, tube diameter, different types of grounding sources, and types of diodes (such as germanium, zener, and silicon) as each diode cuts the signal strength by a different amount. Leave a page for this section, as you might have to rewrite your conclusion a few times before you get it the way you want it.
Step 7: References: Leave a page for this section, and fill it in as you do your research in the beginning.
Tips & Tricks & Bonus Ideas!
There are a lot of steps to keeping a rock-solid science journal, but once you get into the rhythm, it'll come naturally and you'll actually start to think ahead as you work through your experiment, because you know what you'll need to record to make it worthwhile. One of the things I do is write the seven steps on the inside cover of my journal as a quick reference sheet, so I know how many pages to mark off ahead of time as I write up a new experiment.
If I'm starting a fresh notebook, then I'll usually skip the first 5-10 pages before starting to write, and stop writing 5-10 pages before the end. Then I'll go back and add a table of contents in those first skipped pages and an index and/or glossary in the last skipped pages for a more complete book. I'll also number the pages as I go along so this part is a lot easier!
Often, I don't take data right in my book, because I make a lot of mistakes and have to rerun the experiment or redo the way I set it up. I'll usually take data on a clean sheet of paper that's got a table marked off, and when I finally get a good run I want to use, I'll tape it into the results page of my notebook.
When I first do a new experiment, I don't record anything at all. In fact, I'll just play with the experiment to get really familiar with how it works, why it works, and what I have to tweak to get it to work just right. The recording process comes after I've rolled around and played with the main ideas. With this approach, I'm able to formulate a better question because now I have experience with the experiment and I find that I am not as worried about making mistakes as I was in the beginning.
Often with an entirely new subject area, I'll have two journals - one is much more informal, and usually titled "My Great Ideas", and the other follows the steps above and is titled "My Science Journal". The "My Great Ideas" is a place for me to write down all the crazy ideas I have before I am ready to record anything, along with any books or media I found that might be useful in doing the experiment, and Ah-HA! moments and all questions that pop up. That way, I've got a spot to brainstorm and come up with experiment ideas before committing it to my more formal write-up book. The great ideas book is usually just for my eyes only, so I don't worry about spelling, neatness, or anything that slows down my creativity.
This is a recording of a recent live teleclass I did with thousands of kids from all over the world. I’ve included it here so you can participate and learn, too!
This class is all about Biology, what it is and how it works. If you love plants, animals, insects, and strange puzzling challenges, then this is the area of science for you. We’re about to see and do the kind of science that was not in your typical textbooks. Without biology, there would be no cure for diseases, we wouldn’t understand which foods are the right ones to eat, why we have to brush our teeth and wash our hands, which water we can drink without getting sick, athletes couldn’t figure out how to improve their performance. It helps us understand how life works so we can make the most effective use of that information, like how to clean up our environment or grow better crops without exhausting the soil.
Materials:
- Salt
- Clear glass cup
- Coffee filter and a funnel
- Isopropyl alcohol (91%) – COLD!
- Blender or food processor
- Liquid dishwashing detergent
- A fruit or vegetable
- 2 handheld magnifying lenses

This is a recording of a recent live teleclass I did with thousands of kids from all over the world. I’ve included it here so you can participate and learn, too! Learn about the world of rocks, crystals, gems, fossils, and minerals by moving beyond just looking at pretty stones and really being able to identify, test, and classify samples and specimens you come across using techniques that real field experts use. While most people might think of a rock as being fun to climb or toss into a pond, you will now be able to see the special meaning behind the naturally occurring material that is made out of minerals by understanding how the minerals are joined together, what their crystalline structure is like, and much more.
Materials:
- Geology Field Trip in a Bag
- Worksheet printout
- Unglazed porcelain tile (or the bottom of a coffee mug)
- Paper plate or disposable pie pan
- Microscope slide
- Magnifying glass
- Cup of water
- Steel nail
- Double-sided tape
- Magnet
This is a recording of a recent live teleclass I did with thousands of kids from all over the world. I’ve included it here so you can participate and learn, too!
This class is all about Light Waves, Lasers and Holograms! This is a newly updated version of the older Light Waves and Lasers teleclass here.
We’re going to learn about the wild world of light that has baffled scientists for over a century. You’ll be twisting and bending light as we learn about refraction, reflection, absorption, and transmission using lenses, lasers, mirrors, and optical filters with everyday stuff like gummy bears, paperclips, pencils and water!
We’re going to learn how to build a projection hologram out of piece of old plastic, make a laser microscope so you can see tiny little microscopic creatures, bend laser light to follow any path you want without using mirrors, and finally understand how glow in the dark toys really work on the subatomic level. Are you ready?
Materials:
- Pencil
- Paper
- Clothespin
- Paperclip
- Rubber band
- Gummy bears
- Red laser
- Flashlight
- Old CD
- Scissors
- Pliers
- Glass of water
- Clear Plastic Film
This is a recording of a recent live class I did with an entire high school astronomy class. I’ve included it here so you can participate and learn, too!
Light is energy that can travel through space. How much energy light has determines what kind of wave it is. It can be visible light, x-ray, radio, microwave, gamma or ultraviolet. The electromagnetic spectrum shows the different energies of light and how the energy relates to different frequencies, and that’s exactly what we’re going to cover in class. We’re going to talk about light, what it is, how it moves, and it’s generated, and learn how astronomers study the differences in light to tell a star’s atmosphere from millions of miles away.
I usually give this presentation at sunset during my live workshops, so I inserted slides along with my talk so you could see the pictures better. This video below is long, so I highly recommend doing this with friends and a big bowl of popcorn. Ready?
Please login or register to read the rest of this content.
This is a recording of a recent live teleclass I did with thousands of kids from all over the world. I've included it here so you can participate and learn, too!
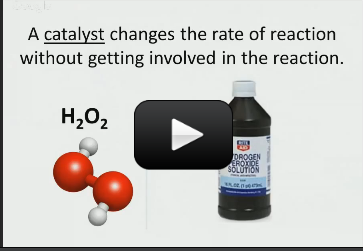
We’re going to be mixing up dinosaur toothpaste, doing experiments with catalysts, discovering the 5 states of matter, and building your own chemistry lab station as we cover chemical kinetics, phase shifts, the states of matter, atoms, molecules, elements, chemical reactions, and much more. We’re also going to turn liquid polymers into glowing putty so you can amaze your friends when it totally glows in the dark. AND make liquids freeze by heating them up (no kidding) using a scientific principle called supercooling,
Materials:
- Chemistry Worksheet
- Aluminum pie plate
- Bowl
- Clear glue or white glue
- Disposable cups
- Goggles & gloves
- Hydrogen peroxide
- OPTIONAL: Instant reusable hand warmer (containing sodium acetate )
- Liquid soap
- Popsicle sticks
- Scissors or pliers
- Sodium tetraborate (also called “Borax”)
- Water bottle
- Yeast
- Yellow highlighter
- Optional: If you want to see your experiments glow in the dark, you'll need a fluorescent UV black light (about $10 from the pet store - look in cleaning supplies under "Urine-Off" for a fluorescent UV light). UV flashlights and UV LEDs will not work.
This is a recording of a recent live teleclass I did with thousands of kids from all over the world. I’ve included it here so you can participate and learn, too! (Click here if you’re looking for the more recent version that also includes Chemical Engineering.)
When you think of slime, do you imagine slugs, snails, and puppy kisses? Or does the science fiction film The Blob come to mind? Any way you picture it, slime is definitely slippery, slithery, and just plain icky — and a perfect forum for learning real science. But which ingredients work in making a truly slimy concoction, and why do they work? Let’s take a closer look…
Materials:
- Sodium tetraborate (also called “Borax” – it’s a laundry whitener) – about 2 tablespoons
- Clear glue or white glue (clear works better if you can find it) – about 1/2 cup
- Yellow highlighter
- Pliers or sharp razor (with adult help). (PREPARE: Use this to get the end off your highlighter before class starts so you can extract the ink-soaked felt inside. Leave the felt inside highlighter with the end loosely on (so it doesn’t dry out))
- Resuable Instant Hand Warmer that contains sodium acetate (Brand Name: EZ Hand Warmer) – you’ll need two of these
- Scissors
- Glass half full of COLD water (PREPARE: put this in the fridge overnight)
- Mixing bowl full of ice (PREPARE: leave in freezer)
- Salt
- Disposable aluminum pie place or foil-wrapped paper plate
- Disposable cups for solutions (4-6)
- Popsicle sticks for mixing (4-6)
- Rubber gloves for your hands
- Optional: If you want to see your experiments glow in the dark, you’ll need a fluorescent UV black light (about $10 from the pet store – look in cleaning supplies under “Urine-Off” for a fluorescent UV light). UV flashlights and UV LEDs will not work.
This is a recording of a recent live teleclass I did with thousands of kids from all over the world. I’ve included it here so you can participate and learn, too!
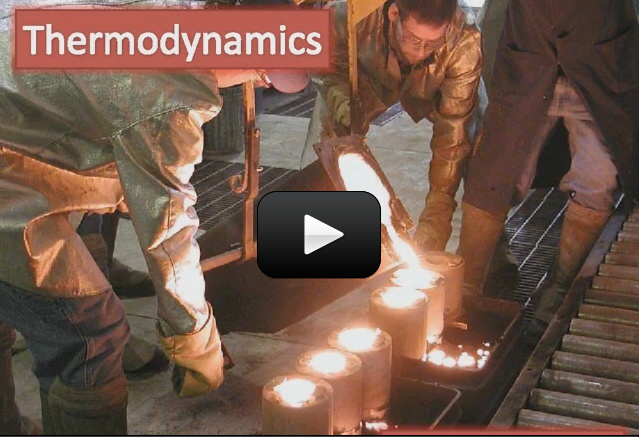
You’ll discover how to boil water at room temperature, heat up ice to freeze it, make a fire water balloon, and build a real working steam boat as you learn about heat energy. You’ll also learn about thermal energy, heat capacity, and the laws of thermodynamics.
Materials:
- cup of ice water
- cup of room temperature water
- cup of hot water (not scalding or boiling!)
- tea light candle and lighter (with adult help)
- balloon (not inflated)
- syringe (without the needle)
- block of foam
- copper tubing (¼” diameter and 12” long)
- bathtub or sink
- scissors or razor
- fat marker (to be used to wrap things around, not for writing)
This is a recording of a recent live teleclass I did with thousands of kids from all over the world. I've included it here so you can participate and learn, too!
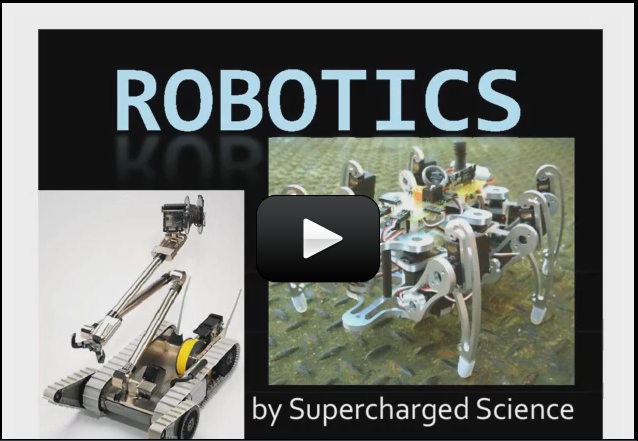
Spark together electric motors, build homemade burglar alarms, wire up circuits and build your own robot from junk! Create your own whizzing, hopping, dancing, screeching, swimming, crawling, wheeling, robot during class. We'll cover hot topics in electricity, magnetism, electrical charges, robot construction, sensors and more.
Please login or register to read the rest of this content.
This is a recording of a recent live teleclass I did with thousands of kids from all over the world. I’ve included it here so you can participate and learn, too!
Discover how to detect magnetic fields, learn about the Earth’s 8 magnetic poles, and uncover the mysterious link between electricity and magnetism that marks one of the biggest discoveries of all science…ever.
Materials:
- Box of paperclips
- Two magnets (make sure one of them ceramic because we’re going to break it)
- Compass
- Hammer
- Nail
- Sandpaper or nail file
- D cell battery
- Rubber band
- Magnet Wire
Optional Materials if you want to make the Magnetic Rocket Ball Launcher:Four ½” (12mm) neodymium magnets
- Nine ½” (12 mm) ball bearings
- Toilet paper tube or paper towel tube
- Ruler with groove down the middle
- Eight strong rubber bands
- Scissors
This is a recording of a recent live teleclass I did with thousands of kids from all over the world. I’ve included it here so you can participate and learn, too!
We’re going to study electrons and static charge. Kids will build simple electrostatic motor to help them understand how like charges repel and opposites attract. After you’ve completed this teleclass, be sure to hop on over the teleclass in Robotics!
Electrons are strange and unusual little fellows. Strange things happen when too many or too few of the little fellows get together. Some things may be attracted to other things or some things may push other things away. Occasionally you may see a spark of light and sound. The light and sound may be quite small or may be as large as a bolt of lightning. When electrons gather, strange things happen. Those strange things are static electricity.
Please login or register to read the rest of this content.
This is a recording of a recent live teleclass I did with thousands of kids from all over the world. I've included it here so you can participate and learn, too!
This class is all about Light Waves! Energy can take one of two forms: matter and light (called electromagnetic radiation). Light is energy in the form of either a particle or a wave that can travel through space and some kinds of matter, like glass.
We're going to investigate the wild world of the photon that has baffled scientists for over a century. We'll also do experiments in shattering laser beams, bending and twisting light, and also split light waves into rainbow shadows. Materials:
- laser pointer
- flashlight
- paper clip
- gummy bear (green and red)
- old CD
- paper clip
- rubber band
- pond water (just a little bit)
This is a recording of a recent live teleclass I did with thousands of kids from all over the world. I’ve included it here so you can participate and learn, too!
We’re ready to deal with the topic you’ve all been waiting for! Join me as we find out what happens to stars that wander too close, how black holes collide, how we can detect super-massive black holes in the centers of galaxies, and wrestle with question: what’s down there, inside a black hole?
Materials:
- marble
- metal ball (like a ball bearing) or a magnetic marble
- strong magnet
- small bouncy ball
- tennis ball and/or basketball
- two balloons
- bowl
- 10 pennies
- saran wrap (or cup open a plastic shopping bag so it lays flat)
- aluminum foil (you’ll need to wrap inflated balloons with the foil, so make sure you have plenty of foil)
- scissors
This is a recording of a recent live teleclass I did with thousands of kids from all over the world. I've included it here so you can participate and learn, too
Our solar system includes rocky terrestrial planets (Mercury, Venus, Earth, and Mars), gas giants (Jupiter and Saturn), ice giants (Uranus and Neptune), and assorted chunks of ice and dust that make up various comets and asteroids.
Did you know you can take an intergalactic star tour without leaving your seat? To get you started on your astronomy adventure, I have a front-row seat for you in a planetarium-style star show. I usually give this presentation at sunset during my live workshops, so I inserted slides along with my talk so you could see the pictures better. This video below is long, so I highly recommend doing this with friends and a big bowl of popcorn. Ready?
This is a recording of a recent live teleclass I did with thousands of kids from all over the world. I’ve included it here so you can participate and learn, too!
Sound is a form of energy, and is caused by something vibrating. So what is moving to make sound energy?
Molecules. Molecules are vibrating back and forth at fairly high rates of speed, creating waves. Energy moves from place to place by waves. Sound energy moves by longitudinal waves (the waves that are like a slinky). The molecules vibrate back and forth, crashing into the molecules next to them, causing them to vibrate, and so on and so forth. All sounds come from vibrations.
Materials:
- 1 tongue-depressor size popsicle stick
- Three 3″ x 1/4″ rubber bands
- 2 index cards
- 3 feet of string (or yarn)
- scissors
- tape or hot glue
This is a recording of a recent live teleclass I did with thousands of kids from all over the world. I’ve included it here so you can participate and learn, too!
Soar, zoom, fly, twirl, and gyrate with these amazing hands-on classes which investigate the world of flight. Students created flying contraptions from paper airplanes and hangliders to kites! Topics we will cover include: air pressure, flight dynamics, and Bernoulli’s principle.
Materials:
- 5 sheets of 8.5×11” paper
- 2 index cards
- 2 straws
- 2 small paper clips
- Scissors, tape
- Optional: ping pong ball and a small funnel

This is a recording of a recent live teleclass I did with thousands of kids from all over the world. I've included it here so you can participate and learn, too!
Blast your imagination with this super-popular class on rocketry! Kids learn about fin design, hybrid and solid-state rocketry, and how rockets make it into space without falling out of orbit. This class is taught by a real live rocket scientist (me!). We'll launch rockets during the class, too!
Please login or register to read the rest of this content.
This is a recording of a recent live teleclass I did with thousands of kids from all over the world. I've included it here so you can participate and learn, too!
We're going to cover energy and motion by building roller coasters and catapults! Kids build a working catapult while they learn about the physics of projectile motion and storing elastic potential energy. Let's discover the mysterious forces at work behind the thrill ride of the world’s most monstrous roller coasters, as we twist, turn, loop and corkscrew our way through g-forces, velocity, acceleration, and believe it or not, move through orbital mechanics, like satellites. We’ll also learn how to throw objects across the room in the name of science… called projectile motion. Are you ready for a fast and furious physics class?
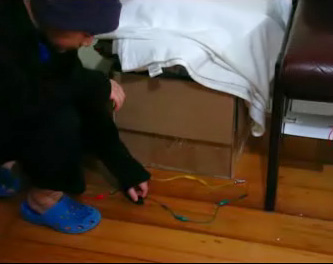
 Hello, my name is Genevieve. I am 6. I love science, rockets, and robots and rainbows and all things pink. I am excited to get bigger so I can be a scientist.
When my mom showed me the cookie snatcher robot project I got very excited. This would be my 4th robot, but the others were solar powered.
First I connected the motor and nut to the popsicle sticks and made them into 1 group. Then I put the battery cases on and made the switches Then I connected the wires
I have 2 older brothers and I wanted to use their toothbrushes for the grabbers, but mom said no. Darn ! So I used more popsicle sticks instead
The nut on my robot moved so fast my mom and dad had to put a rubber band at the end of the bolt to keep the nut from coming off.
I followed along with the video and only needed a little help from my mom and dad. It was so much fun to do it by myself.
I can’t wait to do more, but first I think I want to add wheels and a cart so I can get as many cookies as I can. I want to make an alligator cookie snatcher too.
Thank you for all of the fun projects!
Supercharged Science helps you create outstanding learning opportunities for your students by focusing on wonder, discovery, and imagination.
I want to thank you for the wonderful half school year that I’ve done in science. I’ve had fun doing the experiments I’m actually almost done all the units! I attached a video of my bristlebot.
[jwplayer config=StandardPlayer file=http://escience.s3.amazonaws.com/main-escience/kid-movie2.flv image=https://www.sciencelearningspace2.com/wp-content/uploads/2010/09/kidmovie2.jpg]
I have a couple pictures I will show you:
This one below is of a magnifying glass and a leaf from Unit 9.
And this is my jigglebot!

Just thought you’d enjoy seeing some of your excited students in Anchorage, Alaska. We learned that it’s best to make colored rockets so we might have a better chance of locating them in the deep snow. Pinks and purples are preferred to yellow since digging up yellow snow can be risky, if you know what I mean.
To give you some perspective, the kids are standing on a picnic table top so they may have a hard surface upon which to stomp the soda bottle. This is a record snowfall so far this winter.
Thanks for the great project. We had a blast!!
[jwplayer config=StandardPlayer file=http://escience.s3.amazonaws.com/main-escience/kid-movie1.flv image=https://www.sciencelearningspace2.com/wp-content/uploads/2010/09/kidmovie1.jpg]
All the best,
Samantha, Mason & Allegria
 “…Thank you for the free tele-classes. Also my son got “pouring science” (the homesciencetools chemistry set recommended on your site) but I’m just letting him pour colored water back and forth while he learns not to spill.”
“…whenever I sing that catchy insurance jingle, “we are farmers”,
He says “we’re not farmers. We’re scientists.”
I have been pre-schooling him at home, but he definitely has had the spark for science lighted.
My husband was happy to see that our boy is handy with a little screw driver thanks to your robotics summer lab.
(He kept asking for this “pouring science” mainly because of the pics on your site.)
Quotes we’ve memorized from your live tele classes:
- What does soda have that water does not have?
Bubbles. - What are bubbles?
Gas. - Which is faster, thunder or lightening?
Lightening. - What is fire?
Heat and light. - What else is fire?
Gas and Plasma.
We’ll keep adding to it. Thanks!
[jwplayer config=StandardPlayer file=http://escience.s3.amazonaws.com/main-escience/sciencejan32012002.flv image=https://www.sciencelearningspace2.com/wp-content/themes/chrome_20/images/tadaa1.jpg]
This is a recording of a recent live teleclass I did with thousands of kids from all over the world. I’ve included it here so you can participate and learn!
Discover the world of clean, renewable energy that scientists are developing today! Explore how they are harnessing the energy of tides and waves, lean how cars can run on just sunlight and water, tour a hydroelectric power plant, visit the largest wind farms on the planet, and more! You’ll learn how streets are being designed to generate electricity, how teenagers are making jet fuel from pond scum in their garage, and how 70 million tons of salt can provide free, clean energy 24 hours a day forever! During class, you’ll learn how to bake solar cookies, magni-fry marshmallows and do the experiment with light Einstein won a Nobel prize for that is the basis of all photovoltaic energy today.
Materials:
- One cup each: hot (not boiling), cold, and room temperature water
- Cardboard box, shoebox size or larger.
- Aluminum foil
- Plastic wrap (like Saran wrap or Cling wrap)
- Hot glue, razor, scissors, tape
- Wooden skewers (BBQ-style)
- Black construction paper
- Cookie dough (your favorite kind!)
- Chocolate, large marshmallows, & graham crackers if you want to make s’mores! If not, try just the large marshmallow.
- Large page magnifier (also called a Fresnel lens, found at drug stores or places that also sell reading glasses, or at Amazon.com)
Science Fair Projects. This phrase will strike more fear into the hearts of parents than electrons in a lightning storm. Whether you’re a teacher, parent, kid, or science fair judge, you can quickly turn dread into dexterity with a few quick tips and tricks from the pros of the trade.
Does this sound familiar?Please login or register to read the rest of this content.
One of the problems kids have is how to experiment with their great ideas without getting lost in the jumble of results. So often students will not have any clear ideas about what change caused which effect in their results!
They also have trouble communicating their ideas in a way that not only makes sense, but also is acceptable by science fairs or other technical competitions designed to get kids thinking like a real scientist. Kids constantly struggle to apply the scientific method to their science project in school, for scout badges, or any other type of report where it’s important that other folks know and understand their work.
In this video, I am going to walk you through all the steps of the scientific method by just doing it so you can really see it in action. I've taken an everyday topic in alternative energy and applied the scientific method to get a real answer to my question about solar cells.
The scientific method is widely used by formal science academia as well as scientific researchers. For most people, it’s a real jump to figure out not only how to do a decent project, but also how to go about formulating a scientific question and investigate answers methodically like a real scientist.
Presenting the results in a meaningful way via “exhibit board”… well, that’s just more of a stretch that most kids just aren’t ready for. There isn’t a whole lot of useful information available on how to do it by the people who really know how.
This section is designed to show you how to do several cool projects (and one really nifty one at the end), walk you through the steps of theorizing, hypothesizing, experimentation, and iterating toward a conclusion the way a real engineer or scientist does. And we’ll also cover communicating your ideas to your audience using a display board and the oral presentation using top tips and tricks from real scientists.
Click to download the reading or start the experiments!
 How many drops of water can a penny hold? We’re going to learn how to use the scientific method using everyday materials so you’re comfortable with how it works and how to apply it to every situations. Don’t worry – we’re also going to show you how to do more complicated projects later… but first, let’s cover the basics.
What you need: Pennies, eye or medicine dropper, water, a notebook or science journal.
Please login or register to read the rest of this content.
 Now let’s use the scientific method to discover a couple of things about pendulums. Before we start, I need to tell you two new terms. One is constant variable and the other is changing variable. A variable is a part of your experiment, like the coin in the Underwater Presidents experiment. If it is a constant variable, it stays the same for every trial of that experiment.
For example, we always used the same penny in the Underwater Presidents. Those variables never changed. A changing variable is what you change for each trial. It is often what you are testing for; “If I change this, what happens to that?”
For example, in the Underwater Presidents experiment, if we tried water in the dropper, then we tried vegetable oil, then corn syrup; the changing variable would be the liquid we are using in the droppers. When you do an experiment you have to try very hard to keep all variables constant except for the one you are testing for. If you don’t keep all but one variable constant, you won’t know why you are getting the results you’re getting. If you change the size of the coin, and the type of liquid with the Underwater Presidents experiment, you will have a hard time knowing if it’s the change of coin or the type of liquid that’s causing more or fewer drops on the coin. Let’s try the following experiment and see if this becomes clearer.
What you need:
- String
- Weight of some sort
- Tape
- Timer (or a watch with a second hand)
 A constant variable is one that does not change from trial to trial. A changing variable is the one variable you are testing for. It does change from trial to trial. One of the most difficult things to do in scientific research is to know what all of your variables are and to keep all but one variable constant.
In these pendulum experiments other variables were the temperature of the room, the humidity, the spin of the Earth, the design of the pendulum, etc., etc. We made an assumption that all those variables remained constant and didn’t really matter to our experiments. In this case, that’s a safe assumption but sometimes you can’t be too sure!
Constant and changing variables are around you all the time. What would be some variables in your breakfast? Which ones change from morning to morning? Which ones stay the same? What about some variables in the car? Which are constant and which are changing?
Let’s take a look at how to handle these questions:
What you need:
- String
- Several weights of some sort (a bunch of the same kind of washer works very well)
- Tape
- Scale (optional)
- Timer (or a watch with a second hand)
- Use the same pendulum set up you used for “The Size of the Swing” experiment.
 The first step of the scientific method is observation. In my opinion, this is the most important and enjoyable part of the scientific method. Observation is the skill of “seeing” things that are there, “seeing” things that aren’t there and “seeing” things that should be there.
Observation is the skill that separates scientists from super scientists. Einstein, Galileo and Newton, for example, were fantastic observers. They were able to “see” beyond and through what other people were able to “see” before them in order to get to deeper truths inside science.
I’m putting “see” in quotes because there’s more to observing then just seeing with your eyes. First, you need to detect something. You can use your eyes, ears and nose to detect things. You can also use instruments like telescopes, microscopes or prisms to detect things. Somehow, something needs to come to your attention.
But that’s not all there is to observing something. Next you need to use your knowledge and your intuition, to fully observe what’s happening. When you look up into the night sky you might only see bunches of little white dots, but a trained astronomer would see stars of different magnitudes, galaxies and constellations. The astronomer’s knowledge allows her to “see” more. This is why I think observation is so much fun.
Observing allows you to know things and knowing things allows you to observe more things! You can’t help but get smarter if you spend your time observing! In this lesson, we’re going to spend time becoming better observers. Try this activity.
Please login or register to read the rest of this content.
We’re going to build on the idea from the last experiment by adding a color component to the experiment. Here’s what you need to do:

You need:
- Paper
- Pencils
- Volunteers
This is an excellent exercise in observation. I highly recommend finding other pictures in books and magazines and doing this several times. It’s a great way to get better and better at the skill of observation. It’s also a nice way to pass the time in a waiting room!

You need:
- The question sheet below
- Paper
- Pencils
- Friends
 Observation is a skill just like any other skill and it can be exercised and improved over time. Being a good observer means always keeping your eyes open and being aware of what’s around you. With good observation skills and knowledge the world becomes just that much more wonder-filled!
Here’s an activity you can do to hone your observation skills:
You need:
- 5 to 10 small items (pencils, crayons, balls, eraser, toy cars, buttons, whatever is handy)
- A handkerchief or napkin large enough to cover all the items.
- Some friends
 Fish in the can saws wild apples dog car sidewalk tree. Shirt the table carpet in the floor roof cloud. What? What do you mean I’m not making sense? I’m using simple English words. Oh, I see. I must not be communicating.
Believe it or not, communication is not as easy as it seems. In this lesson, I’m hoping to show you that hearing what someone is saying, and saying what you want someone to hear is quite a skill. A good skill for life and a vital skill for science.
In science, the ability to tell someone what you did, how you did it, and what happened after you did it, is a key skill in sharing science information. Scientists from around the world share information and their measurements and details of what they did must be very precise. To begin with, let’s try this little exercise in giving directions.
You need:
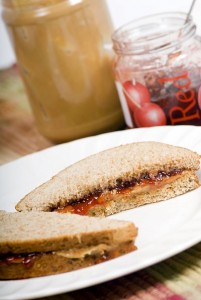
- Peanut Butter
- Jelly
- Bread
- Butter Knife
(Be prepared to make a mess and have fun.)
Please login or register to read the rest of this content.
 Communication isn’t just giving directions however. It’s also hearing what’s being said and following directions. How good are you at following directions? (I know the first time I tried this experiment, I didn’t do nearly so well!)
Try this:
You Need: The instruction sheet (see below), one for each person in the group, and pencils for each person in the group.
Please login or register to read the rest of this content.
 This is a great activity and it really shows how hard it is to communicate with someone. It does a great job at pointing out assumptions and showing how careful and detailed you have to be with your instructions. It also shows that the listener has an important role to play. The listener must be very careful not to make assumptions and to be sure to take responsibility for what they are hearing by asking good questions.
One more thing this activity does is show how important definitions are to good communication. When I do this activity with my groups, I do it a few times and then take the time to point out some of the definitions the group has been using. For example, when they call one block the red square everyone knows which block that is. I also point out where a definition can come in handy.
For example “Stand the blue block on its side.” Well, which side? Long side, short side, fat side… how do you know? At this point, I take the time with the group to create definitions. “Okay, so when we say long side that always means this side of this block.” As you do this activity, you’ll see where assumptions are made and definitions can come in handy. In science, good definitions are vital. If somebody says, “I put the apparatus one meter from the ping pong ball.” Everyone in the world knows how far a meter is. There is a standard for meters, inches, cups, liters, ohms, joules and all sorts of measurements. Without good definitions no one would know what anyone was talking about!
Please login or register to read the rest of this content.
Ready for MORE?
You’ll find several ultra-cool projects under the ‘Advanced‘ section that walk you step by step through not only the experiment but also the scientific method.
Rocketry
Fruit Batteries
Linear Accelerator
Measuring the Speed of Light
Alternative Energy
Hovercraft
Underwater ROV Robot
Crystal Radio
I’ve shown you how to take an ordinary experiment and transform it into something you can turn into a science fair… but you don’t need to enter a competition to work through these projects at all. Simply watch the videos and learn how to apply the scientific method to any experiment.
Download the Unit 15: Advanced Chemistry file here.
Don’t forget – we didn’t record this track in a professional studio, so don’t worry if you hear pops, clicks, chimes, or other odd sounds – just focus on the real message and the learning that’s going on. Are you ready??
Download the Unit 14: Electronics file here.
Don’t forget – we didn’t record this track in a professional studio, so don’t worry if you hear pops, clicks, chimes, or other odd sounds – just focus on the real message and the learning that’s going on. Are you ready??
Wired Remote Control Car
We used a plastic throat lozenge box container to make our remote control. And to make the car look cooler, we used a mushroom box for a top. We tried a Kleenex box but that was too heavy and it wouldn’t allow it to turn as well. We also used telephone wire to make it easier to wire to both motors.
What we learned:
Wires can get put on the wrong way but it is easy to switch back around so the car moves in the right direction. Having switches to turn something on and off is much better than needing to disconnect wires. Wide rubber bands on the wheels add more traction.
This project took a lot of patience to get it to work the way we wanted it to.
 Hydraulic Earth Mover
Materials used:
large size popcicle sticks, vinyl tubing, syringes, water, hot glue, brass fasteners, wire, plastic cup, wheels, skewers and straws
How it works:
The syringes and tubing are filled with water and when one set pushes in, the other pushes out causing the vehicle to move its arm up or down. We color coded ours so we would know which syringe moved what part of the vehicle.
This is how some construction trucks work except they use oil instead of water. This was a complicated project but really cool when it’s done. All our friends are impressed with this and love to try it out!
Download Student Worksheet & Exercises
Click on image above to enlarge.
Exercises
- Hydraulics refers to the use of what to do work?
- Solids
- Gases
- Fluids
- Liquids
- What is it called when we use air to do work?
- Aerodynes
- Pneumatics
- Nitrous
- Oxygenation
- In general, liquids cannot be squished together. What do we call this?
- Impressive
- Immersive
- Inert
- Incompressible
- Is the answer to the previous question important to how all hydraulic systems work?
- Yes
- No
 We love kites and have lots of them. Sled kites are the easiest to fly and easy to make. Tetrahedral kits are more of a challenge but worth the extra work. My mom had to help with a lot of the knot tying.
What we learned:
Kites are like planes. The forces on them are the same. They are the lift, thrust, drag and the weight.
When we made a larger version of the tetrahedral kite we discovered that it flew better without a bridle. We attached the lead string directly to the kite and it doesn’t need a tail for stability either. When we made a smaller one, it needed the bridle and tail to keep it from spinning around. The best size we made was using 9 and a half inch straws. This made a bigger surface area for the tissue paper skin. When we first tried to fly this we were actually attempting to fly it upside down. We thought the wind should catch it more like a parachute to fly it. But then we realized it was more like an airplane flying like a v-shape in the air. That worked much better.
Once we made the 10 cell kite and tried it out we figured it would fly even better if it had more surface area so we made another level and changed it to a 20 cell kite. It worked and flew great! Someday we may even add more but we’ll have to do that work out in the garage because it won’t fit through our door!
Click on an image to enlarge:
 |
 |
|
 |
 |
|
 What we used:
Copper tubing, votive and birthday candles, a lighter and matches, foam insulation and foil bread and pie pans
How Elijah built his boat:
First my dad coiled the copper tubing for us. Then I got a piece of foam and then I drilled holes for my tubing and dug another hole for my candle to sit in which I covered in foil to protect the foam from burning or melting. Then I used a pie pan and bent it to fit and cut a hole in the top for a smoke vent and to let oxygen in. I used a birthday candle so I could get a bigger flame. It worked great and moved very fast in the water. I named it the Turbo Turtle.
How Hannah built her boat:
My boat was more boat shaped. I used a tin bread pan and bent the back of the pan inward to set my copper tubing on. I hot glued it in place. Then I used metal tape to set the candle on so sit wouldn’t slip. For decoration I used cut pieces of a pie pan to make a top section and a flag for the back.
How Eliana built her boat:
My mom helped me drill holes in the back on the bread pan and we put the coil through those and used lots of hot glue to try to seal it. We used a little piece of foam to hold it up. Then we put the candle in the middle. Mine worked for a little while but then got leaks so I just decorated mine the way I wanted and used it to play with.
What we learned and how it worked:
We filled the copper tubing with water and put it in the pool and lit the candle and waited a short while and then watched it shake and then start cruising. The water in the tubing boils causing steam that pushes out the back and then causes a vacuum to suck more water back in and start the cycle over again. These worked really good and it was fun to be creative with it.
Click on an image to enlarge:
 |
 |
|
 |
|
|
 Solar Powered Cooking
We got together with a group of friends and made four different kind of solar ovens.
The first one was large (2’x3′). My mom helped with this one. We used a box inside another box and we insulated it with foam insulation on the bottom and newspapers on the side. We were hoping this would allow the temperature to get about 300 degrees. We lined the inside of the box with foil to keep the heat in and lined that with black paper to absorb the heat. We used foam board covered in a paper mirror sheeting for reflectors. We attached those on 3 sides. Inside we used a rack to raise the food off the bottom of the oven and to be able to get the best angle of the sun. We also needed to tip the whole box to make sure we didn’t have shadows inside the oven. Then we covered the top with sheets of glass to help insulate more.
The second ovens were made out of pizza boxes. After we cut our windows, we used slow cooker oven liners for the windows instead of plastic wrap so we would not have a chemical reaction with the heated plastic. We also insulated these with a thin layer of foam on the bottom before the foil and black paper.
The third ovens we made were hot dog cookers made out of pringle’s chips cans. We cut a slit down the middle and made flaps to open and then used the cooker liners for windows again. Last we drilled holes in each end for a skewer to fit through.
The fourth oven was a funnel shaped cooker. We covered poster board with foil and shaped that into a funnel and used a foil covered piece of foam for the base. Then we covered a jar with black paper to use for cooking.
Into the (preheated) big oven we put chocolate chip cookie dough. And to compared ovens we put cookie dough in one of the pizza box ovens as well. The cookies in the big oven were done in about 20 minutes. The oven had reached about 250 degrees. The smaller oven took about 40 minutes and had reached 200 degrees.
In the rest of the pizza box ovens we had chips and cheese for nachos and one box had an egg cooking. We all used dark colored pans inside the cookers. The cheese only took about 10-15 minutes to melt. The egg took about an hour.
In the pringles cans we cooked hot dogs which took 1/2 an hour to reach 170 degrees. We were hungry and couldn’t wait longer than that.
The jar inside the funnel cooker had green beans from our garden in it. They never really got done. The temp only reached 160 degrees but this was probably because it was really cold to start with so it was taking to long to heat. And then it got cloudy. Oh well, no veggies that day!
This was super fun to do. We had a lot of success. We were surprised how quickly the cookies got done even though it didn’t get as hot as we were hoping it would.
Click on an image to enlarge.
 |
 |
|
 |
 |
|
I had a lot of fun making this. Thank you, Aurora, for showing me how to do all this.
This really was a challenge to connect up! But now I know how to make a Motor Reversal Switch…Nightmare!
I didn’t have a wooden peg to push the tacks through, so I have used a plastic peg with metal clips wrapped around the peg opening. Also, I couldn’t find fishing line to use for the trip wire, so I had to use some other line, but it still works well.
Please login or register to read the rest of this content.
 Sugar Crystals/ Rock Candy
We did this with a group of friends so we started with 18 cups of sugar but ended up using a whole 25 pound bag to get the solution supersaturated.
We used superfine sugar which dissolved really quickly so it was hard to tell when there were bits still on the bottom. We also flavored it with some LifeSaver candies.
We used 4 different jars to grow our crystals. In one we had a string suspended in it with no lid. In the second, we used a skewer with a lid on. In the third, we had a skewer with the lid partway off. And in the fourth, we had a skewer and the lid was mostly off. The only major difference we noticed was with the jar with the string and no cover at all. the crystals are not lined up as neatly and it’s kind of big and chunky. The skewers helped to form the crystals more uniformly. We also don’t think evaporation was too important in the forming of the crystals.
We learned that sugar crystals are shaped like prisms and rectangles and that the growth is not just a multiplication of more crystals, the crystals themselves actually get bigger. Most of our growth happened within the first 3 weeks. They haven’t changed much since then. So we concluded that this had something to do with the superfine sugar versus regular sugar. Next time we’ll have to try it with regular to compare the growth rate.
This was fun to do and hopefully our mom will actually let us eat it now!
Click on an image to enlarge.
Download the Unit 13: Thermodynamics file here.
Don’t forget – we didn’t record this track in a professional studio, so don’t worry if you hear pops, clicks, chimes, or other odd sounds – just focus on the real message and the learning that’s going on. Are you ready??
Earn $$ telling people about eScience! Click to learn how to become a Supercharged Science Affiliate…
Download the Unit 12: Alternative Energy file here.
Don’t forget – we didn’t record this track in a professional studio, so don’t worry if you hear pops, clicks, chimes, or other odd sounds – just focus on the real message and the learning that’s going on. Are you ready??
Download the Unit 11: Magnetism file here.
Don’t forget – we didn’t record this track in a professional studio, so don’t worry if you hear pops, clicks, chimes, or other odd sounds – just focus on the real message and the learning that’s going on. Are you ready??
Download the Unit 9: Light & Lasers file here.
Don’t forget – we didn’t record this track in a professional studio, so don’t worry if you hear pops, clicks, chimes, or other odd sounds – just focus on the real message and the learning that’s going on. Are you ready??
 This article has all the information you need to complete a Science Fair Project, including instructional step-by-step video, documentation, required forms, experimentation tips and tricks, and how to squeeze your great idea into the scientific method.
This experiment is for advanced students.
Please login or register to read the rest of this content.
Download the Unit 8: Chemistry file here.
Don’t forget – we didn’t record this track in a professional studio, so don’t worry if you hear pops, clicks, chimes, or other odd sounds – just focus on the real message and the learning that’s going on. Are you ready??
 This article has all the information you need to complete a Science Fair Project, including instructional step-by-step video, documentation, required forms, experimentation tips and tricks, and how to squeeze your great idea into the scientific method. This experiment is for advanced students.
Please login or register to read the rest of this content.
 This article has all the information you need to complete a Science Fair Project, including instructional step-by-step video, documentation, required forms, experimentation tips and tricks, and how to squeeze your great idea into the scientific method.
Please login or register to read the rest of this content.
Download the Unit 6: Sound (Vibration, Waves & Resonance) file here.
Don’t forget – we didn’t record this track in a professional studio, so don’t worry if you hear pops, clicks, chimes, or other odd sounds – just focus on the real message and the learning that’s going on. Are you ready??
 This article has all the information you need to complete a Science Fair Project, including instructional step-by-step video, documentation, required forms, experimentation tips and tricks, and how to squeeze your great idea into the scientific method.
Please login or register to read the rest of this content.
Download the Unit 5: Energy (Potential and Kinetic) file here.
Don’t forget – we didn’t record this track in a professional studio, so don’t worry if you hear pops, clicks, chimes, or other odd sounds – just focus on the real message and the learning that’s going on. Are you ready??
This article has all the information you need to complete a Science Fair Project, including instructional step-by-step video, documentation, required forms, experimentation tips and tricks, and how to squeeze your great idea into the scientific method.
Please login or register to read the rest of this content.
Please login or register to read the rest of this content.
Aurora will share some of her top secrets with you so you can do the same with your own children. If you set it up right, you will no longer need to push your child to learn, but rather your child will be naturally pulled toward it in a way that lasts long-term. We’ll uncover the ten modes of motivation and the four different types of learning so you can enter your child’s world and meet them at their level, and you will walk away with a game plan for getting the most out of your learning time together.
Please login or register to read the rest of this content.
Download the Unit 4: Energy (Pulleys & Levers) file here.
Don’t forget – we didn’t record this track in a professional studio, so don’t worry if you hear pops, clicks, chimes, or other odd sounds – just focus on the real message and the learning that’s going on. Are you ready??
 This article has all the information you need to complete a Linear Accelerator (Gauss Rifle) Science Fair Project, including instructional step-by-step video, documentation, required forms, experimentation tips and tricks, and how to squeeze your great idea into the scientific method. Using the principles of momentum and magnetics, you'll build a record-fast accelerator you can fire across the room from the palm of your hand.
Please login or register to read the rest of this content.
Download the Unit 3: Matter (Atoms, Density & Solids) Teleclass MP3 file here.
Don’t forget – we didn’t record this track in a professional studio, so don’t worry if you hear pops, clicks, chimes, or other odd sounds – just focus on the real message and the learning that’s going on. Are you ready??
We're going to learn how to use the energy stored in fruit and veggies to run a clock, light, and other cool stuff. Are you ready?
This webpage has all the information you need to complete a Science Fair Project, including instructional step-by-step video, documentation, required forms, experimentation tips and tricks, and how to squeeze your great idea into the scientific method.
Please login or register to read the rest of this content.
Download the Unit 2: Mechanics (Velocity & Acceleration) Teleclass MP3 file here.
Don’t forget – we didn’t record this track in a professional studio, so don’t worry if you hear pops, clicks, chimes, or other odd sounds – just focus on the real message and the learning that’s going on.
Every so often, we'll be posting articles that include COMPLETE instructions for doing a top-notch Science Fair Project. These articles will include everything you need to create, build, and test out your Science Fair Project!
To get you started, we're turning a previous experiment into a science fair project, so you can see how we've broken down the steps and set up the main framework for turning any project into something worthy of the judge's eye. All the information you need is here to complete a Science Fair Project, including instructional step-by-step video, documentation, required forms, experimentation tips and tricks, and how to squeeze your great idea into the scientific method. Are you ready?
Here's what you need to know: Please login or register to read the rest of this content.
Did you know: You can make yellow light from green and red? Oxygen is not flammable? We’ll help you set the record straight and get your year off to a great start with this interactive class for parents. (We’ve found dozens of principles, definitions, and concepts in physical science textbooks that are just plain wrong!)
We’ve posted the recording here so you can just play it right on your computer.
Download the file here.
Don’t forget – we didn’t record this track in a professional studio, so don’t worry if you hear pops, clicks, chimes, or other odd sounds – just focus on the real message and the learning that’s going on.
Doing science is exciting, fun, and full of big ideas! Why bother with writing when you could be mixing up chemicals, blasting rockets, or shattering laser beams?Because all your "great ideas" are worth nothing if you can't tell others about what you're doing. Scientists write in journals to let others know the latest news with their experiments, announce their new discoveries, or to simply keep track of their progress.
Keeping a science journal doesn't have to be flashy or fancy, just accurate. Science is already hard enough without the added chaos of not knowing what you did yesterday. I'm going to show you the three easy steps to keeping a journal.
You don't have to write a novel - just keep track of what you're doing along with any questions that come up. It's a lot easier to do a couple pages a day for a month rather than trying to pound out a hundred pages in a day! This is something you're going to use throughout the program doing just a little bit at a time, At the end of the month or year, you'll be surprised to see how much science you've covered! Please login or register to read the rest of this content.
Here's a quick and easy way to handle the documentation issue minimal fuss and hassle. This method will even score you points toward your science curriculum requirements along with setting up a life-long habit, which will serve your child even greater in the future, which is really what we're after.
 If you're reading about gravity, jot down a few notes about what you picked up. This is where you want to capture your Ah-HA! moments. If getting your child to write is harder than changing a car transmission in a snowstorm, then grab a video camera and record them as they work and talk their way through the experiment. Just have them describe what they are doing as they do it (you can probe them along with questions if they get stuck for words). For shyer kids, don't have them look at the camera - in fact, if you focus the camera only on their hands as they work through an experiment, their shyness usually will vanish.
A lot of scientists and engineers carry around a voice recorder, so when they have a GREAT IDEA, they can quickly capture it with words by hitting the 'record' button (even while driving!). This allows them to quickly capture and talk about the idea without fussing with the slowness of a pencil and paper. They later play it back and jot down notes and expand it when they have more time.
If you love to write and draw, simply write down the experiment or reading bullet points and illustrate with pictures, describing it with real words that make sense to you. Don't worry about it not being 'formal' or 'correct' - this is your journal, not for anyone else.
For example, if you're launching the potato cannon (which we'll actually be doing later on), and you finally figured out how it worked, we'd rather see you write: "I shoved the stick in, which squashed the air, and POP!" instead of "...as the lowermost potato slug was moved in an upward direction, the pressure increased as the volume decreased until the structural integrity of the uppermost potato was breached, at which time the..." Use words that really speak to you in your own terms. You are not writing a textbook, but rather capturing the essence of the experience you're having as you learn science. Got it?
 Also, if you have any questions that pop up along the way (especially ones that require more time to search for the answers), write them down here as well. Highlight or *star* each question so you remember to go back and get them answered when you have more time.
If you're recording your progress on a science experiment, get your picture taken as you are doing the experiment and paste it in the notebook. Add a caption about what you are doing, what you found, etc. Most scientists will also record any data they took for the experiment alongside the picture of their set up so it's all in one place.
An excellent idea many families have reported using is at the end of the unit, the parents will become the student and the kids teach the lesson back to the parent until the parent gets it. This may take a bit of work of the kid's part, but most of the time, you'll find kids are determined and creative at getting their point across because they are so excited and passionate about what they have just learned. (Don't believe us? Try faking ignorance and see what your child comes up with.)
There are three simple steps to this process:
Grab, Title, and Record
Step 1:Grab a notebook.
You don't need a fancy quad-ruled, glossy bound, gold-letter-embossed notebook, either. Just find a regular spiral-bound notebook from the store and scribble your child's name across the top. (You can even staple ten blank pages together and call it a notebook if you really want to.)Step 2: Title the top of a fresh page with the name of the lesson or experiment.
For example, from Unit 1, you'd write: Gravity. Easy so far, right? Add the date and time to the top corner and number your pages (in case you need to reference them later on. Trust me - it's a lot easier to number as you go).Step 3: Record by describing what you're doing.
If you're reading about gravity, jot down a few notes about what you picked up. This is where you want to capture your Ah-HA! moments. If getting your child to write is harder than changing a car transmission in a snowstorm, then grab a video camera and record them as they work and talk their way through the experiment. Just have them describe what they are doing as they do it (you can probe them along with questions if they get stuck for words). For shyer kids, don't have them look at the camera - in fact, if you focus the camera only on their hands as they work through an experiment, their shyness usually will vanish.A lot of scientists and engineers carry around a voice recorder, so when they have a GREAT IDEA, they can quickly capture it with words by hitting the 'record' button (even while driving!). This allows them to quickly capture and talk about the idea without fussing with the slowness of a pencil and paper. They later play it back and jot down notes and expand it when they have more time.
If you love to write and draw, simply write down the experiment or reading bullet points and illustrate with pictures, describing it with real words that make sense to you. Don't worry about it not being 'formal' or 'correct' - this is your journal, not for anyone else.
For example, if you're launching the potato cannon (which we'll actually be doing later on), and you finally figured out how it worked, we'd rather see you write: "I shoved the stick in, which squashed the air, and POP!" instead of "...as the lowermost potato slug was moved in an upward direction, the pressure increased as the volume decreased until the structural integrity of the uppermost potato was breached, at which time the..." Use words that really speak to you in your own terms. You are not writing a textbook, but rather capturing the essence of the experience you're having as you learn science. Got it?
Also, if you have any questions that pop up along the way (especially ones that require more time to search for the answers), write them down here as well. Highlight or *star* each question so you remember to go back and get them answered when you have more time.If you're recording your progress on a science experiment, get your picture taken as you are doing the experiment and paste it in the notebook. Add a caption about what you are doing, what you found, etc. Most scientists will also record any data they took for the experiment alongside the picture of their set up so it's all in one place.
An excellent idea many families have reported using is at the end of the unit, the parents will become the student and the kids teach the lesson back to the parent until the parent gets it. This may take a bit of work of the kid's part, but most of the time, you'll find kids are determined and creative at getting their point across because they are so excited and passionate about what they have just learned. (Don't believe us? Try faking ignorance and see what your child comes up with.)
And that's it! Do you think this is something you can do?
If so, you've just boosted yourself to the top 10% of the students worldwide that actually take the time to capture and record their work. If you just hear or read something only one time, you will only remember 12% of it after about a week. However, when you capture and record notes about what you're doing, the retention after a week shoots up to over 65%. When you take it one step further and teach it to others, you're now over 85% retention after the first month.Turning your Science Journal into Homework You Can Hand In
Once you've mastered the basic steps to keeping a science journal, you can easily match it with your state's requirements for science, provide it as a writing sample with your college application (especially if it contains photos of you taking data), or show it it to your adviser.By documenting your work in this way, you are setting one of the corner foundations of being a real scientist. Your experiments aren't going to be useful if you can't tell other people about it. There's a standard format that most scientists follow, and that's what we're going to cover here. When you practice these essential steps, your child will be light-years ahead of the game when they hit college. Your kids will not just know the steps on an intellectual level, but it will become built into their nervous system through habit and be a guide as they work through their homework for years to come.
When you use this approach when working through the activities, projects, and experiments in the eScience program, you will have a rock-solid documentation that will pass any curriculum adviser, college-entrance examiner, or state required documentation. And it will be organized, easy to use, and rewarding to flip through years later.
Writing a Rock-Solid Science Journal Report
Once you've gotten into the habit of Grab, Title, and Record, now it's time to put a little more structure into the 'Record' section. I'm going to share with you how we teach engineering students to keep their lab books at the University. This is the same techniques used by astronomers, automotive designers, nuclear engineers, and NASA scientists.When you use this approach when working through the activities, projects, and experiments in the eScience program, you will have a rock-solid documentation that will pass any curriculum adviser, college-entrance examiner, or state required documentation. And it will be organized, easy to use, and rewarding to flip through years later.
Here's what you need to know:
In this case, your title area needs to have the title of the experiment, your name (and the names of any helpers that assisted you during your experiment), and the date you performed the experiment (or date range, if your experiment happened over more than a day).
For example:
For example:
For example:
For example:
NOTE: The numbers above are NOT real!
For example:
For example: (The first four are book references, and the last one is a journal reference.)Step 1: Title: Effects of Antenna Wire Length on Crystal Radio Reception, by Aurora Lipper, November 23, 2010. This goes at the top of the page.
Step 2: Introduction (Question/Hypothesis/Intro): What effect does antenna length have on an AM band crystal radio? After researching the electromagnetic spectrum, frequency, quartz crystals, wavelength, radio circuitry, sonic vibrations, and how the human ear detects sound, I realized I had all the basics for building a small radio. But which antenna length would produce the best signal? I hypothesized that the longest antenna would give strongest and clearest radio signals. This takes a half page (one paragraph maximum), and is written last. Step 3: Materials: List everything you used in your experiment here. Leave a page for this in case you have to add to it later.
Step 4: Procedure/Experiment: After a quick trip to Radio Shack, I built a crystal radio to test. I ran ten trials varying the type of radio and estimated the signal strength using a sound scale from 1 to 5. Leave two pages for this, one for drawing your experiment out (or snap a photo and insert it here), and the second for writing out what you did and how you set it up. Step 5: Results: Record your data and analyze any numbers. You can add a discussion about what went on during your experiment. Leave a page or two (depending on how many trials you're running) in table form. Test only one thing at a time (the antenna length, in our example), and record what you found.
Step 6: Conclusion/Recommendations: I found that my initial hypothesis (the longer the antenna, the stronger the signal in the crystal radio) was supported by the data, but not in the way I had expected. I found that an antenna length of 60’ and above all gave clear, strong signal results. For further study, I recommend running an experiment to test the various gauges of wire, tube diameter, different types of grounding sources, and types of diodes (such as germanium, zener, and silicon) as each diode cuts the signal strength by a different amount. Leave a page for this section, as you might have to rewrite your conclusion a few times before you get it the way you want it.
Step 7: References: Leave a page for this section, and fill it in as you do your research in the beginning.
If I'm starting a fresh notebook, then I'll usually skip the first 5-10 pages before starting to write, and stop writing 5-10 pages before the end. Then I'll go back and add a table of contents in those first skipped pages and an index and/or glossary in the last skipped pages for a more complete book. I'll also number the pages as I go along so this part is a lot easier! Often, I don't take data right in my book, because I make a lot of mistakes and have to rerun the experiment or redo the way I set it up. I'll usually take data on a clean sheet of paper that's got a table marked off, and when I finally get a good run I want to use, I'll tape it into the results page of my notebook.
When I first do a new experiment, I don't record anything at all. In fact, I'll just play with the experiment to get really familiar with how it works, why it works, and what I have to tweak to get it to work just right. The recording process comes after I've rolled around and played with the main ideas. With this approach, I'm able to formulate a better question because now I have experience with the experiment and I find that I am not as worried about making mistakes as I was in the beginning.
Often with an entirely new subject area, I'll have two journals - one is much more informal, and usually titled "My Great Ideas", and the other follows the steps above and is titled "My Science Journal". The "My Great Ideas" is a place for me to write down all the crazy ideas I have before I am ready to record anything, along with any books or media I found that might be useful in doing the experiment, and Ah-HA! moments and all questions that pop up. That way, I've got a spot to brainstorm and come up with experiment ideas before committing it to my more formal write-up book. The great ideas book is usually just for my eyes only, so I don't worry about spelling, neatness, or anything that slows down my creativity.
Step 1: Title
The first thing you need is a title. Something that says what you did in ten words or less and describes the main idea. If you ever wanted to transform your experiment into a lab report, your title would have an entire page to itself.In this case, your title area needs to have the title of the experiment, your name (and the names of any helpers that assisted you during your experiment), and the date you performed the experiment (or date range, if your experiment happened over more than a day).
For example:
Effects of Antenna Wire Length on Crystal Radio Reception Aurora Lipper November 23, 2010
Step 2: Introduction (Purpose)
In your science journal, save a half-page to write this later. You won't be able to write it beforehand, as it includes your hypothesis, background information, and summary of how the experiment went. Just leave a spot so you can jot it in later. Keep it simple, straightforward, and only one paragraph. The best thing to include in this section is why you did the experiment.For example:
Which antenna length gives the best radio signal? After researching the electromagnetic spectrum, frequency, wavelength, quartz crystals, and radios, I realized I had all the basics for picking up AM radio stations using simple electrical equipment. But which antenna length would produce the clearest, strongest radio signal in my crystal radio? This radio detects in the AM band that have been traveling from stations (transmitters) thousands of miles away. One of the biggest challenges with detecting low-power radio waves is that there is no amplifier on the radio to boost the signal strength. When designing the experiment, I had to take into account the finer details, such as the width of the wire, whether to use magnet or plastic-insulated wire, the type of diode, and the tube diameter. In addition, I also needed to find an adequate grounding source (I used a metal water pipe) and have enough space to spread out my antenna, which ranged from 10’ to 100’.
Step 3: Materials
What did you use to do your project? Make sure you list everything you used, even equipment you measured with (rulers, stopwatch, etc.) If you need specific amounts of materials, make sure you list those, too! Check with your school to see which unit system you should use. (Metric or SI = millimeters, meters, kilograms. English or US = inches, feet, pounds.)For example:
- Toilet paper tube
- Magnet wire
- Germanium diode (1N34A)
- Telephone handset or get a crystal earphone
- Alligator clip test leads
- 100’ stranded insulated wire (for the antenna)
- Camera to document project
- Composition or spiral-bound notebook to take notes
- Display board (the three-panel kind with wings), about 48” wide by 36” tall
- Paper for the printer (and photo paper for printing out your photos from the camera)
- Computer and printer
Step 4: Procedure
This is the place to write a highly detailed description of what you did to perform your experiment. Write this as if you were telling someone else how to do your exact experiment and reproduce the same results you achieved. If you think you’re overdoing the detail, you’re probably just at the right level. Diagrams, photos, etc. are a great addition (NOT a substitution) to writing your description.For example:
First, I became familiar with the experiment and setup. After raiding Radio Shack for magnet wire, diodes and earphones, I created a simple crystal radio that could detect AM radio waves without the use of a battery. I ran ten trials varying the length of the antenna and estimated the signal strength.
I made myself a data logger in my science journal. I placed the crystal radio in a spot clear from noise, obstructions, and interference from nearby transmitters and connected the ground wire to the metal pipe and strung the antenna along the ground. I then listened to on the earphone and connected up different antenna lengths to get a better feel for judging the scale for signal strength from 1 to 5. Once I finished the pre-tests, I ran ten trials, varying the antenna length in increments of 10’, recording the signal strength with each trial run.
Step 5: Results
This is the data you logged during your experiment. You can leave a page or two to include a chart or graph – whichever suits your data the best, or both if that works for you. Use a scatter or bar graph, label the axes with units, and title the graph with something more descriptive than “Y vs. X or Y as a function of X”. On the vertical (y-axis) goes your dependent variable (the one you recorded), and the horizontal (x-axis) holds the independent variable (the one you changed).| Crystal Radio Data Sheet | |||
| Name | Aurora Lipper | Antenna wire gauge | 24g |
| Date | Nov. 28, 2009 | Tube wire gauge | 28g magnet |
| Time | 12:45pm | Diode type | germanium |
| Trial # | Antenna Length | Signal Strength | |
| (feet) | (Min = 1, Max =5) | ||
| 1 | 10 | 1 | |
| 2 | 20 | 2 | |
| 3 | 30 | 2 | |
| 4 | 40 | 3 | |
| 5 | 50 | 4 | |
| 6 | 60 | 4.5 | |
| 7 | 70 | 5 | |
| 8 | 80 | 5 | |
| 9 | 90 | 5 | |
| 10 | 100 | 5 | |
|
Step 6: Conclusion
Conclusions are the place to state what you found. Compare your results with your initial hypothesis or question – do your results support or not support your hypothesis? Avoid using the words “right”, “wrong”, and “prove” here. Instead, focus on what problems you ran into as well as why (or why not) your data supported (not supported) your initial hypothesis. Are there any places you may have made mistakes or not done a careful job? How could you improve this for next time? Don’t be shy – let everyone know what you learned!For example:
I found that my initial hypothesis (the longer the antenna, the stronger the signal in the crystal radio) was supported by the data, but not in the way I had expected. My best guess was that an antenna of 100’ would produce a clear enough signal to hear distinct words and songs. I found that an antenna length of 60’ and above all gave clear, strong signal results.
For further study, I recommend running an experiment to test the various gauges of wire, tube diameter, and types of grounding sources. This experiment was a lot of fun!
Step 7: References
Every source of information you collected and used for your project gets listed here. Most of the time, people like to see at least five sources of information listed, with a maximum of two being from the internet. If you’re short on sources, don’t forget to look through magazines, books, encyclopedias, journals, newsletters… and you can also list personal interviews.For example: (The first four are book references, and the last one is a journal reference.)
Fox, McDonald, Pritchard. Introduction to Fluid Mechanics, Wiley, 2005.
Hickam, Homer. Rocket Boys, Dell Publishing, 1998.
Gurstelle, William. Backyard Ballistics, Chicago Review Press, 2001.
Turner, Martin. Rocket and Spacecraft Propulsion. Springer Praxis Books, 2001.
Eisfeld, Rainer. "The Life of Wernher von Braun." Journal of Military History Vol 70 No. 4. October 2006: 1177-1178.
Whew! So to recap...
Step 1: Title: Effects of Antenna Wire Length on Crystal Radio Reception, by Aurora Lipper, November 23, 2010. This goes at the top of the page.Step 2: Introduction (Question/Hypothesis/Intro): What effect does antenna length have on an AM band crystal radio? After researching the electromagnetic spectrum, frequency, quartz crystals, wavelength, radio circuitry, sonic vibrations, and how the human ear detects sound, I realized I had all the basics for building a small radio. But which antenna length would produce the best signal? I hypothesized that the longest antenna would give strongest and clearest radio signals. This takes a half page (one paragraph maximum), and is written last. Step 3: Materials: List everything you used in your experiment here. Leave a page for this in case you have to add to it later.
Step 4: Procedure/Experiment: After a quick trip to Radio Shack, I built a crystal radio to test. I ran ten trials varying the type of radio and estimated the signal strength using a sound scale from 1 to 5. Leave two pages for this, one for drawing your experiment out (or snap a photo and insert it here), and the second for writing out what you did and how you set it up. Step 5: Results: Record your data and analyze any numbers. You can add a discussion about what went on during your experiment. Leave a page or two (depending on how many trials you're running) in table form. Test only one thing at a time (the antenna length, in our example), and record what you found.
Step 6: Conclusion/Recommendations: I found that my initial hypothesis (the longer the antenna, the stronger the signal in the crystal radio) was supported by the data, but not in the way I had expected. I found that an antenna length of 60’ and above all gave clear, strong signal results. For further study, I recommend running an experiment to test the various gauges of wire, tube diameter, different types of grounding sources, and types of diodes (such as germanium, zener, and silicon) as each diode cuts the signal strength by a different amount. Leave a page for this section, as you might have to rewrite your conclusion a few times before you get it the way you want it.
Step 7: References: Leave a page for this section, and fill it in as you do your research in the beginning.
Tips & Tricks & Bonus Ideas!
There are a lot of steps to keeping a rock-solid science journal, but once you get into the rhythm, it'll come naturally and you'll actually start to think ahead as you work through your experiment, because you know what you'll need to record to make it worthwhile. One of the things I do is write the seven steps on the inside cover of my journal as a quick reference sheet, so I know how many pages to mark off ahead of time as I write up a new experiment.If I'm starting a fresh notebook, then I'll usually skip the first 5-10 pages before starting to write, and stop writing 5-10 pages before the end. Then I'll go back and add a table of contents in those first skipped pages and an index and/or glossary in the last skipped pages for a more complete book. I'll also number the pages as I go along so this part is a lot easier! Often, I don't take data right in my book, because I make a lot of mistakes and have to rerun the experiment or redo the way I set it up. I'll usually take data on a clean sheet of paper that's got a table marked off, and when I finally get a good run I want to use, I'll tape it into the results page of my notebook.
When I first do a new experiment, I don't record anything at all. In fact, I'll just play with the experiment to get really familiar with how it works, why it works, and what I have to tweak to get it to work just right. The recording process comes after I've rolled around and played with the main ideas. With this approach, I'm able to formulate a better question because now I have experience with the experiment and I find that I am not as worried about making mistakes as I was in the beginning.
Often with an entirely new subject area, I'll have two journals - one is much more informal, and usually titled "My Great Ideas", and the other follows the steps above and is titled "My Science Journal". The "My Great Ideas" is a place for me to write down all the crazy ideas I have before I am ready to record anything, along with any books or media I found that might be useful in doing the experiment, and Ah-HA! moments and all questions that pop up. That way, I've got a spot to brainstorm and come up with experiment ideas before committing it to my more formal write-up book. The great ideas book is usually just for my eyes only, so I don't worry about spelling, neatness, or anything that slows down my creativity.
Download the Unit 1: Mechanics Teleclass MP3 file here.
Don’t forget – we didn’t record this track in a professional studio, so don’t worry if you hear pops, clicks, chimes, or other odd sounds – just focus on the real message and the learning that’s going on.
 The eScience program is appropriate for students grades K-12. You’ll find lots of experiments for students in this entire grade range. Younger students can still work through most of the program with a bit of your help (for using tools and hot glue guns) as they build the robots, laser shows, hovercraft, catapults, roller coasters, chemistry experiments, and much more.