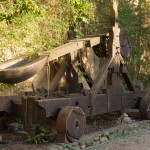
 Ancient people teach us a thing or two about energy when they laid siege to an enemy town. Although we won’t do this today, we will explore some of the important physics concepts about energy that they have to teach us by making a simple catapult. We’re utilizing the “springy-ness” in the popsicle stick, spoon, and the torsion spring to fling the ball around the room. By moving the fulcrum as far from the ball launch pad as possible (on the catapult), you get a greater distance to press down and release the projectile.
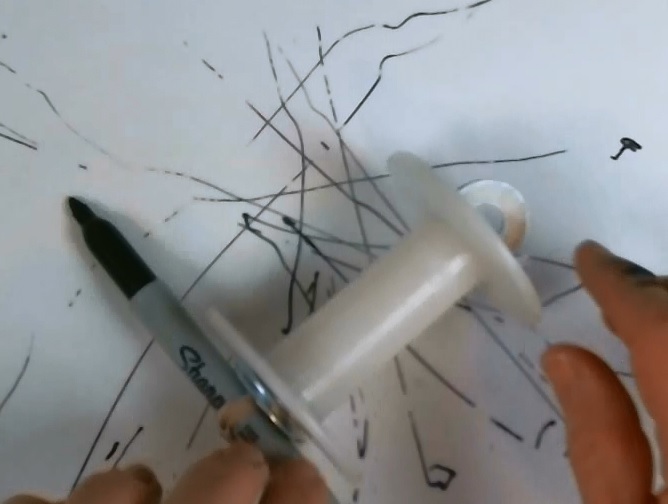
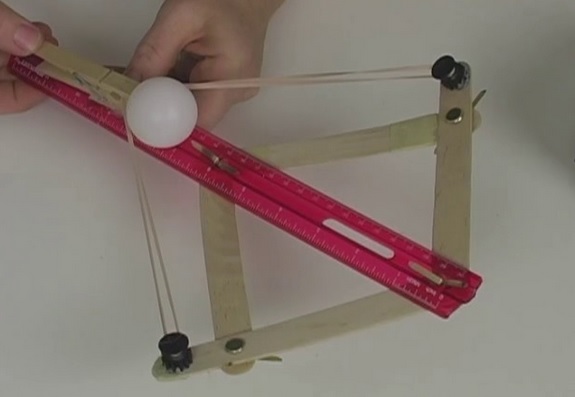
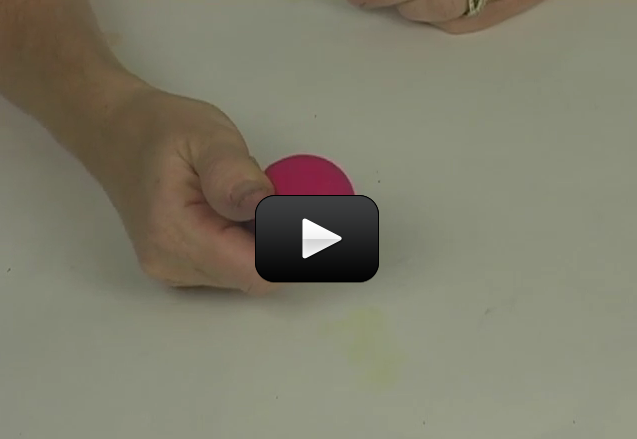
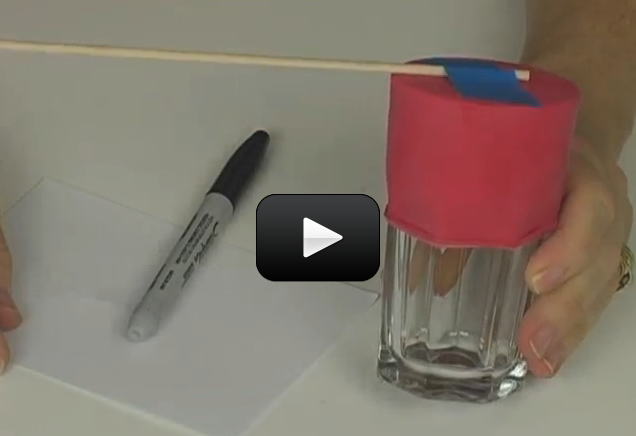
We're going to make a quick and easy drawing machine that will teach your kids about the conservation of energy! By storing energy in the rubber band (called "elastic potential energy"), you can see for yourself how this transforms into movement (called "kinetic energy") while making a picture on your paper.
Everything in the universe takes one of two forms: energy and matter. This experiment explores the idea that energy can never be created or destroyed, but it can transform. All the different forms of energy (heat, electrical, nuclear, sound etc.) can be broken down into two categories, potential and kinetic energy.
Think of potential energy the “could” energy. The battery “could” power the flashlight. The light “could” turn on. I “could” make a sound. That ball “could” fall off the wall. That candy bar “could” give me energy. Potential energy is the energy that something has that can be released. For example, the battery has the potential energy to light the bulb of the flashlight if the flashlight is turned on and the energy is released from the battery. Your legs have the potential energy to make you hop up and down if you want to release that energy (like you do whenever it’s time to do science!). The fuel in a gas tank has the potential energy to make the car move.
Kinetic energy is the energy of motion. Kinetic energy is an expression of the fact that a moving object can do work on anything it hits; it describes the amount of work the object could do as a result of its motion. Whether something is zooming, racing, spinning, rotating, speeding, flying, or diving… if it’s moving, it has kinetic energy. How much energy it has depends on two important things: how fast it’s going and how much it weighs.
We’re utilizing the elasticity of the rubber band to store potential energy to fling the ball around the room. The potential energy in the rubber band is transformed into kinetic energy of the moving ball when you hit the trigger to release the rubber band.
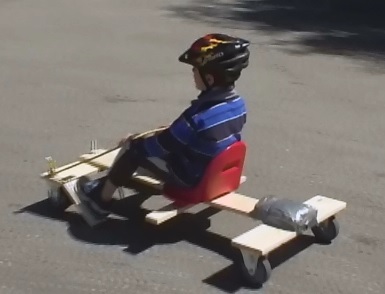
Nothing says summer time fun than a home-built go-kart that can race down the driveway with just as much thrill as two story roller coasters.
A go-karts (also called "go-cart") can be gravity powered (without a motor) or include electric or gas powered motors. The gravity powered kind are also known as Soap Box Derby racers, and are the simplest kind to make since all you need is wheels, a frame, and a good hill (and a helmet!).
Please login or register to read the rest of this content.
If you’ve ever wondered how glow in the dark toys stay bright even in the dark, this activity is just for you! When light hits a material, it’s either reflected, transmitted, or absorbed as we discovered with the gummy bear activity earlier. However, certain materials will absorb one wavelength and emit an entirely different wavelength, and when this happens it’s called “fluorescence”. Let’s do an experiment first, and then we’ll go over why it does what it does.
Please login or register to read the rest of this content.
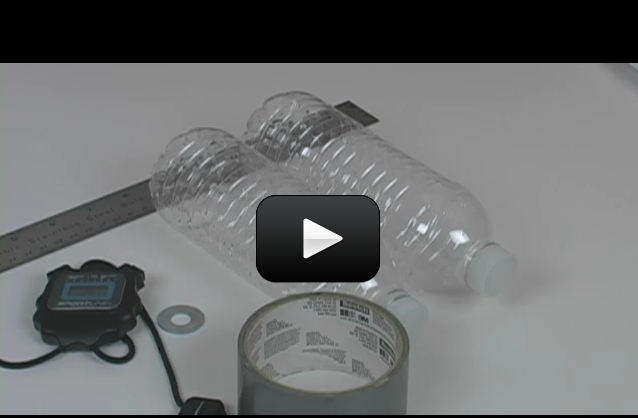
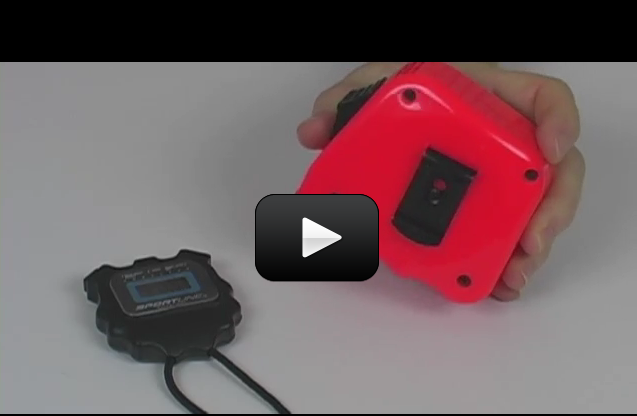
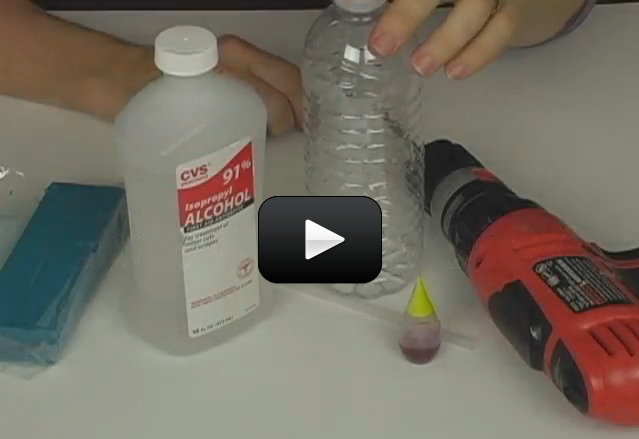
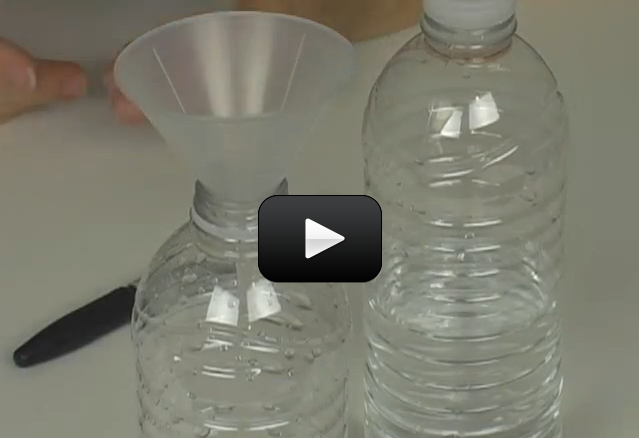
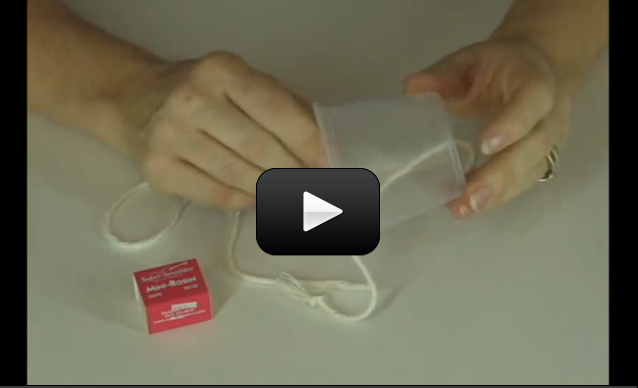
This lab is a physical model of what happens on Mercury when two magnetic fields collide and form magnetic tornadoes.
You’ll get to investigate what an invisible magnetic tornado looks like when it sweeps across Mercury.
Materials
- Two clear plastic bottles (2 liter soda bottles work well)
- Steel washer with a 3/8 inch hole
- Ruler and stopwatch
- Glitter or confetti (optional)
- Duct tape (optional)
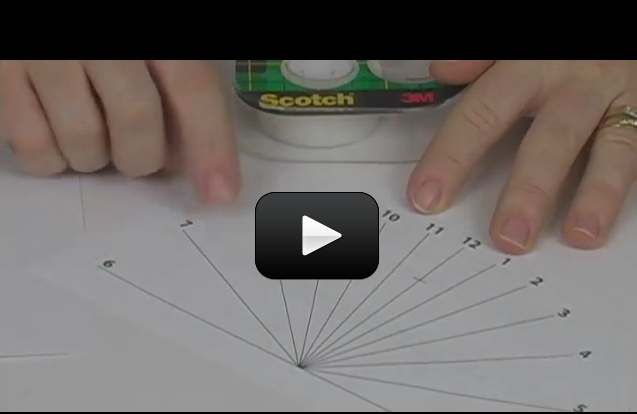
Using the position of the Sun, you can tell what time it us by making one of these sundials. The Sun will cast a shadow onto a surface marked with the hours, and the time-telling gnomon edge will align with the proper time.
In general, sundials are susceptible to different kinds of errors. If the sundial isn’t pointed north, it’s not going to work. If the sundial’s gnomon isn’t perpendicular, it’s going to give errors when you read the time. Latitude and longitude corrections may also need to be made. Some designs need to be aligned with the latitude they reside at (in effect, they need to be tipped toward the Sun at an angle). To correct for longitude, simply shift the sundial to read exactly noon when indicated on your clock. This is especially important for sundials that lie between longitudinal standardized time zones. If daylight savings time is in effect, then the sundial timeline must be shifted to accommodate for this. Most shifts are one hour.
Please login or register to read the rest of this content.
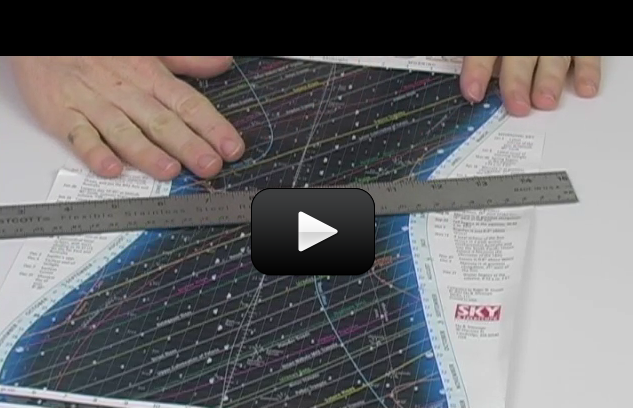
Today you get to learn how to read an astronomical chart to find out when the Sun sets, when twilight ends, which planets are visible, when the next full moon occurs, and much more. This is an excellent way to impress your friends.
The patterns of stars and planets stay the same, although they appear to move across the sky nightly, and different stars and planets can be seen in different seasons.
Materials:
- Printout of Stargazer’s Almanac
- Pencil
- Tape and scissors (optional)
- Ruler

Kepler’s Laws of planetary orbits explain why the planets move at the speeds they do. You’ll be making a scale model of the solar system and tracking orbital speeds.
Kepler’s 1st Law states that planetary orbits about the Sun are not circles, but rather ellipses. The Sun lies at one of the foci of the ellipse. Kepler’s 2nd Law states that a line connecting the Sun and an orbiting planet will sweep out equal areas in for a given amount of time. Translation: the further away a planet is from the Sun, the slower it goes.
Please login or register to read the rest of this content.
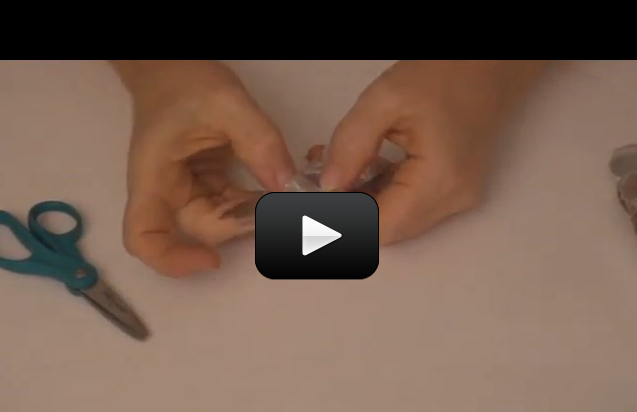
How do astronomers find planets around distant stars? If you look at a star through binoculars or a telescope, you’ll quickly notice how bright the star is, and how difficult it is to see anything other than the star, especially a small planet that doesn’t generate any light of its own! Astronomers look for a shift, or wobble, of the star as it gets gravitationally “yanked” around by the orbiting planets. By measuring this wobble, astronomers can estimate the size and distance of larger orbiting objects.
Doppler spectroscopy is one way astronomers find planets around distant stars. If you recall the lesson where we created our own solar system in a computer simulation, you remember how the star could be influenced by a smaller planet enough to have a tiny orbit of its own. This tiny orbit is what astronomers are trying to detect with this method.
Materials
- Several bouncy balls of different sizes and weights, soft enough to stab with a toothpick
- Toothpicks
It just so happens that the Sun’s diameter is about 400 times larger than the Moon, but the Moon is 400 times closer than the Sun. This makes the Sun and Moon appear to be about the same size in the sky as viewed from Earth. This is also why the eclipse thing is such a big deal for our planet.
You’re about to make your own eclipses as you learn about syzygy. A total eclipse happens about once every year when the Moon blocks the Sun’s light. Lunar eclipses occur when the Sun, Moon, and Earth are lined up in a straight line with the Earth in the. Lunar eclipses last hours, whereas solar eclipses last only minutes.
Materials
- 2 index cards
- Flashlight or Sunlight
- Tack or needle
- Black paper
- Scissors

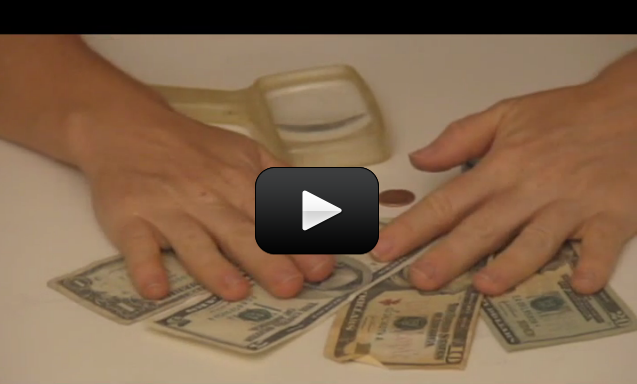
A meteoroid is a small rock that zooms around outer space. When the meteoroid zips into the Earth’s atmosphere, it’s now called a meteor or “shooting star”. If the rock doesn’t vaporize en route, it’s called a meteorite as soon as it whacks into the ground. The word meteor comes from the Greek word for “high in the air.”
Meteorites are black, heavy (almost twice the normal rock density), and magnetic. However, there is an Earth-made rock that is also black, heavy, and magnetic (magnetite) that is not a meteorite. To tell the difference, scratch a line from both rocks onto an unglazed tile. Magnetite will leave a mark whereas the real meteorite will not.
Materials
- White paper
- Strong magnet
- Handheld magnifying glass (optional)
You are going to start observing the Sun and tracking sunspots across the Sun using one of two different kinds of viewers so you can figure out how fast the Sun rotates. Sunspots are dark, cool areas with highly active magnetic fields on the Sun’s surface that last from hours to months. They are dark because they aren’t as bright as the areas around them, and they extend down into the Sun as well as up into the magnetic loops.
Materials
- Tack and 2 index cards OR a Baader film (this works better than the tacks and card)

Have you ever wondered why the sky is blue? Or why the sunset is red? Or what color our sunset would be if we had a blue giant instead of a white star? This lab will answer those questions by showing how light is scattered by the atmosphere.
Particles in the atmosphere determine the color of the planet and the colors we see on its surface. The color of the star also affects the color of the sunset and of the planet.
Materials
- Glass jar
- Flashlight
- Fingernail polish (red, yellow, green, blue)
- Clear tape
- Water
- Dark room
- Few drops of milk
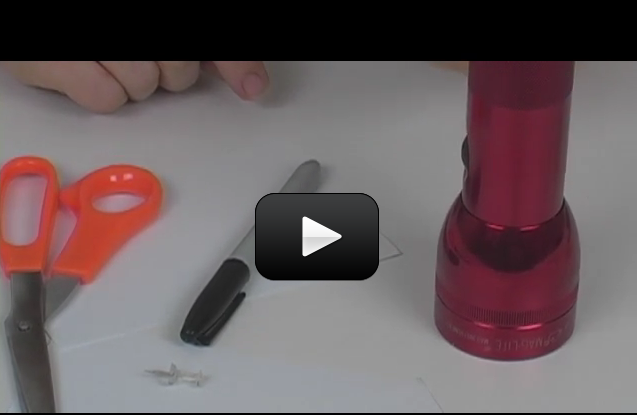
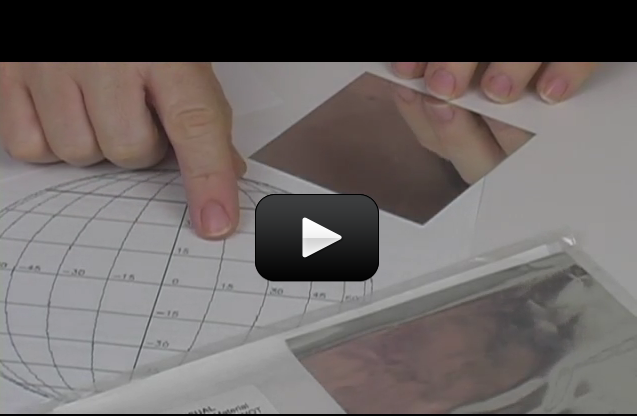
One common misconception is that the seasons are caused by how close the Earth is to the Sun. Today you get to do an experiment that shows how seasons are affected by axis tilt, not by distance from the Sun. And you also find out which planet doesn’t have sunlight for 42 years.
The seasons are caused by the Earth’s axis tilt of 23.4o from the ecliptic plane.
Materials
- Bright light source (not fluorescent)
- Balloon
- Protractor
- Masking tape
- 2 liquid crystal thermometers (optional)
- Ruler, yardstick or meter stick
- Marker
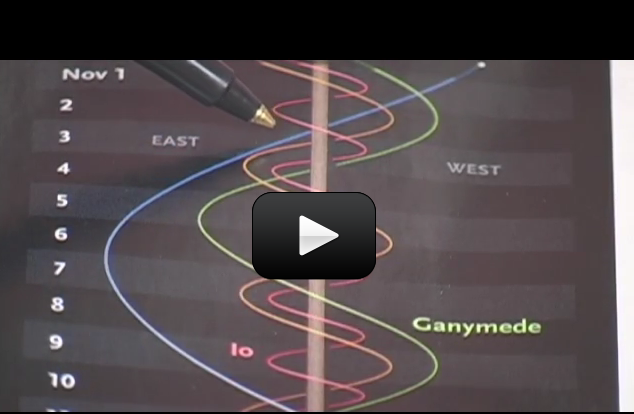
On a clear night when Jupiter is up, you’ll be able to view the four moons of Jupiter (Europa, Ganymede, Io, and Callisto) and the largest moon of Saturn (Titan) with only a pair of binoculars. The question is: Which moon is which? This lab will let you in on the secret to figuring it out.
You get to learn how to locate a planet in the sky with a pair of binoculars, and also be able to tell which moon is which in the view.
Materials
- Printout of corkscrew graph
- Pencil
- Binoculars (optional)
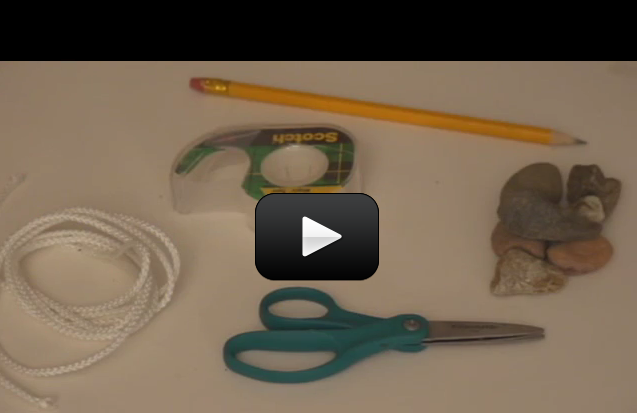
If you want to get from New York to Los Angeles by car, you’d pull out a map. If you want to find the nearest gas station, you’d pull out a smaller map. What if you wanted to find our nearest neighbor outside our solar system? A star chart is a map of the night sky, divided into smaller parts (grids) so you don’t get too overwhelmed. Astronomers use these star charts to locate stars, planets, moons, comets, asteroids, clusters, groups, binary stars, black holes, pulsars, galaxies, planetary nebulae, supernovae, quasars, and more wild things in the intergalactic zoo.
How to find two constellations in the sky tonight, and how to get those constellations down on paper with some degree of accuracy.
Materials
- Dark, cloud-free night
- Two friends
- String
- Rocks
- Pencil
When high energy radiation strikes the Earth from space, it’s called cosmic rays. To be accurate, a cosmic ray is not like a ray of sunshine, but rather is a super-fast particle slinging through space. Think of throwing a grain of sand at a 100 mph… and that’s what we call a ‘cosmic ray’. Build your own electroscope with this video!
Please login or register to read the rest of this content.
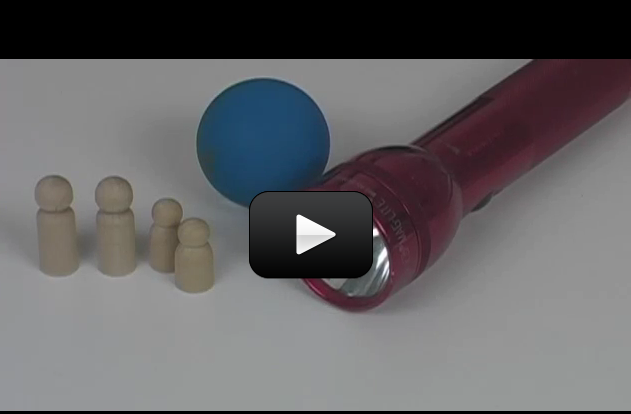
The Moon appears to change in the sky. One moment it’s a big white circle, and next week it’s shaped like a sideways bike helmet. There’s even a day where it disappears altogether. So what gives?
The Sun illuminates half of the Moon all the time. Imagine shining a flashlight on a beach ball. The half that faces the light is lit up. There’s no light on the far side, right? For the Moon, which half is lit up depends on the rotation of the Moon. And which part of the illuminated side we can see depends on where we are when looking at the Moon. Sound complicated? This lab will straighten everything out so it makes sense.
Materials
- ball
- flashlight
Do you have thick or thin hair? Let’s find out using a laser to measure the width of your hair and a little knowledge about diffraction properties of light. (Since were using lasers, make sure you’re not pointing a laser at anyone, any animal, or at a reflective surface.)
Please login or register to read the rest of this content.
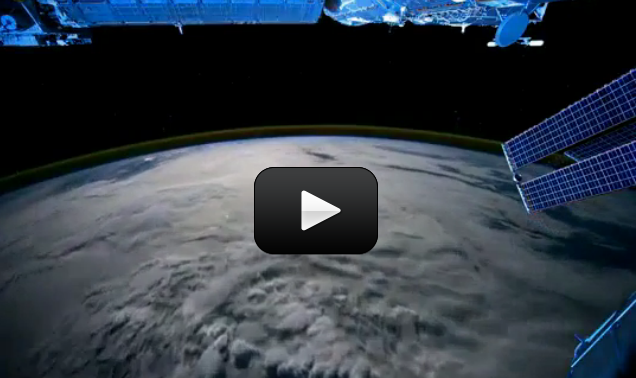
Many wonders are visible when flying over the Earth at night, especially if you are an astronaut on the International Space Station (ISS)! Passing below are white clouds, orange city lights, lightning flashes in thunderstorms, and dark blue seas. On the horizon is the golden haze of Earth’s thin atmosphere, frequently decorated by dancing auroras as the video progresses. The green parts of auroras typically remain below the space station, but the station flies right through the red and purple auroral peaks. You’ll also see solar panels of the ISS around the frame edges. The wave of approaching brightness at the end of each sequence is just the dawn of the sunlit half of Earth, a dawn that occurs every 90 minutes, as the ISS travels at 5 miles per second to keep from crashing into the earth.
Video Credit: Gateway to Astronaut Photography, NASA

Being able to predict tomorrow's weather is one of the most challenging and frequently requested bits of information to provide. Do you need a coat tomorrow? Will soccer practice be canceled? Will the crops freeze tonight?
Scientists use different instruments to record the current weather conditions, like temperature, barometric pressure, wind speed, humidity, etc. The real work comes in when they spend time looking over their data over days, months, even years and search for patterns.
But where does the weather station get its weather from?
One of the greatest leaps in meteorology was using numbers to predict the flow of the atmosphere. The math equations needed for these (using fluid dynamics and thermodynamics) are enough to make even a graduate student quiver with fear. Even today's most powerful computers cannot solve these complex equations! The best they can do is make a guess at the solution and then adjust it until it fits well enough in a given range. How do the computers know what to guess?
Several weather stations around the world work together to report the current weather every hour. These stations can be land-based, mounted on buoys in the ocean, or launched on radiosondes and report back to a home station as they rise through the different layers of the atmosphere. Pilots will also give weather reports en route to their destination, which get recorded and added to the database of weather knowledge.
We're going to build our own homemade weather station and start keeping track of weather right in your own home town. By keeping a written record (even if it's just pen marks on the wall), you'll be able to see how the weather changes and even predict what it will do, once you get the hang of the pattern in your local area. For example, if you live in Florida, what happens to the pressure before the daily afternoon thunderstorm? Or if you live in the deserts of Arizona, what does a sudden increase in humidity tell you?
Please login or register to read the rest of this content.
One of the most remarkable images of our planet has always been how dynamic the atmosphere is a photo of the Earth taken from space usually shows swirling masses of white wispy clouds, circling and moving constantly. So what are these graceful puffs that can both frustrate astronomers and excite photographers simultaneously?
Clouds are frozen ice crystals or white liquid water that you can see with your eyes. Scientists who study clouds go into a field of science called nephology, which is a specialized area of meteorology. Clouds don’t have to be made up of water – they can be any visible puff and can have all three states of matter (solid, liquid, and gas) existing within the cloud formation. For example, Jupiter has two cloud decks: the upper are water clouds, and the lower deck are ammonia clouds.
We’re going to learn how to build a weather instrument that will record whether (weather?) the day was sunny or cloudy using a very sensitive piece of paper. Are you ready?
Please login or register to read the rest of this content.
First invented in the 1600s, thermometers measure temperature using a sensor (the bulb tip) and a scale. Temperature is a way of talking about, measuring, and comparing the thermal energy of objects. We use three different kinds of scales to measure temperature. Fahrenheit, Celsius, and Kelvin. (The fourth, Rankine, which is the absolute scale for Fahrenheit, is the one you’ll learn about in college.)
Mr. Fahrenheit, way back when (18th century) created a scale using a mercury thermometer to measure temperature. He marked 0° as the temperature ice melts in a tub of salt. (Ice melts at lower temperatures when it sits in salt. This is why we salt our driveways to get rid of ice). To standardize the higher point of his scale, he used the body temperature of his wife, 96°.
As you can tell, this wasn’t the most precise or useful measuring device. I can just imagine Mr. Fahrenheit, “Hmmm, something cold…something cold. I got it! Ice in salt. Good, okay there’s zero, excellent. Now, for something hot. Ummm, my wife! She always feels warm. Perfect, 96°. ” I hope he never tried to make a thermometer when she had a fever.
Just kidding, I’m sure he was very precise and careful, but it does seem kind of weird. Over time, the scale was made more precise and today body temperature is usually around 98.6°F.
Later, (still 18th century) Mr. Celsius came along and created his scale. He decided that he was going to use water as his standard. He chose the temperature that water freezes at as his 0° mark. He chose the temperature that water boils at as his 100° mark. From there, he put in 100 evenly spaced lines and a thermometer was born.
Last but not least Mr. Kelvin came along and wanted to create another scale. He said, I want my zero to be ZERO! So he chose absolute zero to be the zero on his scale.
Absolute zero is the theoretical temperature where molecules and atoms stop moving. They do not vibrate, jiggle or anything at absolute zero. In Celsius, absolute zero is -273 ° C. In Fahrenheit, absolute zero is -459°F (or 0°R). It doesn’t get colder than that!
As you can see, creating the temperature scales was really rather arbitrary:
“I think 0° is when water freezes with salt.”
“I think it’s just when water freezes.”
“Oh, yea, well I think it’s when atoms stop!”
Many of our measuring systems started rather arbitrarily and then, due to standardization over time, became the systems we use today. So that’s how temperature is measured, but what is temperature measuring?
Temperature is measuring thermal energy which is how fast the molecules in something are vibrating and moving. The higher the temperature something has, the faster the molecules are moving. Water at 34°F has molecules moving much more slowly than water at 150°F. Temperature is really a molecular speedometer.
Let’s make a quick thermometer so you can see how a thermometer actually works:
Please login or register to read the rest of this content.
Hygrometers measure how much water is in the air, called humidity. If it's raining, it's 100% humidity. Deserts and arid climates have low humidity and dry skin. Humidity is very hard to measure accurately, but scientists have figured out ways to measure how much moisture is absorbed by measuring the change in temperature (as with a sling psychrometer), pressure, or change in electrical resistance (most common).
The dewpoint is the temperature when moist air hits the water vapor saturation point. If the temperature goes below this point, the water in the air will condense and you have fog. Pilots look for temperature and dewpoint in their weather reports to tell them if the airport is clear, or if it''s going to be 'socked in'. If the temperature stays above the dewpoint, then the airport will be clear enough to land by sight. However, if the temperature falls below the dewpoint, then they need to land by instruments, and this takes preparation ahead of time.
A sling psychrometer uses two thermometers (image above), side by side. By keeping one thermometer wet and the other dry, you can figure out the humidity using a humidity chart. Such as the one on page two of this document. The psychrometer works because it measures wet-bulb and dry-bulb temperatures by slinging the thermometers around your head. While this sounds like an odd thing to do, there's a little sock on the bottom end of one of the thermometers which gets dipped in water. When air flows over the wet sock, it measures the evaporation temperature, which is lower than the ambient temperature, measured by the dry thermometer.
Scientists use the difference between these two to figure out the relative humidity. For example, when there's no difference between the two, it's raining (which is 100% humidity). But when there's a 9oC temperature difference between wet and dry bulb, the relative humidity is 44%. If there's 18oC difference, then it's only 5% humidity.
You can even make your own by taping two identical thermometers to cardboard, leaving the ends exposed to the air. Wrap a wet piece of cloth or tissue around the end of one and use a fan to blow across both to see the temperature difference!
One of the most precise are chilled mirror dewpoint hygrometers, which uses a chilled mirror to detect condensation on the mirror's surface. The mirror's temperature is controlled to match the evaporation and condensation points of the water, and scientists use this temperature to figure out the humidity.
We're going to make a very simple hygrometer so you get the hand of how humidity can change daily. Be sure to check this instrument right before it rains. This is a good instrument to read once a day and log it in your weather data book.
Most weather stations have anemometers to measure wind speed or wind pressure. The kind of anemometer we’re going to make is the same one invented back in 1846 that measures wind speed. Most anemometers use three cups, which is not only more accurate but also responds to wind gusts more quickly than a four-cup model.
Some anemometers also have an aerovane attached, which enables scientists to get both speed and direction information. It looks like an airplane without wings – with a propeller at the front and a vane at the back.
Other amemometers don’t have any moving parts – instead they measure the resistance of a very short, thin piece of tungsten wire. (Resistance is how much a substance resists the flow of electrical current. Copper has a low electrical resistance, whereas rubber has a very high resistance.) Resistance changes with the material’s temperature, so the tungsten wire is heated and placed in the airflow. The wind flowing over the wire cools it down and increases the resistance of the wire, and scientists can figure out the wind speed.
Please login or register to read the rest of this content.
A barometer uses either a gas (like air) or a liquid (like water or mercury) to measure pressure of the atmosphere. Scientists use barometers a lot when they predict the weather, because it’s usually a very accurate way to predict quick changes in the weather.
Barometers have been around for centuries – the first one was in the 1640s!
At any given momen, you can tell how high you are above sea level by measure the pressure of the air. If you measure the pressure at sea level using a barometer, and then go up a thousand feet in an airplane, it will always indicate exactly 3.6 kPa lower than it did at sea level.
Scientists measure pressure in “kPa” which stands for “kilo-Pascals”. The standard pressure is 101.3 kPa at sea level, and 97.7 kPa 1,000 feet above sea level. In fact, every thousand feet you go up, pressure decreases by 4%. In airplanes, pilots use this fact to tell how high they are. For 2,000 feet, the standard pressure will be 94.2 kPa. However, if you’re in a low front, the sea level pressure reading might be 99.8 kPa, but 1000 feet up it will always read 3.6 kPa lower, or 96.2 kPa.
Please login or register to read the rest of this content.
Also known as an udometer or pluviometer or ombrometer, or just plan old ‘rain cup’, this device will let you know how much water came down from the skies. Folks in India used bowls to record rainfall and used to estimate how many crops they would grow and thus how much tax to collect!
These devices reports in “millimeters of rain” or “”centimeters of rain” or even inches of rain”. Sometimes a weather station will collect the rain and send in a sample for testing levels of pollutants.
While collecting rain may seem simple and straightforward, it does have its challenges! Imagine trying to collect rainfall in high wind areas, like during a hurricane. There are other problems, like trying to detect tiny amounts of rainfall, which either stick to the side of the container or evaporate before they can be read on the instrument. And what happens if it rains and then the temperature drops below freezing, before you’ve had a chance to read your gauge? Rain gauges can also get clogged by snow, leaves, and bugs, not to mention used as a water source for birds.
So what’s a scientist to do?
Press onward, like all great scientists! And invent a type of rain gauge that will work for your area. We’re going to make a standard cylinder-type rain gauge, but I am sure you can figure out how to modify it into a weighing precipitation type (where you weigh the amount in the bottle instead of reading a scale on the side), or a tipping bucket type (where a funnel channels the rain to a see-saw that tips when it gets full with a set amount of water) , or even a buried-pit bucket (to keep the animals out).
Please login or register to read the rest of this content.
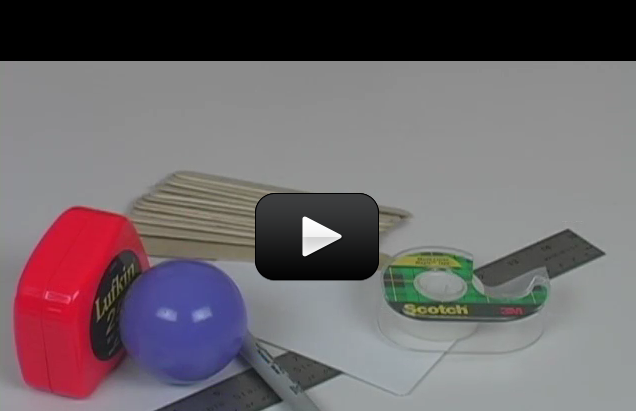
How many of these items do you already have? We’ve tried to keep it simple for you by making the majority of the items things most people have within reach (both physically and budget-wise).
This particular shopping list has many different projects on it, so we’ve broken the list into sections based on the projects. For example, the roller coaster activities are all in one area, the weather station in another, etc. You might want to view the videos before gathering your supplies.
Click here for a printer-friendly version of this page.
Materials
Materials for Sonic Vibrations Experiments
- 3 popsicle sticks (tongue depressor size)
- 2 index cards
- Scissors, tape, hot glue gun
- 2 film canisters (or plastic snap-lid M&M containers)
- Straw
- Three 7-9” balloons
- 2 water balloons
- 3’ string
- Rubber bands (at least two are ¼” thick)
- Disposable cup (plastic, foam, or paper)
- Hexnut (1/4” or smaller)
- Razor or drill to make holes in the film canister
- Scissors, tape
Weather Station Project
- 2 popsicle sticks
- 1 long strand of hair
- 1 index card
- 12” piece of cardboard (scraps are great)
- 4 foam cups
- 2 popsicle sticks
- 1 pencil with built-in eraser on top
- 2 tacks
- 1 nickel
- Scissors
- Tape
- 7-9” balloon
- Water glass
- Straw or wooden skewer
- Empty water bottle
- Funnel
- Rubbing alcohol
- Clay
- Straw
- Food coloring
- Optional: Sunprint Paper and soup can
Magic Tricks
- Dollar bill
- 2 small paperclips
- 6’ of rope
- 1 rubber band
- 1 toilet paper tube
- 1 egg (hard boiled) OR ball that sits on the end of the toilet paper tube without falling in
- Aluminum pie plate or plastic dish (something not breakable)
- Broom handle or ruler
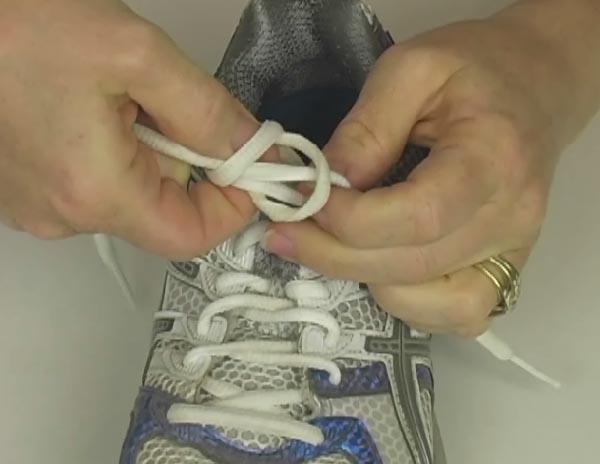
- Shoe with laces
- Four bracelets (optional)
Materials for Roller Coasters Experiments
- ¾” foam pipe insulation
- Masking tape
- A handful of marbles
- Chairs and tables
Materials for Clothespin Catapult Project
- Popsicle sticks
- Plastic spoon
- 3 rubber bands
- Wood clothespin
- Straw
- Wood dowel that fits inside the straw
- Scissors
- Hot glue gun
Materials for Mousetrap RaceCar
- Mousetrap (NOT a rat trap)
- Foam block or piece of cardboard
- Four old CDs
- Thin string or fishing line
- Wood dowel or long, straight piece from a wire coat hanger (use pliers to straighten it)
- Straw
- Two wood skewers (that fit inside straw)
- Hot glue gun
- Duct tape
- Scissors
- Four caps to water bottles
- Drill
- Razor with adult help
 Click here for a printer-friendly version of this page.
Objective You will learn about force, acceleration, velocity, and what scientist really mean when they say, “Try it again…and again…and again… until you get the result you want.” This lab uses the Iteration Technique to solving a problem, which is different than the Scientific Method, and actually much more widely used by engineers in the science field.
About the Experiment This lab is an excellent opportunity for kids to practice their resilience, because we guarantee this experiment will not work the first several times they try it. While you can certainly help the kids out, it’s important that you help them figure it out on their own. You can do this by asking questions instead of rushing in to solve their problems. For instance, when the marble flies off the track, you can step back and say:
“Hmmm… did the marble go to fast or too slow?”
“Where did it fly off?”
“Wow – I’ll bet you didn’t expect that to happen. Now what are you going to try?”
Become their biggest fan by cheering them on, encouraging them to make mistakes, and try something new (even if they aren’t sure if it will work out). One of the greatest gifts you can give your child is the expectation of their success.
The How and Why To make the roller coasters, you’ll need foam pipe insulation, which is sold by the six-foot increments at the hardware store. You’ll be slicing them in half lengthwise, so each piece makes twelve feet of track. It comes in all sizes, so bring your marbles when you select the size. The ¾” size fits most marbles, but if you’re using ball bearings or shooter marbles, try those out at the store. (At the very least you’ll get smiles and interest from the hardware store sales people.) Cut most of the track lengthwise (the hard way) with scissors. You’ll find it is already sliced on one side, so this makes your task easier. Leave a few pieces uncut to become “tunnels” for later roller coasters.
The next step is to join your track together before adding all the features like loops and curves. Join two tracks together in butt-joint fashion and press a piece of masking tape lengthwise along both the inside and the underside of the track. A third piece of tape should go around the entire joint circumferentially. Make this connection as smooth as possible, as your high-speed marble roller coaster will tend to fly off the track at the slightest bump.
Loops Swing the track around in a complete circle and attach the outside of the track to chairs, table legs, and hard floors with tape to secure in place. Loops take a bit of speed to make it through, so have your partner hold it while you test it out before taping. Start with smaller loops and increase in size to match your entrance velocity into the loop. Loops can be used to slow a marble down if speed is a problem.
Camel-Backs Make a hill out of track in an upside-down U-shape. Good for show, especially if you get the hill height just right so the marble comes off the track slightly, then back on without missing a beat.
Whirly-Birds Take a loop and make it horizontal. Great around poles and posts, but just keep the bank angle steep enough and the marble speed fast enough so it doesn’t fly off track.
Corkscrew Start with a basic loop, then spread apart the entrance and exit points. The further apart they get, the more fun it becomes. Corkscrews usually require more speed than loops of the same size.
Jump Track A major show-off feature that requires very rigid entrance and exit points on the track. Use a lot of tape and incline the entrance (end of the track) slightly while declining the exit (beginning of new track piece).
Pretzel The cream of the crop in maneuvers! Make a very loose knot that resembles a pretzel. Bank angles and speed are the most critical, with rigid track positioning a close second. If you’re having trouble, make the pretzel smaller and try again. You can bank the track at any angle because the foam is so soft. Use lots of tape and a firm surface (bookcases, chairs, etc).
Troubleshooting Marbles will fly everywhere, so make sure you have a lot of extras! If your marble is not following your track, look very carefully for the point of departure – where it flies off.
- Does the track change position with the weight of the marble, making it fly off course? Make the track more rigid by taping it to a surface.
- Is the marble jumping over the track wall? Increase your bank angle (the amount of twist the track makes along its length).
- Does your marble just fall out of the loop? Increase your marble speed by starting at a higher position. When all else fails and your marble still won’t stay on the track, make it a tunnel section by taping another piece on top the main track. Spiral-wrap the tape along the length of both pieces to secure them together.
Why does the marble stick to the track? The faster the marble travels in a loop, the more it sticks to the track. This is the same pancake feeling you get when your body gets pulled into a tight turn (whether in a car or on a roller coaster). The faster and tighter the turn, the more the “pancake feeling”. That pancake thing is called acceleration. You’re feeling a pull away from the center of the loop, which will vary depending on how fast you are going, called centrifugal force.
That’s usually enough for kids. But if you really want to be thoroughly confused, keep reading about how centripetal and centrifugal forces are NOT the same thing:
What about centripetal force? Ah, yes… these two words constantly throw college students into a frenzy, partially because there is no clear definition in most textbooks. As I best understand it, centripetal (translation = “center-seeking”) force is the force needed to keep an object following a curved path. Remember how objects will travel in a straight line unless they bump into something or have another force acting on it (gravity, drag force, etc.)? Well, when you swing a bucket of water around, the force to keep the bucket of water swinging in a curved arc is the centripetal force, which can be felt in the tension experienced by the handle (or your arm, in our case). Swinging an object around on a string will cause the rope to undergo tension (centripetal force), and if your rope isn’t strong enough, it will snap and break, sending the mass flying off in a tangent (straight) line until gravity and drag force pull the object to a stop. This force is proportional to the square of the speed… the faster you swing the object, the higher the force.
Centrifugal (translation = “center-fleeing”) force has two different definitions, which also causes confusion. The inertial centrifugal force is the most widely referred to, and is purely mathematical, having to do with calculating kinetic forces using reference frames, and is used with Newton’s laws of motion. It’s often referred to as the ‘fictitious force’.
The other kind, reactive centrifugal force, happens when objects move in a curved path. This force is actually the same magnitude as centripetal force, but in the opposite direction, and you can think of it as the reaction force to the centripetal force. Think of how you stand on the Earth… your weight pushes down on the Earth, and a reaction force (called the “normal” force) pushes up in reaction to your weight, keeping you from falling to the center of the Earth. A centrifugal governor (spinning masses that regulate the speed of an engine) and a centrifugal clutch (spinning disk with two masses separated by a spring inside) are examples of this kind of force in action.
One more example: Imagine driving a car along a banked turn. The road exerts a centripetal force on the car, keeping the car moving in a curved path (the “banked” turn). If you neglected to buckle your seat belt and the seats have a fresh coat of Armor-All (making them slippery), then as the car turns along the banked curve, you get “shoved” toward the door. But who pushed you? No one – your body wanted to continue in a straight line but the car keeps moving in your path, turning your body in a curve. The push of your weight on the door is the reactive centrifugal force, and the car pushing on you is the centripetal force.
What about the fictitious (inertial) centrifugal force? Well, if you imagine being inside the car as it is banking with the windows blacked out, you suddenly feel a magical ‘push’ toward the door away from the center of the bend. This “push” is the fictitious force invoked because the car’s motion and acceleration is hidden from you (the observer) in the reference frame moving within the car.
Click here for a printer-friendly version of this page.
Objective This noisy lab lets you experiment with the idea that sound is a vibration. By making over a dozen different noisemakers, you can explore how to change the sound speed and use everyday materials to annoy your parents.
About the Experiments Instead of starting with an explanation of how sound works, mystify your kids with it instead by picking one of the experiments that you know your kids will like. After they’ve build the project (you might want ear muffs for this lab), you can start asking them how they think it works. Give them the opportunity to figure it out by changing different things on their noisemaker (stretch the rubber band, increase the tube length, etc) to allow them a chance to hone their skills at figuring things out.
The How and Why Explanation Sound is everywhere. It can travel through solids, liquids, and gases, but it does so at different speeds. It can rustle through trees at 770 MPH (miles per hour), echo through the ocean at 3,270 MPH, and resonate through solid rock at 8,600 MPH. Sound is made by things vibrating back and forth, whether it’s a guitar string, drum head, or clarinet. The back and forth motion of an object (like the drum head) creates a sound wave in the air that looks a lot like a ripple in a pond after you throw a rock in. It radiates outward, vibrating it’s neighboring air molecules until they are moving around, too. This chain reaction keeps happening until it reaches your ears, where your “sound detectors” pick up the vibration and works with your brain to turn it into sound.
Your voice is a vibration, and you can feel it when you place a hand on your throat when you speak. As long as there are molecules around, sound will be traveling though them by smacking into each other. That’s why if you put an alarm clock inside a glass jar and remove the air, there’s no sound from the clock. There’s nothing to transfer the vibrational energy to – nothing to smack into to transfer the sound. It’s like trying to grab hold of fog – there’s nothing to hold on to.
Sound can change according to the speed at which it travels. Another word for sound speed is pitch. When the sound speed slows, the pitch lowers. With clarinet reeds, it’s high. Guitar strings can do both, as they are adjustable. If you look carefully, you can actually see the low pitch strings vibrate back and forth, but the high pitch strings move so quickly it’s hard to see. But you can detect the effects of both with your ears.
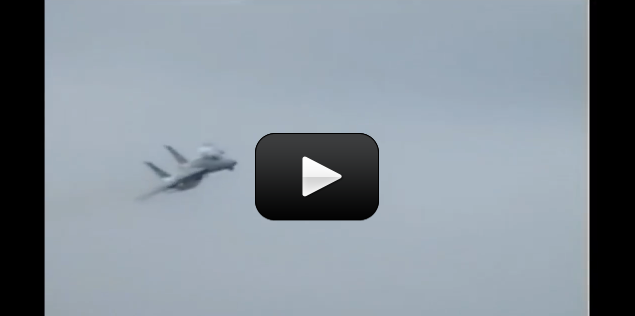
The range of your ears is about 20 – 20,000 Hz (cycles per second). Bats and dogs can hear a lot higher than we can. The image (right) is a real picture of an aircraft as it breaks the sound barrier – meaning that the aircraft is passing the speed that sounds travels at (about 700 mph). The white cloud you see in the photo is related to the shock waves that are forming around the craft as it moves into supersonic speeds. You can think of a shock wave as big pressure front, which creates clouds. In this photo, the pressure from the shock waves is condensing the water vapor in the air.
There are lots of things on earth that break the sound barrier – bullets and bullwhips, for example. The loud crack from a whip is the tip zipping faster than the speed of sound. Your air horn is a loud example of how sound waves travel through the air.
Questions to Ask When you’ve worked through most of the experiments ask your kids these questions and see how they do:
- Sound travels fastest in (a) air (b) the ocean (c) rock (d) outer space
- The hornet works because (a) the rubber band vibrates when the wind flies over it (b) you’ve trapped a real wasp in there (c) the string vibrates when you twirl it around (d) the card vibrates with the wind
- An old-fashioned telephone made from cups and string work great because (a) no batteries are required (b) the cup vibrates (c) the string vibrates (d) your voice vibrates (e) all of the above
- Knowing what you do know about sound and cups, which way do you think you would hold a cup up to your ear (open end or closed end?) to hear the conversation on the other side of a door?
- When you replaced the string with a slinky, why can’t you talk or hear voices through it anymore? What can you hear instead?
- What would you use to completely block out the sound of an alarm clock?
- Does the pitch increase or decrease when you fill a glass bottle while tapping the side with a fork?
- List out the different kinds of strings tested with the String Test, and number them in order of best to worst.
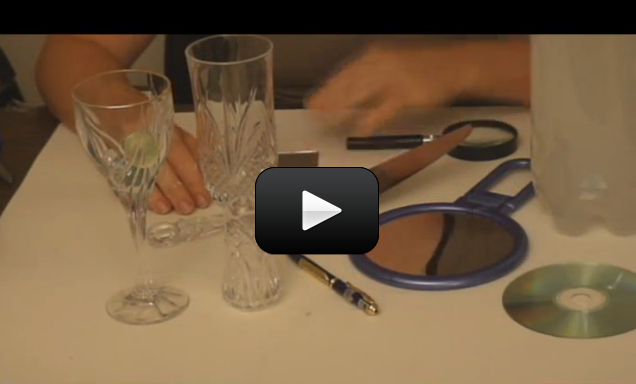
 Did you know you can create a compound microscope and a refractor telescope using the same materials? It’s all in how you use them to bend the light. These two experiments cover the fundamental basics of how two double-convex lenses can be used to make objects appear larger when right up close or farther away.
Things like lenses and mirrors can bend and bounce light to make interesting things, like compound microscopes and reflector telescopes. Telescopes magnify the appearance of some distant objects in the sky, including the moon and the planets. The number of stars that can be seen through telescopes is dramatically greater than can be seen by the unaided eye.
Materials
- A window
- Dollar bill
- Penny
- Two hand-held magnifying lenses
- Ruler
If you’ve never made a paperclips jump together and link up by themselves, turned water into ink, or made metal rings pass through solid rope, you’re missing out. Big time. We’re going to show you our set of incredible magic-show-style tricks that will make you truly amazing.
But, there is something you should know about magic…
Please login or register to read the rest of this content.
![]() This trick is one of my favorites, because it's super-easy and quick... you'll have a hard time describing to yourself how it even happened. Most scientists can't explain it either. Are you ready?
This trick is one of my favorites, because it's super-easy and quick... you'll have a hard time describing to yourself how it even happened. Most scientists can't explain it either. Are you ready?
Materials: dollar bill, two paperclips, and a rubber band.
Here's what you do:
This particular trick kept me tied up for hours as a kid. I was so determined to figure this out that I eventually had a rope-impression rubbed into my skin when I finally did slide out. I’ll bet it doesn’t take you nearly as long, and you can substitute bracelets for the rope to make it more comfortable as you work. You need two kids for this trick to work. And a camera to capture the moment.
Materials: 6 feet of rope, two kids, and 4 bracelets (optional)
Here’s what you do:
Please login or register to read the rest of this content.
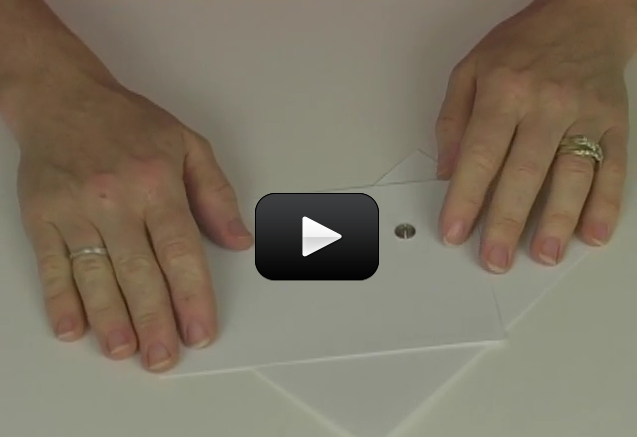
You might be curious about how to observe the sun safely without losing your eyeballs. There are many different ways to observe the sun without damaging your eyesight. In fact, the quickest and simplest way to do this is to build a super-easy pinhole camera that projects an image of the sun onto an index card for you to view.
CAUTION: DO NOT LOOK AT THE SUN THROUGH ANYTHING WITH LENSES!!
This simple activity requires only these materials:
- tack
- 2 index cards (any size)
- sunlight
 Click here for a printer-friendly version of this page.
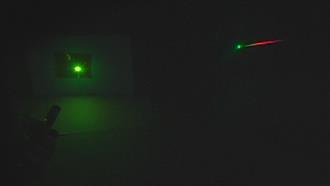
Objective You will learn about light waves and optics in this Laser Lab. Kids will play with their lasers and see what happens when they shine it on and through different objects.
Laser Safety Before we start our laser experiments, you’ll need eye protection – tinted UV ski goggles are great to use, as are large-framed sunglasses, but understand that these methods of eye protection will not protect your eyes from a direct beam. They are intended as a general safety precaution against laser beam scatter. (If you’re using a Class I or II laser, you don’t need to wear the goggles – but it is a good habit to get the kids into, so it’s up to you.)
About the Experiment This lab is an excellent opportunity for kids to practice asking better questions. Don’t worry too much about academics at this point – just give them a box of materials and let them figure these things out on their own. One of the neat things you can do is ask the kids some questions about what they are doing.
For example, when they shine their laser on a window, you’ll see part of the beam pass through while another part gets reflected back… now why is that? And why does the CD produce so many different reflections? Sometimes these reflections are hard to find actually seeing the beam itself. While red lasers are impossible to see with the naked eye, you can make your beam visible by doing your experiments in a steamy dark bathroom (after a hot shower).
The How and Why The word “LASER” stands for Light Amplification by Stimulated Emission of Radiation. A laser is an optical light source that emits a concentrated beam of photons. Lasers are usually monochromatic – the light that shoots out is usually one wavelength and color, and is in a narrow beam.
By contrast, light from a regular incandescent light bulb covers the entire spectrum as well as scatters all over the room. (Which is good, because could you light up a room with a narrow beam of light?)
There are about a hundred different types of atoms in the entire universe, and they are always vibrating, moving, and rotating. When you add energy to an atom, it vibrates faster and moves around a lot more. When the atoms relax back down to their “normal” state, they emit a photon (a light particle). A laser controls the way energized atoms release photons.
Imagine kids zooming all over the playground, a mixture of joy and chaos. Light from an incandescent light bulb works the same way – the bulb emits high energy photons that bounce all over the place. Can you round up the kids and get them to jumping in unison? Sure you can – just hit the play button on a song, and they’ll be clapping and stamping together. You can do the same with light – when you focus the energy into a narrow beam, it’s much more powerful than having it scattered all over the place. That’s just what a laser is – a high-energy, highly-focused beam of light.
Questions to Ask When you’ve worked through most of the experiments ask your kids these questions and see how they do:
- What does LASER stand for?
- How is a laser different from an incandescent bulb?
- What are two things that can split a laser beam?
- How do you make a laser beam visible?
- What’s the secret behind the laser light show?
- How do lasers damage things?
How many of these items do you already have? We’ve tried to keep it simple for you by making the majority of the items things most people have within reach (both physically and budget-wise).
You do not need to do ALL the experiments – just pick the ones you want to do! Look over the experiments and note which items are needed, and off you go!
Click here for a printer-friendly version of this page.
NOTE: Radio Shack part numbers have been replaced. Click here for full chart.
Materials
Materials for the Laser Light Show
- Red laser pointer
- Old CD you can scratch
- 5-6 small mirrors (like mosaic mirrors from a craft store)
- Ice cube
- Window
- Feather
- 3 large paper clips
- 10 brass fasteners
- Index card
- Cardboard
- Rubber band or zip tie
- Scissors
- Tape
- Two 3V DC motors
- Two AA battery packs
- Four AA batteries
- Three alligator wires
- Optional: plastic gem pieces
Materials for the Flashlight-Laser Tag, Laser Burglar Alarm, Door Alarm
- Red laser pointer (NOT GREEN!)
- 2 AA batteries
- Old pair of headphones (you need the plug section)
- Computer OR laptop OR portable amplifier
- CdS Cell
- One AA battery holder
- PNP Transistor 2N3906 or 2N4403
- NPN Transistor 2N3904 or 2N222A
- LED
- 4.7k-ohm resistor
- Soldering equipment or breadboard
- Optional: NC (normally-closed) switch
Materials for Crystal Radio Project: (This is a battery-free radio!)
- Toilet paper tube
- Magnet wire
- Germanium diode: 1N34A
- 4.7k-ohm resistor
- Alligator clip test leads
- 100’ stranded insulated wire (for the antenna)
- Scrap of cardboard
- Brass fasteners (3-4)
- Telephone handset or get a crystal earphone
Where’s the pressure difference in this trick?
At the opening of the glass. The water inside the glass weighs a pound at best, and, depending on the size of the opening of the glass, the air pressure is exerting 15-30 pounds upward on the bottom of the card. Guess who wins? Tip, when you get good at this experiment, try doing it over a friend’s head!
Materials: a glass, and an index card large enough to completely cover the mouth of the glass.
Please login or register to read the rest of this content.
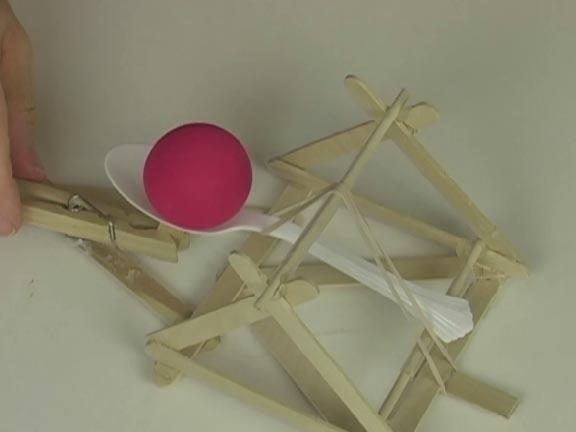
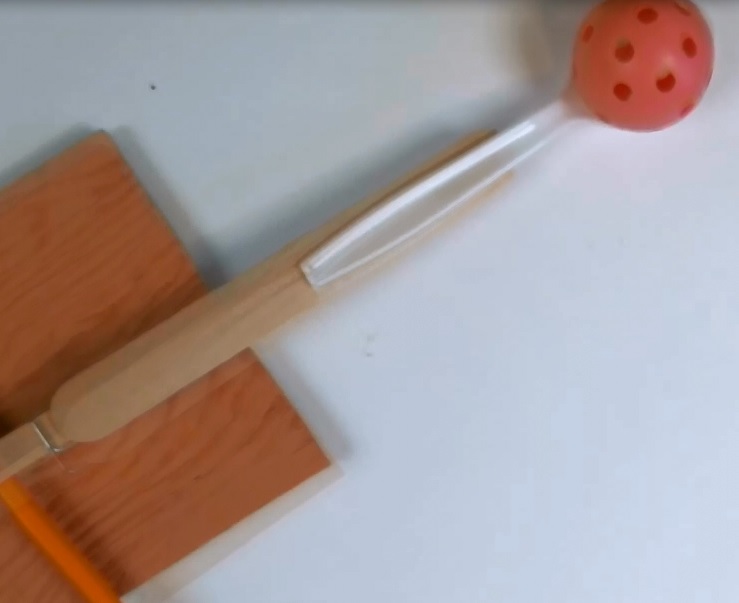
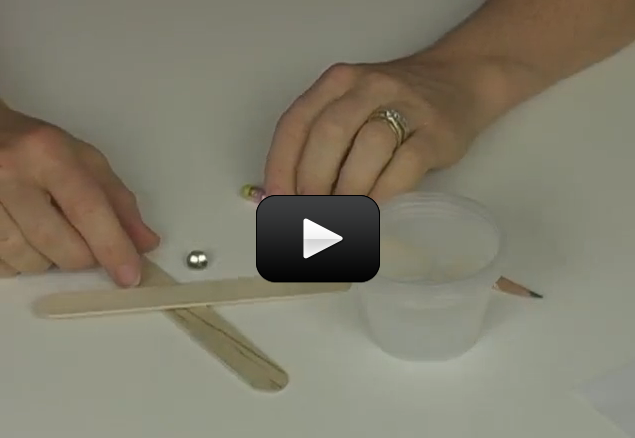
This catapult requires a little more time, materials, and effort than the Fast Catapult, but it's totally worth it. This device is what most folks think of when you say 'catapult'. I've shown you how to make a small model - how large can you make yours?
This project builds on the ideas from Unit 5: Lesson 2: Kinetic Energy.
Materials:
Please login or register to read the rest of this content.
This project builds on the ideas from Unit 5: Lesson 2: Kinetic Energy.
Materials:
- plastic spoon
- 14 popsicle sticks
- 3 rubber bands
- wooden clothespin
- straw
- wood skewer or dowel
- scissors
- hot glue gun
Please login or register to read the rest of this content.
A super-fast, super-cool car that uses the pent-up energy inside a mouse trap spring to propel a homemade car forward. While normally this is reserved for high school physics classes, it really is a fun and inexpensive experiment to do with kids of all ages.
This is a great demonstration of how energy changes form. At first, the energy was stored in the spring of the mousetrap as elastic potential energy, but after the trap is triggered, the energy is transformed into kinetic energy as rotation of the wheels.
Remember with the First Law of Thermodynamics: energy can’t be created or destroyed, but it CAN change forms. And in this case, it goes from elastic potential energy to kinetic energy.
There’s enough variation in design to really see the difference in the performance of your vehicle. If you change the size of the wheels for example, you’ll really see a difference in how far it travels. If you change the size of the wheel axle, your speed is going to change. If you alter the size of the lever arm, both your speed and distance will change. It's fun to play with the different variables to find the best vehicle you can build with your materials!
Here's what you need to do this project:
Please login or register to read the rest of this content.
Did you know that the word LASER stands for Light Amplification by Stimulated Emission of Radiation? And that a MASER is a laser beam with wavelengths in the microwave part of the spectrum? Most lasers fire a monochromatic (one color) narrow, focused beam of light, but more complex lasers emit a broad range of wavelengths at the same time.
In 1917, Einstein figured out the basic principles for the LASER and MASER by building on Max Planck’s work on light. It wasn’t until 1960, though when the first laser actually emitted light at Hughes Research Lab. Today, there are several different kinds of lasers, including gas lasers, chemical lasers, semiconductor lasers, and solid state lasers. One of the most powerful lasers ever conceived are gamma ray lasers (which can replace hundreds of lasers with only one) and the space-based x-ray lasers (which use the energy from a nuclear explosion) – neither of these have been built yet!
Please login or register to read the rest of this content.
By using lenses and mirrors, you can bounce, shift, reflect, shatter, and split a laser beam. Since the laser beam is so narrow and focused, you’ll be able to see several reflections before it fades away from scatter. Make sure you complete the Laser Basics experiment first before working with this experiment.
You’ll need to make your beam visible for this experiment to really work. There are several different ways you can do this:
Please login or register to read the rest of this content.
Lasers are cool, but what can you do with one? This is a great introductory activity into what lasers are, how they work, and how different mediums (like glass, feathers, mirrors, etc.) can change the direction of the beam.
Lasers are a monochromatic (one color) concentrated beam of light. This means that when compared with a flashlight, the laser delivers more punch on a light detector. The alignment is more critical (as you’ll find out when you zig-zag a laser through several mirrors), so take your time and do these experiments in a steamy, dark bathroom after a hot shower. That way, you’ll be able to see the beam and align your optics easily.
Please login or register to read the rest of this content.
 This is a super-cool and ultra-simple circuit experiment that shows you how a CdS (cadmium sulfide cell) works. A CdS cell is a special kind of resistor called a photoresistor, which is sensitive to light.
A resistor limits the amount of current (electricity) that flows through it, and since this one is light-sensitive, it will allow different amounts of current through depends on how much light it "sees".
Photoresistors are very inexpensive light detectors, and you'll find them in cameras, street lights, clock radios, robotics, and more. We're going to play with one and find out how to detect light using a simple series circuit.
Materials:
- AA battery case with batteries
- one CdS cell
- three alligator wires
- LED (any color and type)
This is a super-cool and ultra-simple circuit experiment that shows you how a CdS (cadmium sulfide cell) works. A CdS cell is a special kind of resistor called a photoresistor, which is sensitive to light.
A resistor limits the amount of current (electricity) that flows through it, and since this one is light-sensitive, it will allow different amounts of current through depends on how much light it "sees".
Photoresistors are very inexpensive light detectors, and you'll find them in cameras, street lights, clock radios, robotics, and more. We're going to play with one and find out how to detect light using a simple series circuit.
Materials:
- AA battery case with batteries
- one CdS cell
- three alligator wires
- LED (any color and type)
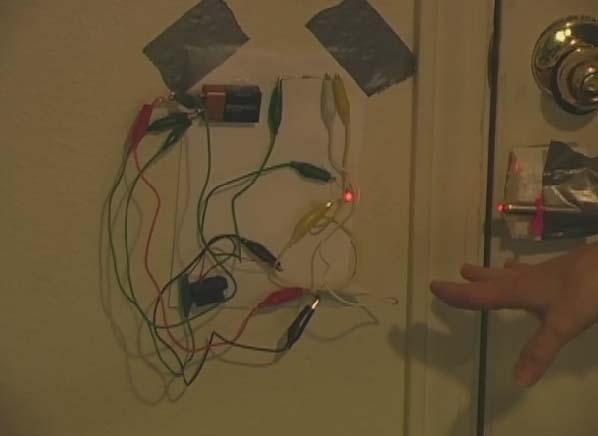
This is a beefier-version of the Electric Eye that will be able to turn on a buzzer instead of a LED by increasing the voltage in the circuit. This type of circuit is a light-actuated circuit. When a beam of light hits the sensor (the "eye"), a buzzer sounds. Use this to indicate when a door closes or drawer closes... your suspect will never know what got triggered.
Please login or register to read the rest of this content.
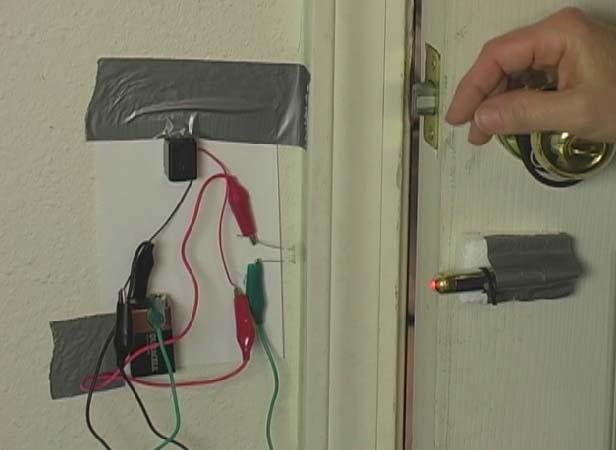
If you've already made the Laser Burglar Alarm (which is highly recommend doing FIRST), then you're probably wondering how to make the circuit act in the opposite way... meaning how do you make it so that the buzzer sounds when the light is turned off?
This circuit requires more patience and parts, but it's totally worth it. It uses the same parts as the previous experiment (plus a few more) with a couple of extra twists and turns in the circuit to let the buzzer know when it's time to turn off. Use this in doorways or as an invisible trip wire trigger across hallways.
Materials:
- Red laser pointer
- 9V battery or two AA's in a AA battery pack
- 7 alligator clip leads
- CdS Cell
- 9V Battery OR 2 AA's in a battery holder
- NPN Transistor 2N3904 or 2N222A
- 4.7k-ohm resistor
- Buzzer (3-6V)
 What happens when you shine a laser beam onto a spinning mirror? In the Laser Maze experiment, the mirrors stayed put. What happens if you took one of those mirrors and moved it really fast?
It turns out that a slightly off-set spinning mirror will make the laser dot on the wall spin in a circle. Or ellipse. Or oval. And the more mirrors you add, the more spiro-graph-looking your projected laser dot gets.
Why does it work? This experiment works because of imperfections: the mirrors are mounted off-center, the motors wobble, the shafts do not spin true, and a hundred other reasons why our mechanics and optics are not dead-on straight. And that’s exactly what we want – the wobbling mirrors and shaky motors make the pretty pictures on the wall! If everything were absolutely perfectly aligned, all you would see is a dot.
Here’s how to do this experiment:
Please login or register to read the rest of this content.
Please login or register to read the rest of this content.
 This super-cool project lets kids have the fun of playing tag in the dark on a warm summer evening, without the "gun" aspect traditionally found in laser tag. Kids not only get to enjoy the sport but also have the pride that they build the tag system themselves - something you simply can't get from opening up a laser tag game box.
While real laser tag games actually never use lasers, but rather infrared beams, this laser tag uses real lasers, so you'll want to arm the kids with the "no-lasers-on-the-face" with a 10-minute time-out penalty to ensure everyone has a good time. You can alternatively use flashlights instead of lasers, which makes the game a lot easier to tag someone out.
This game uses a simple two-transistor latching circuit design, so there's no programming or overly complicated circuitry to worry about. If you've never built this kind of circuit before, it's a perfect first step into the world of electronics.
I've provided you with three videos below. This first video is an introduction to what we are going to make and how it works. Here's what you need:
NOTE: We updated this circuit in 2023 to reflect "best practices" when using transistors.
Be sure to build this project as shown in the schematic and breadboard diagrams, and not as shown in the video.
The material list below is based on the new design as shown in the schematic and breadboard diagrams on this page.
The videos show how to build the old circuit, but are still very useful.
Wouldn't it be nice to wake up your brother or sister using an alarm you build yourself, triggered by natural sunlight? The happy news is now you can, using your Flashlight Laser Tag circuit you already built!
Since your circuit is already sensitive to light, you can transform it easily into an alarm clock that will buzz or light up when hit by the sun's rays.
Note - you can also use your Laser Door Alarm for this as well, since it's also triggered by light. However, the Burglar Alarm will not work, because it gets triggered by darkness, so unless you want your alarm to sound just as your drifting off to sleep, you'll want to use the Laser Door Alarm or the Flashlight Laser Tag circuit. Here's what you need to know (it's really simple...):
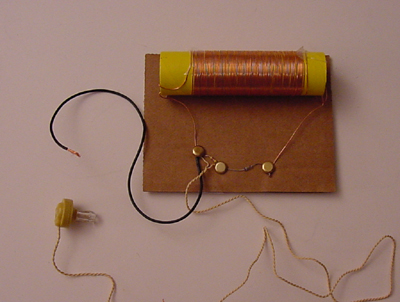
 In addition to laser experiments, I thought you’d like to learn how to pick up sound that’s traveling on a light wave. A crystal radio is among the simplest of radio receivers – there’s no battery or power source, and nearly no moving parts. The source of power comes directly from the radio waves (which is a low-power, low frequency light wave) themselves.
The crystal radio turns the radio signal directly into a signal that the human ear can detect. Your crystal radio detects in the AM band that have been traveling from stations (transmitters) thousands of miles away. You’ve got all the basics for picking up AM radio stations using simple equipment from an electronics store. I’ll show you how…
The radio is made up of a tuning coil (magnet wire wrapped around a toilet paper tube), a detector (germanium diode) and crystal earphones, and an antenna wire.
One of the biggest challenges with detecting low-power radio waves is that there is no amplifier on the radio to boost the signal strength. You’ll soon figure out that you need to find the quietest spot in your house away from any transmitters (and loud noises) that might interfere with the reception when you build one of these.
One of things you’ll have is to figure out the best antenna length to produce the clearest, strongest radio signal in your crystal radio. I’m going to walk you through making three different crystal radio designs.
You’ll need to find these items below.
- Toilet paper tube
- Magnet wire
- Germanium diode: 1N34A
- 4.7k-ohm resistor
- Alligator clip test leads
- 100’ stranded insulated wire (for the antenna: option 1 or option 2)
- Scrap of cardboard
- Brass fasteners (3-4)
- Telephone handset or get a crystal earphone
Here’s what you do:
Please login or register to read the rest of this content.

These are a set of videos made using planetarium software to help you see how the stars and planets move over the course of months and years. See what you think and tell us what you learned by writing your comments in the box below.
What’s odd about these star trails?
You can really feel the Earth rolling around under you as you watch these crazy star trails.
Please login or register to read the rest of this content.
Ever wonder exactly how far away the planets really are? Here’s the reason they usually don’t how the planets and their orbits to scale – they would need a sheet of paper nearly a mile long!
To really get the hang of how big and far away celestial objects really are, find a long stretch of road that you can mark off with chalk. We’ve provided approximate (average) orbital distances and sizes for building your own scale model of the solar system.
When building this model, start by marking off the location of the sun (you can use chalk or place the objects we have suggested below as placeholders for the locations). Are you ready to find out what’s out there? Then let’s get started.
Materials:
- measuring tape (the biggest one you have)
- tape or chalk to mark off the locations
- 2 grains of sand or white sugar
- 12″ beach ball
- 3 peppercorns
- golf or ping pong ball
- shooter-size marble
- 2 regular-size marbles
Please login or register to read the rest of this content.
Please login or register to read the rest of this content.

After you've participated in the Planetarium Star Show (either live or by listening to the MP3 download), treat your kids to a Solar System Treasure Hunt! You'll need some sort of treasure (I recommend astronomy books or a pair of my favorite binoculars, but you can also use 'Mars' candy bars or home made chocolate chip cookies (call them Galaxy Clusters) instead.
You can print out the clues and hide these around your house on a rainy day. Did you know that I made these clues up myself as a refresher course after the astronomy presentation? Enjoy!

You know you're not supposed to look at the sun, so how can you study it safely? I'm going to show you how to observe the sun safely using a very inexpensive filter. I actually keep one of these in the glove box of my car so I can keep track of certain interesting sunspots during the week!
The visible surface of the sun is called the photosphere, and is made mostly of plasma (remember the grape experiment?) that bubbles up hot and cold regions of gas. When an area cools down, it becomes darker (called sunspots). Solar flares (massive explosions on the surface), sunspots, and loops are all related the sun’s magnetic field. While scientists are still trying to figure this stuff out, here’s the latest of what they do know...
The sun is a large ball of really hot gas - which means there are lots of naked charged particles zipping around. And the sun also rotates, but the poles and the equator move and different speeds (don’t forget – it’s not a solid ball but more like a cloud of gas). When charged particles move, they make magnetic fields (that’s one of the basic laws of physics). And the different rotation rates allow the magnetic fields to ‘wind up’ and cause massive magnetic loops to eject from the surface, growing stronger and stronger until they wind up flipping the north and south poles of the sun (called ‘solar maximum’). The poles flip every eleven years.
There have been several satellites specially created to observe the sun, including Ulysses (launched 1990, studied solar wind and magnetic fields at the poles), Yohkoh (1991-2001, studied x-rays and gamma radiation from solar flares), SOHO (launched 1995, studies interior and surface), and TRACE (launched 1998, studies the corona and magnetic field).
Ok - so back to observing the sun form your own house. Here's what you need to do:
 Sound can change according to the speed at which it travels. Another word for sound speed is pitch. When the sound speed slows, the pitch lowers. With clarinet reeds, it’s high. Guitar strings can do both, as they are adjustable. If you look carefully, you can actually see the low pitch strings vibrate back and forth, but the high pitch strings move so quickly it’s hard to see. But you can detect the effects of both with your ears.
This is one of my absolute favorites, because it’s so unexpected and unusual… the setup looks quite harmless, but it makes a sound worse than scratching your nails on a chalkboard. If you can’t find the weird ingredient, just use water and you’ll get nearly the same result (it just takes more practice to get it right). Ready?
NOTE: DO NOT place these anywhere near your ear… keep them straight out in front of you.
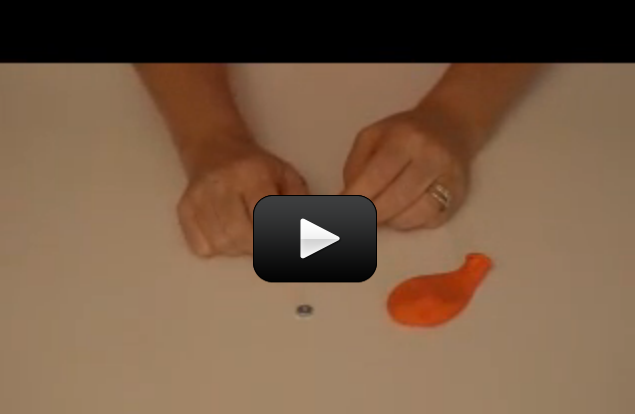
You can easily make a humming (or screaming!) balloon by inserting a small hexnut into a balloon and inflating. You can also try pennies, washers, and anything else you have that is small and semi-round. We have scads of these things at birthday time, hiding small change in some and nuts in the others so the kids pop them to get their treasures. Some kids will figure out a way to test which balloons are which without popping… which is what we’re going to do right now.
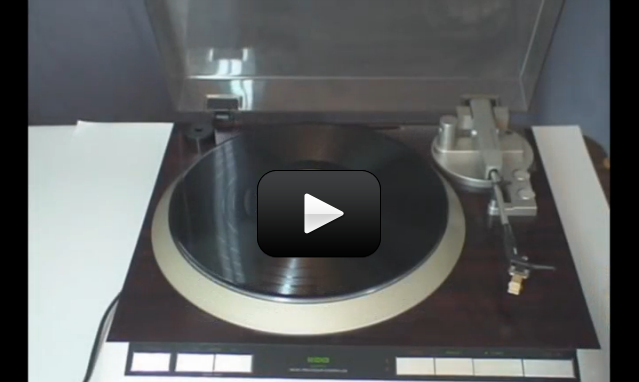
Before CDs, there were these big black discs called records. Spinning between 33 and 45 times per minute on a turntable, people used to listened to music just like this for nearly a century. Edison, who had trouble hearing, used to bite down hard on the side of his wooden record player (called a phonograph) and “hear” the music as it vibrated his jaw.
Many people today still think that records still sound better than CDs (I think they do), especially if the record is well cared for and their players are tuned just right. Here’s a video on how a record works:
Bobsleds use the low-friction surface of ice to coast downhill at ridiculous speeds. You start at the top of a high hill (with loads of potential energy) then slide down a icy hill til you transform all that potential energy into kinetic energy. It’s one of the most efficient ways of energy transformation on planet Earth. Ready to give it a try?
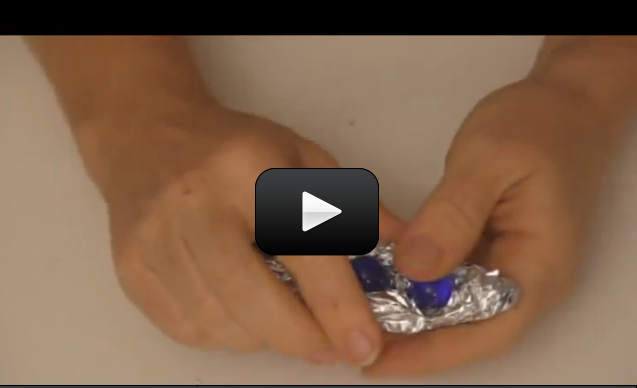
This is one of those quick-yet-highly-satisfying activities which utilizes ordinary materials and turns it into something highly unusual… for example, taking aluminum foil and marbles and making it into a racecar.
While you can make a tube out of gift wrap tubes, it’s much more fun to use clear plastic tubes (such as the ones that protect the long overhead fluorescent lights). Find the longest ones you can at your local hardware store. In a pinch, you can slit the gift wrap tubes in half lengthwise and tape either the lengths together for a longer run or side-by-side for multiple tracks for races. (Poke a skewer through the rolls horizontally to make a quick-release gate.)
Here’s what you need:
- aluminum foil
- marbles (at least four the same size)
- long tube (gift wrapping tube or the clear protective tube that covers fluorescent lighting is great)
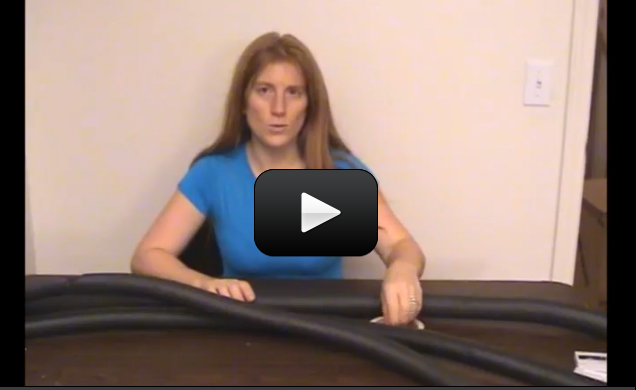
We're going to build monster roller coasters in your house using just a couple of simple materials. You might have heard how energy cannot be created or destroyed, but it can be transferred or transformed (if you haven't that's okay - you'll pick it up while doing this activity).
Roller coasters are a prime example of energy transfer: You start at the top of a big hill at low speeds (high gravitational potential energy), then race down a slope at break-neck speed (potential transforming into kinetic) until you bottom out and enter a loop (highest kinetic energy, lowest potential energy). At the top of the loop, your speed slows (increasing your potential energy), but then you speed up again and you zoom near the bottom exit of the loop (increasing your kinetic energy), and you're off again!
Here's what you need:

A super-fast, super-cool car that uses the pent-up energy inside a mouse trap spring to propel a homemade car forward. While normally this is reserved for high school physics classes, it really is a fun and inexpensive experiment to do with kids of all ages.
This is a great demonstration of how energy changes form. At first, the energy was stored in the spring of the mousetrap as elastic potential energy, but after the trap is triggered, the energy is transformed into kinetic energy as rotation of the wheels.
Remember with the First Law of Thermodynamics: energy can’t be created or destroyed, but it CAN change forms. And in this case, it goes from elastic potential energy to kinetic energy.
There’s enough variation in design to really see the difference in the performance of your vehicle. If you change the size of the wheels for example, you’ll really see a difference in how far it travels. If you change the size of the wheel axle, your speed is going to change. If you alter the size of the lever arm, both your speed and distance will change. It's fun to play with the different variables to find the best vehicle you can build with your materials!
Here's what you need to do this project:
Please login or register to read the rest of this content.
This is a great demonstration of how energy changes form. At first, the energy was stored in the spring of the mousetrap as elastic potential energy, but after the trap is triggered, the energy is transformed into kinetic energy as rotation of the wheels.
Remember with the First Law of Thermodynamics: energy can’t be created or destroyed, but it CAN change forms. And in this case, it goes from elastic potential energy to kinetic energy.
There’s enough variation in design to really see the difference in the performance of your vehicle. If you change the size of the wheels for example, you’ll really see a difference in how far it travels. If you change the size of the wheel axle, your speed is going to change. If you alter the size of the lever arm, both your speed and distance will change. It's fun to play with the different variables to find the best vehicle you can build with your materials!
Here's what you need to do this project:
Please login or register to read the rest of this content.
Ever wonder how magicians work their magic? This experiment is worthy of the stage with a little bit of practice on your end.
Here’s how this activity is laid out: First, watch the video below. Next, try it on your own. Make sure to send us your photos of your inventions here!
 Sound is everywhere. It can travel through solids, liquids, and gases, but it does so at different speeds. It can rustle through trees at 770 MPH (miles per hour), echo through the ocean at 3,270 MPH, and resonate through solid rock at 8,600 MPH.
Sound is made by things vibrating back and forth, whether it’s a guitar string, drum head, or clarinet. The back and forth motion of an object (like the drum head) creates a sound wave in the air that looks a lot like a ripple in a pond after you throw a rock in. It radiates outward, vibrating it’s neighboring air molecules until they are moving around, too. This chain reaction keeps happening until it reaches your ears, where your “sound detectors” pick up the vibration and works with your brain to turn it into sound.
You can illustrate this principle using a guitar string – when you pluck the string, your ears pick up a sound. If you have extra rubber bands, wrap them around an open shoebox to make a shoebox guitar. You can also cut a hole in the lid (image left) and use wooden pencils to lift the rubber band off the surface of the shoebox.
Your voice is a vibration, and you can feel it when you place a hand on your throat when you speak. As long as there are molecules around, sound will be traveling though them by smacking into each other.
That’s why if you put an alarm clock inside a glass jar and remove the air, there’s no sound from the clock. There’s nothing to transfer the vibrational energy to – nothing to smack into to transfer the sound. It’s like trying to grab hold of fog – there’s nothing to hold on to.