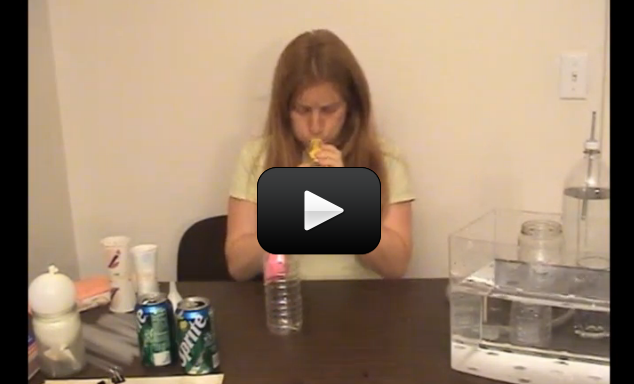
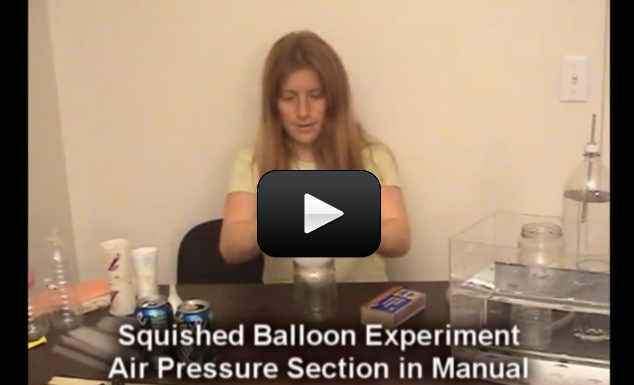
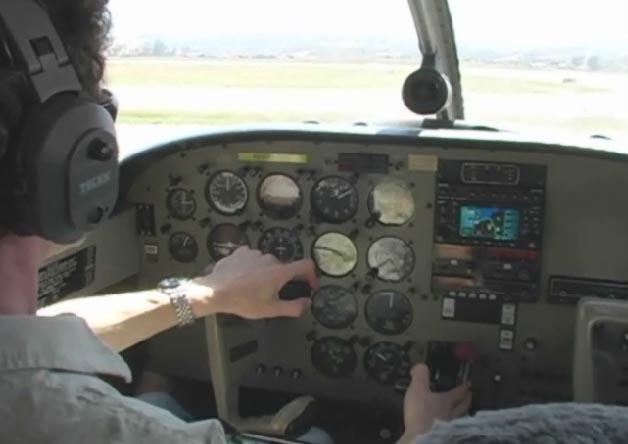
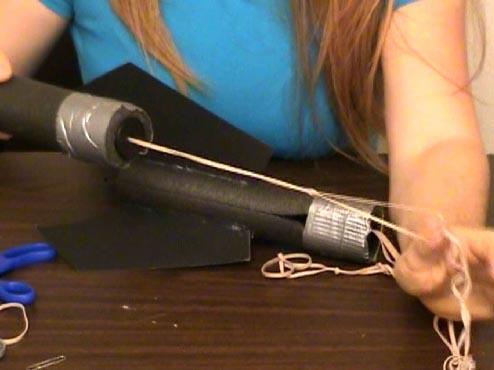
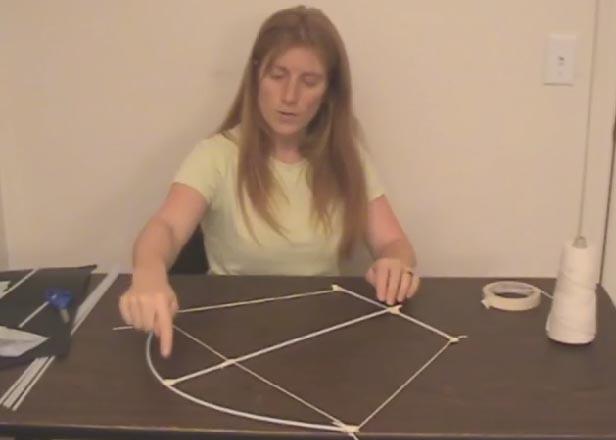
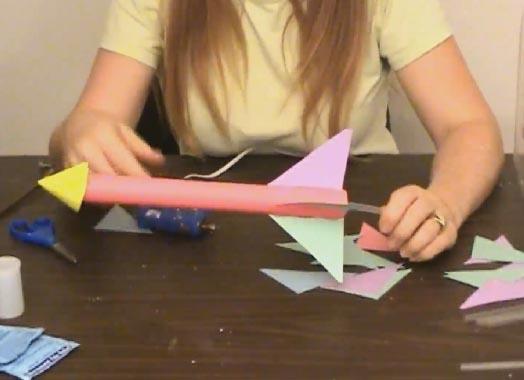
You’re going to do several experiments that change air pressure and mystify your kids. The goal is to set them thinking about how and why things fly (you’ll do this by learning about air pressure and Bernoulli’s law).


While you are playing with the experiments in the video, see if you can notice these important ideas:

  1. Air pressure is all around us.
  2. Air pushes downward and creates pressure on all things.
  3. Air pressure changes all the time.
  4. Higher pressure always pushes.
  5. The faster air travels over a surface, the less time it has to push down on that surface and create pressure. Fast moving air creates low pressure regions.
  6. The four fundamental forces on an airplane are lift, weight, thrust, and drag.

[/am4show]


You’re going to do several experiments that change air pressure and mystify your kids. The goal is to set them thinking about how and why things fly (you’ll do this by learning about air pressure and Bernoulli’s law).


[am4show have=’p8;p9;p10;p37;p93;’ guest_error=’Guest error message’ user_error=’User error message’ ]


While you are playing with the experiments in the video, see if you can notice these important ideas:


  1. Air pressure is all around us.
  2. Air pushes downward and creates pressure on all things.
  3. Air pressure changes all the time.
  4. Higher pressure always pushes.
  5. The faster air travels over a surface, the less time it has to push down on that surface and create pressure. Fast moving air creates low pressure regions.
  6. The four fundamental forces on an airplane are lift, weight, thrust, and drag.

[/am4show]


Simple rockets are not only fun to launch, but teach kids the basics of fin design (how many fins are best?), projectile motion(does launch angle matter for furthest distance), and basic construction (can you really make fins from just tape itself?). Let your kid's imagination soar with this easy and fun project. [am4show have='p8;p9;p10;p37;p95;' guest_error='Guest error message' user_error='User error message' ] Materials:
  • straw
  • rubber band
  • skewer
  • scissors
  • tape
  What happens if you strap this to a paper airplane? [/am4show]

Flying machines are just plain awesome, and ones that can fly without really looking like they should are even better! Throw this one like a football for longer flights!

[am4show have='p8;p9;p10;p37;p93;' guest_error='Guest error message' user_error='User error message' ]


[/am4show]

The Ancient Chinese discovered that kites with curved surfaces flew better than kites with flat surfaces. A wing needs to have camber: the top needs to be slightly curved, like a bump, and the bottom is straight.

This is called an airfoil. Airfoils are designed to generate as much lift as possible with as little drag as possible. Here’s how you make an airfoil:

[am4show have='p8;p9;p10;p37;p93;' guest_error='Guest error message' user_error='User error message' ]

Materials:

  • index card

  • tape

  • skewer or pencil


First, you set up how wide you want your wing to be. This is a chord line. One point on the chord line is the leading edge and one is the trailing edge.

Now add camber by pushing up the top surface until it curves. Now push that bump to the left so it’s more curved at the leading edge. How thick you make this will depend on how fast your wing is going to go and how much lift you need.

Now add the same thickness under the camber line to make the lower surface. Now you have an airfoil!

The airfoil uses Bernoulli’s principle. The top surface of the wing has more camber than the bottom surface, which means that air will flow faster over the top than it does underneath. This means that there’s less air pressure above the wing than under it, and this difference in air pressure makes lift.

How much lift? Well that depends on the airfoil shape, the size and shape of the wing, the angle it makes with the air, the density of the air, and how fast it’s going. Airplanes designed to fly slow have thicker airfoils than supersonic aircraft because the air flows slightly differently at fast versus slow speeds. Airplanes flying at high altitudes have less air molecules to generate lift in the same amount of air as lower flying planes.

If you’ve ever heard of “stalls”, it’s different when an airplane stalls than when a car stalls. What happens when a car stalls? The engine stops, right? If the engine stops in an airplane, it’s called an engine failure, not a stall. A stall is when the air stops flowing over the wing. The engine in an airplane can stop but air can still go over the wing, right? During an engine failure, a propeller airplane turns into a glider, which still can fly. So a stall happens when the wing tips up so high that air can’t flow over the top, so there’s no lower pressure and therefore no lift. If there’s no lift, the airplane turns basically into a rock and falls.

[/am4show]

You get to not only build as many rockets as you want, but also the launcher to go with it! Although the launcher takes about 20 minutes to assemble, it will serve you for thousands of rocket launches, and doesn’t require an air compressor or even a bike pump! You’re going to make your own single-piston air pump using everyday hardware store parts. You can opt to include the protractor if you want to be more precise in your measurements. You can use this experiment in more advanced projects, like science fairs. See tips below for more information. [am4show have='p8;p9;p10;p37;p95;' guest_error='Guest error message' user_error='User error message' ] Materials: Rocket
  • Straw
  • Masking tape
  • Small ball of clay
  Launcher Note: In the video, I use 2" and 1-1/4" PVC for the inner piston. For a smaller, less expensive model, substitute 1-1/4" PVC pipe and fittings for the 2", and 1" for the 1-1/4" PVC pipe and fittings. You will not need to wrap the inner piston if you choose the smaller size.
  • 2” PVC pipe approx. 2’ long
  • 1 1/4” PVC pipe approx. 2’ long
  • 1/2” PVC pipe approx. 6” long
  • 1-1/4” PVC end cap
  • 1/2” PVC plug
  • 1/2” PVC elbow
  • 2” to 1/2” PVC reducer
  • 2” PVC elbow
  • 3/16” brass tubing
  • PVC cement
  • Hot glue
  • 2” pipe clamp
  • 2 wood screws
  • Electrical tape
  • Protractor (optional)
  • Drill and drill bits (3/16”)
  • Scrap piece of wood

After the initial fun, you may start to wonder about how you can use this as a science fair project or something that really does some real science. This is a great setup for this type of experimenting, since you can do repeated launches and measure your results. The first thing you’ll need to do is figure out a way to make it so that you push down with the same amount of force each time you launch the rocket. You can attach a bungee cord to connect the cap of the 1-1/4” PVC pipe to the opening of the 2” PVC pipe, and add small increments on the 1-1/4” pipe.  This experiment can show the effect of gravity of different masses of rockets, since the speed of the rocket is the same at all angles fired at (if you launch with the same force each time). You can also vary the launch angle and measure how far the rocket goes horizontally each time, or make the vertical measurement tool shown in the video as well. You can experimentally figure out the best angle to launch at, since if you launch completely vertical, all the energy goes into making the rocket move vertically and it doesn't travel any vertical distance, and lets drag stop the rocket while it’s still in the air. If you aim it near the horizontal, there’s less energy available to overcome the pull of gravity, so it doesn't fly nearly as high and it hits the ground and drags to a stop, wasting energy. There’s a “best launch angle” that balances these two effects to make a parabolic trajectory (path) that the rocket takes when launched. Other ideas including carrying the nose-weight of the rocket. You’ll need to be able to measure the clay (in grams) and see what effect this has on flight as well. Try a rocket without any clay at all and see how it flies! Use a pencil tip or an edge of a ruler to balance each rocket and find it’s center of gravity, and measure this from the nose and record this with your data in a table. What happens if you change the size, shape, and location of the fins?  What if you put fins in the front, middle or back of the straw? Use big or small fins? [/am4show]

There's really nothing better than making a rocket in less than 5 minutes that can shoot clear across the room using stuff you'd find in a desk or kitchen drawer. Here's how you do it: [am4show have='p8;p9;p10;p37;p109;p95;' guest_error='Guest error message' user_error='User error message' ] Materials:
  • index card
  • paperclip
  • rubber band
  • straw
  • popsicle stick
  • tape
  • scissors
If you're having trouble with the rocket catching on the end of the rubber band, make the "hook" part smaller. Bend it straight again, and then re-bend it so there's not quite so much of it hanging down. You can also adjust the angle so it's more than a 90 degree bend so it will release quicker. Play with the design and see what kind of improvements you can think up! [/am4show]

This is a recording of a recent live teleclass I did with thousands of kids from all over the world. I’ve included it here so you can participate and learn, too!


Soar, zoom, fly, twirl, and gyrate with these amazing hands-on classes which investigate the world of flight. Students created flying contraptions from paper airplanes and hangliders to kites! Topics we will cover include: air pressure, flight dynamics, and Bernoulli’s principle.


Materials:


  • 5 sheets of 8.5×11” paper
  • 2 index cards
  • 2 straws
  • 2 small paper clips
  • Scissors, tape
  • Optional: ping pong ball and a small funnel

[am4show have=’p8;p9;p11;p38;p93;’ guest_error=’Guest error message’ user_error=’User error message’ ]


Key Concepts

While the kids are playing with the experiments see if you can get them to notice these important ideas. When they can explain these concepts back to you (in their own words or with demonstrations), you’ll know that they’ve mastered the lesson.


  1. Air pressure is all around us. Air pushes downward and creates pressure on all things.
  2. Air pressure changes all the time.
  3. Higher pressure always pushes.
  4. The faster air travels over a surface, the less time it has to push down on that surface and create pressure. Fast moving air creates low pressure regions. (Bernoulli’s Law).
  5. The four fundamental forces on an airplane are lift, weight, thrust, and drag.

What’s Going On?

There’s air surrounding us everywhere, all at the same pressure of 14.7 pounds per square inch (psi). You feel the same force on your skin whether you’re on the ceiling or the floor, under the bed or in the shower.


An interesting thing happens when you change a pocket of air pressure – things start to move. This difference in pressure causes movement that creates winds, tornadoes, airplanes to fly, and some of the experiments we’re about to do together.


An important thing to remember is that higher pressure always pushes stuff around. While lower pressure does not “pull,” we think of higher pressure as a “push”. The higher pressure inside a balloon pushes outward and keeps the balloon in a round shape.


Weird stuff happens with fast-moving air particles. When air moves quickly, it doesn’t have time to push on a nearby surface, such as an airplane wing. The air just zooms by, barely having time to touch the surface, so not much air weight gets put on the surface. Less weight means less force on the area. You can think of “pressure” as force on a given area or surface. Therefore, a less or lower pressure region occurs wherever there is fast air movement.


There’s a reason airplane wings are rounded on top and flat on the bottom. The rounded top wing surface makes the air rush by faster than if it were flat. When you put your thumb over the end of a gardening hose, the water comes out faster when you decrease the size of the opening. The same thing happens to the air above the wing: the wind rushing by the wing has less space now that the wing is curved, so it zips over the wing faster, and creates a lower pressure area than the air at the bottom of the wing.


The Wright brothers figured how to keep an airplane stable in flight by trying out a new idea, watching it carefully, and changing only one thing at a time to improve it. One of their biggest problems was finding a method for generating enough speed to get off the ground. They also took an airfoil (a fancy word for “airplane wing”), turned it sideways, and rotated it around quickly to produce the first real propeller that could generate an efficient amount of thrust to fly an aircraft.  Before the Wright brothers perfected the airfoil, people had been using the same “screw” design created by Archimedes in 250 BC.  This twist in the propeller was such a superior design that modern propellers are only 5% more efficient than those created a hundred years ago by the two brilliant Wright brothers.


Questions to Ask

When you’ve worked through most of the experiments ask your kids these questions and see how they do:


  1. Higher pressure does which? (a) pushes (b) pulls (c) decreases temperature (d) meows (e) causes winds, storms, and airplanes to fly
  2. The tips on the edge of a paper airplane wing provide more lift by: (a) flapping a lot
    (b) destroying wingtip vortices that kill lift (c) getting stuck in a tree more easily (d) decreasing speed
  3. In the ping pong ball and funnel experiment, the ball stayed in the funnel was because:         (a) you couldn’t blow hard enough (b) you glued it into the funnel (c) the ball had a hole in it  (d) the fast blowing caused a low-pressure region around the ball, causing the surrounding atmospheric pressure to be a higher pressure, thus pushing the ball into the funnel
  4. If your plane takes a nose dive, you should try (a) changing the elevators by pinching the edges (b) change the dihedral angle (c) change how you throw it (d) all of the above
  5. What are the four forces that act on every airplane in flight?
  6. Draw a quick sketch of your plane viewed from the front with a positive dihedral.
  7. If you were designing your own “Flying Paper Machine Kit”, what would be inside the box?
  8. What’s the one thing you need to remember about higher pressure?
  9. What keep an airplane from falling?
  10. Where is the low pressure area on an airplane wing?

Answers:


1 (a, e) 2 (b) 3 (d) 4 (d) 5 (lift, weight, thrust, drag) 8 (higher pressure pushes) 9 (lift) 10 (top surface)


[/am4show]


This is a recording of a recent live teleclass I did with thousands of kids from all over the world. I've included it here so you can participate and learn, too! Blast your imagination with this super-popular class on rocketry! Kids learn about fin design, hybrid and solid-state rocketry, and how rockets make it into space without falling out of orbit. This class is taught by a real live rocket scientist (me!). We'll launch rockets during the class, too! [am4show have='p8;p9;p11;p38;p95;' guest_error='Guest error message' user_error='User error message' ] Materials:
  • straw
  • paperclip
  • rubber band
  • index card
  • popsicle stick
  • scissors
  • masking tape
  • water
  • alka-seltzer tablets (generic brands work fine)
  • film canister or small container with tight-fitting lid
  • OPTIONAL: Small toy car
Below you will find an older version of the same teleclass. We are making a different experiment during class, so the materials you will need are a little different: Materials:
  • 2L soda bottle
  • 1/2" PVC pipe
  • duct tape
  • pen or pencil
  • index cards
  • sheets of paper
  • bicycle inner tube

Key Concepts

A rocket has a few parts different from an airplane. One of the main differences is the absence of wings. Rockets utilize fins, which help steer the rocket, while airplanes use wings to generate lift. Rocket fins are more like the rudder of an airplane than the wings. Another difference is the how rockets get their speed. Airplanes generate thrust from a rotating blade, whereas rockets get their movement by squeezing down a high-energy gaseous flow and squeezing it out a tiny exit hole. If you've ever used a garden hose, you already know how to make the water stream out faster by placing your thumb over the end of the hose. You're decreasing the amount of area the water has to exit the hose, but there's still the same amount of water flowing out, so the water compensates by increasing its velocity. This is the secret to rocket nozzles - squeeze the flow down and out a small exit hole to increase velocity. The rockets we're about to build get their thrust by generating enough pressure and releasing that pressure very quickly. You will generate pressure both by pumping and by chemical reaction, which generates gaseous products.

What's Going On?

For every action, there is equal and opposite reaction. If flames shoot out of the rocket downwards, the rocket itself will soar upwards. It's the same thing if you blow up a balloon and let it go-the air inside the balloon goes to the left, and the balloon zips off to the right (at least, initially). Your rocket generates a high pressure by squeezing the air into a very small space and using Bernoulli's Principles in action! As you stomp on the rocket, the air pressure leaves the bottle pretty quickly, pushing the paper rocket out of the way as it zooms out of the tube. By narrowing the exit diameter, you allow the air to speed up as it exits, creating a higher launch for your rocket. You can modify your rocket body design. Add more fins, tilt the fins at a angle, or try no fins at all! You can add a more steeply slanted  nose. You can cut the rocket body in half or make it twice as long.  There's so many things you can test out, change, or modify with this simple activity! You can also add canards (glider-type wings) to either side of the rocket body right under the nose and turn it into a glider when it starts to fall back to Earth!

Questions to Ask

  1. Does it matter how many fins you use?
  2. What happens if there's an air leak in the system?
  3. How can you make the rocket fly even higher? Name three different ways.
  4. Is the center of pressure before or aft of the center of gravity on your rocket?
  5. For stable flight, how many fins do you ideally need?
  6. How can you make the rocket spin as it launches?
[/am4show]

Rene Descartes (1596-1650) was a French scientist and mathematician who used this same experiment show people about buoyancy. By squeezing the bottle, the test tube (diver) sinks and when released, the test tube surfaces. You can add hooks, rocks, and more to your set up to make this into a buoyancy game!
[am4show have=’p8;p9;p93;p30;p57;p84;’ guest_error=’Guest error message’ user_error=’User error message’ ]


The test tube sinks because the when you squeeze the bottle, you increase the pressure of the water and this forces water up into the test tube, which then compresses the air inside the tube. When this happens, it adds enough mass to cause it to sink. Releasing the squeeze on the bottle means that you decrease the pressure and the water is forced back out of the tube.


[/am4show]


This is a faster, easier project than the Linear Accelerator, and builds on the ideas from both Unit 11: Magnetism and Unit 2: Motion (in the momentum section).

Have you ever shot a billiard ball toward another on a pool table and watched the first one stop while the second goes flying? This has to do with a concept known as momentum.
[am4show have='p8;p9;p10;p37;p95;' guest_error='Guest error message' user_error='User error message' ]
Momentum can be defined as inertia in motion. Something must be moving to have momentum. Momentum is how hard it is to get something to stop or to change directions. A moving train has a whole lot of momentum. A moving ping pong ball does not. You can easily stop a ping pong ball, even at high speeds. It is difficult, however, to stop a train even at low speeds.

Mathematically, momentum is mass times velocity, or Momentum=mv. The heavier something is and/or the faster it’s moving the more momentum it has. The more momentum something has, the more force it takes to get it to change velocity and the more force it can apply if it hits something.

Momentum is inertia in motion, how hard it is to get something to change directions or speed. Momentum = mv. Conservation of momentum; mv = mv. If something hits something else the momentum of the objects before the collision will equal the momentum of the objects after the collision.

This experiment is a great example of how momentum can be transferred from one object to another, just like on the pool table.

Materials (refer to shopping list for online stores):

  • five 1/2" ball bearings (or similar size)
  • 1-4 neodymium magnets
  • paper towel tube


The ball furthest from the magnet breaks free because it has enough momentum (which is directly related to speed) to escape the magnetic field of the strong magnet. What happens if you try this experiment without the magnets? Can you get one ball bearing to transfer all its momentum to a second one? You can read more about momentum here.

Turn this experiment into a first-prize science fair project by using our Science Fair Project guides!

Advanced students: Download your Momentum lab here.

[/am4show]


Newton's Third Law states that all forces come in pairs. When you push against the wall, the wall pushes back against you with an equal amount of force (or push). When a rocket fires, the rocket moves forward as the exhaust gases move in the opposite direction. An inflated balloon will zip through the air as the air escapes. For every action there is an equal and opposite reaction.

If you were to fart in space, what do you think would happen (before it froze)? You would move in the opposite direction!

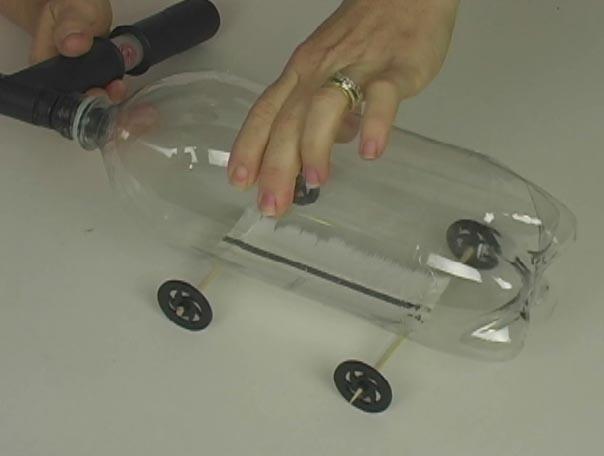
This rocket car uses high pressure on the inside to blow a weight out the back (the neoprene stopper) and propel itself forward.

[am4show have='p8;p9;p10;p37;p95;' guest_error='Guest error message' user_error='User error message' ]
Materials:

  • 2L soda bottle
  • scissors
  • 2 straws
  • 2 skewers (make sure these fit into your straws)
  • 4 wheels (milk jug caps, film canister lids, cardboard circles...)
  • needle valve (the kind you'd use to fill up a basketball with)
  • neoprene stopper (fits your soda bottle)
  • bike pump (make sure it fits the needle valve)
  • hot glue gun with glue sticks


Download Student Worksheet & Exercises

When you pump air into the bottle, you are building up pressure inside the bottle. The neoprene cork stays in because there's a high amount of friction between the bottle and the cork. Eventually, however, there's enough of a push from the inside pressure to overcome this frictional force and cause the cork to go flying out of the bottle, which in turn propels the rocket forward. The compressed air inside the bottle also escapes out the open end, which also propels the rocket car forward!

Exercises 

  1. What is inertia?
  2. What is Newton’s First Law?

[/am4show]


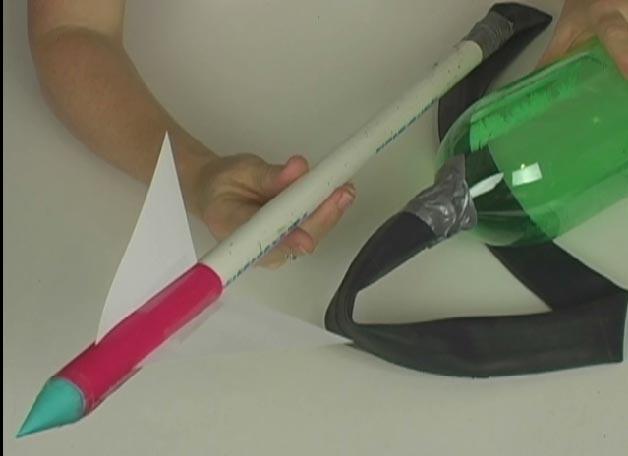
These rockets use air pressure to launch your lightweight rocket skyward. Using simple materials, you'll be able to make your launcher in minutes and as many rockets as you want. The first time I flew these, they got stuck on the roof, so be prepared with a few extras just in case. [am4show have='p8;p9;p10;p37;p109;p95;' guest_error='Guest error message' user_error='User error message' ] Materials:
  • 2L soda bottle
  • 1/2" PVC pipe
  • duct tape
  • pen or pencil
  • index cards
  • sheets of paper
  • bicycle inner tube
The higher pressure is generated inside the bottle when you stomp on it. Because air is a gas, it's also compressible, which means you can pack the same volume of air into a tighter space. When you decrease the volume, you increase the pressure. Since higher pressure always pushes, the rocket feels a push as soon as the bottle collapses down, which moves the rocket forward. [/am4show]

Fill the bathtub and climb in. Grab your water bottle and tack and poke several holes into the lower half the water bottle. Fill the bottle with water and cap it. Lift the bottle above the water level in the tub and untwist the cap. Water should come streaming out. Close the cap and the water streams should stop. Open the cap and when the water streams out again, can you “pinch” two streams together using your fingers?


Materials: A tack, and a plastic water bottle with cap, and bathtub


[am4show have=’p8;p9;p93;p30;p57;p84;’ guest_error=’Guest error message’ user_error=’User error message’ ]


What’s happening? First, you’re getting clean. Second, you’re playing with pressure again. Watch the water level when you uncap the bottle. As the water streams out, the water level in the bottle moves downward. Notice how the space for air increases in the top of the bottle as the water line moves down. (The air comes in through the mouth of the bottle.) When you cap on the bottle, there’s no place for air to enter the bottle. The water line wants to move down, but since there’s no incoming air to equalize the pressure, the flow of water through the holes stops. Technically speaking, there’s a small decrease in pressure in the air pocket in the top of the bottle and therefore the air outside the bottle has a higher pressure that keeps the water in the bottle. Higher pressure pushes!


[/am4show]


This experiment illustrates that air really does take up space! You can’t inflate the balloon inside the bottle without the holes, because it’s already full of air. When you blow into the bottle with the holes, air is allowed to leak out making room for the balloon to inflate. With the intact bottle, you run into trouble because there’s nowhere for the air already inside the bottle to go when you attempt to inflate the balloon.


You’ll need to get two balloons, one tack, and two empty water bottles.


[am4show have=’p8;p9;p82;p93;p30;p57;p84;’ guest_error=’Guest error message’ user_error=’User error message’ ]


Poke a balloon into a water bottle and stretch the balloon’s neck covering the mouth of the bottle from the inside. Repeat with the other bottle. Using the tack, poke several small holes in the bottom of one of the water bottles. Putting your mouth to the neck of each bottle, try to inflate the balloons.


A cool twist on this activity is to drill a larger hole in the bottle (say, large enough to be covered up by your thumb) and inflate the balloon inside the bottle with hole open, then plug up the hole with your thumb. The balloon will remain inflated even though its neck is not tied! Where is the higher pressure region now?


[/am4show]


Fire eats air, or in more scientific terms, the air gets used up by the flame and lowers the air pressure inside the jar. The surrounding air outside the jar is now at a higher pressure than the air inside the jar and it pushes the balloon into the jar. Remember: Higher pressure pushes!


Materials: a balloon, one empty glass jar, scrap of paper towel , matches with an adult


[am4show have=’p8;p9;p93;p30;p57;p84;’ guest_error=’Guest error message’ user_error=’User error message’ ]


Blow up a balloon so that it is just a bit larger than the opening of the jar and can’t be easily shoved in. With an adult, light the small wad of paper towel on fire and drop it into the jar. Place the balloon on top. When the fire goes out, lift the balloon. The jar goes with it!


[/am4show]


As you blow air into the bottle, the air pressure increases inside the bottle. This higher pressure pushes on the water, which gets forced up and out the straw (and up your nose!).


Materials: small lump of clay, water, a straw, and one empty 2-liter soda bottle.


[am4show have=’p8;p9;p82;p84;p93;p30;p57;’ guest_error=’Guest error message’ user_error=’User error message’ ]


Fill a 2-liter soda water bottle full of water and seal it with a lump of clay wrapped around a long straw so that the straw is secured to the mouth of the bottle. (The straw should be partly submerged in the water.) Blow hard into the straw. Splash!


[/am4show]


If your kids are hog-wild about flying and can't seem to get enough of paper airplanes, flying kites, and rockets, here's something you can do that will last their entire lifetime.

One of the best ways to introduce kids into the world of aeronautics and aviation is to get them inside a small airplane. By having the kids actually FLY, they get a chance to interact with a real pilot, see how the airplane responds to the controls, and get a taste for what their future can really be like if they keep up their studies in aerodynamics.

We're going to learn how to fly an airplane from a certified flight instructor.  He's going to walk you through every step, from pre-flight to take-off to landing.  You'll hear the radio transmissions from other aircraft flying in the area, how the control tower directs traffic, and more.  We've used a special microphone inside the cockpit to cut down on the engine noise (which actually was rigged up to only record when it heard voice sounds), so the sound might seem different than you expected.

Are you ready?

[am4show have='p8;p9;p93;' guest_error='Guest error message' user_error='User error message' ]


Want to fly a REAL airplane? There are a few different ways you can do this:

  • Get a First Flight from the Young Eagles group in your area.
  • Rent this video from the library or video rental store: One-Six Right
  • Check out Flight Training to find local pilots and magazines you can really learn from.
  • Visit your local airport and ask for a list of CFIs (Certified Flight Instructors) who can provide you with your first flight.  It's usually much less expensive than you think!

When we teach our Summer Science Camps, one of the first things we do is give away a free airplane lesson.  We do this for a number of reasons, but first and foremost, to reinforce that when you teach science, you must do it by starting with the experiment first, then follow it up with the academic content. I know it sounds backwards from most approaches to teaching science, and it is!  BUT it's the best way that kids learn in the long-term.

With this method, you are able to introduce a topic that really gets kids excited because now they have a real-world, hands-on  application of it that really makes sense to them. When kids are excited about a subject, it's much easier for them to pick up the academics. Once they start asking you questions, they've signaled you that they are ready to learn more about it (like lift, drag, aerodynamics, wing design, etc.)

It's also such a wonderful thing to see the kids come up to us, years later, with their eyes still twinkling over the memory of their first flying lesson!

[/am4show]


Want to build a kite in less than 5 minutes? This kite is basically a paper airplane on a string. It’s fast and easy to make. The best thing about this kite is that it needs next to no wind to get airborne, so you can simply run with it to get it up in the sky.

You'll need to get: 11”x17” sheet of paper (you can also tape two 8.5" x 11" sheets together to make this size), 10 feet of string, two donut stickers (also known as page reinforcement stickers), a stapler, and a straw.

Why does this kite fly? This kite soars because you’re holding the kite at the correct angle to the wind. The kite actually has two things (scientifically speaking) going on that help it fly: first, the shape of the wing cause a pressure difference that create lift under the wing surface, the same way that real airplanes generate lift. Second, the angle that the kite hits the wind generates impact lift on the kite, the same way fighter jets generates lift, since fighter jet’s wings are not curved like an airplane’s. In an airplane, the wind flows both over and under the kite, and with this shape, the air flying over the kite is traveling a bit faster than the wind under the kite. Higher wind speed means lower pressure, so the underside of the kite now has a relatively higher pressure, thus pushing the kite upwards into the sky.

Can I add string to any paper airplane and make it into a kite? Anytime someone asks us a question like this, we respond with a very enthusiastic: “I don’t know. Try it!” Then we offer enough tools for the job with a smile. We want kids experimenting with new ideas (even if we’re not entirely sure if they will work). So go ahead, roll up your sleeves, test out your ideas, and prepared to learn.

Here's what you need to do:

[am4show have='p8;p9;p94;' guest_error='Guest error message' user_error='User error message' ]


Take an 11x17-inch sheet of paper and fold it in half so it now becomes 8 ½ x 11 inches. Curl one corner tip to the center fold, 2 inches from the same end. Do the same with the other side, and secure the fold with a staple. Two inches below the staple, punch a hole near the center fold and attach donut stickers (to keep string from tearing through the paper). Attach a good length of string and run! This kite works with little-to-no wind. Just run!

Note: To make a string handle, cut a straw in half and thread one of the pieces onto the end of the string, looping the free end back onto the main line. Wind the excess string around the straw.

Teaching Tip: When we teach kids how to make this kite, we punch holes both on both sides of the staple and ask the kids which hole works best.

Troubleshooting: The bat kite needs very little wind to fly – in fact, most kids get their kites airborne just by running. Depending on where the staple is located, you can place your string forward or aft of (behind) the staple. Encourage kids to test and find their own answer, but our recommendation is to shoot for the aft hole 3.5 inches from the nose and the staple 1.5 inches from the nose. This kite is very forgiving about measurements.

[/am4show]

Ever wonder how airplanes fly through those fluffy white things in the sky? If they can't see where they are going, how do they get there?

You might be tempted to think: "GPS!" Ah, yes... but airplanes were flying through clouds long before GPS was ever invented. So how did they do it? That's what this video is all about.

Although most new planes are being outfitted with "glass cockpits", which is to say computer screens with GPS systems, there's really nothing like a plane with vacuum-tube instruments, crackling radios, transponders, VOS, and DMEs. We're going to show you how IFR pilots (those who are specially trained to fly only by instruments without peeking out the window) use their equipment to get the plane down to the ground.

Are you ready? Then strap on your seat belt and get ready to fly with a certified instrument flight instructor...

[am4show have='p8;p9;p93;' guest_error='Guest error message' user_error='User error message' ]


[/am4show]

You'll see these in toy stores, but why not design your own version? You can add weight to the nose, widen the fins, and lengthen the slingshot part to figure out how to get to to soar further.


Materials:


  • foam tube (I used a piece of foam from 3/4" pipe insulation, but you can also use a paper towel tube)
  • foam sheet
  • film canister or other small container to hold the rubber band in place (or tape the rubber bands to the outside using duct tape)
  • paper clip
  • 5 to 8 rubber bands
  • scissors
  • hot glue gun
  • duct tape

[am4show have='p8;p9;p10;p37;p109;p95;' guest_error='Guest error message' user_error='User error message' ]


Punch a small hole in the bottom of a black Kodak film canister. Chain 5 rubber bands together and push one end of the rubber band chain through the hole from the outside, catching it with a paper clip on the inside like a cotter pin so it can’t slip back through the opening.


Hot glue the canister into one end of a 6-inch piece of ¾-inch foam pipe insulation. Check the hardware store for this insulation, which comes in 6 foot. Tape the circumference of the pipe with a few wraps of duct tape. The rubber bands should be hanging out of the foam pipe.


Cut out triangular fins from a foam sheet and attach with hot glue to the opposite end. To launch, hook the rubber band over your thumb, pull back, and release!


Want to make a Paper Slingshot Rocket?
[/am4show]


This is the kind of thing I wish I had back in grade school. I could have launched these across the room without anyone being the wiser. Be sure to fold the nose down securely, or you'll have air leaks (and no launch!) This is a smaller version of the Rocketships experiment. Materials: All you need is a
  • sheet of paper
  • a straw
  • tape
  • scissors
[am4show have='p8;p9;p10;p37;p109;p95;' guest_error='Guest error message' user_error='User error message' ]

Paper Blow Gun Rocket


Spiral-wrap a thin strip of paper around and along the length of a wood pencil and use tape to secure. You can alternately use a naked straw instead of making your own rocket body from paper, but then you’ll need a slightly smaller launch tube straw. Hot glue triangular fins made from an index card to one end. Fold the opposite end over twice and secure the fold with a ring of tape to make a nose for the rocket. Insert straw into the rocket body and blow hard! [/am4show]

This is a simpler version of the box kite. By making it out of everyday materials and changing the structure so that it's more rigid, all you need is an afternoon to make this simple and colorful kite.

The directions here are for making a single cell (image is a pyramid of four cells), and the largest we've ever made is ten without needing stronger materials. (It's the straws that bend under the weight). You can add a tail to keep it from spinning during flight.

Here's what you do:

[am4show have='p8;p9;p94;' guest_error='Guest error message' user_error='User error message' ]

Materials: Six straws, one sheet of tissue paper, string, crepe paper streamers, glue sticks (not included), scissors and tape.

Thread three naked straws (straws with the wrapper removed) onto a length of string and tie it off to make a stiff triangle. Thread two more straws onto a string and attach to a different corner of the triangle, making a 2D diamond shape.

Thread one straw onto a string and attach one end to each diamond apex, pulling your shape into a 3D tetrahedral triangle or pyramid shape.

Cover two adjacent sides with tissue paper and use glue sticks to fold the tissue around the straws and back onto itself. Then attach a bridle string along the tissue fold. Add a crepe paper streamer for a tail and you’re ready to fly!

Tip: You can also make four tetrahedral shapes and stack them into one giant pyramid!
[/am4show]


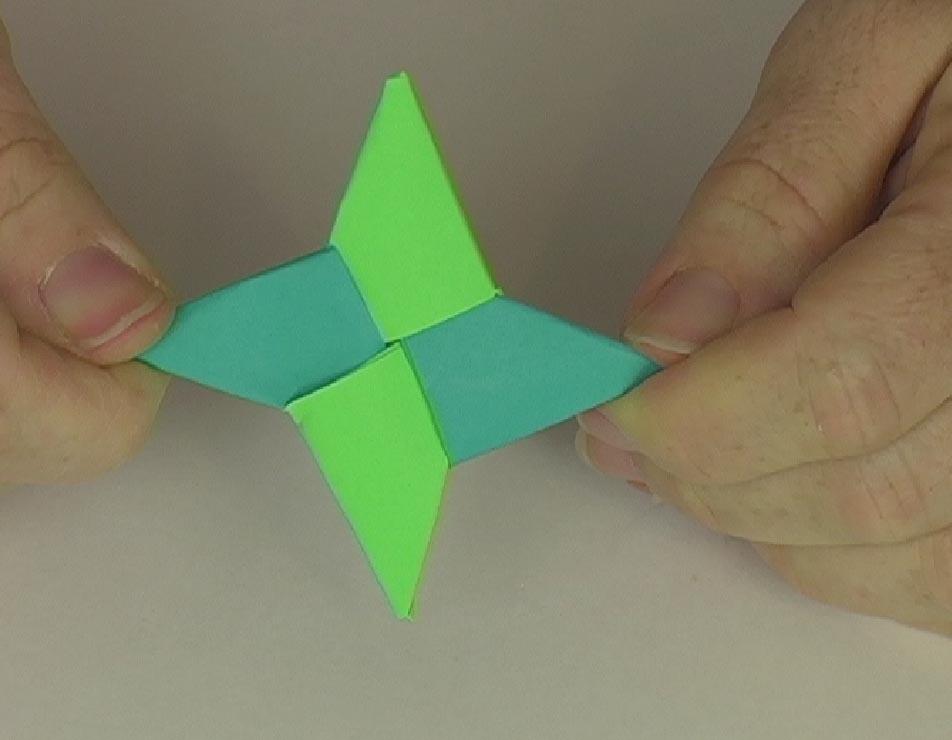
This is a double-project, because each requires the scraps of the other. The origami airplane requires a square sheet of paper, and the ninja star needs the strip left over from turning a regular sheet of copy paper into a square sheet.

Both of these contraptions fly well if you take your time and make them carefully. Just watch yourself with the ninja star - it's not only fast and furious, the ends are sharp and guaranteed to turn heads... and necks.
[am4show have='p8;p9;p93;' guest_error='Guest error message' user_error='User error message' ]


P.S. I learned how to make this ninja star back in 4th grade, where I was sworn to secrecy in the girl's bathroom with my best friend. Although I've made thousands of these, I've never showed anyone else! I've kept this secret for a long time, so I ask you now to keep these instructions a secret between us. Are you in?

[/am4show]

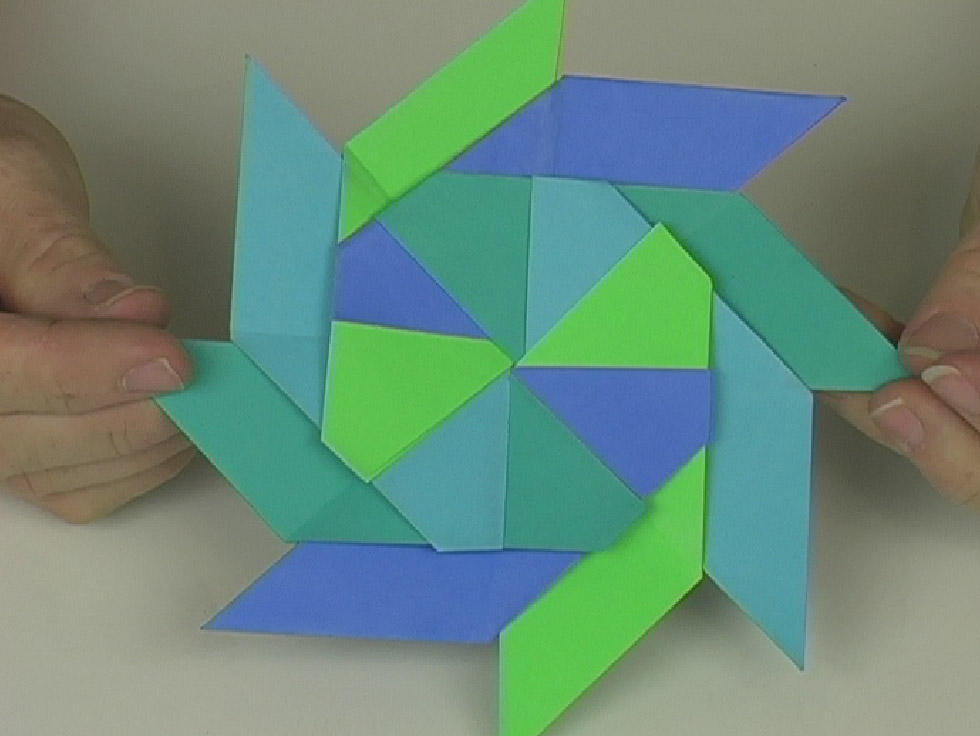
My students love making this one, because it's not only a throwing star like the Ninja Star, but also opens up to be a frisbee! You'll need eight sheets of square paper, all the same size. They don't have to be large - I use two that are cut into quarters. Here's what you do:

[am4show have='p8;p9;p93;' guest_error='Guest error message' user_error='User error message' ]

Materials:

  • eight sheets of square paper, any size (you'll see how to make this from only two sheets in the video)

  • ruler

  • straight edge or ruler

  • pencil

  • 15 minutes


[/am4show]

I carried one of these kites in my backpack in grade school, as it collapses down very small when not in use. You can make smaller versions from still paper, but the one we're going to do uses plastic.

Here's what you need to get:

Two 24 inch wood dowels (or two 24 inch long plastic balloon sticks), four donut stickers (also known as page reinforcement stickers), string, plastic garbage bags, tape and scissors.

[am4show have='p8;p9;p94;' guest_error='Guest error message' user_error='User error message' ]


Cut a garbage bag into a rectangle 24 inches high and 30 inches long. Snip the corner of the upper right side as follows:

From the upper right corner, measure 9 inches to the left and mark with a dot (the dot will be on an edge). From the corner again, measure down 7.5 inches and make another dot (again, on an edge). Connect the dots and cut along a line. Cut the left upper corner to match. Tip: You can easily do this by folding the bag in half and follow the cut you just made.

Snip the lower bottom corners the same way. From the lower right corner, measure over 9 inches to the left and mark with a dot, then measure 16.5 inches up from the corner and mark with another dot. Connect the dots and cut along the line. Do the same for the left side. Shape the top straight edge of your kite by cutting a shallow curve (like the neckline of a T-shirt) for better airflow.

Your kite should look like a rectangle with a triangle attached to either side, pointing out. At those points, punch a hole and reinforce it with donut hole savers. Attach six feet of string with double knots at each hole, then knot the ends together. Spread your kite out flat. Line up your dowels where the rectangle edges meet the triangle edges, one for each side and tape them in place. Add a spool of string and you are ready to go!

[/am4show]


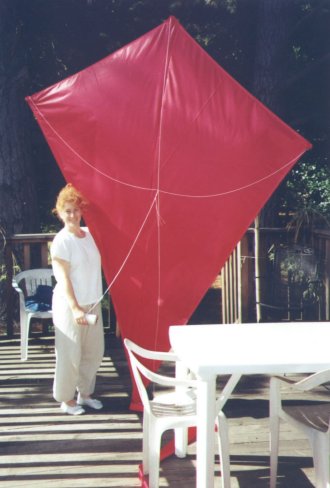
Did you notice how BIG these kites can get? And yes, that's me in the photo, at full size!

If you're looking for a kite that will lift you off your feet, THIS IS THE ONE! I'm going to show you how to build a smaller version first, so you get the hang of how it goes together.

Afterward, you can make a 6-foot, 9-foot, or 12-foot model. Just keep your proportions right and find strong, lightweight materials (bamboo is a popular choice, but watch the wall-thickness or it too can get heavy).

The photo here is the 9-foot tall version of this kite, which sports a 25-foot tail. To fly this, you'll need a lot of wind, so if you live near the beach, you might be able to get this up. Otherwise, you can try to get it airborne by doing what I used to do with mine - tie it to the bumper of your pickup truck and drive out in the country with about a mile of strong string!

The 6-foot versions in a strong wind will generate enough to lift small kids, so watch out (and get your camera).

If you can find balloon sticks (white plastic stiff tubes about 3 feet long), use them. They’re inexpensive, lightweight, and easy to work with. Otherwise, use wood dowels from a hardware store or 36” bamboo gardening stakes from a nursery.

[am4show have='p8;p9;p94;' guest_error='Guest error message' user_error='User error message' ]
Materials: Two 36" dowels or plastic balloon sticks, string, plastic garbage bags, crepe paper streamers, tape and scissors.

Make a lowercase T-shape with two sticks, crossing one stick one-third the way down from the top, and lash them together with string or tape.

Outline the diamond-shape by attaching thin string around the ends of the dowels clockwise. Use a garbage bag for the kite skin by trimming the plastic bag with an inch of excess outside the kite outline, fold the trimmed plastic over the kite string and tape it along the edge.

Attach crepe paper streamers for a tail. Then attach a bridle to the kite by tying one string to the top and bottom of the vertical dowel, and other string to both ends of the horizontal dowel. Tie the main kite string line (the one with attached to the spool) around both bridles. You’ll need to play with the string lengths to adjust the angle that the kite makes with the wind.

To make the large red kite in the photo above, simply make the diamond kite as described above, with these modifications:

Use 6 foot lengths of bamboo for a 6x6 foot kite or 9 foot lengths for a 9x9 foot kite. You can find these poles for the spars at your hardware store. Use rip-stop nylon from a fabric store for the skin and a sewing machine to attach the skin to the spars where you are instructed to use tape above.

Tip: Place the sewing machine in the center of the room as you will need space to maneuver the kite around the needle as you work. The tail for this large kite should be 25-40 feet long (start longer and sip as you go).

Instead of string, use nylon cord with a tensile strength of at least 500 pounds and tie the end onto the bumper of a truck—unless you want to be lifted off the ground! We have successfully made a 12 foot version of this kite, which requires about a mile of string takes hours to pull it in. If you love to fly, this is the ultimate project!

[/am4show]


Click here for a printer-friendly version of this page.


Objective Kids love going fast and blowing things skyward. This set of experiments should satisfy both needs.  The goal is to not only provide them with a safe set of activities that will keep their eyebrows intact, but also to get them really excited about aerodynamics and rocket design by building projects that really work. Most rockets will require a certain amount of tweaking (like the Flying Machines experiments did) in order to fly straight. This is an excellent time to hone their observation skills and get them into the habit of changing and testing only one thing at a time.


We’re going to continue learning about pressure as we generate high pressure through both bicycle pumps as well as chemical reactions. The first thing to do is watch the video on the Rocketry website page, and then dive into the experiments.


Main Ideas While the kids are playing with the experiments see if you can get them to notice these important ideas. When they can explain these concepts back to you (in their own words or with demonstrations), you’ll know that they’ve mastered the lesson.


  1. For every action, there is an equal and opposite reaction.
  2. The position of the center of pressure relative to the center of gravity of a rocket determines how stable the flight will be.

About the Experiments The experiments in this section vary from small indoor flights to rockets that go over a football field in distance. All rockets move by a quick release in pressure. Once your rocket takes flight, take a clear look (or better, a video so you can watch it a few times over) at how it flies when it’s up there.  By launching at an angle instead of straight up, you’ll get a better view… just be sure your launch area is clear.


Stability of Flight: A rocket has two key points (CP & CG, covered in the Flying Machines experiments) that you need to know in order to have stable flight.  Here’s how you find and adjust them:


  1. Finding the Center of Pressure: You can find center of pressure by tying a string around the rocket body and swinging it around your head. The balance point is your center of pressure.  Mark the point as CP.
  2. Finding the Center of Gravity: Balance your rocket on a pencil tip. Mark the point as CG. Note if this is forward or aft of your CP.
  3. To adjust the CG/CP: It’s easier to adjust the CG – add weight to the nose or more fins to the tail section.  Re-measure your CG when you’re done.
  4. Read more about rocket stability here.

The How and Why Explanation Rockets shoot skyward with massive amounts of thrust, produced by chemical reaction or air pressure.  Scientists create the thrust force by shoving a lot of gas (either air itself, or the gas left over from the combustion of a propellant) out small exit nozzles.


According to the universal laws of motion, for every action, there is equal and opposite reaction.  If flames shoot out of the rocket downwards, the rocket itself will soar upwards.  It’s the same thing if you blow up a balloon and let it go—the air inside the balloon goes to the left, and the balloon zips off to the right (at least, initially, until the balloon neck turns into a thrust-vectored nozzle, but don’t be concerned about that just now).


A rocket has a few parts different from an airplane.  One of the main differences is the absence of wings.  Rockets utilize fins, which help steer the rocket, while airplanes use wings to generate lift.  Rocket fins are more like the rudder of an airplane than the wings.


Another difference is the how rockets get their speed.  Airplanes generate thrust from a rotating blade, whereas rockets get their movement by squeezing down a high-energy gaseous flow and squeezing it out a tiny exit hole.


If you’ve ever used a garden hose, you already know how to make the water stream out faster by placing your thumb over the end of the hose.  You’re decreasing the amount of area the water has to exit the hose, but there’s still the same amount of water flowing out, so the water compensates by increasing its velocity.  This is the secret to converging rocket nozzles—squeeze the flow down and out a small exit hole to increase velocity.


The rockets we’re about to build get their thrust by generating enough pressure and releasing that pressure very quickly.  You will generate pressure both by pumping and by chemical reaction, which generates gaseous products. Let’s get started!


Questions to Ask When you’ve worked through most of the experiments ask your kids these questions and see how they do:


  1. If you inflate a balloon (don’t tie the end), which direction does the air in the balloon and the balloon itself travel?   (a) both the same way (b) in opposite directions  (c) nothing happens
  2. When you drop an effervescent tablet into water, what happens? (a) bubbles foam up (b) it burps (c) carbon dioxide gas is released    (d) it produces a chemical reaction that can propel a rocket skyward
  3. Puff Rockets use which of the following propellants?  (a) air pressure (b) chemical reactions (c) both (d) neither
  4. The most dangerous parts of the Water Rocket experiment is are: (a) working with high pressure (b) that you’ve stripped out the threads that normally secure the cap in place, and now it’s easier to accidentally release the rocket and shoot someone’s eyeballs out (c) reusing the bottles over and over causes fissures and cracks to form in the bottle, increasing the chances of bursting if you don’t replace the bottle after every 7-10 launches (d) all of the above and more
  5. The most important things to remember when launching water rockets are: (a) safety goggles or face shield (b) 70 psi maximum air pressure (c) always hold the valve-side down when holding the bottle (d) only use soda bottles that are build to hold pressure (e) never water bottles, juice bottles, sports drink bottles, or any others that don’t say pssssst! when you first open them
  6. To get the multi-staging rockets to work correctly, where does the trigger need to be?  (a) inside the first balloon (b) on the string (c) in the straw (d) squished between the first balloon and the cup
  7. How does a Slingshot Rocket work?  Where does the thrust come from?
  8. If your Blow Gun Rocket straw rips loose, what can you do to quickly repair it without rebuilding the entire rocket?

Click here for a printer-friendly version of this page.

Objective You’re going to do several experiments that change air pressure and mystify your kids. The goal is to set them thinking about how and why things fly (you’ll do this by learning about air pressure and Bernoulli’s law, but you don’t need to tell them that). The first thing to do is watch the video below and then dive into the experiments.

Main Ideas While the kids are playing with the experiments see if you can get them to notice these important ideas. When they can explain these concepts back to you (in their own words or with demonstrations), you’ll know that they’ve mastered the lesson.

  1. Air pressure is all around us. Air pushes downward and creates pressure on all things.
  2. Air pressure changes all the time.
  3. Higher pressure always pushes.
  4. The faster air travels over a surface, the less time it has to push down on that surface and create pressure. Fast moving air creates low pressure regions. (Bernoulli’s Law).
  5. The four fundamental forces on an airplane are lift, weight, thrust, and drag.

About the Experiments There are a lot of experiments in this section that will hone your child’s observation skills. About half the experiments are on flying machines and the other half consist of air pressure demonstrations. When their airplane doesn’t work right, ask them what exactly it’s doing (or not doing), and then take a more careful look at how it’s constructed. Focus on watching what happens when you make small changes, and try to change only one thing at a time.

The How and Why Explanation There’s air surrounding us everywhere, all at the same pressure of 14.7 pounds per square inch (psi). You feel the same force on your skin whether you’re on the ceiling or the floor, under the bed or in the shower.

An interesting thing happens when you change a pocket of air pressure – things start to move. This difference in pressure causes movement that creates winds, tornadoes, airplanes to fly, and some of the experiments we’re about to do together.

An important thing to remember is that higher pressure always pushes stuff around. While lower pressure does not “pull,” we think of higher pressure as a “push”. The higher pressure inside a balloon pushes outward and keeps the balloon in a round shape.

Weird stuff happens with fast-moving air particles. When air moves quickly, it doesn’t have time to push on a nearby surface, such as an airplane wing. The air just zooms by, barely having time to touch the surface, so not much air weight gets put on the surface. Less weight means less force on the area. You can think of “pressure” as force on a given area or surface. Therefore, a less or lower pressure region occurs wherever there is fast air movement.

There’s a reason airplane wings are rounded on top and flat on the bottom. The rounded top wing surface makes the air rush by faster than if it were flat. When you put your thumb over the end of a gardening hose, the water comes out faster when you decrease the size of the opening. The same thing happens to the air above the wing: the wind rushing by the wing has less space now that the wing is curved, so it zips over the wing faster, and creates a lower pressure area than the air at the bottom of the wing.

The Wright brothers figured how to keep an airplane stable in flight by trying out a new idea, watching it carefully, and changing only one thing at a time to improve it. One of their biggest problems was finding a method for generating enough speed to get off the ground. They also took an airfoil (a fancy word for “airplane wing”), turned it sideways, and rotated it around quickly to produce the first real propeller that could generate an efficient amount of thrust to fly an aircraft.  Before the Wright brothers perfected the airfoil, people had been using the same “screw” design created by Archimedes in 250 BC.  This twist in the propeller was such a superior design that modern propellers are only 5% more efficient than those created a hundred years ago by the two brilliant Wright brothers.

Questions to Ask When you’ve worked through most of the experiments ask your kids these questions and see how they do:

  1. Higher pressure does which? (a) pushes (b) pulls (c) decreases temperature (d) meows (e) causes winds, storms, and airplanes to fly
  2. The tips on the edge of a paper airplane wing provide more lift by: (a) flapping a lot
    (b) destroying wingtip vortices that kill lift (c) getting stuck in a tree more easily (d) decreasing speed
  3. In the ping pong ball and funnel experiment, the ball stayed in the funnel was because:         (a) you couldn’t blow hard enough (b) you glued it into the funnel (c) the ball had a hole in it  (d) the fast blowing caused a low-pressure region around the ball, causing the surrounding atmospheric pressure to be a higher pressure, thus pushing the ball into the funnel
  4. In the sneaky bottle experiment, which of the two bottles was the balloon able to inflate in? (a) the one with a hole (b) the one with no holes (c) the one the kid fit inside
  5. If your plane takes a nose dive, you should try (a) changing the elevators by pinching the edges (b) change the dihedral angle (c) change how you throw it (d) all of the above
  6. What are the four forces that act on every airplane in flight?
  7. Draw a quick sketch of your plane viewed from the front with a positive dihedral.
  8. Why does the index card stay in place when you invert the cup of water in the magic water glass trick?
  9. When the balloon was squished into the jam jar with the snuffed candle, where was the higher pressure?

10.  Why does the water stop streaming out of the bottle when you put the cap on in the streaming water experiment?  Why does the water come out if you squeeze the capped bottle?

11.  How can you make the fountain bottle shoot even higher?

12.  If you were designing your own “Flying Paper Machine Kit”, what would be inside the box?

13.  What’s the one thing you need to remember about higher pressure?

14.  What keep an airplane from falling?

15.  Where is the low pressure area on an airplane wing?


How many of these items do you already have? We’ve tried to keep it simple for you by making the majority of the items things most people have within reach (both physically and budget-wise).


You do not need to do ALL the experiments – just pick the ones you want to do! Look over the experiments and note which items are needed, and off you go!


Click here for a printer-friendly version of this page.


Materials

  • 10 sheets of 8×11” paper
  • 5 index cards
  • 7-9” latex balloon
  • 15 large straws
  • 5 small straws (make sure these slide easily into the larger straws)
  • wooden spring-type clothespin
  • 4 popsicle sticks (any size)
  • 5 skewers
  • 8 milk jug lids, film tops, or other small, plastic lids that are round for wheels
  • 6” long piece of 3/4” foam pipe insulation
  • foam sheet from a craft store
  • 4 Fuji film canisters or plastic M&M containers (check recycle bin at a photo developing store)
  • 2 small paper clips
  • 8 rubber bands
  • effervescent tablets (generic alka seltzer works great)
  • clean, empty shampoo or lotion bottle
  • small piece of squishy foam or packing peanut
  • wood skewer (should fit inside straws)
  • bike pump
  • needle valve
  • neoprene stopper that fits a 2L soda bottle
  • empty 2-liter soda bottles

Tools


  • duct tape
  • scissors
  • tape
  • hot glue gun

Optional Materials: These rockets go a lot further, but also require adult help to create or are more expensive to build. Watch the video first before starting these projects!


  • razor blade
  • vice or vice grips
  • drill with ½” drill bit (spade bit is best)
  • air compressor and/or air tank
  • spray-nozzle for compressor/tank
  • 3 foot piece of metal tubing that fits just inside the larger straws (listed above)
  • car tire valve (find this at a tire repair shop)
  • 2 to 5 empty 2-liter soda bottles with caps
  • 5 ball bearings , ½” diameter
  • 4 neodymium (super-strong) magnets (1/2″ cube)
  • paper towel tube
  • 1 inch wide bike tube (at least 3 feet long)
  • 12” long x 1/2” diameter PVC pipe

How many of these items do you already have? We’ve tried to keep it simple for you by making the majority of the items things most people have within reach (both physically and budget-wise).


You do not need to do ALL the experiments – just pick the ones you want to do! Look over the experiments and note which items are needed, and off you go!


Click here for a printer-friendly version of this page.


Materials

  • 11”x17” sheet of paper (or tape two 8 ½” x 11” to make this size)
  • A big roll of string (enough for six kites)
  • 20 donut stickers (also known as page reinforcement stickers)
  • 50 straws
  • 4 sheets of tissue paper
  • 10-20’ crepe paper streamer for kite tail
  • 3 wire coat hangers or 36” balloon sticks (these are a better choice if you can find them)
  • Five plastic garbage bags
  • 2 foam plates (at least 4 inches in diameter)
  • 6”x4” clean foam meat tray

Tools

  • Stapler
  • Tape
  • Scissors
  • Hot glue gun with glue sticks
  • Glue sticks (the retractable kind)
  • Duct tape

This kite is sometimes referred to as a "Comet Kite", as it has a main head area and a loooong tail section. We recommend making the kite from lightweight garbage bags, as they tend to hold up better than tissue paper, and don't require sewing they way ripstop nylon material does.

Here's what you need to get: Wire coat hanger or thin plastic dowel, string, straw, plastic garbage bags, tape, and scissors.

Here's what you do:
[am4show have='p8;p9;p94;' guest_error='Guest error message' user_error='User error message' ]

Bend a very thin wire coat hanger into a D-shape. Tape a covering of a trimmed plastic garbage bag for a kite skin. Along the straight side of the D, tape a ten-foot pieced-together section of garbage bag the same width as the D for the tail. Attach a bridle of string to the top and bottom of the coat hanger section, and add a main kite line to the bridle. This kite works best in an area with a lot of wind, such as the beach. Try making a larger version with a fifty foot tail!

[/am4show]


How many of these items do you already have? We’ve tried to keep it simple for you by making the majority of the items things most people have within reach (both physically and budget-wise).


You do not need to do ALL the experiments – just pick the ones you want to do! Look over the experiments and note which items are needed, and off you go!


Click here for a printer-friendly version of this page.


Materials

Materials


  • Water
  • Bathtub or sink
  • Bowl
  • Scrap of paper towel
  • 2 clear cups
  • 25 straws
  • Small lump of clay
  • 3 balloons
  • 2 thumbtacks
  • Plastic funnel
  • Ping pong ball
  • Plastic garbage bag
  • Red and blue food coloring
  • 20 sheets of 8 ½” x 11” paper
  • Pencil
  • Rubber band
  • Popsicle stick
  • 2 small paper clips
  • 2 identical water glasses
  • 10 index cards (large enough to cover the mouth of the water glass)
  • 3 empty soda cans
  • Empty glass jar
  • Empty 2-liter soda bottle
  • 2 empty water bottles
  • 12” flexible tubing (or use a flexible straw)
  • Matches with adult help
  • Test tube
  • 2-liter soda bottle


Tools


  • Scissors
  • Tongs
  • Tape
  • Duct tape
  • Hair dryer
  • Stove with adult help

Optional


The projects that require these items are either more expensive or harder to build and require adult help. Watch the videos before shopping for these items!


Every flying thing, whether it's an airplane, spacecraft, soccer ball, or flying kid, experiences four aerodynamic forces: lift, weight, thrust, and drag. An airplane uses a propeller or jet engine to generate thrust. The wings create lift. The smooth, pencil-thin shape minimizes drag. And the molecules that make up the airplane attribute to the weight.

Think of a time when you were riding in a fast-moving car. Imagine rolling down the window and sticking out your hand, palm down. The wind slips over your hand. Suppose you turn your palm to face the horizon. In which position do you think you would feel more force against your hand?

When designing airplanes, engineers pay attention to details, such as the position of two important points: the center of gravity and the center of pressure (also called the center of lift). On an airplane, if the center of gravity and center of pressure points are reversed, the aircraft’s flight is unstable and it will somersault into chaos. The same is true for rockets and missiles!

How to Build an Airplane

Materials: balsa wood flyer

This video shows how to use a balsa airplane to show what all the parts (rudder, wings, elevator, fuselage) are for.  You can pick one up for a few dollars, usually at a toy store, or make your own (see second video below).

[am4show have='p8;p9;p93;' guest_error='Guest error message' user_error='User error message' ]

Want to go for a REAL airplane flight?

You can learn how to fly an airplane from a real flight instructor without leaving your seat! Click here!

[/am4show]


As you blow into the funnel, the air under the ball moves faster than the other air surrounding the ball, which generates an area of lower air pressure. The pressure under the ball is therefore lower than the surrounding air which is, by comparison, at a higher pressure. This higher pressure pushes the ball back into the funnel, no matter how hard you blow or which way you hold the funnel. The harder you blow, the more stuck the ball becomes. Cool.


Materials: A funnel and a ping pong ball


[am4show have=’p8;p9;p82;p84;p93;p30;p57;’ guest_error=’Guest error message’ user_error=’User error message’ ]


Insert a ping pong ball into a funnel. Place the stem of the funnel between your lips and tilt your head back so ball stays inside. Blow a strong, long stream of air into the funnel.


[/am4show]


Click here for a printer-friendly version of this page.


Objective You’re going to build on the Flying Machines concepts by building larger airfoils called Kites.  The goal is to get them even more excited about fluid mechanics and aerodynamics by building projects that really fly. We’re going to continue learning about air pressure and Bernoulli’s law through the different kite designs. The first thing to do is watch the video on the Kites website page, and then dive into the experiments.


Main Ideas While the kids are playing with the experiments see if you can get them to notice these important ideas. When they can explain these concepts back to you (in their own words or with demonstrations), you’ll know that they’ve mastered the lesson.


  1. Higher pressure always pushes.
  2. The faster air travels over a surface, the less time it has to push down on that surface and create pressure. Fast moving air creates low pressure regions. (Bernoulli’s Law).
  3. The four fundamental forces on a kite are lift, weight, thrust, and drag. (The thrust is the pull on the string, and the lift occurs when wind flows over the top and bottom of the kite.)

About the Experiments The experiments in this section will take more time to put together, as you are building several different kite designs, including the box kite, the dragon, the diamond, and the rotor kite. If your kite doesn’t take off immediately, ask your child how it doesn’t work… did the nose tip over, did it spin, flip, or just tumble?  Asking better questions is one of the key ingredients to making a great a scientist. Focus on watching what happens when you make small changes, and try to change only one thing at a time.


Before flight, hold your kite where the main line attaches to the bridle (the part that attaches to the string spool).  Adjust the strings so that the kite hangs about 30 degrees into the wind.  Use your fingers on the bridle on a windy day to find the “magic spot” or the place where your kite picks right up and flies best.


Moving the bridle forward makes the kite fly higher in smooth winds and   moving it backward helps it fly in gusty winds.  If your kite fails to rise, try a windier spot or a shorter tail.  If it flies then quickly crashes, you may need to shorten your bridle or change the angle.  If your kite spins around and around while flying, add more tail length.


The How and Why Explanation Kites are airplanes on a string.  They use both high and low pressure to gain altitude and soar skyward.  Not all kites need tails—the tail section helps stabilize an otherwise unstable kite design by adding a bit of weight near the bottom.  While kites need to be lightweight, the framework needs to be strong, as they can withstand winds greater than 70 mph at higher altitudes.


To launch a kite, you can start with it on the ground and simply start running, hold it in your hands and toss it behind you as you run, or have someone hold it for you and toss it up as you start to run with the string. The best launch method depends on the kind of kite you’re working with. For example, the Bat Kite just needs to be tossed into the air with a kid running in front of it, while the rotor kite is going to require a windy day or a bicycle.


Questions to Ask When you’ve worked through most of the experiments ask your kids these questions and see how they do:


1. Kites need string so: (a) they don’t get lost (b) to hold them at the correct angle to the wind (c) so you can pull the kite in when you’re done  (d) all the above


2. Kites can be in the shape of which ones?  (a) box (b) pyramid  (c) diamond (d) hippos


3. Which part of the kite is the most adjustable?  (a) the kite skin (b) the tail (c) the bridle (d) the frame


4. Which kite is collapsible and easy to carry? (a) sled (b) dragon (c) bat   (d) rotor (e) tetrahedral (f) diamond


5. If your kite crashes to the ground, what two things can you try changing?


6. How do you get your kite to spin in circles?


7. How much wind does the Rotor kite need? (a) a day at the beach could work (b) zero (c) winds like a hurricane (d) running ought to do it


8. What do you do if your kite doesn’t lift off the ground?  (a) run faster    (b) find a windier spot (c) let go of the kite (d) stop stepping on it (e) all of the above


9. Where is the higher pressure area on the kite during flight? (a) the topside (b) the underside (c) the tail (d) nowhere


10. What is the frame for on a kite?  (a) to keep the kite in the right shape (b) to provide weight in the right places (c) so it can break (d) so you have something to attach the bridle to


11. Which kite works with the least amount of wind?


If you don't have access to an air compressor or air tank with a spray-nozzle, you can either make your own rocket launcher (watch second video below), or make the blow-gun rockets. Either way, you're going to be launching sky-high in no time!


Materials:


  • Two straws each in two different sizes
  • two sheets
  • index cards
  • scissors
  • tape
  • hot glue gun
  • air compressor or air tank with spray-nozzle
  • metal tubing that fits just inside the larger straws


[am4show have='p8;p9;p10;p37;p109;p95;' guest_error='Guest error message' user_error='User error message' ]

Make a very long straw by joining two straws with tape. Roll an 8½x11-inch sheet of paper into a long tube and tape it shut. Cut triangle fins out of the index card and hot glue to the base end of the rocket.


Construction Tip: Younger kids can roll the paper around a dowel to help.


To make the nosecone, cut a circle out of paper. You can trace the inner diameter of masking tape roll to get a good circle. To make a flat circle into a 3D cone, begin to cut the circle in half, but stop cutting when you get to the center. Slide one flap over the other to form a nose for your rocket and tape it shut. Pile a lot of glue inside the cone insert the long straw and wait to for it to dry. Slip the straw inside the tube and seal the nosecone to the rocket body.


When dry, blow into your straw to check for leaks. It should be impossible to blow through. If you have a leak, go back and fix it now. Otherwise, slip a metal tube slightly larger than the straw over the straw and blow hard. Tip: Check a hardware store for the metal tube.


What’s going on? This rocket uses air pressure to launch itself skyward. When you blow hard, you create a higher pressure region behind the rocket. Higher pressure always pushes, so off it goes!


If you have an air tank or compressor handy, the nozzle from it to blast these rockets hundred of feet in the air! Check out the video below for making your own rocket launcher that uses a bicycle pump!


Repair Tip: If your straws come loose, simply cut the rocket body just below the nosecone and rebuild the straw-cone assembly, fastening it in place when dry.


Materials & Tools:

  • drill & bits
  • red hot blue glue
  • gloves
  • respirator (for gluing session)
  • PVC pipe cutter (adults only!)
  • wire strippers
  • soldering equipment
  • measuring tape
  • teflon tape
  • marker
  • car tire valve
  • vice grips
  • wire
  • 9V battery with clip
  • momentary ON switch
  • car tire valve
  • 3/4″ threaded sprinkler valve (in-line)
  • 3/16″ brass tubing
  • 1/2″ screw top cap

1-1/4" SCH40 PVC pipe pieces:

  • 3 pieces 16" long
  • 2 pieces 6-1/2" long
  • 1 piece 3" long

1-1/4" SCH40 PVC pipe pieces:

  • 3 pieces 16" long
  • 2 pieces 6-1/2" long
  • 1 piece 3" long

1-1/4" Fittings:

  • Four 90 deg elbows, slip fit
  • 1 cross
  • 1 end cap, slip fit

1" SCH40 PVC pipe pieces & fittings:

  • One 1" pipe 5" long
  • 2 slip caps (1" dia)
  • One 3" pipe 3" long

1/2" SCH40 PVC pipe pieces:

  • 1 piece 12" long

More fittings:

  • 1/2" adapter (female slip on one end, threaded male on the other)
  • One threaded 1/2 cap
  • 1" female slip fit to 3/4" threaded male adapter
  • 1-1/4" to 1" slip fit adapter
  • 1/2" female slip fit to 3/4" threaded male adapter
  • 1/2" slip-slip union
  • 1/2" male-female slip-slip elbow

[/am4show]


Where’s the pressure difference in this trick?


At the opening of the glass. The water inside the glass weighs a pound at best, and, depending on the size of the opening of the glass, the air pressure is exerting 15-30 pounds upward on the bottom of the card. Guess who wins? Tip, when you get good at this experiment, try doing it over a friend’s head!


Materials: a glass, and an index card large enough to completely cover the mouth of the glass.


[am4show have=’p8;p9;p82;p84;p93;p100;p30;p57;’ guest_error=’Guest error message’ user_error=’User error message’ ]


Fill a glass one-third with water. Cover the mouth with an index card and over a sink invert the glass while holding the card in place. Remove your hand from the card. Voila! Because atmospheric air pressure is pushing on all sides of both the glass and the card, the card defies gravity and “sticks” to the bottom of the glass. Recall that higher pressure pushes and when you have a difference in pressure, things move. This same pressure difference causes storms, winds, and the index card to stay in place.


[/am4show]


About 400 years ago, Leonardo da Vinci wanted to fly… so he studied the only flying things around at that time: birds and insects. Then he did what any normal kid would do—he drew pictures of flying machines!


Centuries later, a toy company found his drawing for an ornithopter, a machine that flew by flapping its wings (unlike an airplane, which has non-moving wings). The problem (and secret to the toy’s popularity) was that with its wing-flapping design, the ornithopter could not be steered and was unpredictable: It zoomed, dipped, rolled, and looped through the sky. Sick bags, anyone?


Hot air balloons that took people into the air first lifted off the ground in the 1780s, shortly after Leonardo da Vinci’s plans for the ornithopter took flight. While limited seating and steering were still major problems to overcome, let’s get a feeling for what our scientific forefathers experienced as we make a balloon that can soar high into the morning sky.


Materials: A lightweight plastic garbage bag, duct or masking tape, a hand-held hair dryer. And a COLD morning.


Here’s what you do:


[am4show have=’p8;p9;p82;p84;p93;p30;p57;’ guest_error=’Guest error message’ user_error=’User error message’ ]


Shake out a garbage bag to its maximum capacity. Using duct or masking tape, reduce the opening until it is almost-closed leaving only a small hole the size of the hair dryer nozzle. Use the hair dryer to inflate the bag, heating the air inside, but make sure you don’t melt the bag! When the air is at its warmest, release your hold on the bag while at the same time you switch off the hair dryer. The bag should float upwards and stay there for a while.


Troubleshooting: This experiment works best on cold, windless mornings. If it’s windy outside, try a cool room. The greater the temperature difference between the hot air inside the garbage bag versus the cold, still air, the faster the bag rises. The only other thing to watch for is that you’ve taped the mouth of the garbage bag securely so the hot air doesn’t seep out. Be sure the opening you leave is only the diameter of your hair dryer’s nozzle.


Want to go BIGGER? Then try the 60-foot solar tube!
[/am4show]


Lots of science toy companies will sell you this experiment, but why not make your own? You’ll need to find a loooooong bag, which is why we recommend a diaper genie. A diaper genie is a 25′ long plastic bag, only both ends are open so it’s more like a tube. You can get three 8-foot bags out of one pack.


Kids have a tendency to shove the bag right up to their face and blow, cutting off the air flow from the surrounding air into the bag. When they figure out this experiment and perform it correctly, this is one of those oooh-ahhh experiments that will leave your kids with eyes as big as dinner plates.


Here’s what you do:


[am4show have=’p8;p9;p82;p84;p93;p30;p57;’ guest_error=’Guest error message’ user_error=’User error message’ ]


Cut an eight-foot section of the diaper genie bag and knot one of the ends. Hold the other end open, take a deep breath, and blow. How many breaths does it take for you to fill up the entire bag with air? Try this now…


After you know how many breaths it takes, do you think you can fill the bag with only ONE breath? The answer is YES! Hold the bag about eight inches from the face and blow long and steady into the bag. As soon as you run out of air, close the end of the bag and slide your hand along the length (toward the knotted end) until you have an inflated blimp.


Troubleshooting: If the bag tears open, use packing tape to mend it.


What’s going on? When you blow air past your lips, a pocket of lower air pressure forms in front of your face. The stronger you blow, the lower the air pressure pocket. The air surrounding this lower pressure region is now at a higher pressure than the surrounding air, which causes things to shift and move. When you blow into the bag (keeping the bag a few inches from your face), you build a lower pressure area at the mouth of the bag, and the surrounding air rushes forward and into the bag.


Substitution Tip: If you can’t locate a diaper genie, you can string together plastic sheets from garbage bags, using lightweight tape to secure the seams. You’ll need to make a 8-12” diameter by eight-foot long tube and close one end. When kids get their eight-foot bag inflated in just one breath, ask them: “Did you really have that much air in your lungs?”


[/am4show]


solar-balloonWe didn't include this particular experiment in our shopping list, as the tube's kind of expensive and can only be used for one particular experiment, BUT it's an incredible blast to do in the summer.
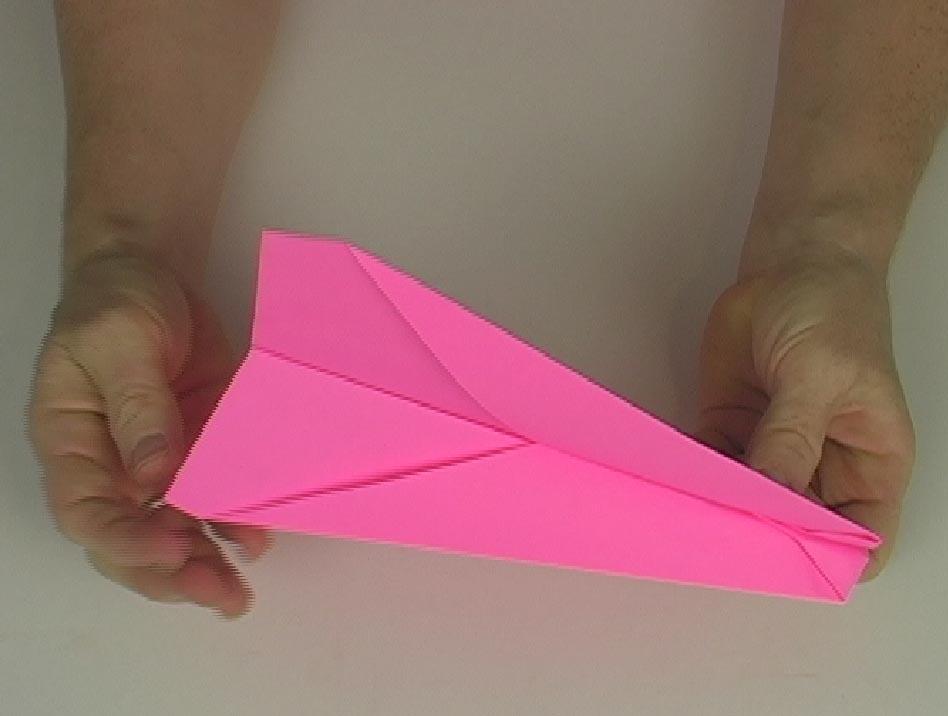
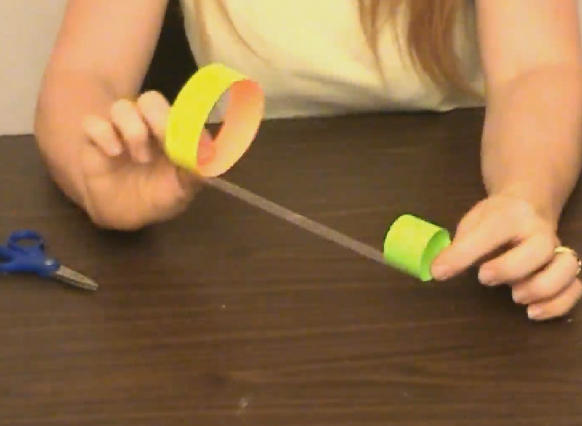
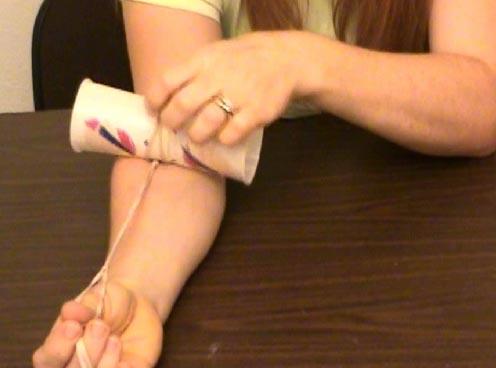
Here's the main idea - an incredibly loooooong and super-lightweight black plastic garbage bag is filled with air and allowed to heat itself in the sun. In a few short minutes, the entire 60-foot tube tube rises into the air. Before you try this experiment, try the Hot Air Balloon first!

Order the Solar Tube here.

[am4show have='p8;p9;p93;' guest_error='Guest error message' user_error='User error message' ]

Your kids will actually get to see several science principles in action, including: hot air is less dense than cool air (when the balloon rises); black objects heat up faster (when the air heats up inside); gases expand when heated (you'll see the bag self-inflate as it heats up).

Here's what you do:

1. In the morning during summer, when there's no wind and it's still cool, stretch your tube out flat in the shade. If it's already hot, fill the tube indoors with a fan. It's the temperature difference that will make this bag rise. If the temperature of the air inside the tube is nearly the same as the outside air, then it will simply remain on the ground.

2. Open one end of the tube and (with a few friends to help you), walk (or run) to fill it full of air, and tie off the end when it's full. It may still be a bit baggy in some places - don't worry - it will fill itself out when it heats up.

3. Tie off a length of lightweight string (like kite string) to one end. This will make sure you can get your tube back!

4. Bring it into the sun and watch it slowly rise of the ground.

NOTE: Kids can get a bit overexcited when they do this experiment, so watch they don't puncture the bag. You can seal it back up with a thick strip of lightweight packing tape if needed.

DO NOT let the solar tube rise without the string. If it gets loose at higher altitudes, it's a serious threat to airplanes.

[/am4show]


This is another favorite of mine - you can fold this one in under two minutes. Make sure you tweak your airplane to get it to fly just the way you want.


[am4show have='p8;p9;p93;' guest_error='Guest error message' user_error='User error message' ]


[/am4show]


Why can this thing fly? It doesn’t even LOOK like a plane! When I teach at the university, this is the plane that mathematically isn’t supposed to be able to fly! There are endless variations to this project—you can change the number of loops and the size of loops, you can tape two of these together, or you can make a whole pyramid of them. Just be sure to have fun!

Materials: Index card, straw, scissors, tape.

[am4show have='p8;p9;p93;' guest_error='Guest error message' user_error='User error message' ]

[/am4show]


This experiment is one of my favorites to use when teaching university-level fluid mechanics, because it is quite a complex task to demonstrate and analyze the aerodynamic lift. The easiest explanation is that lift is generated by the rotation of the cups. How and why the vortex generates lift is much more complex, but remember that as the air velocity increases, the pressure decreases. And remember... higher pressure regions always push.

[am4show have='p8;p9;p93;' guest_error='Guest error message' user_error='User error message' ]
Materials: Two paper cups, 5 to 7 rubber bands, and tape.

Here's what you do:
1. Tape two paper cups together, bottom-to-bottom.
2. Chain together six rubber bands.
3. Loop one end of the rubber band chain over your thumb and hold your arm out horizontally straight, palm up. Drape the remainder of the chain along your arm.
4. Place the taped cups at the free end of the rubber band chain near your shoulder and slowly wind the rubber bands around the middle section of the cups. When you wind near the end, stop, stretch the chain back toward your elbow, make sure the rubber band comes from the underside of the cups.
5. Now release the cups. The cups should rotate quickly and take air, then gracefully descend down for a light landing.

You can try further experiments with your butterfly cups: Try reversing the rotation direction, spin the cups in a cloud of fog or smoke while your video-tape their flight, performing the same experiment underwater (add small particles to the water so you can see the lines of flow!), change the size of the cups, and change the number of cups.

[/am4show]


Build your own paper version of a soaring, looping flying machine, much like the one DaVinci dreamed of. You can either hold this by the keep (the folded part on the bottom) and throw like a jet, or hold onto the very edge at the back and simply let go from a tall height. Either way, it'll still fly.

[am4show have='p8;p9;p93;' guest_error='Guest error message' user_error='User error message' ]

Trouble flying? Click here to learn how to tweak your wings.

Want to know more about airplane design? Check out Why Airplanes Need Wings.
[/am4show]


This is one of the fastest plane designs we've come across. Slick, swift, and strong, you'll need a hefty throw to break our record of 127 feet. If you do, let us know so we can celebrate with you!

[am4show have='p8;p9;p93;' guest_error='Guest error message' user_error='User error message' ]

Trouble flying? Click here to learn how to tweak your wings.

Want to know more about airplane design? Check out Why Airplanes Need Wings.
[/am4show]


This super-fast dart flyer requires only a sheet of paper and three patient minutes. Take the challenge and dig out a stopwatch and tape measure to record your best "time aloft" and "distance traveled". I usually write mine right onto the wing itself (on the underside).

In fact, each time it flies well, I'll take a measurement and so pretty soon my plane has a data table under the wing. This way, I know which plane to choose in a race!

[am4show have='p8;p9;p93;' guest_error='Guest error message' user_error='User error message' ]


[/am4show]

A classic that we just had to toss into the mix. The best thing about this plane it that it shows you how to fold an airplane without using tape. Notice how the wings of this airplane are different than the stunt plane designs - the swept back design mimics those used on fighter planes from the Air Force.

[am4show have='p8;p9;p93;' guest_error='Guest error message' user_error='User error message' ]

Trouble flying? Click here to learn how to tweak your wings.

Want to know more about airplane design? Check out Why Airplanes Need Wings.
[/am4show]


iStock_000003125985XSmallWe’ve included several flying designs for you to test, including: stunt planes, fast jets, hang gliders, and a one that, mathematically-speaking, isn’t even supposed to fly.
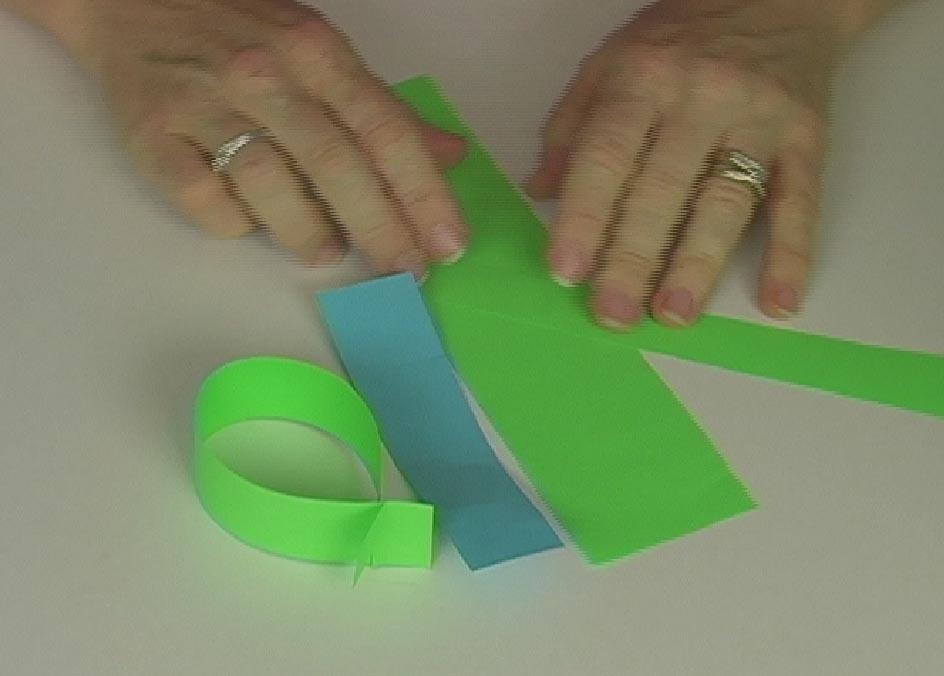
The trick to any paper airplane, be it a dart, stunt, or glider, is in the tweaking. In order to turn a disappointing nose-diver into a stellar barrel-roller, you’ll need to pay close attention to your dihedral angle (angle the wings make with the horizon) and elevator angle (pinching up or down to the tail section).

Here’s how we do it:

[am4show have='p8;p9;p93;' guest_error='Guest error message' user_error='User error message' ]

• Throw your airplane. Notice if you threw it hard, medium, or easy. Try modifying the throw to see which one works better for this particular airplane design. Stunt planes tend to work better with an easy throw and jets zoom with a fast throw.

• Now make the wing dihedral neutral (level with the horizon). Pinch up on the elevators a tiny bit and give it another like the throw that worked best last time.

• If the plane nose dives sharply, give it more of a pinch up on the elevators. If it nosed up first, then pitched down and crashed, you’ve got too much ‘up elevator’ in the back. What happens when you pinch one elevator up and one down?

• If the airplane still won’t fly correctly, then check your symmetry. Are your wings exactly the same size and shape? When you fold your airplane, do the wings sit right on top of each other? Most airplanes don’t like being asymmetrical, and it’ll show up when you try to fly.

[/am4show]


Did you know that the Wright brothers figured out one of the biggest leaps in propeller technology?  Prop blades had basically stayed the same for about 2,500 years until they figured out to take an airplane wing, turn it sideways and rotate it to create thrust.  The main idea being a wing is that it needs to have a half-twist and the thickness needs to vary along its length (this is because you want to get the same amount of thrust at each point along its length, or one part of the propeller will generate more thrust and rip itself apart).

[am4show have='p8;p9;p93;' guest_error='Guest error message' user_error='User error message' ]
This project is pretty bullet-proof—to fly the helicopters, all you need to do is drop them!

[/am4show]


We're going to make spinning, flying fish! All you need is a strip of paper and a pair of scissors to make these. If you 're like me, you'll make a whole grocery-bag full of a rainbow assortment and drop them from the upstairs railing - it's quite a show!

[am4show have='p8;p9;p93;' guest_error='Guest error message' user_error='User error message' ]


Want more floating, flying, spinning contraptions? Click here for our roto-copters!
[/am4show]

This is such a cool project that I had to include it in our Flying Machines archive. The science teacher who developed this project has a sincere love of gliders he calls "walk-along flyers". Note that the instructions for making this project are longer and more precise than usual, so take your time and go slow.

If your kids love airplanes, you'll be able to keep them busy for hours with this project! You will be flying a piece of paper, surfing it on a wave of air created with cardboard. Are you ready?  There are two different designs to choose from: the Tumblewing, which works by rotation, and the Hanglider.

Here's what you need:

  • piece of paper from a phone book
  • scrap of cardboard
  • scissors
  • help from a very patient adult
  • an afternoon (this project is super-sensitive and you need time and persistence to accomplish it!)

Tumblewing Design

You'll need to print out this Tumblewing template to get started.

Hanglider Design:

You'll need to print out this Hanglider template to get started.


A big THANKS goes out to projects developer and science teacher Slater Harrison for his ultra-cool flying inventions!


The best, all purpose, lazy afternoon loop-and-corkscrew stunt flying machine that we've found. This plane can easily go straight, or curve in a loop, or do a barrel roll, or boomerang back to you...and it can even do the bat maneuver (nose-up-nose-down-nose-up-nose-down-nose-up-nose-down...) with the right kind of tweaking. Spend extra time on those back elevators and you'll get a plane worthy of warm drafts.
[am4show have='p8;p9;p93;' guest_error='Guest error message' user_error='User error message' ]


Trouble flying? Click here to learn how to tweak your wings.

Want to know more about airplane design? Check out Why Airplanes Need Wings.

[/am4show]


While this isn’t actually an air-pressure experiment but more of an activity in density, really, it’s still a great visual demonstration of why Hot Air Balloons rise on cold mornings.


Imagine a glass of hot water and a glass of cold water sitting on a table, side by side. Now imagine you have a way to count the number of water molecules in each glass. Which glass has more water molecules?


The glass of cold water has way more molecules… but why? The cold water is more dense than the hot water. Warmer stuff tends to rise because it’s less dense than colder stuff and that’s why the hot air balloon in experiment 1.10 floated up to the sky.


Clouds form as warm air carrying moisture rises within cooler air. As the warm, wet air rises, it cools and begins to condense, releasing energy that keeps the air warmer than its surroundings. Therefore, it continues to rise. Sometimes, in places like Florida, this process continues long enough for thunderclouds to form. Let’s do an experiment to better visualize this idea.


[am4show have=’p8;p9;p82;p84;p93;p30;p57;’ guest_error=’Guest error message’ user_error=’User error message’ ]


Materials: Two identical tall glasses, hot water, cold water, red and blue food dye, and an index card larger enough to cover the opening of the glasses


Fill two identical water glasses to the brim: one with hot water, the other with cold water. Put a few drops of blue dye in the cold water, a few drops of red dye in the hot water. Place the index card over the mouth of the cold water and invert the glass over the glass of hot water. Line up the openings of both glasses, and slowly remove the card.


Troubleshooting: Always invert the cold glass over the hot glass using an index card to hold the cold water in until you’ve aligned both glasses. You can also substitute soda bottles for water glasses and slide a washer between the two bottles to decrease the flow rate between the bottles so the effect lasts longer.


[/am4show]


When air moves, the air pressure decreases. This creates a lower air pressure pocket right between the cans relative to the surrounding air. Because higher pressure pushes, the cans clink together. Just remember – whenever there’s a difference in pressure, the higher pressure pushes.


You will need about 25 straws and two empty soda cans or other lightweight containers


[am4show have=’p8;p9;p82;p84;p93;p30;p57;’ guest_error=’Guest error message’ user_error=’User error message’ ]


Lay a row of straws parallel to each other on a smooth tabletop. Place two empty soda cans on the straws about an inch apart. Lower your nose to the cans and blow hard through the space between the two cans.


Clink! They should roll toward each other and touch!


[/am4show]


Rotor kites (often called UFO kites) are one of those unusual kites that require more complex aerodynamics in order to fly. This particular kite flies only when rotating. Make sure you have lots of wind for this kite by either visiting the beach or tying it to your bicycle.

This kite is very picky about wind speed. Make sure the string doesn’t rub on the plates during flight. You can use hollow gardening stakes, empty ballpoint pen tubes taped together into a long straw, or composite tubes instead of the straws described here. Fishing line or nylon string works for kite line as well.

Materials: Two straws, a long length of string (20 feet or more), duct tape, two foam plates (at least 4 inches in diameter, one 6x4-inch clean foam meat tray, hot glue gun, and scissors.

Here's what you do:

[am4show have='p8;p9;p94;' guest_error='Guest error message' user_error='User error message' ]

Cut the curved sides off the short ends and cut the tray lengthwise to make two vanes. Measure the length of your vanes and add three inches to the measurement—this is the straw length you need. Tip: You can tape together several smaller straws to make one long straw.

Important: Puzzle-fit your meat tray back into its original shape. Note that there’s a lip that runs all the way around the tray. Take ONE vane and flip it over, still keeping the cut sides together. Now your rotor should have one lip facing up, the other facing down. Slide your extended straw between the cut sides of the vane and hot glue it into place.

Tip: Use duct tape to hold it together securely.

Poke a hole in the center of two foam plates. Slide one foam plate onto the straw and hot glue it in place next to the vane. Do the same for both sides.

Thread a line through the straw and tie it back onto itself, leaving enough room for the rotor to spin freely in the wind. Attach the main kite line and go find a place with lot of wind, like at the beach! Running around isn’t enough to get this kite in the air!

Tip: To see this kite working in a close-up range, get an indoor fan and set it on high speed while you hold your kite string close to the knot in the bridle. Hold your kite in the airstream until it rotates freely. Depending on where you live, you can drive your car on a country road or ride your bike to generate more wind speed than just running.

[/am4show]


You’re about to play with one of the first methods of underwater breathing developed for scuba divers hundreds of years ago.! Back then, scientists would invert a very large clear, bell-shaped jar over a diver standing on a platform, then lower the whole thing into the water. Everyone thought this was a great idea, until the diver ran out of breathable air…


Materials: 12″ flexible tubing, two clear plastic cups, bathtub


[am4show have=’p8;p9;p93;p30;p57;p84;’ guest_error=’Guest error message’ user_error=’User error message’ ]


Part I: Fill the tub and climb in. Plunge one cup underwater so it fills completely with water. While the cup is underwater, point its mouth downward. Insert one end of the tubing into the cup and blow hard into the other end. The water is forced out of the cup!


Part II: While still in the tub, invert one cup (mouth downwards) and plunge it into the tub so that air gets trapped inside the cup. Place the second cup in the water so it fills with water. Invert the water-filled cup while underwater and position it above the first cup so when you tilt the first cup to release the air bubbles, they get trapped inside the second cup. Here you see that air takes space, because in both variations of this experiment the air forced the water out of the cups.


[/am4show]


Here are a few ideas for making a mini-stomp rocket called a PUFF ROCKET that uses something other than your lungs to get your rocket launched. When you do this experiment, think about which kind of bottles will work the best. And does straw length matter? In our testing, we had one rocket that cleared 25 feet!
  • clean lotion bottle or shampoo bottle
  • larger straw that fits onto a smaller straw
  • small piece of foam that fits snugly into the straws
  • hot glue gun
Here's what you do: [am4show have='p8;p9;p10;p37;p95;' guest_error='Guest error message' user_error='User error message' ]

1. Grab a clean, empty shampoo or lotion bottle. Make sure the bottle you choose gives you a good puff of air out the top cap when you squeeze it. You’ll also need two straws, one slightly smaller than the other. And a small piece of foam. 2. Insert the smaller straw into the hole in the cap. If you have trouble, ream out the hole or just take off the cap and seal the connection with a lump of clay or a lot of hot glue. Insert a small bit of foam into one end of the larger straw. Slide the larger straw (your rocket) onto the smaller straw (your launcher). 3. Squeeze the bottle hard! POOF! [/am4show]

Rockets shoot skyward with massive amounts of thrust, produced by chemical reaction or air pressure. Scientists create the thrust force by shoving a lot of gas (either air itself, or the gas left over from the combustion of a propellant) out small exit holes out the back of the nozzles.

Here are two videos of real rockets being tested. The second video uses a special type of photography to see the shock waves (you will learn more about how that's done in Unit 9).

For every action, there is equal and opposite reaction. If flames shoot out of the rocket downwards, the rocket itself will soar upwards. It’s the same thing if you blow up a balloon and let it go—the air inside the balloon goes to the left, and the balloon zips off to the right. They both follow Newton's Third Law: for every action, there is an equal and opposite reaction.

What you're looking at in the video below is exactly the kind of work I did as a graduate student in college when I was 21. The end of a rocket nozzle is on the right side, and you're looking at supersonic air (made visible by a special type of photography called 'Schlieren') as a rushes past from right to left. The thick white lines are shock waves, which are lines where the pressure drop is huge. When the flow is fast enough (around Mach 2 and up), you'll see nicely shaped 'Mach Diamonds' form.

Scientists use these images to tell how well the engines will perform at high-speed flight. One of the greatest aeronautical engineers, Kelly Johnson, who founded Skunkworks at Lockheed, said the greatest compliment he ever received was when a friend commented: "It's amazing... he can actually see airflow." This is what Johnson could visualize in his mind simply because he understood the fundamentals of aerodynamics:


An average can of soda at room temperature measures 55 psi before you ever crack it open. (In comparison, most car tires run on 35 psi, so that gives you an idea how much pressure there is inside the can!)


If you heat a can of soda, you’ll run the pressure over 80 psi before the can ruptures, soaking the interior of your house with its sugary contents. Still, you will have learned something worthwhile: adding energy (heat) to a system (can of soda) causes a pressure increase. It also causes a volume increase (kaboom!).
How about trying a safer variation of this experiment using water, an open can, and implosion instead of explosion?


Materials – An empty soda can, water, a pan, a bowl, tongs, and a grown-up assistant.


NOTE: If you can get a hold of one, use a beer can – they tend to work better for this experiment. But you can also do this with a regular old soda can. And no, I am not suggesting that kids should be drinking alcohol! Go ask a parent to find you one – and check the recycling bin.


[am4show have=’p8;p9;p93;p30;p57;p84;’ guest_error=’Guest error message’ user_error=’User error message’ ]


Prepare an ice bath by putting about ½” of ice water in a shallow dish. With an adult, place a few tablespoons of water in an empty soda or beer can and place the can upright in a skillet on the stove. When the can emits a think trickle of steam, grab the can with tongs and quickly invert it into the ice dish. CRACK!


Troubleshooting: The trick to making this work is that the can needs to be full of hot steam, which is why you only want to use a tablespoon or two of water in the bottom of the can. It’s alright if a bit of water is still at the bottom of the can when you flip it into the ice bath. In fact, there should be some water remaining or you’ll superheat the steam and eventually melt the can. You want enough water in the ice bath to completely submerge the top of the can.


Always use tongs when handling the heated can and make sure you completely submerge the top of the can in the icy water. The water needs to seal the hole in the top of the can so the steam doesn’t escape. Be prepared for a good, loud CRACK! when you get it right.


Why does this work? By heating up the water in the can, you’re changing the state of water from a liquid to a has (called water vapor), which drives out the air, leaving the steam inside. When inverted and cooled, the steam condenses to a small volume of liquid water (much smaller than if it was just hot air). The molecules in water vapor are a lot further apart than when they are in a liquid state. Since the air inside the can has been replaced by the steam, when it cools quickly, it creates a lower air pressure region in the can, so the air pressure surrounding the outside of the can rapidly crushes the can.


If you look really carefully as it condenses, you’ll see cold water from the bowl zoom into the can, just like when you suck water through a straw. The vacuum created int he can by the condensing steam creates a lower pressure, which pushes water into the can itself. When you suck from a straw, you’re creating a lower air pressure region in your mouth so that the surrounding air pressure pushes liquid up the straw to equalize the pressure.


Remember, high pressure always pushes!


[/am4show]


This project is simple, yet highly satisfying.  The current record distance traveled is 74 feet... can you beat that?  Make sure you launch these UP, not horizontally! You only need three items, all of which are in your house right now! First, you need a piece of...

[am4show have='p8;p9;p10;p37;p109;p93;p95;' guest_error='Guest error message' user_error='User error message' ]

...paper, a skinny rubber band, and a pair of scissors.


[/am4show]


When designing airplanes, engineers pay attention to details, such as the position of two important points: the center of gravity and the center of pressure (also called the center of lift). On an airplane, if the center of gravity and center of pressure points are reversed, the aircraft’s flight is unstable and it will somersault into chaos. The same is true for rockets and missiles!

Let’s find the center of gravity on your airplane. Grab your flying machine and sharpened pencil. You can find the ‘center of gravity’ by balancing your airplane on the tip of a pencil. Label this point “CG” for Center of Gravity.

Materials:

  • sheet of paper

  • hair dryer

  • pencil with a sharp tip


We're going to make a paper airplane first, and then do a couple of wind tunnel tests on it.

For the project, all you need is a sheet of paper and five minutes... this is one my favorite fliers that we make with our students!


Find the Center of Pressure (CP) by doing the opposite: Using a blow-dryer set to low-heat so you don’t scorch your airplane, blast a jet of air up toward the ceiling. Put your airplane in the air jet and, using a pencil tip on the top side of your plane, find the point at which the airplane balances while in the airstream. Label this point “CP” for Center of Pressure. (Which one is closest to the nose?)


Besides paying attention to the CG and CP points, aeronautical engineers need to figure out the static and dynamic stability of an airplane, which is a complicated way of determining whether it will fly straight or oscillate out of control during flight. Think of a real airplane and pretend you’ve got one balanced on your finger. Where does it balance? Airplanes typically balance around the wings (the CG point). Ever wonder why the engines are at the front of small airplanes? The engine is the heaviest part of the plane, and engineers use this weight for balance, because the tail (elevator) is actually an upside-down wing that pushes the tail section down during flight.

How does an airplane remain stable during flight? Positive stability means that the airplane is designed so that if the pilot jams on the controls during straight and level flight (in other words, pitch up hard), and then let go, the airplane will more or less return to straight and level flight.

Let's make another favorite flyer of mine...
[am4show have='p8;p9;p93;' guest_error='Guest error message' user_error='User error message' ]


Here’s how stability works: When the airplane’s nose suddenly pitches up, the wind speed over the wings slows and decreases the lift on the plane. This causes the nose to tip downwards and the wind to rush over the wings again, creating more lift. This cycle eventually dampens out and soon the airplane is flying level again.

If, however, you have a negative stability (meaning that your CG is aft of or behind the CP), when the airplane suddenly pitches up, one of several things may happen, all of which require sick bags and a parachute. One of the worst cycles is this: When a tail-heavy plane noses down, the speed over the wings increases and provides more lift but only briefly, because a tail-heavy plane will keep its nose up until the wind speed slows so much that the winds stall. Lift is no longer generated by wind flowing over the wings, because there is no wind, and the airplane “falls” a distance until the air flows back over the wings. This generates a lot of lift very quickly until the tail section tilts the nose back up. The cycle continues to worsen each time with greater “fall” distances” that place huge structural forces on the fuselage or body of the plane until you jump ship.

Can you find both the center of pressure AND the center of gravity? Does it matter which one is closer to the nose for stable flight? (Hint... yes, it does!) Here are directions for how to make an easy wind tunnel to test your airplanes.

[/am4show]

Mathematically speaking, this particular flying object shouldn't be able to fly.  What do you think about that?

Why can this thing fly? It doesn’t even LOOK like a plane! When I teach at the university, this is the plane that mathematically isn’t supposed to be able to fly! There are endless variations to this project—you can change the number of loops and the size of loops, you can tape two of these together, or you can make a whole pyramid of them. Just be sure to have fun!

Find the Center of Pressure (CP) by doing the opposite: Using a blow-dryer set to low-heat so you don’t scorch your airplane, blast a jet of air up toward the ceiling. Put your airplane in the air jet and, using a pencil tip on the top side of your plane, find the point at which the airplane balances while in the airstream. Label this point “CP” for Center of Pressure. (Which one is closest to the nose?)

Besides paying attention to the CG and CP points, aeronautical engineers need to figure out the static and dynamic stability of an airplane, which is a complicated way of determining whether it will fly straight or oscillate out of control during flight. Think of a real airplane and pretend you’ve got one balanced on your finger. Where does it balance? Airplanes typically balance around the wings (the CG point). Ever wonder why the engines are at the front of small airplanes? The engine is the heaviest part of the plane, and engineers use this weight for balance, because the tail (elevator) is actually an upside-down wing that pushes the tail section down during flight.

When we use math to add up the forces (the pull of gravity would be the weight, for example), it works out that there isn’t enough lift generated by thrust to overcome the weight and drag. When I say, “mathematically speaking...” I mean that the numbers don’t work out quite right. When this happens in science for real scientists, it usually means that they don’t fully understand something yet. There are a number of ‘unsolved’ mysteries still in science.. maybe you’ll be able to help us figure them out?

[am4show have='p8;p9;p93;' guest_error='Guest error message' user_error='User error message' ]
[/am4show]


Rockets shoot skyward with massive amounts of thrust, produced by chemical reaction or air pressure. Scientists create the thrust force by shoving a lot of gas (either air itself, or the gas left over from the combustion of a propellant) out small exit nozzles.

According to the universal laws of motion, for every action, there is equal and opposite reaction. If flames shoot out of the rocket downwards, the rocket itself will soar upwards. It’s the same thing if you blow up a balloon and let it go—the air inside the balloon goes to the left, and the balloon zips off to the right (at least, initially, until the balloon neck turns into a thrust-vectored nozzle, but don’t be concerned about that just now).

A rocket has a few parts different from an airplane. One of the main differences is the absence of wings. Rockets utilize fins, which help steer the rocket, while airplanes use wings to generate lift. Rocket fins are more like the rudder of an airplane than the wings.

Another difference is the how rockets get their speed. Airplanes generate thrust from a rotating blade, whereas rockets get their movement by squeezing down a high-energy gaseous flow and squeezing it out a tiny exit hole.

If you’ve ever used a garden hose, you already know how to make the water stream out faster by placing your thumb over the end of the hose. You’re decreasing the amount of area the water has to exit the hose, but there’s still the same amount of water flowing out, so the water compensates by increasing its velocity. This is the secret to converging rocket nozzles—squeeze the flow down and out a small exit hole to increase velocity.

There comes a point, however, when you can’t get any more speed out of the gas, no matter how much you squeeze it down. This is called “choking” the flow. When you get to this point, the gas is traveling at the speed of sound (around 700 mph, or Mach 1). Scientists found that if they gradually un-squeeze the flow in this choked state, the flow speed actually continues to increase. This is how we get rockets to move at supersonic speeds or above Mach 1.

f18The image shown here is a real picture of an aircraft as it breaks the sound barrier. This aircraft is passing the speed at which sounds travel. The white cloud you see in the photo is related to the shock waves that are forming around the craft as it moves into supersonic speeds. Because the aircraft is moving through air, which is a gas, the gas can compress and results in a shock wave.
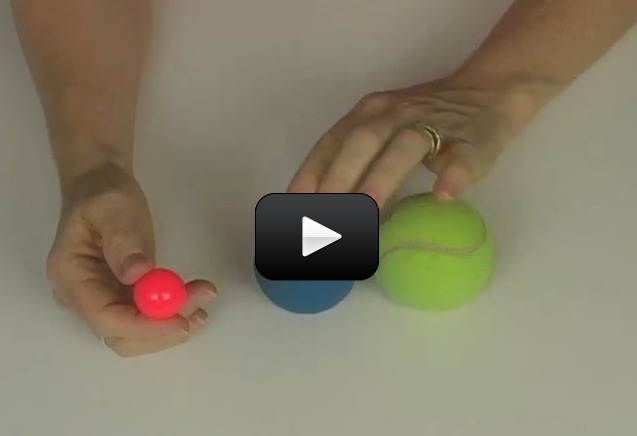
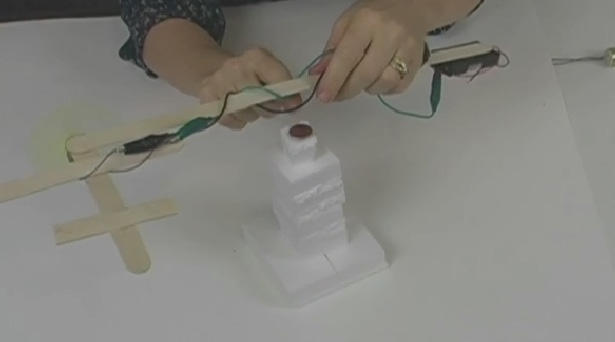
You can think of a shock wave as big pressure front. In this photo, the pressure is condensing water vapor in the air, hence the cloud. There are lots of things on earth that break the sound barrier – bullets and bullwhips, for example. The loud crack from a whip is the tip zipping faster than the speed of sound.

The rockets we're about to build get their thrust by generating enough pressure and releasing that pressure very quickly. You will generate pressure both by pumping and by chemical reaction, which generates gaseous products. Let's get started!

For this experiment, you will need:

[am4show have='p8;p9;p10;p37;p109;p95;' guest_error='Guest error message' user_error='User error message' ]

  • film canister or other plastic container with a tight-fitting lid (like a mini-M&M container)
  • alka-seltzer or generic effervescent tablets
  • water
  • outside area for launching

The record for these rockets is 28' high. What do you think about that? Note - you can use anything that uses a chemical reaction... what about baking soda and vinegar? Baking powder? Lemon juice?


Important question: Does more water, tablets, or air space give you a higher flight?

Variations: Add foam fins and a foam nose (try a hobby or craft shop), hot glued into place. Foam doesn’t mind getting wet, but paper does. Put the fins on at an angle and watch the seltzer rocket spin as it flies skyward. You can also tip the rocket on its side and add wheels for a rocket car, stack rockets, for a multi-staging project, or strap three rockets together with tape and launch them at the same time! You can also try different containers using corks instead of lids.


More Variations: What other chemicals do you have around that also produces a gas during the chemical reaction? Chalk and vinegar, baking soda, baking powder, hydrogen peroxide, isopropyl alcohol, lemon juice, orange juice, and so on.

[/am4show]

[am4show have='p9;p39;' guest_error='Guest error message' user_error='User error message' ]

Advanced students: Download your Pop Rockets Lab here.

[/am4show]


A rocket has a few parts different from an airplane. One of the main differences is the absence of wings. Rockets utilize fins, which help steer the rocket, while airplanes use wings to generate lift. Rocket fins are more like the rudder of an airplane than the wings. A fighter plane is like a cross between a rocket and an airplane, because of the high amount of thrust generated by the engines.

A pulse jet engine is something students make in college engineering courses under the direction of experienced professors. When I was a student, we made a small Pulse Jet Engine out of clear acrylic that burned bright and loud enough to wear eye and hearing protection.

These types of engines are very simple, as they have no moving parts. They've been used on scram jet engines and other types of supersonic craft.  A pulsejet engine works by alternately pushing out a hot breath of air rearward and then breathing in fresh air to replace it.  They can run on gasoline, diesel, or kerosene. 

The video below is for DEMONSTRATION PURPOSES ONLY. Please read text below the video.

Note: Please don't try to make one of these pulse jets! There are videos that will show you how, and not one of them I've found is safe to do without a supervising instructor... in fact, they are highly dangerous because of the types of containers and fuels people have chosen to try. The container must be able to withstand high thermal differentials and pressure changes, and the propellant chosen must not burn too hot or you'll explode the container.


We’re going to experiment with Newton’s Third law by blowing up balloons and letting them rocket, race, and zoom all over the place. When you first blow up a balloon, you’re pressurizing the inside of the balloon by adding more air (from your lungs) into the balloon. Because the balloon is made of stretchy rubber (like a rubber band), the balloon wants to snap back into the smallest shape possible as soon as it gets the chance (which usually happens when the air escapes through the nozzle area). And you know what happens next – the air inside the balloon flows in one direction while the balloon zips off in the other.


Question: why does the balloon race all over the room? The answer is because of something called ‘thrust vectoring’, which means you can change the course of the balloon by angling the nozzle around. Think of the kick you’d feel if you tried to angle around a fire hose operating at full blast. That kick is what propels balloons and fighter aircraft into their aerobatic tricks.


We’re going to perform several experiments here, each time watching what’s happening so you get the feel for the Third Law. You will need to find:


  • balloons
  • string
  • wood skewer
  • two straws
  • four caps (like the tops of milk jugs, film canisters, or anything else round and plastic about the size of a quarter)
  • wooden clothespin
  • a piece of stiff cardboard (or four popsicle sticks)
  • hot glue gun

First, let’s experiment with the balloon. Here’s what you can do:


[am4show have=’p8;p9;p12;p39;p109;p72;p92;p95;’ guest_error=’Guest error message’ user_error=’User error message’ ]
1. Blow up the balloon (don’t tie it)


2. Let it go.


3. Wheeeee!


4. Tie one end of the string to a chair.


5. Blow up the balloon (don’t tie it).


6. Tape a straw to it so that one end of the straw is at the front of the balloon and the other is at the nozzle of the balloon.


7. Thread the string through the straw and pull the string tight across your room.


8. Let go. With a little bit of work (unless you got it the first time) you should be able to get the balloon to shoot about ten feet along the string.


This is a great demonstration of Newton’s Third Law – the air inside the balloon shoots one direction, and the balloon rockets in the opposite direction. It’s also a good opportunity to bring up some science history. Many folks used to believe that it would be impossible for something to go to the moon because once something got into space there would be no air for the rocket engine to push against and so the rocket could not “push” itself forward.


In other words, those folks would have said that a balloon shoots along the string because the air coming out of the balloon pushes against the air in the room. The balloon gets pushed forward. You now know that that’s silly! What makes the balloon move forward is the mere action of the air moving backward. Every action has an equal and opposite reaction.


Multi-Stage Balloon Rocket

You can create a multi-stage balloon rocket by adding a second balloon to the first just like you see here in the video:


Tie a length of string through the room, having at least twenty feet of clear length.  Thread two straws onto the string before securing the end.  Punch the bottoms out of two foam coffee cups and tape parallel to the threaded straws.


Blow up balloons while they are inside the cups, so they extend out either end.  When blowing up the second balloon, sandwich the untied end of the first inflated balloon between the second inflated balloon surface and inside the cup.  Hold the second balloon’s end with a clothespin and release!


Balloon Racecar

Now let’s use this information to create a balloon-powered racecar. You’ll need the rest of the items outlined above to build your racecar. NOTE: in the video, we’re using the popsicle sticks, but you can easily substitute in a sheet of stiff cardboard for the popsicle sticks. (Either one works great!)


Download Student Worksheet & Exercises


You now have a great grasp of Newton’s three laws and with it you understand a good deal about the way matter moves about on Earth and in space. Take a look around. Everything that moves or is moved follows Newton’s Laws.


In the next unit, we will get into Newton’s Third Law a little deeper when we discuss momentum and conservation of momentum by whacking things together *HARD*. But more on this later…


Exercises


  1. What is Newton’s Third Law of Motion?
  2. Why does the balloon stop along the string?

[/am4show]


[am4show have=’p9;p39;’ guest_error=’Guest error message’ user_error=’User error message’ ]


Advanced students: Download your Balloon Racer Lab here.


[/am4show]


This is a satisfyingly simple activity with surprising results. Take a tennis ball and place it on top of a basketball… then release both at the same time.


Instant ball launcher!


You’ll find the top ball rockets off skyward while the lower ball hit the floor flat (without bouncing much, if at all). Now why is that? It’s easier to explain than you think…


Remember momentum? Momentum can be defined as inertia in motion. Something must be moving to have momentum. Momentum is how hard it is to get something to stop or to change directions. A moving train has a whole lot of momentum. A moving ping pong ball does not. You can easily stop a ping pong ball, even at high speeds. It is difficult, however, to stop a train even at low speeds.


Mathematically, momentum is mass times velocity, or Momentum=mv.


One of the basic laws of the universe is the conservation of momentum.  When objects smack into each other, the momentum that both objects have after the collision, is equal to the amount of momentum the objects had before the crash. Once the two balls hit the ground, all the larger ball’s momentum transferred to the smaller ball (plus the smaller ball had its own momentum, too!) and thus the smaller ball goes zooming to the sky.


Materials:


  • two balls, one significantly larger than the other

[am4show have=’p8;p9;p12;p39;p72;p92;p95;’ guest_error=’Guest error message’ user_error=’User error message’ ]


Download Student Worksheet & Exercises


Do you see how using a massive object as the lower ball works to your advantage here?  What if you shrink the smaller ball even more, to say bouncy-ball size?  Momentum is mass times by velocity, and since you aren’t going to change the velocity much (unless you try this from the roof, which has its own issues), it’s the mass that you can really play around with to get the biggest change in your results. So for momentum to be conserved, after impact, the top ball had to have a much greater velocity to compensate for the lower ball ‘s velocity going to zero.


You can also try a small bouncy ball (about the size of a quarter) and a larger bouncy ball (tennis-ball size) and rest the small one on top of the large one. Hold upright as high as you can, then release. If the balls stay put (the small one stays on top of the larger) at impact, the energy transfer will create a SUPER high bounce for the small ball. (Note how high the larger ball bounces when dropped.)


What happens if you try THREE?


Read more about impulse here.


Exercises 


  1. What is the mathematical formula for momentum?
  2.  Explain momentum in words.
  3.  What happens to the momentum of the bottom ball in this experiment?

[/am4show]


After you've made the paper flying machines, it's time to step it up and make an electric plane that really flies around in a circle. You can suspend this from a string tied to the ceiling or pop it into the eraser top on a wooden pencil. Either way, it's guaranteed to make you and your cat quite dizzy.

[am4show have='p8;p9;p93;' guest_error='Guest error message' user_error='User error message' ]
Materials:

  • 1 wood pencil with eraser

  • AA battery pack

  • 3VDC motor

  • 5 popsicle sticks

  • 2 alligator clip leads

  • AA batteries for your battery case (Cheap dollar-store “heavy duty” type are perfect. Do NOT use alkaline batteries like Duracell or Energizer!)

  • 1 propeller (rip this off an old toy or hand-held fan or balsa wood airplane)

  • 1 tack


Here's what you do:


This is an excellent demonstration of Newton's Third Law: the propeller generates thrust in one direction, sending the airplane in the other. Since the airplane is attached to the long shaft, it's flight is restricted to a tight circle. It's important to be sure to balance the rod on your fingertip before attaching the tack, or it may not be able to correct this imbalance during flight. Give it a try!

[/am4show]