Here we’re going to discuss the differences between three types of worms; flatworms, roundworms, and segmented worms. The word “worm” is not, in fact, a scientific name. It’s an informal way of classifying animals with long bodies and no appendages (no including snakes). They are bilaterally symmetrical (the right and left sides mirror each other). Worms live in salt and fresh water, on land, and inside other organisms as parasites.


The differences between the three types of worms we will discuss depend on the possession of a body cavity and segments. Flatworms have neither a body cavity nor segments. Roundworms only have a body cavity, and segmented worms have both a body cavity and segments.


Flatworms (Phylum Platyhelminthes) have incomplete digestive systems. That means that their digestive system has only one opening. The gas exchange occurs on the surface of their bodies. There are no blood vessels or nervous systems in flatworms. Some are non-parasitic, like the Sea flat worm, and some are parasitic, like the tapeworm.


[am4show have=’p8;p9;p28;p55;p78;p86;p87;’ guest_error=’Guest error message’ user_error=’User error message’ ]


Roundworms (Phylum Nematoda) have body cavities—as contrasted with flatworms which do not. The body cavity allows roundworms to have complete digestive tracts (both a mouth and an anus). The mouth and anus are connected by a gut—where the food is digested. They also have a simple nervous system and brain.
Roundworms can be parasites of plants and animals. In dogs they are often know to cause heart problems. In humans roundworm parasites can sometimes cause a swelling disease called elephantitis.


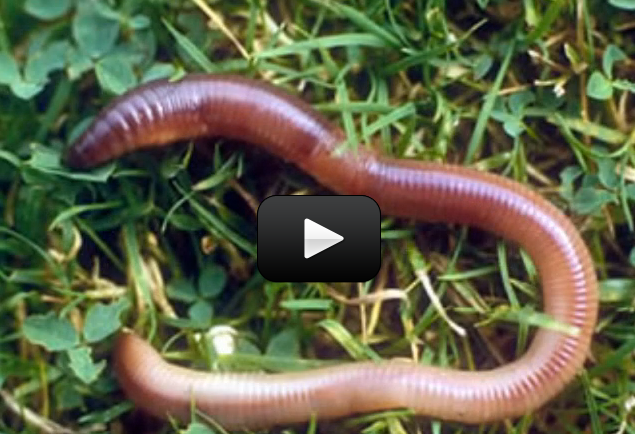
Annelids or Segmented Worms (Phylum Annalida) the most developed of the three, have both a body cavity and segments. Their body cavity helps give them structure—it serves as a hydroskeleton. By “segmented” it’s meant that they are divided into repeating units. They can be non-parasitic (i.e. earthworms) or parasitic (i.e. leeches). Interestingly, the giant red leech only eats giant earthworms.


Worm Column

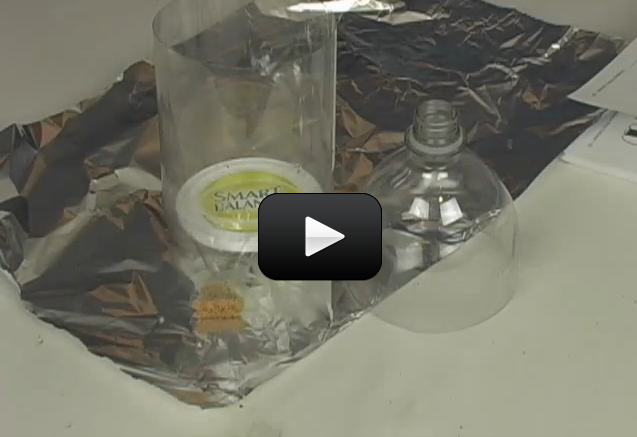
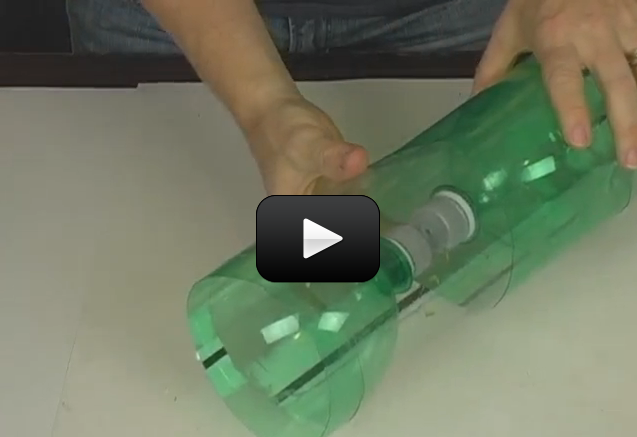
If you’re fascinated by worms but frustrated that you can’t see them do their work underground, then this worm column is just the ticket for you. By using scrap materials from the recycling bin, you’ll be able to create a transparent worm farm. here’s what you need:


  • two 2-liter soda bottles, empty and clean
  • one brown paper grocery bag
  • 20 red worms
  • newspaper, old leaves, peat moss, and/or straw for worm bedding
  • last night’s dinner, organic scraps, plant material for worm food

Here’s what you do:


Download Student Worksheet & Exercises


Things to Compare with your Worms:


  1. Look at the worms under the magnifying glass.
  2. Measure the lengths of the worms.
  3. Make note of:
    1. The outer layer of the worms: Is it hard? Is it segmented? What are other observations that can be made?
    2. Do they have legs?
    3. Do they have antenna?
    4. What are the main differences?
    5. What are the main similarities?

Garden Worm Tower

Here’s how you can make your own worm tower right in your garden:


Build your own worm farm and watch them turn food scraps into soil!

Materials:


  • 2 polystyrene boxes with lids the same size. (Let’s call them Bin A and Bin B.)
  • A sheet of insect screen to fit the bottom of the boxes
  • Newspaper clippings
  • Garden soil
  • Food scraps (half-eaten fruits and veggies, stale biscuits and cakes, crushed egg shells, coffee grounds)
  • Water
  • Worms (Either “Tiger”, “reds”, or “blues”; ask for them at your local garden store)


Build the farm:


  1. Punch evenly spaced holes in the bottom of Bin A.
  2. Place the insect screen on the bottom of Bin A (this is so that the worms don’t fall out).
  3. Fill Bin A ¾ full with wet newspaper clippings.
  4. Add a layer of garden soil to Bin A.
  5. Add the worms.
  6. Place Bin A in Bin B. Make sure there’s enough room in Bin B when Bin A’s placed in it to collect the worm pee and waste. Be sure to empty and clean Bin B every couple days.
  7. Add food to bin A! Start off small. You don’t want to over-feed the worms. Start out with a couple scraps in the corner and see how long it takes for them to disappear—that should give you a good idea of how much to feed your worms.

Earthworm Dissection

You can dissect a earthworm right at home using this inexpensive earthworm specimen and simple dissection tools!


Exercises


  1. What are three types of worms?
  2.  What are the characteristics of each?
  3.  What are the elements of a complete digestive system?
  4.  What are some benefits of worms in gardening?

[/am4show]


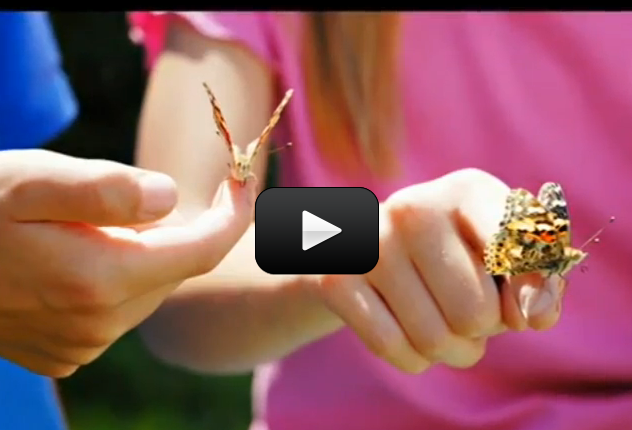
Insects are not only the most diverse subgroup of arthropods, but with over a million discovered species it is the most diverse group of animals on earth. Although they can’t all be as beautiful as a butterfly, they all play important roles in their ecosystems—just think of where we would be without bees!


The segmented exoskeletons of insects have a hard, inner layer called the cuticle, and a water-resistant outside layer called the exocuticle. Insects are divided into two major groups: winged insects and wingless insects. Air is taken in through structures called spirials, and delivered directly to the body.


Most insects reproduce sexually and are oviparous (hatch from eggs after the eggs are laid), although some insects reproduce asexually.


You can grow your own butterflies using a premade kit from Home Training Tools!


A biological net is one of the essential tools of a field biology researcher — you! A bio-net allows you to safely and gently gather samples. Whether you’re studying butterflies or tadpoles a bio-net is the tool to have! Important safety note: Do both of these with parental supervision. Many of the steps are tricky and involve sharp objects.


[am4show have=’p8;p9;p28;p55;p69;’ guest_error=’Guest error message’ user_error=’User error message’ ]


What you need (these materials are not listed int he main shopping list, as this project is a little more involved):


  • 1-meter x 2-meter fly-wire screen netting (gauge = 0.6mm spaces)
  • 4 strips (20cm x 1m) of heavy canvas
  • 2 broom handles
  • Nails
  • Thread
  • Hammer
  • Sewing machine
  • Ironing board with iron

How to make a two-handled bio-net:


Basically, you’re going to create a square net of fly-wire, frame it with the strips of canvas, then attach the broom handles to either side. Your final product should look like this:


  1. Fold the fly-wire in half so it’s 1m X 1m.
  2. Fold the edges of the canvas strips under so there’s a smooth edge to each of the sides of the strips. About 1cm each side should work.
  3. Sew two of the strips to the top and bottom of the fly-wire square.
  4. Sew the other two to the sides of the fly-wire, but leave enough space for the broom handles to slip in.
  5. Slip the broom handles into the sleeves you just created. Use the nails to firmly attach the canvas sleeves to the handles. These are the handles of the bio-net. Voilà!

How to make a single handled sampling net:


What you need:


  • 4 (60cm X 30cm) pieces of fly-wire netting (250um mesh)
  • 1.5m piece of bias tape
  • 1m (or longer) broom handle
  • Thread
  • Scissors
  • Sewing machine
  • 3 wire coat hangers
  • Drill with 0.5com wood bit
  • Pliers
  • Binding

Let’s make the net!


  1. Cut the netting into four triangles (50cm high with 30cm bases) (1).
  2. Sew them together into a single net.
  3. Sew a 1.5m strip of bias tape onto the net. Don’t sew both sides. Leave the outside flap un-sewn so that you can sip the wire in (2).
  4. Drill a hole in one of the ends of the broom handle.
  5. Remove the hooks from the hangers.
  6. Untwist the hangers and slip into the bias-tape sleeve.
  7. Sew the bias tape sleeve closed.
  8. Twist the tops of the hangers together into a stem and insert into the hole in the broom handle.
  9. Bend the hanger hooks into a “U” and use it to bind the net to the handle.
  10. Bind the U to the broom with the binding (5).

[/am4show]


When you hear “roach” you might not immediately think of something that would make a good pet, but not all roaches are like the cockroaches you might have seen in your house!


Species such as the Orange Spotted Roach (Blaptica dubia) make excellent insect pets: they don’t cost much, they have an interesting life cycle and habits, and they do not require much effort to care for. Their average lifespan is about 18 months and you’ll be able to learn more about their fascinating life cycle (from egg to adult) if you allow them to breed!


A pet roach isn’t a pest?


It may seem like all roaches are pests, but of 4,000 species, only 4 or 5 live in homes and are considered pests (such as the American cockroach). Most roaches live in tropical environments far from domesticated areas. They are very different from the kind of household pest you might think of when you hear “roach.”


You might think roaches would make pretty boring pets, but they are surprisingly fast and fun to watch. You can learn a lot about insect anatomy and what makes roaches unique by taking care of them. The species that make good pets do not smell, are not noisy, cannot fly, and generally are very easy to clean up after. They typically are most active at night, because they prefer a dark environment like they have on the floor of the rainforest. They love to hide during the day, but will come out to eat.


Can I touch them?  They are meant to be pets, and are perfectly safe to handle. A good environment for roaches is a small aquarium or plastic cage with cardboard egg cartons for them to hang out in. You might try picking up one of the egg cartons where a roach is hiding, then either hold the carton so the roach can crawl around on it or let the roach crawl in to your hands. Hold out your hand, keeping your fingers together and flat. Let the roach crawl on you, then slowly lift out your hand and cup it slightly. Remember to wash your hands afterwards, using warm water and soap. Although these insects don’t cause diseases in humans, they may be carrying harmful bacteria, so it is important to wash your hands so that you don’t get sick.


How long do they live? It varies, but species like Orange Spotted Roaches have a lifespan of 18-24 months. The female gives live birth, usually to 20-30 babies at a time. The babies reach maturity in 3-4 months after they are born. While they are growing into adults, they will molt – shedding their outer hard shell, or exoskeleton, and then growing a bigger one.


Will my roaches breed? If you get one male and one female, there is a good chance that they will breed under the right circumstances. If you do not want baby roaches, keep the temperature of the habitat around 70 degrees, or normal room temperature. Adult Orange Spotted Roaches will be fine at this temperature, but they will not mate because their young need higher temperatures to survive. If you would like to see the complete life cycle, you will need to ensure that their habitat has enough heat and humidity.


Feeding Time: What does a pet roach eat? They are omnivores – they eat plants and meat. So a good basic diet contains protein from plants and animals and fiber from grains. You can buy special roach food for them and then to supplement their diet give them fresh fruits and vegetables once a week. Try putting a slice of apple, banana, orange, carrot, potato, or zucchini, or a few spinach leaves in a shallow plastic dish and put it in their habitat. This will provide vitamins and minerals for your pets. Be sure to take the uneaten produce out of the habitat within 48 hours to prevent mold from growing, or attracting ants or fruit flies. A great roach diet would be dry food every day and a fresh food supplement once a week.


Be sure to keep their water dish full. Roaches can live a long time without food, but usually only survive three days without water. The water dish also helps make their habitat more moist and humid. For easiest care, use water absorbent crystals that hold water. You can keep an airtight container of prepared water crystals in a cool place, and add another crystal to the water dish whenever needed (usually every 2-3 days).


If the habitat is hot and humid, the roaches will be more active, which means they will also eat and drink more.


Cleaning Time: You should periodically clean out your pet roach’s habitat to make sure there is no mold growing. Cleaning out the habitat takes only a few minutes and will prevent any bad odors coming from your insects. When is the right time to clean the habitat? When you see small dark roach droppings starting to collect on the bottom, you should clean the habitat out. Usually about once a month is a good time. The minimum should be once every other month.


To clean out the habitat, first remove the roaches. Place them in a container that has smooth sides to prevent them from climbing out. Pick up the roaches one at a time and transfer them to the carton or other container. If a roach is hiding in an egg carton, carefully lift out the carton, then let the roach crawl off into the container or onto your hand. Wash your hands with soap and warm water after touching the roaches.


Take the food and water dishes out, as well as the egg cartons, and place them on paper towels. Rinse the container out and then wash it with a solution of 10 parts warm water to 1 part bleach. Rinse the container again and dry it thoroughly. Place the food and water dishes back in the container. If the cardboard egg cartons seem clean, put them back into the container. Don’t use foam egg cartons. You can also use cardboard tubes in different sizes (mailing tubes, toilet paper tubes, or wrapping paper tubes cut down to shorter lengths) so the roaches can crawl in them. When you’re finished cleaning, throw the used egg cartons away as well as the paper towels. Transfer your roaches back to their habitat, using a flat hand so they can crawl off.


Building a Roach Ranch: If you decide to get a pet roach, you can create a habitat to be as simple or creative as you like. If you wish to make a more natural-looking habitat for your pet roaches to enjoy, you can buy peat moss or coconut husk mulch from a pet store (in the Reptile section). Put in a layer of moss or mulch (about one inch), then add pieces of bark for the roaches to climb on and hide under. This type of Roach Ranch will be similar to the Orange Spotted Roaches’ natural environment in the rainforests of South America.


You can make a Roach Ranch out of cardboard, which can easily be thrown away when it gets dirty. Make a multi-level mansion for your roaches by cutting 3-4 identical shapes (square, rectangle, L-shape) from cardboard. Put separators in between each level – use stacked cardboard strips that are one inch wide and several inches long. Each level should be separated about ½” or three strips of cardboard stacked together. Use Elmer’s glue to attach the separators and flat levels, and let it dry completely (may take up to 24 hours) before putting it in your roach habitat. Add cardboard tubes or crumpled newspaper to complete your Roach Ranch. Remember that it will be easier to clean if roach droppings can fall freely to the ground. When you clean your habitat, check to see if your Roach Ranch is staying clean. Throw away any parts that have been well-used and add new cardboard material for the roaches to climb.

One place where bacteria can be found is on your teeth. This is why it’s so important to brush well. Don’t believe me? Then this experiment is for you. You’ll need to gather your materials and make sure you have a toothbrush and microscope nearby.


This is important because prokaryotes are incredibly common and have a huge impact on our lives.  You may already know some of the ways bacteria can be harmful to you, and this is certainly important information.  Scientists have used knowledge of prokaryotes to create medications, vaccines, and healthy living habits that have led to a healthier life for billions of people.


[am4show have=’p8;p9;p27;p54;p78;’ guest_error=’Guest error message’ user_error=’User error message’ ]


Materials:


  • water
  • toothbrush
  • microscope with coverslips and slides

Experiment:


  1. Place a drop of water on a microscope slide.
  2. Gently brush your toothbrush against your teeth and then apply the saliva from the brush to the slide.
  3. Add a cover slip, and observe under the microscope. Draw what you see.

Here’s a short video on a real bacterial colonization of the mouth after only 8 hours of having a cleaning done at the dentist:


If you’ve ever gone to the store to buy toothpaste, you know there many brands. Do any actually do a better job of getting rid of bacteria on your teeth? This is a great question for the scientific method. Here’s what you do:


  1. Brush your teeth really well.
  2. Swab your teeth with a cotton ball and apply to a petrie dish of agar.The next day, brush with a different brand of toothpaste, and again, swab and apply to a different dish.
  3. Repeat for five days with five different brands. Record the growth of bacteria on each dish for each day.
  4. Remember that “day 1” for the first dish will be different than “day 1” for the second dish, and so on.
  5. Which brand left the fewest bacteria? Could there be factors that caused the difference besides toothpaste brand? (Hint: Do you eat the same thing every day?)

[/am4show]


If you’re thinking sunlight, you’re right. Natural light is best for plants for any part of the plant’s life cycle. But what can you offer indoor plants?


In Unit 9 we learned how light contains different colors (wavelengths), and it’s important to understand which wavelengths your indoor plant prefers.


Plants make their food through photosynthesis: the chlorophyll transforms carbon dioxide into food. Three things influence the growth of the plant: the intensity of the light, the time the plant is exposed to light, and the color of the light.


When plants grow in sunlight, they get full intensity and the full spectrum of all wavelengths. However, plants only really use the red and blue wavelengths. Blue light helps the leaves and stems grow (which means more area for photosynthesis) and seedlings start, so fluorescent lights are a good choice, since they are high in blue wavelengths.


[am4show have=’p8;p9;p27;p54;p65;p69;’ guest_error=’Guest error message’ user_error=’User error message’ ]


For my fourth grade science project, I placed a box over a plant and poked different colored lights into each upper corner to see which way the plant grew. It turned out that my plant grew toward the blue light the most.  When I turned off the red light, my little plant stopped flowering, but started flowering again when the red light turned on.


After doing my homework, I learned that chemicals in my plant respond to light and dark conditions, which means that my little plant could “tell time” by using chemistry. Not the 12-hour clock that we use to tell time with, but they know time over a longer period, like when to flower in a season and when to conserve energy for winter.


I know now that if I had indoor plants, I’d choose fluorescent bulbs high in the blue wavelengths, and I’d also add an incandescent bulb if my plant had flowers I wanted to blossom. Since incandescent also produces heat, I’d also try playing with red LED lights which weren’t available to me when I did my project, but would make an interesting study today!


Here’s a video on what happens if you use a black light with indoor plants:


The scientific method is used by scientists to answer questions and solve problems. Often, good scientific questions are best on things we already know. For example, we know plants need light to grow because the light allows them to make their own food, but what color of light is best? Use the scientific method in the lab below to figure it out.


Experiment:


  • Place four plants in an area that will get minimal natural lighting.
  • Do some colors of light help plants grow better than plain white light? Make a hypothesis about this question.
  • To test things out, grow one plant with plain white light. Grow the other plants with colored light, either by using colored bulbs or by covering white bulbs with tissue paper.
  • Make daily observations. Which plant grew best? Was your hypothesis correct?

[/am4show]


If you have ever seen mold growing on an old loaf of bread or eaten a mushroom, you have encountered a fungus. Fungi (that’s the plural of fungus) are a group of organisms, or living things, that are all around us. Mold on bread and mushrooms on pizza are both examples of fungi.


Fungi have an important job. They help break down other material, so that living things are able to grow in soil. This helps make nutritious foods for other organisms. Fungi are needed for life!


Do you think mushrooms are plants? Scientists used to think that all fungi were plants. Now they know that there are some very important different between these two groups of organisms. One of the most important differences is that plants are autotrophic. This means that they can make their own food, just by using the sunlight. Fungi can’t do this. They have to “eat” other living things in order to get the energy they need. This is called being heterotrophic.


[am4show have=’p8;p9;p27;p54;p78;’ guest_error=’Guest error message’ user_error=’User error message’ ]


Another difference between plants and fungi is that fungi have cell walls like plants do, but their cell walls are made of chitin. Chitin is a material containing nitrogen that is also found in the shells of animals including beetles and lobsters.


Fungi do not have a vascular system, the system used to transport water and nutrients in plants, but do have hyphae, a structure you will learn about in the next section. Although mold and mushrooms are easy to see, most fungi are a lot harder to see. Some are so small they can only be seen with a microscope.


Others are big enough to see, but live in places that make them hard to find. For example, some fungi live deep in the soil, in decaying logs, inside plants and animals, or even inside or on top of other fungi!


Scientists have estimated that there are 1.5 million species of fungi, and these organisms live all over.  Most are found on land, although some do live in water.  Some fungi can even live in deserts.  No matter their environment, fungi act as decomposers.  This means that the fungi break down materials to make their environment better for other organisms to grow.


Humans use fungi for many purposes.  One of the most common uses is in food.  Mushrooms are eaten by many people on pizza or in salads. But yeast is used in the fermentation process to make beer, wine, and bread.


We’re going to learn how to grow our own mushrooms in this video below. Remember, never eat a mushroom unless you check with an expert first. Poisonous mushrooms look similar to edible ones, so be absolutely certain which kind it is before popping one in your mouth.


NEVER pick wild mushrooms! In addition to the uncertainty in the type of mushroom, there’s also possible harmful bacteria growing on the mushroom.


Fungi are also important in the production of some antibiotics, including penicillin and the chitin in cell walls has been said to have wound healing properties.


Learn more about Kenny and mushrooms from Veggie Gardening Tips!


[/am4show]


Living things are all around us.  Sometimes the living things we notice the most are animals, whether its birds chirping in the trees, our pet dogs, or even our fellow human beings.  However, most living things are not animals - they include bacteria, archae, fungi, protists, and plants.  These organisms are extremely important to learn about.  They make life possible for animals, including human beings, by keeping soil ready for growth, and providing oxygen for our survival.  No life would be possible without these remarkable organisms.

The prokaryotes, bacteria and archaea represent an amazingly diverse group of organisms only visible when one looks under a microscope. These single-celled organisms obtain energy and reproduce in a variety of ways.

Though some bacteria are harmful, causing disease, many are very helpful, providing the nitrogen we need to live and aiding in digestion. Archaea have been found in some of the most extreme environments on the planets, including environments that are remarkably hot or salty.

[am4show have='p8;p9;p27;p54;p78;' guest_error='Guest error message' user_error='User error message' ]

Here are a couple of videos that will give you a few ideas on how to view this amazing world using a compound microscope, UV light, and more. First, we're going to grow our own bacteria, then we'll look how to identify the bacteria already around you.

Grow Your Own Bacteria

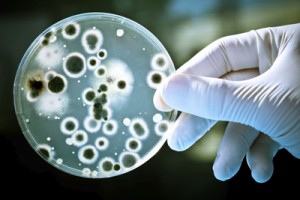
Bacteria, both good and bad, are all around. In fact, there are more bacteria in your mouth than people on Earth! See where you can find bacteria in the activity below.

Materials:

  • petri (petrie) dish
  • agar
  • cotton swab
  • sink or bathtub

Experiment:

1. Prepare your petrie dish of agar.
2. Using your cotton ball, swab a certain area of your house. (Think about what areas might have a lot of bacteria.)
3. Rub the swab over the agar with a few gentle strokes before putting the lid back on and sealing the petrie dish.
4. Allow the dish to sit in a warm area for 2 or 3 days.
5. Check the growth of the bacteria each day by making a drawing and describing the changes.
6. Try repeating the process with a new petrie dish and a swab from under your finger nails or between your toes.
7. Throw away the bacteria by wrapping up the petrie dish in old newspaper and placing in the trash. (Don't open the lid.)


What's happening?

The agar plate and warm conditions provide the ideal place for bacteria to grow. The bacteria you obtained with the cotton ball grow steadily, becoming visible with the naked eye in a relatively short time. Different samples produce different results. What happened when you took a swab sample from your own body?

Want to grow your own bacteria using a hand-washing kit from Home Science Tools?

Is it safe to wash my hands in water?

When you want a glass of water, where do you usually get it from?  Do you drink bottled water or get it from the tap?  You probably don’t drink from a pond (although people in many countries do.)  Why do we have these different ways of getting water?  Is there anything really different about bottled water, tap water, and lake water?  Let’s find out!

Materials:

  • three different water samples (see experiment below)
  • microscope with slides and coverslips
  • notebook with pencil for sketching

Experiment:

  1. Obtain three water samples – tap water, bottled water, and water from outside.  (The “outside” water could be a stream, lake, or just a puddle.)
  2. Make slides using several drops of each water sample.
  3. Observe the slides under the microscope.
  4. Make drawings of what you see, comparing and contrasting each sample.


Is soap better than sanitizer?

In this activity, you will compare the ability of bar soap and hand sanitizer to remove bacteria from your hand.  This is another example of using the scientific method to answer questions and solve problems.

Materials:

  • soap
  • hand sanitizer
  • petri dish
  • agar
  • cotton call or cotton swab

Experiment:

  1. Wash one of your hands with bar soap and clean the other with a hand sanitizer.
  2. Swab each hand with a cotton ball and rub each swab in a Petrie dish with agar.
  3. Place in a warm place and allow to sit for several days.
  4. Compare the bacteria growth in each plate.  Which method of cleaning was more effective?

Learn how well you wash your hands by viewing the germs under a UV light with the Glo Germ kit from Home Science Tools (Do you already have the UV light from Unit 9? Just get the bottle of glow germ gel.)


Here are several additional bonus experiments you can do with the rest of the glo gel you have left over!

[/am4show]


Ah-chooo! Influenza (the “flu”) is when you get chills, fever, sore throat, muscle pains, headaches, coughing, and feel like all you want to do is lie in bed. The flu is often confused with the common cold, but it’s a totally different (and more severe) virus.


The flu is passed from person to person (or animals or birds) by coughing or sneezing. With plants, it’s transmitted through the sap via insects. In the case of birds and animals, the flu is usually transmitted by touching their droppings, which is why hand-washing is so important! In addition to soap, the flu virus can be inactivated by sunlight, disinfectants and detergents.


[am4show have=’p8;p9;p27;p54;p78;’ guest_error=’Guest error message’ user_error=’User error message’ ]


A virus can only replicate inside the living cells of organisms, and most are way too small to be viewed through a microscope. Viruses can infect organisms, animals, plants, bacteria and archaea. Virus particles (virions) are made up of two or three parts, including the genetic material (from either DNA or RNA), long molecules which bring genetic information, and a special coat that protects the genes.


Viruses can be helical or complex structures, but they are a lot smaller than bacteria usually by about a hundredth.


[/am4show]


Birds, people, plants, and microscopic organisms need to know where they are as well as where they want to be. Birds migrate each year and know which way is south, and plants detect the sun so they can angle their leaves properly. People consult a map or GPS to figure out where they are.


Magnetotactic bacteria orients itself along magnetic field lines, whether from a nearby magnet or the Earth’s magnetic field. It’s like having a built-in internal compass.


[am4show have=’p8;p9;p27;p54;p78;’ guest_error=’Guest error message’ user_error=’User error message’ ]


Discovered in 1975, scientists noticed that certain bacteria seemed to move to the same side of the microscope slide. After placing a magnet near the slide, they were able to determine these bacteria contain tiny bits of iron (magnetic crystals, to be exact). The bacteria place the iron (which act like magnets) in a line to make one long magnet, and use this magnet to align to the earth’s magnetic field, just like a compass.


Bacteria move away from oxygen and toward areas with low (or no) oxygen. In water, oxygen levels decrease with depth, so you’ll find magnetotactic bacteria in the deeper parts. These bacteria use their internal compass to figure out which way is deeper.


Since the Earth’s geomagnetic north pole actually points at an angle, the “north-seeking” bacteria aligned to the field lines are also pointing down. When the bacteria move north along the field lines, they are moving into deeper water (with less oxygen). On the flip side (Southern Hemisphere), magnetotactic bacteria must be “south-seeking” in order to go deeper. Of course, at the equator, there’s a mixture of north-seeking and south-seeking bacteria.


Since the magnetic crystals are found in the organisms, even dead cells will align themselves!


[/am4show]


All living things need a way to get energy. Bacteria get their food and energy in many ways. Some bacteria can make food on their own, while others need other organisms.


Some bacteria help other living things as they get energy, others hurt them while they get energy, and still others have no affect on living things at all.
Some living things, or organisms, are able to make their own food in a process called photosynthesis.


In this process, the organism turns energy from the sun into energy that can be used for energy. Organisms that get their energy from photosynthesis are called autotrophs. Some bacteria get their energy this way.


Some bacteria, called chemotrophs, get their energy by breaking down chemical compounds in the environment, including ammonia. Breaking down ammonia is important because ammonia contains the element nitrogen.


[am4show have=’p8;p9;p27;p54;p78;’ guest_error=’Guest error message’ user_error=’User error message’ ]


All organisms need nitrogen to survive, and the nitrogen released by bacteria is crucial to these living things’ survival. Clearly, chemotrophs are very important and beneficial to other living things. Living things that cannot get their energy through photosynthesis or from breaking down chemical compounds have to get their energy from other living things. Some bacteria, called decomposers, get their energy by breaking down dead organisms or waste products into simple nutrients and energy.


Pseudomonas bacteria are decomposers found in the soil, where they recycle dead plant material. The last groups of bacteria get energy from organisms that are still alive, and depend on these organisms to survive.
Mutualistic bacteria get their energy in ways that help another organism. For example, some bacteria live in the roots of legumes, including pea plants. The bacteria make the nitrogen the pea plants need and the pea plants provide a place for the bacteria to live. Other bacteria, called parasitic bacteria, hurt the organism they are getting help from. For example, some bacteria cause illness. We will talk about ways bacteria can be helpful or harmful a little later.


All living things reproduce. This is the only way to ensure the organisms continued survival. Bacteria reproduce asexually. This means that a single “parent” organism produces offspring on their own. In the case of bacteria, a process called binary fission is used. In binary fission, the DNA in the nuceleoid region and plasmids double, and the bacterium splits into two identical copies. If everything happens the way it’s supposed to, the two new bacteria will be identical to the original bacterium. These bacteria can then split again to increase the number of bacteria in the population. Through binary fission, bacteria reproduce very quickly. Some populations can double their size in less than ten minutes!


How to Grow Your Own Bacteria

Although we often think of bacteria as things that cause disease, some bacteria are very helpful. In fact, if you like to eat yogurt, you are eating helpful bacteria all the time! See for yourself in these two activities:


Materials:


  • clean plastic cup
  • yogurt
  • dropper or toothpick
  • microscope with slides and coverslips
  1. Place a very small portion of plain yogurt onto the slide, and add one drop of water. Place the coverslip on top.
  2. Under low power, find a section where the yogurt is pretty thin; this is where you will find the bacteria.
  3. Switch to high power (400X for most microscopes) for a better view of the bacteria.
  4.  Make a sketch of your view under different magnifications.

Finding Bacteria in Yogurt

Materials:


  • clean plastic cup
  • yogurt
  • toothpick
  • water
  • microscope with slides and coverslips
  1. Clean a small plastic cup. Make sure ALL soap is completely rinsed off.
  2. Put a small amount of yogurt in the cup, and put it aside in a dark, relatively warm area. Leave undisturbed for at least 24 hours.
  3. After the time has past, take a small sample with a toothpick and place on a slide. If the sample seems too thick, dilute with a drop of water. Next, place a cover slip on top.
  4. First observe the bacteria at low power 100X to find a good place to start looking. The diaphragm setting should be very low (small) because these bacteria are nearly transparent.
  5. Switch into the highest power to identify the bacteria according to arrangement.
  6. From here you can identify any bacteria you might find. For example, a common inhabitant of yogurt is a paired, round bacteria or diplococcus (see list below)
  7. Did you observe more bacteria in part 1 or 2? Why do you think this is?
  8. Do you want to take it a step further? Think about all the kinds of yogurt out there. There are different flavors, different brands, some that are non-fat, and much more. Do some types have more bacteria than others? This is a great question to investigate using the scientific method. So come up with a specific question, write a hypothesis, grab some yogurt, and get experimenting!

Bacteria are classified as follows:

First observe the way the bacteria are arranged:


  • paired = diploe
  • chained = streptose
  • clusters = staphyle

Next observe the shape of the bacteria:


  • round = coccus
  • rod = bacillus
  • spiral = spirillum

[/am4show]


Bacteria have a bad reputation. Walk down the cleaning aisle of any store and you’ll see rows and rows of products promising to kill them. There are definitely some bacteria that cause problems for people, and we’ll talk about them soon, but we are going to start off positive, and talk about the many ways bacteria can be helpful.


First, decomposers help control waste. Without these bacteria, the amount of waste in soil would quickly make the soil a place where nothing could grow. Bacteria are even used in sewage treatment plants to treat our waste. Decomposers also help provide organisms with nitrogen, as was discussed earlier.


[am4show have=’p8;p9;p27;p54;p78;’ guest_error=’Guest error message’ user_error=’User error message’ ]


Bacteria also have an important role in the foods we eat. Yogurt and some cheeses are made from using bacteria to ferment milk, and sauerkraut is made from using bacteria to ferment cabbage.


Once we’ve eaten, bacteria continue to help us. Bacteria line the digestive tract and help us digest food. In your gut, the number of bacteria cells is greater than the number of your own cells.


In science labs, researchers have found ways to use bacteria to produce medicines. For example, some people with the disease diabetes need insulin. Mass-produced insulin, made possible by bacteria, has lowered the cost of insulin for people suffering from this disease.


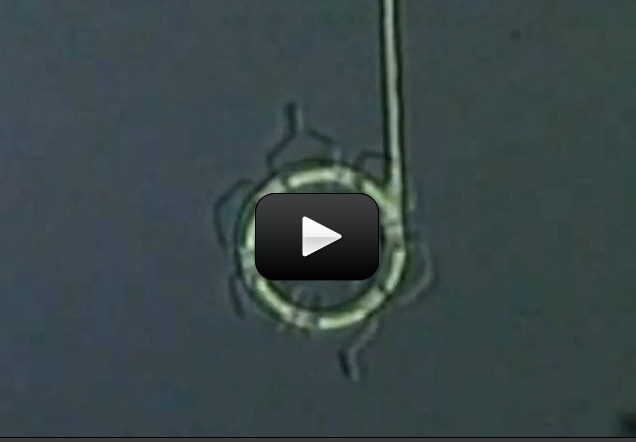
Researchers from Japan’s National Institute of Advanced Industrial Science and Technology (AIST) have figured out a way to get motion from bacteria. This team of scientists have developed a motor that is powered by bacteria movement.


Because this motor is so small (it’s only 20-microns across, where 1 micron = 1 millionth of a meter), we’ve posted a picture (above) so you can see the six revolving motor blades. Each blade has a tab that sits in a circular groove area, which is treated with a substance that makes the bacteria move only in one direction. As the bacteria moves, they push the tabs (which spins the motor). This is a great way to get power for tiny devices, such as tiny pumps inside medical devices.


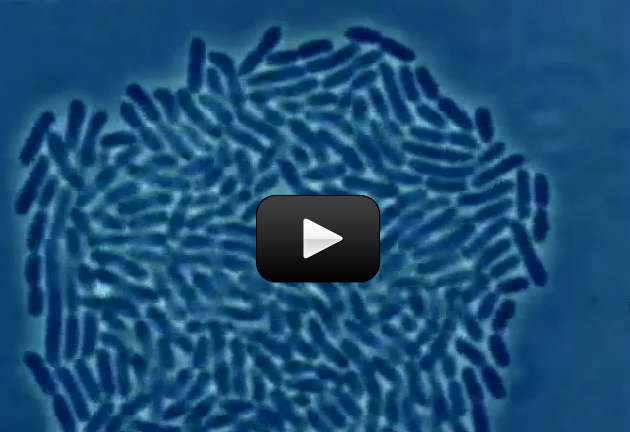
What is true about bacteria is that they are made of only a single cell, are prokaryotes, and are very common. They are the most common living things on Earth. In fact, there are more bacteria living in the mouth of a single person than there are people on the planet!


Since bacteria are made of only one cell, they are very cell. The only way to see bacteria is to look at them in a microscope. When you look at bacteria in a microscope, they usually have one of three shapes.


Bacilli are shaped like rods, cocci are shaped like spheres, and spirilli are shaped like spirals. Using shapes to describe bacteria helps scientists but bacteria into groups, which is often called classification.


[/am4show]


If your kitchen is like most kitchens, you probably have cabinets for cups and pots and pans, along with drawers for silverware and cooking utensils.  You might also have a drawer you call the “junk drawer.”  The things in this drawer aren’t actually “junk.”  If they were, you’d throw them away.  Instead, things usually get put here because they just don’t fit anywhere else.


You might be surprised to learn that the system for classifying organisms has its own “junk drawer.”  It’s called the protist kingdom.  Its members, like the contents of your kitchen junk drawer, are important, but don’t fit nicely in one of the other kingdoms.


Broadly, protists can be classified as animal-like, plant-like, or fungus-like.  It is important to remember that being “animal-like” does not make a protist an animal.  Such and organism, like plant-like or fungus-like protists, are members of an entirely different group of living things.


[am4show have=’p8;p9;p27;p54;p78;’ guest_error=’Guest error message’ user_error=’User error message’ ]
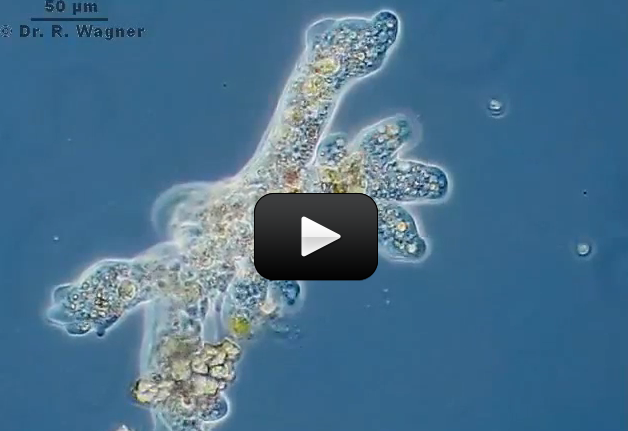
Amoeba are protists that walk using a method called a false foot, or pseudopodia. The amoeba extend a “false foot” and then pull the rest of their body along with them.


Animal-like protists are called protozoa. Like animals, protozoa can move on their own and are heterotrophic. Some protozoa eat by wrapping their bodies around their prey, creating a “food storage compartment.” Toxins are then produced which paralyze the prey, and food moved into the waiting protist.


Other protozoa have flagella, or tails, that assist in feeding. The flagella whip back and forth creating a current that brings food to the protist. Still other protozoa are parasites, and get nutrients from a host organism, harming the host in the process.


Animal-like protists can be classified, or placed into groups, based on how they move. Some move with the aid of a flagellum (that’s the singular form of flagella.) Others have many small tail-like structures called cilia which they move back and forth to get around. Still others have what is known as a “fake foot” or pseudopodia. These protozoa have a part of their cell stretch out, which pulls the rest of the organism along. The amoeba is a common example of this type of protozoan. Finally, some protozoa don’t move at all.


[/am4show]


Six-foot zucchini? Ten-foot carrots? Are giant veggies just a photography trick, or are they real?


The happy news is that yes, they’re real! Expert horticulturists have accumulated a great wealth of knowledge about different climates and dirt conditions. They must know about the different chemical, physical and biological properties of gardens and do multiples of experiments dozens of plants. We found an incredible horticulturist, John Evans, who has accumulated over 180 first places in both quality and giant vegetable categories, with 18 State and 7 World Records.


According to John Evans: “If you could, imagine what it would be like to dig up a carrot from your garden and not knowing how big it is until the last minute, and then finding out that it’s 19 lbs. Now that’s exciting!”


John has spent many years developing fertilizers, bio-catalysts, and growing techniques to grow 76-lb cabbages (photo shown left), 20-lb carrots, 29-lb kale, 60-lb zucchini,  43-lb beets, 35-lb broccoli and cauliflowers, and 70-lb swiss chard that was over 9 feet tall and took three people to carry it to the trailer!


Here’s a video on growing giant flowers by a passionate community gardening club:
[am4show have=’p8;p9;p27;p54;p69;’ guest_error=’Guest error message’ user_error=’User error message’ ]


So what makes the plants grow so large? Apart from good soil and climate conditions, there are a few tricks you can do in order to encourage growth in plants.The video above shows the effects of using gibberellic acid. So what is that stuff, anyway?


Hormones are chemicals that send messages causing changes in living things.  Gibberellic acid is a hormone that makes some pretty noticeable changes. This hormone changes the RNA of plants.  RNA is an important molecule that affects which proteins are produced by an organism.  By changing proteins, the characteristics of the organism can be changed.  In the case of Gibberellic acid, the change in RNA makes cells grow faster and longer. When added to a plant, it makes the plant grow larger than it otherwise would grow.  See for yourself!


  1. Plant two lettuce seeds in similar soil in the same general area.
  2. Spray one seed with Gibberellic Acid.
  3. Make daily observations.
  4. How did the control plant (no acid) compare to the experimental plant (with acid)?

Gibberellic acid is very potent, and does occur naturally in plants to controls their development. This is a place where a little bit goes a long way. In fact, if you use only a couple of drops, you’ll see a big effect… too much and the reverse will happen (hardly any growth at all).


Gibberellic acid can do several things, including stimulate rapid growth in the root and stem and trigger mitosis in the leaves. Scientists have used gibberellic acid to start germination in dormant seeds. You’ll also find it used by farmers who need larger clusters of grapes and cherries. Since plants get ‘used to’ gibberellic acid and become less responsive to it over time, you’ll want to use only a little bit on your plants.


[/am4show]


When you hear the word “bacteria” what do you think of? If you’re like most people, you probably think of things that can make you sick. Although some bacteria do make us sick, this is not true for all of them. In fact, as we’ll see a little later, some bacteria are very helpful.


Did you know that bacteria can have a virus? It’s true! But first, you might be wondering: what’s the difference between viruses and bacteria?


Bacteria grows and reproduces on its own, while viruses cannot exist or reproduce without being in a living cell of a plant, animal, or even bacteria. Size-wise, bacteria are enormous.


[am4show have=’p8;p9;p27;p54;p78;’ guest_error=’Guest error message’ user_error=’User error message’ ]


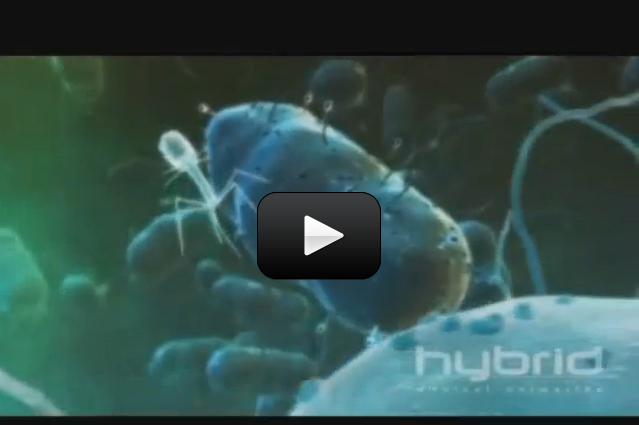
The T4 bacteriophage is a virus that looks like a spaceship from an alien planet. It attaches to the surface of the Escherichia coli (E. coli) bacteria using its six legs and injects DNA into the bacteria. The DNA then tells the bacteria to multiply and essentially fill the bacterial cell to bursting. This is how the T4 kills E. coli.


In this video below, you’ll first see large E. coli bacteria floating around, one of which is attacked by a T4 bacteriophage. Notice how the T4 injects the DNA strand into the bacterium. (What’s not shown is how it bursts, but we’ll leave that to your imagination!)


Some bacteria are responsible for diseases in humans and other organisms. Strep throat, tuberculosis, and pneumonia are all the result of bacteria.


Bacteria can also be responsible for food poisoning. Raw eggs and undercooked meats can contain bacteria that can cause digestive problems. One simple step everyone can take to reduce these kinds problems is washing your hands before cooking or eating. Cleaning cooking surfaces and fully cooking food can also help.


In 2007 the United States Food and Drug Administration (FDA) approved using bacteriophages on all food products. Other places you’ll find bacteriophages are in hospitals, uniforms, sutures and surgery surfaces where it’s important to keep surfaces very clean.


[/am4show]


It drives me crazy it when my store-bought tomatoes go straight from unripe to mush. After talking with local farmers in my area, I discovered a few things that might help you enjoy this fruit without sacrificing taste and time.


Grocery store owners know that their products are very perishable. If the tomatoes arrive ripe, they might start to rot before they can get on the shelf for the customer. Ripe tomatoes are near impossible to transport, which means that farmers often pick unripe (green and therefore very firm) tomatoes to put on the truck. Grocery stores prefer hard, unripe tomatoes so their customers can get them home safely.


The problem is, how do you enjoy a tomato if it’s not ready?


Scientists and food experts ripen tomatoes quickly with ethylene while they are in storage. As the gas surrounds the green tomato, it chemical reacts to speed up the ripening process, causing the tomato to soften and change color to red or orange.


[am4show have=’p8;p9;p27;p54;p78;’ guest_error=’Guest error message’ user_error=’User error message’ ]
The color change in this video is subtle – can you tell the difference between the beginning and end?


Another hormone involved in plants is ethylene. Ethylene is an unusual hormone because it is a gas. What does this mean? Find out using a fruit with plenty of ethylene, a ripe banana.


Materials:


  • green banana
  • very ripe banana
  • paper bag

Experiment:


  1. Place one green banana in a paper bag.
  2. Place another green banana in a paper bag, along with a very ripe banana.
  3. Make daily observations about each banana.
  4. What’s causing the differences you see? (Hint: Think about ethylene and how it can travel.)

What’s Happening: In the bag with two bananas, the gas travels from one to the other, ripening it.


Ethylene, a hydrocarbon gas like propane and butane, is generated by other fruits like bananas. When you store a banana next to a tomato, the banana’s gas triggers the ripening process in the tomato. Scientists have found that tomatoes ripened this way keep longer, but farmers and customers have found that these tomatoes have less flavor and mushier texture.


If you’ve noticed the recent vine-ripened tomato trend at the grocery store, it’s because those tomatoes tend to have more flavor than the green ones picked from the vine and stored in a room of ethylene gas.


When you’re at home, keep fully ripe tomatoes out of the refrigerator, as they are best kept at room temperature on your counters. If you stick a tomato in the fridge, you’ll find it less flavorful and starting to have a starchier texture.


Experiment:


  1. Place a green tomato in a bag with a banana.
  2. Make daily observations about the tomato and banana.
  3. How did the banana take to ripen?

The bottom line? Use the banana-gas trick for tomatoes you cook or bake with, and enjoy your fresh tomatoes straight from the vine and stored on your countertop.


[/am4show]


This type of slime Physarum Polycephalum is called the “many-headed slime”. This slime likes shady, cool, moist areas like you’d find in decaying logs and branches. Slime (or slime mold) is a word used to define protists that use spores to reproduce. (Note: Slime used to be classified as fungi.)


Real slime lives on microorganisms that inhabit dirt, grass, dead leaves, rotting logs, tropical fruits, air conditioners, gutters, classrooms and laboratories. Slime can grow to an area of several square meters.


Slime shows curious behaviors. It can follow a maze, reconnect itself when chopped in half, and predict whether an environment is good to live in or not. Scientists have battled with the ideas that at first glance, slime appears to be simply a “bag of amoebae”, but upon further study, seem to behave as if they have simple brains, like insects.


Slime can be either a plasmodial slime, a bag of cytoplasm containing thousands of individual nuclei, or a cellular slime which usually stays as individual unicellular protists until a chemical signal is released, causing the cells to gather and acts as one organism.
[am4show have=’p8;p9;p27;p54;p78;’ guest_error=’Guest error message’ user_error=’User error message’ ]


Slime feeds by surrounding its food completely and secreting enzymes to digest it. If the slime dries out before its finished eating, it will form a hard tissue shell to protect the dormant slime until the weather turns wet again. The cool part is that the slime will continue searching for food once it hydrates and softens up. When slime can’t find food, it will begin the reproductive phase. Spores form from the mitosis phase and are spread by wind currents. Spores can remain formant for years if the conditions are unfavorable.


Scientist have discovered that physarum polycephalum (orange slime) seems just as intelligent as some insects! A team researchers set up a maze (made of agar) and found that the slime found the shortest possible path to the food.


Another team of scientists are working on bio-computing devices, which use slime instead of semiconductors. The scientists found that slime reacts consistently to certain stimuli. (If they poke it here, it moves to the left…) This team is also figuring out how to precisely point and steer slime using light and food sources.


What this means is that you’ve got a creature that will always emerge from a maze the same way when dropped in at random, is direction-controllable, and always reacts to stimuli the same way. Sounds like the inner workings of a computer, doesn’t it?
[/am4show]