If you’ve ever wondered how glow in the dark toys stay bright even in the dark, this activity is just for you! When light hits a material, it’s either reflected, transmitted, or absorbed as we discovered with the gummy bear activity earlier. However, certain materials will absorb one wavelength and emit an entirely different wavelength, and when this happens it’s called “fluorescence”. Let’s do an experiment first, and then we’ll go over why it does what it does.
Please login or register to read the rest of this content.
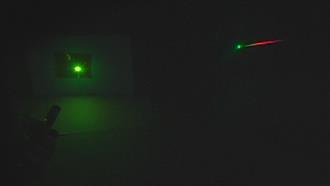
Do you have thick or thin hair? Let’s find out using a laser to measure the width of your hair and a little knowledge about diffraction properties of light. (Since were using lasers, make sure you’re not pointing a laser at anyone, any animal, or at a reflective surface.)
Please login or register to read the rest of this content.

 Click here for a printer-friendly version of this page.
Objective You will learn about light waves and optics in this Laser Lab. Kids will play with their lasers and see what happens when they shine it on and through different objects.
Laser Safety Before we start our laser experiments, you’ll need eye protection – tinted UV ski goggles are great to use, as are large-framed sunglasses, but understand that these methods of eye protection will not protect your eyes from a direct beam. They are intended as a general safety precaution against laser beam scatter. (If you’re using a Class I or II laser, you don’t need to wear the goggles – but it is a good habit to get the kids into, so it’s up to you.)
About the Experiment This lab is an excellent opportunity for kids to practice asking better questions. Don’t worry too much about academics at this point – just give them a box of materials and let them figure these things out on their own. One of the neat things you can do is ask the kids some questions about what they are doing.
For example, when they shine their laser on a window, you’ll see part of the beam pass through while another part gets reflected back… now why is that? And why does the CD produce so many different reflections? Sometimes these reflections are hard to find actually seeing the beam itself. While red lasers are impossible to see with the naked eye, you can make your beam visible by doing your experiments in a steamy dark bathroom (after a hot shower).
The How and Why The word “LASER” stands for Light Amplification by Stimulated Emission of Radiation. A laser is an optical light source that emits a concentrated beam of photons. Lasers are usually monochromatic – the light that shoots out is usually one wavelength and color, and is in a narrow beam.
By contrast, light from a regular incandescent light bulb covers the entire spectrum as well as scatters all over the room. (Which is good, because could you light up a room with a narrow beam of light?)
There are about a hundred different types of atoms in the entire universe, and they are always vibrating, moving, and rotating. When you add energy to an atom, it vibrates faster and moves around a lot more. When the atoms relax back down to their “normal” state, they emit a photon (a light particle). A laser controls the way energized atoms release photons.
Imagine kids zooming all over the playground, a mixture of joy and chaos. Light from an incandescent light bulb works the same way – the bulb emits high energy photons that bounce all over the place. Can you round up the kids and get them to jumping in unison? Sure you can – just hit the play button on a song, and they’ll be clapping and stamping together. You can do the same with light – when you focus the energy into a narrow beam, it’s much more powerful than having it scattered all over the place. That’s just what a laser is – a high-energy, highly-focused beam of light.
Questions to Ask When you’ve worked through most of the experiments ask your kids these questions and see how they do:
- What does LASER stand for?
- How is a laser different from an incandescent bulb?
- What are two things that can split a laser beam?
- How do you make a laser beam visible?
- What’s the secret behind the laser light show?
- How do lasers damage things?
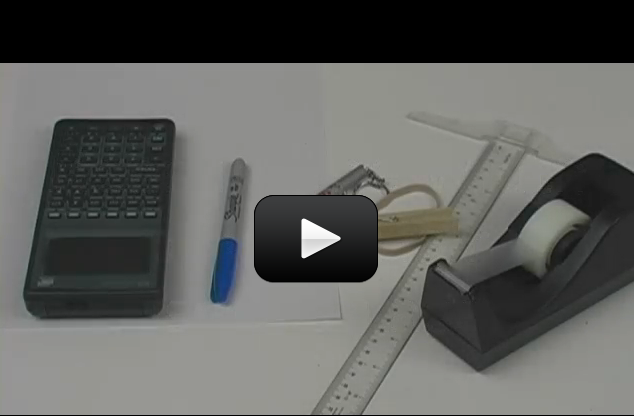
How many of these items do you already have? We’ve tried to keep it simple for you by making the majority of the items things most people have within reach (both physically and budget-wise).
You do not need to do ALL the experiments – just pick the ones you want to do! Look over the experiments and note which items are needed, and off you go!
Click here for a printer-friendly version of this page.
NOTE: Radio Shack part numbers have been replaced. Click here for full chart.
Materials
Materials for the Laser Light Show
- Red laser pointer
- Old CD you can scratch
- 5-6 small mirrors (like mosaic mirrors from a craft store)
- Ice cube
- Window
- Feather
- 3 large paper clips
- 10 brass fasteners
- Index card
- Cardboard
- Rubber band or zip tie
- Scissors
- Tape
- Two 3V DC motors
- Two AA battery packs
- Four AA batteries
- Three alligator wires
- Optional: plastic gem pieces
Materials for the Flashlight-Laser Tag, Laser Burglar Alarm, Door Alarm
- Red laser pointer (NOT GREEN!)
- 2 AA batteries
- Old pair of headphones (you need the plug section)
- Computer OR laptop OR portable amplifier
- CdS Cell
- One AA battery holder
- PNP Transistor 2N3906 or 2N4403
- NPN Transistor 2N3904 or 2N222A
- LED
- 4.7k-ohm resistor
- Soldering equipment or breadboard
- Optional: NC (normally-closed) switch
Materials for Crystal Radio Project: (This is a battery-free radio!)
- Toilet paper tube
- Magnet wire
- Germanium diode: 1N34A
- 4.7k-ohm resistor
- Alligator clip test leads
- 100’ stranded insulated wire (for the antenna)
- Scrap of cardboard
- Brass fasteners (3-4)
- Telephone handset or get a crystal earphone
Did you know that the word LASER stands for Light Amplification by Stimulated Emission of Radiation? And that a MASER is a laser beam with wavelengths in the microwave part of the spectrum? Most lasers fire a monochromatic (one color) narrow, focused beam of light, but more complex lasers emit a broad range of wavelengths at the same time.
In 1917, Einstein figured out the basic principles for the LASER and MASER by building on Max Planck’s work on light. It wasn’t until 1960, though when the first laser actually emitted light at Hughes Research Lab. Today, there are several different kinds of lasers, including gas lasers, chemical lasers, semiconductor lasers, and solid state lasers. One of the most powerful lasers ever conceived are gamma ray lasers (which can replace hundreds of lasers with only one) and the space-based x-ray lasers (which use the energy from a nuclear explosion) – neither of these have been built yet!
Please login or register to read the rest of this content.
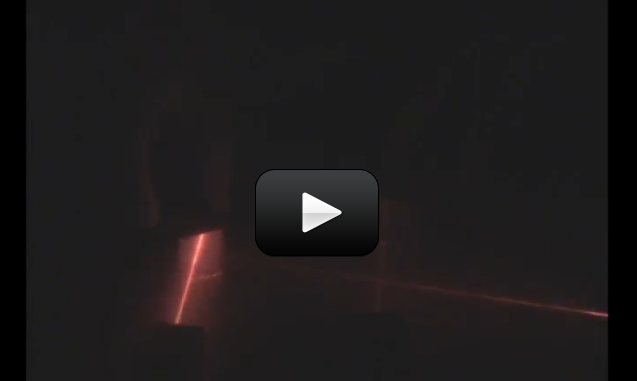
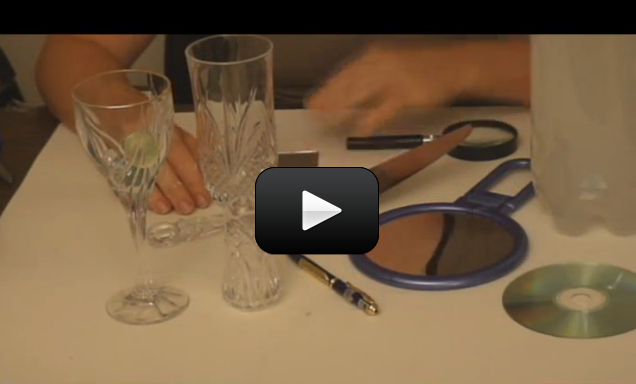
By using lenses and mirrors, you can bounce, shift, reflect, shatter, and split a laser beam. Since the laser beam is so narrow and focused, you’ll be able to see several reflections before it fades away from scatter. Make sure you complete the Laser Basics experiment first before working with this experiment.
You’ll need to make your beam visible for this experiment to really work. There are several different ways you can do this:
Please login or register to read the rest of this content.
Lasers are cool, but what can you do with one? This is a great introductory activity into what lasers are, how they work, and how different mediums (like glass, feathers, mirrors, etc.) can change the direction of the beam.
Lasers are a monochromatic (one color) concentrated beam of light. This means that when compared with a flashlight, the laser delivers more punch on a light detector. The alignment is more critical (as you’ll find out when you zig-zag a laser through several mirrors), so take your time and do these experiments in a steamy, dark bathroom after a hot shower. That way, you’ll be able to see the beam and align your optics easily.
Please login or register to read the rest of this content.
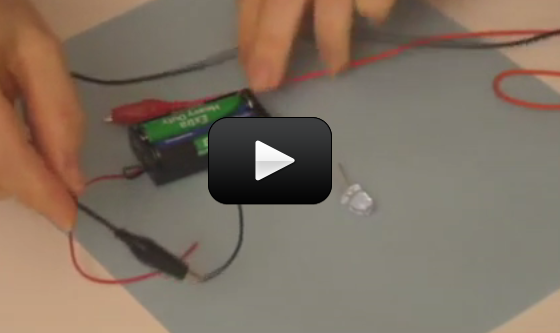
 This is a super-cool and ultra-simple circuit experiment that shows you how a CdS (cadmium sulfide cell) works. A CdS cell is a special kind of resistor called a photoresistor, which is sensitive to light.
A resistor limits the amount of current (electricity) that flows through it, and since this one is light-sensitive, it will allow different amounts of current through depends on how much light it "sees".
Photoresistors are very inexpensive light detectors, and you'll find them in cameras, street lights, clock radios, robotics, and more. We're going to play with one and find out how to detect light using a simple series circuit.
Materials:
- AA battery case with batteries
- one CdS cell
- three alligator wires
- LED (any color and type)
This is a super-cool and ultra-simple circuit experiment that shows you how a CdS (cadmium sulfide cell) works. A CdS cell is a special kind of resistor called a photoresistor, which is sensitive to light.
A resistor limits the amount of current (electricity) that flows through it, and since this one is light-sensitive, it will allow different amounts of current through depends on how much light it "sees".
Photoresistors are very inexpensive light detectors, and you'll find them in cameras, street lights, clock radios, robotics, and more. We're going to play with one and find out how to detect light using a simple series circuit.
Materials:
- AA battery case with batteries
- one CdS cell
- three alligator wires
- LED (any color and type)
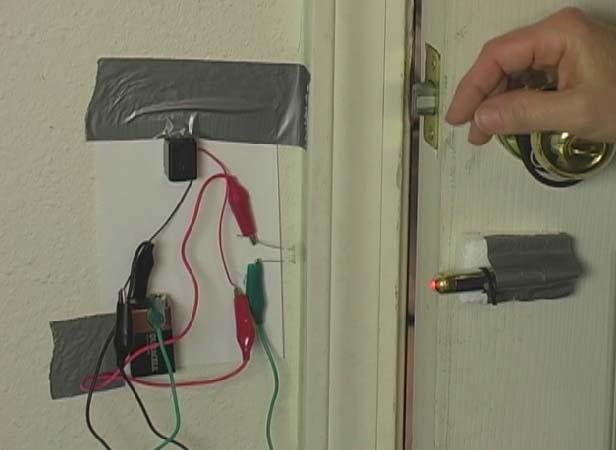
This is a beefier-version of the Electric Eye that will be able to turn on a buzzer instead of a LED by increasing the voltage in the circuit. This type of circuit is a light-actuated circuit. When a beam of light hits the sensor (the "eye"), a buzzer sounds. Use this to indicate when a door closes or drawer closes... your suspect will never know what got triggered.
Please login or register to read the rest of this content.
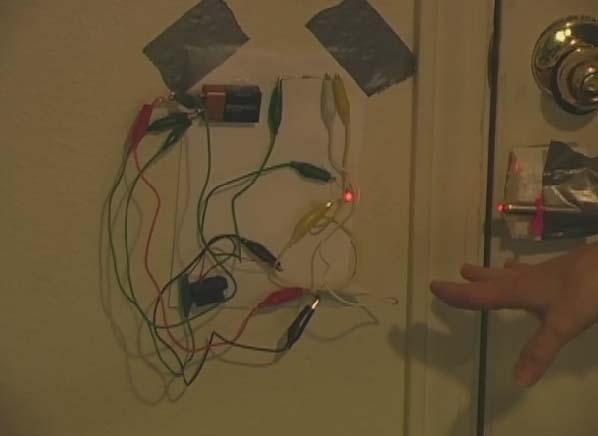
If you've already made the Laser Burglar Alarm (which is highly recommend doing FIRST), then you're probably wondering how to make the circuit act in the opposite way... meaning how do you make it so that the buzzer sounds when the light is turned off?
This circuit requires more patience and parts, but it's totally worth it. It uses the same parts as the previous experiment (plus a few more) with a couple of extra twists and turns in the circuit to let the buzzer know when it's time to turn off. Use this in doorways or as an invisible trip wire trigger across hallways.
Materials:
- Red laser pointer
- 9V battery or two AA's in a AA battery pack
- 7 alligator clip leads
- CdS Cell
- 9V Battery OR 2 AA's in a battery holder
- NPN Transistor 2N3904 or 2N222A
- 4.7k-ohm resistor
- Buzzer (3-6V)
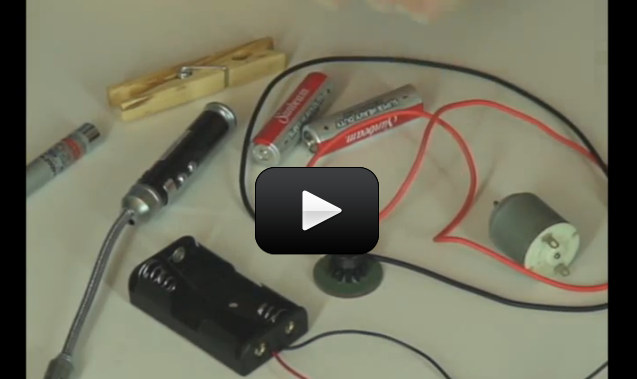
 What happens when you shine a laser beam onto a spinning mirror? In the Laser Maze experiment, the mirrors stayed put. What happens if you took one of those mirrors and moved it really fast?
It turns out that a slightly off-set spinning mirror will make the laser dot on the wall spin in a circle. Or ellipse. Or oval. And the more mirrors you add, the more spiro-graph-looking your projected laser dot gets.
Why does it work? This experiment works because of imperfections: the mirrors are mounted off-center, the motors wobble, the shafts do not spin true, and a hundred other reasons why our mechanics and optics are not dead-on straight. And that’s exactly what we want – the wobbling mirrors and shaky motors make the pretty pictures on the wall! If everything were absolutely perfectly aligned, all you would see is a dot.
Here’s how to do this experiment:
Please login or register to read the rest of this content.
Please login or register to read the rest of this content.
 This super-cool project lets kids have the fun of playing tag in the dark on a warm summer evening, without the "gun" aspect traditionally found in laser tag. Kids not only get to enjoy the sport but also have the pride that they build the tag system themselves - something you simply can't get from opening up a laser tag game box.
While real laser tag games actually never use lasers, but rather infrared beams, this laser tag uses real lasers, so you'll want to arm the kids with the "no-lasers-on-the-face" with a 10-minute time-out penalty to ensure everyone has a good time. You can alternatively use flashlights instead of lasers, which makes the game a lot easier to tag someone out.
This game uses a simple two-transistor latching circuit design, so there's no programming or overly complicated circuitry to worry about. If you've never built this kind of circuit before, it's a perfect first step into the world of electronics.
I've provided you with three videos below. This first video is an introduction to what we are going to make and how it works. Here's what you need:
NOTE: We updated this circuit in 2023 to reflect "best practices" when using transistors.
Be sure to build this project as shown in the schematic and breadboard diagrams, and not as shown in the video.
The material list below is based on the new design as shown in the schematic and breadboard diagrams on this page.
The videos show how to build the old circuit, but are still very useful.
Wouldn't it be nice to wake up your brother or sister using an alarm you build yourself, triggered by natural sunlight? The happy news is now you can, using your Flashlight Laser Tag circuit you already built!
Since your circuit is already sensitive to light, you can transform it easily into an alarm clock that will buzz or light up when hit by the sun's rays.
Note - you can also use your Laser Door Alarm for this as well, since it's also triggered by light. However, the Burglar Alarm will not work, because it gets triggered by darkness, so unless you want your alarm to sound just as your drifting off to sleep, you'll want to use the Laser Door Alarm or the Flashlight Laser Tag circuit. Here's what you need to know (it's really simple...):
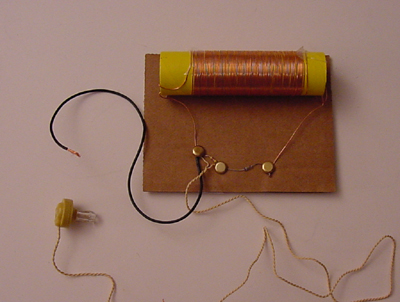
 In addition to laser experiments, I thought you’d like to learn how to pick up sound that’s traveling on a light wave. A crystal radio is among the simplest of radio receivers – there’s no battery or power source, and nearly no moving parts. The source of power comes directly from the radio waves (which is a low-power, low frequency light wave) themselves.
The crystal radio turns the radio signal directly into a signal that the human ear can detect. Your crystal radio detects in the AM band that have been traveling from stations (transmitters) thousands of miles away. You’ve got all the basics for picking up AM radio stations using simple equipment from an electronics store. I’ll show you how…
The radio is made up of a tuning coil (magnet wire wrapped around a toilet paper tube), a detector (germanium diode) and crystal earphones, and an antenna wire.
One of the biggest challenges with detecting low-power radio waves is that there is no amplifier on the radio to boost the signal strength. You’ll soon figure out that you need to find the quietest spot in your house away from any transmitters (and loud noises) that might interfere with the reception when you build one of these.
One of things you’ll have is to figure out the best antenna length to produce the clearest, strongest radio signal in your crystal radio. I’m going to walk you through making three different crystal radio designs.
You’ll need to find these items below.
- Toilet paper tube
- Magnet wire
- Germanium diode: 1N34A
- 4.7k-ohm resistor
- Alligator clip test leads
- 100’ stranded insulated wire (for the antenna: option 1 or option 2)
- Scrap of cardboard
- Brass fasteners (3-4)
- Telephone handset or get a crystal earphone
Here’s what you do:
Please login or register to read the rest of this content.