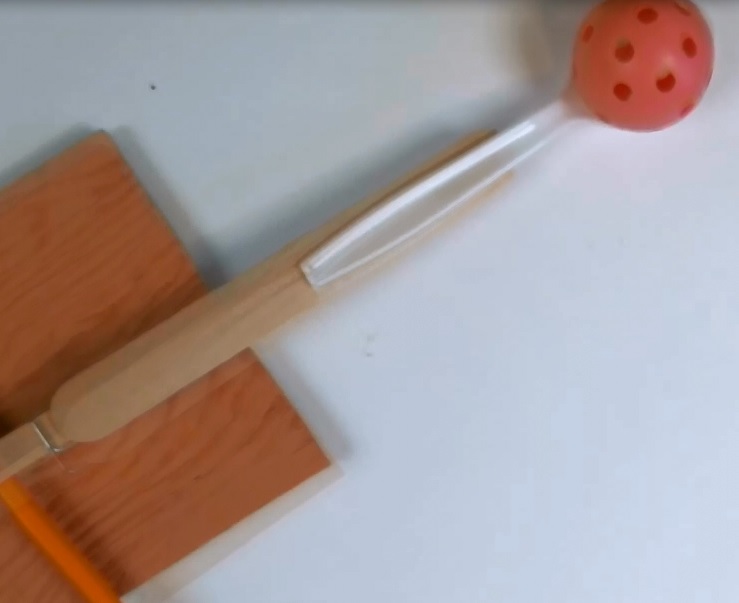
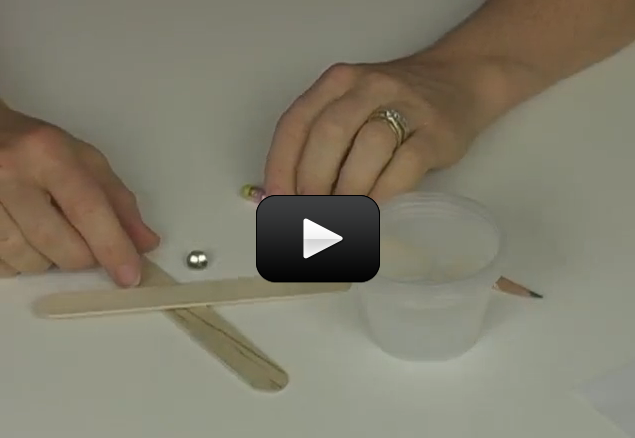
 Ancient people teach us a thing or two about energy when they laid siege to an enemy town. Although we won’t do this today, we will explore some of the important physics concepts about energy that they have to teach us by making a simple catapult. We’re utilizing the “springy-ness” in the popsicle stick, spoon, and the torsion spring to fling the ball around the room. By moving the fulcrum as far from the ball launch pad as possible (on the catapult), you get a greater distance to press down and release the projectile.
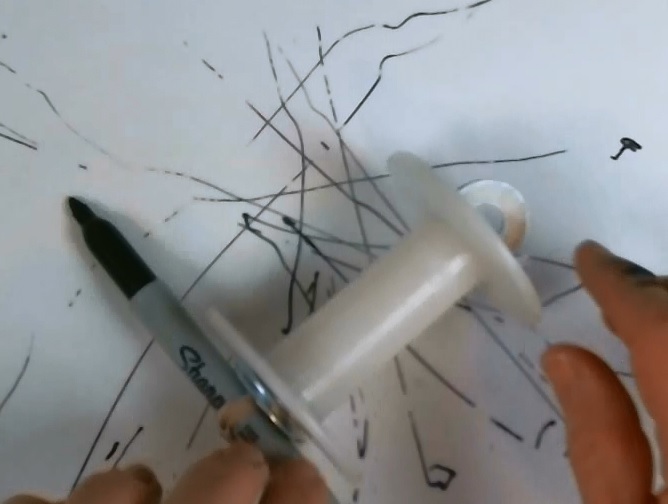
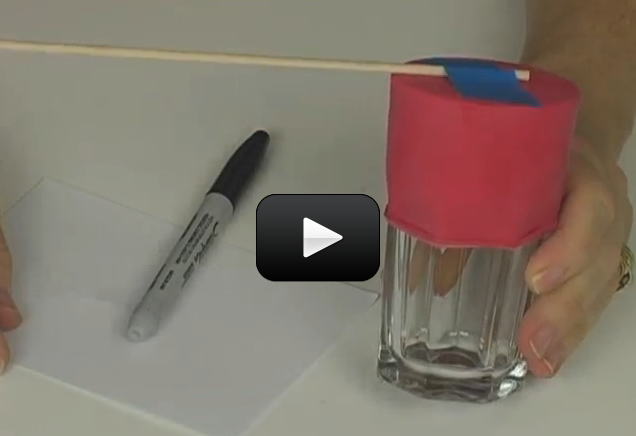
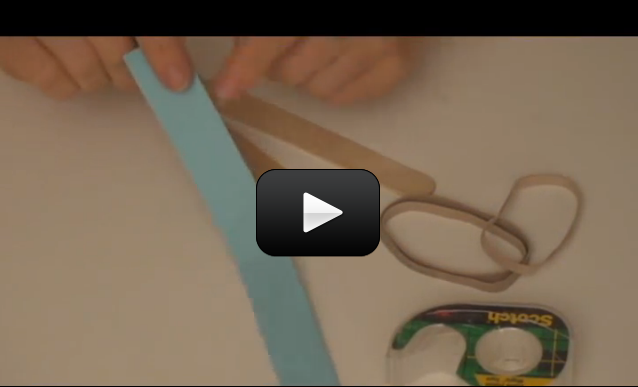
We're going to make a quick and easy drawing machine that will teach your kids about the conservation of energy! By storing energy in the rubber band (called "elastic potential energy"), you can see for yourself how this transforms into movement (called "kinetic energy") while making a picture on your paper.
Everything in the universe takes one of two forms: energy and matter. This experiment explores the idea that energy can never be created or destroyed, but it can transform. All the different forms of energy (heat, electrical, nuclear, sound etc.) can be broken down into two categories, potential and kinetic energy.
Think of potential energy the “could” energy. The battery “could” power the flashlight. The light “could” turn on. I “could” make a sound. That ball “could” fall off the wall. That candy bar “could” give me energy. Potential energy is the energy that something has that can be released. For example, the battery has the potential energy to light the bulb of the flashlight if the flashlight is turned on and the energy is released from the battery. Your legs have the potential energy to make you hop up and down if you want to release that energy (like you do whenever it’s time to do science!). The fuel in a gas tank has the potential energy to make the car move.
Kinetic energy is the energy of motion. Kinetic energy is an expression of the fact that a moving object can do work on anything it hits; it describes the amount of work the object could do as a result of its motion. Whether something is zooming, racing, spinning, rotating, speeding, flying, or diving… if it’s moving, it has kinetic energy. How much energy it has depends on two important things: how fast it’s going and how much it weighs.
We’re utilizing the elasticity of the rubber band to store potential energy to fling the ball around the room. The potential energy in the rubber band is transformed into kinetic energy of the moving ball when you hit the trigger to release the rubber band.
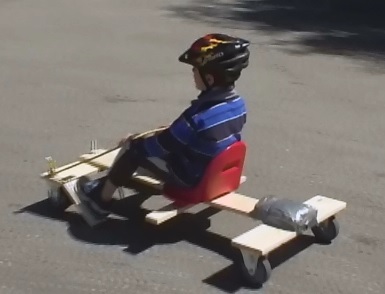
Nothing says summer time fun than a home-built go-kart that can race down the driveway with just as much thrill as two story roller coasters.
A go-karts (also called "go-cart") can be gravity powered (without a motor) or include electric or gas powered motors. The gravity powered kind are also known as Soap Box Derby racers, and are the simplest kind to make since all you need is wheels, a frame, and a good hill (and a helmet!).
Please login or register to read the rest of this content.
Being able to predict tomorrow's weather is one of the most challenging and frequently requested bits of information to provide. Do you need a coat tomorrow? Will soccer practice be canceled? Will the crops freeze tonight?
Scientists use different instruments to record the current weather conditions, like temperature, barometric pressure, wind speed, humidity, etc. The real work comes in when they spend time looking over their data over days, months, even years and search for patterns.
But where does the weather station get its weather from?
One of the greatest leaps in meteorology was using numbers to predict the flow of the atmosphere. The math equations needed for these (using fluid dynamics and thermodynamics) are enough to make even a graduate student quiver with fear. Even today's most powerful computers cannot solve these complex equations! The best they can do is make a guess at the solution and then adjust it until it fits well enough in a given range. How do the computers know what to guess?
Several weather stations around the world work together to report the current weather every hour. These stations can be land-based, mounted on buoys in the ocean, or launched on radiosondes and report back to a home station as they rise through the different layers of the atmosphere. Pilots will also give weather reports en route to their destination, which get recorded and added to the database of weather knowledge.
We're going to build our own homemade weather station and start keeping track of weather right in your own home town. By keeping a written record (even if it's just pen marks on the wall), you'll be able to see how the weather changes and even predict what it will do, once you get the hang of the pattern in your local area. For example, if you live in Florida, what happens to the pressure before the daily afternoon thunderstorm? Or if you live in the deserts of Arizona, what does a sudden increase in humidity tell you?
Please login or register to read the rest of this content.
One of the most remarkable images of our planet has always been how dynamic the atmosphere is a photo of the Earth taken from space usually shows swirling masses of white wispy clouds, circling and moving constantly. So what are these graceful puffs that can both frustrate astronomers and excite photographers simultaneously?
Clouds are frozen ice crystals or white liquid water that you can see with your eyes. Scientists who study clouds go into a field of science called nephology, which is a specialized area of meteorology. Clouds don’t have to be made up of water – they can be any visible puff and can have all three states of matter (solid, liquid, and gas) existing within the cloud formation. For example, Jupiter has two cloud decks: the upper are water clouds, and the lower deck are ammonia clouds.
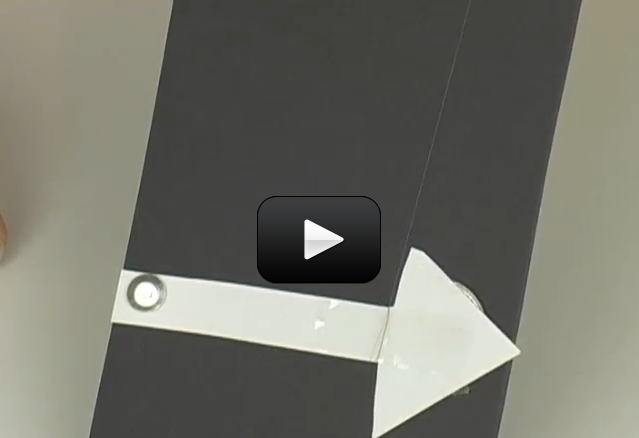
We’re going to learn how to build a weather instrument that will record whether (weather?) the day was sunny or cloudy using a very sensitive piece of paper. Are you ready?
Please login or register to read the rest of this content.
First invented in the 1600s, thermometers measure temperature using a sensor (the bulb tip) and a scale. Temperature is a way of talking about, measuring, and comparing the thermal energy of objects. We use three different kinds of scales to measure temperature. Fahrenheit, Celsius, and Kelvin. (The fourth, Rankine, which is the absolute scale for Fahrenheit, is the one you’ll learn about in college.)
Mr. Fahrenheit, way back when (18th century) created a scale using a mercury thermometer to measure temperature. He marked 0° as the temperature ice melts in a tub of salt. (Ice melts at lower temperatures when it sits in salt. This is why we salt our driveways to get rid of ice). To standardize the higher point of his scale, he used the body temperature of his wife, 96°.
As you can tell, this wasn’t the most precise or useful measuring device. I can just imagine Mr. Fahrenheit, “Hmmm, something cold…something cold. I got it! Ice in salt. Good, okay there’s zero, excellent. Now, for something hot. Ummm, my wife! She always feels warm. Perfect, 96°. ” I hope he never tried to make a thermometer when she had a fever.
Just kidding, I’m sure he was very precise and careful, but it does seem kind of weird. Over time, the scale was made more precise and today body temperature is usually around 98.6°F.
Later, (still 18th century) Mr. Celsius came along and created his scale. He decided that he was going to use water as his standard. He chose the temperature that water freezes at as his 0° mark. He chose the temperature that water boils at as his 100° mark. From there, he put in 100 evenly spaced lines and a thermometer was born.
Last but not least Mr. Kelvin came along and wanted to create another scale. He said, I want my zero to be ZERO! So he chose absolute zero to be the zero on his scale.
Absolute zero is the theoretical temperature where molecules and atoms stop moving. They do not vibrate, jiggle or anything at absolute zero. In Celsius, absolute zero is -273 ° C. In Fahrenheit, absolute zero is -459°F (or 0°R). It doesn’t get colder than that!
As you can see, creating the temperature scales was really rather arbitrary:
“I think 0° is when water freezes with salt.”
“I think it’s just when water freezes.”
“Oh, yea, well I think it’s when atoms stop!”
Many of our measuring systems started rather arbitrarily and then, due to standardization over time, became the systems we use today. So that’s how temperature is measured, but what is temperature measuring?
Temperature is measuring thermal energy which is how fast the molecules in something are vibrating and moving. The higher the temperature something has, the faster the molecules are moving. Water at 34°F has molecules moving much more slowly than water at 150°F. Temperature is really a molecular speedometer.
Let’s make a quick thermometer so you can see how a thermometer actually works:
Please login or register to read the rest of this content.
Hygrometers measure how much water is in the air, called humidity. If it's raining, it's 100% humidity. Deserts and arid climates have low humidity and dry skin. Humidity is very hard to measure accurately, but scientists have figured out ways to measure how much moisture is absorbed by measuring the change in temperature (as with a sling psychrometer), pressure, or change in electrical resistance (most common).
The dewpoint is the temperature when moist air hits the water vapor saturation point. If the temperature goes below this point, the water in the air will condense and you have fog. Pilots look for temperature and dewpoint in their weather reports to tell them if the airport is clear, or if it''s going to be 'socked in'. If the temperature stays above the dewpoint, then the airport will be clear enough to land by sight. However, if the temperature falls below the dewpoint, then they need to land by instruments, and this takes preparation ahead of time.
A sling psychrometer uses two thermometers (image above), side by side. By keeping one thermometer wet and the other dry, you can figure out the humidity using a humidity chart. Such as the one on page two of this document. The psychrometer works because it measures wet-bulb and dry-bulb temperatures by slinging the thermometers around your head. While this sounds like an odd thing to do, there's a little sock on the bottom end of one of the thermometers which gets dipped in water. When air flows over the wet sock, it measures the evaporation temperature, which is lower than the ambient temperature, measured by the dry thermometer.
Scientists use the difference between these two to figure out the relative humidity. For example, when there's no difference between the two, it's raining (which is 100% humidity). But when there's a 9oC temperature difference between wet and dry bulb, the relative humidity is 44%. If there's 18oC difference, then it's only 5% humidity.
You can even make your own by taping two identical thermometers to cardboard, leaving the ends exposed to the air. Wrap a wet piece of cloth or tissue around the end of one and use a fan to blow across both to see the temperature difference!
One of the most precise are chilled mirror dewpoint hygrometers, which uses a chilled mirror to detect condensation on the mirror's surface. The mirror's temperature is controlled to match the evaporation and condensation points of the water, and scientists use this temperature to figure out the humidity.
We're going to make a very simple hygrometer so you get the hand of how humidity can change daily. Be sure to check this instrument right before it rains. This is a good instrument to read once a day and log it in your weather data book.
Most weather stations have anemometers to measure wind speed or wind pressure. The kind of anemometer we’re going to make is the same one invented back in 1846 that measures wind speed. Most anemometers use three cups, which is not only more accurate but also responds to wind gusts more quickly than a four-cup model.
Some anemometers also have an aerovane attached, which enables scientists to get both speed and direction information. It looks like an airplane without wings – with a propeller at the front and a vane at the back.
Other amemometers don’t have any moving parts – instead they measure the resistance of a very short, thin piece of tungsten wire. (Resistance is how much a substance resists the flow of electrical current. Copper has a low electrical resistance, whereas rubber has a very high resistance.) Resistance changes with the material’s temperature, so the tungsten wire is heated and placed in the airflow. The wind flowing over the wire cools it down and increases the resistance of the wire, and scientists can figure out the wind speed.
Please login or register to read the rest of this content.

A barometer uses either a gas (like air) or a liquid (like water or mercury) to measure pressure of the atmosphere. Scientists use barometers a lot when they predict the weather, because it’s usually a very accurate way to predict quick changes in the weather.
Barometers have been around for centuries – the first one was in the 1640s!
At any given momen, you can tell how high you are above sea level by measure the pressure of the air. If you measure the pressure at sea level using a barometer, and then go up a thousand feet in an airplane, it will always indicate exactly 3.6 kPa lower than it did at sea level.
Scientists measure pressure in “kPa” which stands for “kilo-Pascals”. The standard pressure is 101.3 kPa at sea level, and 97.7 kPa 1,000 feet above sea level. In fact, every thousand feet you go up, pressure decreases by 4%. In airplanes, pilots use this fact to tell how high they are. For 2,000 feet, the standard pressure will be 94.2 kPa. However, if you’re in a low front, the sea level pressure reading might be 99.8 kPa, but 1000 feet up it will always read 3.6 kPa lower, or 96.2 kPa.
Please login or register to read the rest of this content.
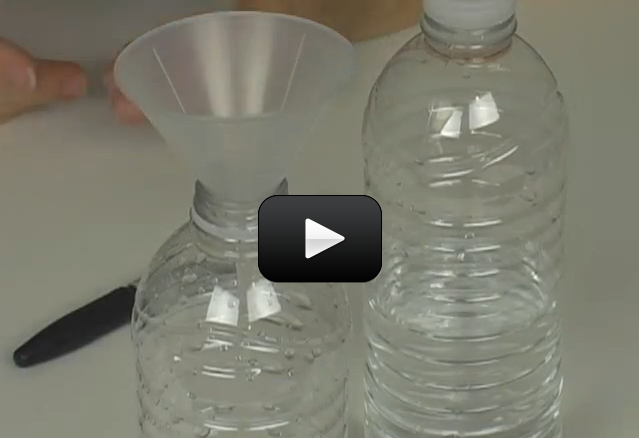
Also known as an udometer or pluviometer or ombrometer, or just plan old ‘rain cup’, this device will let you know how much water came down from the skies. Folks in India used bowls to record rainfall and used to estimate how many crops they would grow and thus how much tax to collect!
These devices reports in “millimeters of rain” or “”centimeters of rain” or even inches of rain”. Sometimes a weather station will collect the rain and send in a sample for testing levels of pollutants.
While collecting rain may seem simple and straightforward, it does have its challenges! Imagine trying to collect rainfall in high wind areas, like during a hurricane. There are other problems, like trying to detect tiny amounts of rainfall, which either stick to the side of the container or evaporate before they can be read on the instrument. And what happens if it rains and then the temperature drops below freezing, before you’ve had a chance to read your gauge? Rain gauges can also get clogged by snow, leaves, and bugs, not to mention used as a water source for birds.
So what’s a scientist to do?
Press onward, like all great scientists! And invent a type of rain gauge that will work for your area. We’re going to make a standard cylinder-type rain gauge, but I am sure you can figure out how to modify it into a weighing precipitation type (where you weigh the amount in the bottle instead of reading a scale on the side), or a tipping bucket type (where a funnel channels the rain to a see-saw that tips when it gets full with a set amount of water) , or even a buried-pit bucket (to keep the animals out).
Please login or register to read the rest of this content.
How many of these items do you already have? We’ve tried to keep it simple for you by making the majority of the items things most people have within reach (both physically and budget-wise).
This particular shopping list has many different projects on it, so we’ve broken the list into sections based on the projects. For example, the roller coaster activities are all in one area, the weather station in another, etc. You might want to view the videos before gathering your supplies.
Click here for a printer-friendly version of this page.
Materials
Materials for Sonic Vibrations Experiments
- 3 popsicle sticks (tongue depressor size)
- 2 index cards
- Scissors, tape, hot glue gun
- 2 film canisters (or plastic snap-lid M&M containers)
- Straw
- Three 7-9” balloons
- 2 water balloons
- 3’ string
- Rubber bands (at least two are ¼” thick)
- Disposable cup (plastic, foam, or paper)
- Hexnut (1/4” or smaller)
- Razor or drill to make holes in the film canister
- Scissors, tape
Weather Station Project
- 2 popsicle sticks
- 1 long strand of hair
- 1 index card
- 12” piece of cardboard (scraps are great)
- 4 foam cups
- 2 popsicle sticks
- 1 pencil with built-in eraser on top
- 2 tacks
- 1 nickel
- Scissors
- Tape
- 7-9” balloon
- Water glass
- Straw or wooden skewer
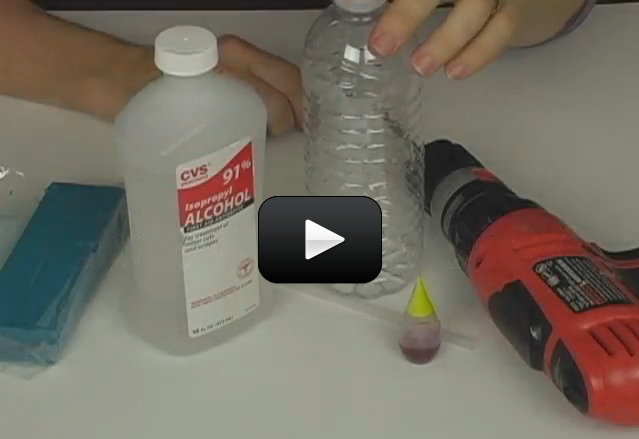
- Empty water bottle
- Funnel
- Rubbing alcohol
- Clay
- Straw
- Food coloring
- Optional: Sunprint Paper and soup can
Magic Tricks
- Dollar bill
- 2 small paperclips
- 6’ of rope
- 1 rubber band
- 1 toilet paper tube
- 1 egg (hard boiled) OR ball that sits on the end of the toilet paper tube without falling in
- Aluminum pie plate or plastic dish (something not breakable)
- Broom handle or ruler
- Shoe with laces
- Four bracelets (optional)
Materials for Roller Coasters Experiments
- ¾” foam pipe insulation
- Masking tape
- A handful of marbles
- Chairs and tables
Materials for Clothespin Catapult Project
- Popsicle sticks
- Plastic spoon
- 3 rubber bands
- Wood clothespin
- Straw
- Wood dowel that fits inside the straw
- Scissors
- Hot glue gun
Materials for Mousetrap RaceCar
- Mousetrap (NOT a rat trap)
- Foam block or piece of cardboard
- Four old CDs
- Thin string or fishing line
- Wood dowel or long, straight piece from a wire coat hanger (use pliers to straighten it)
- Straw
- Two wood skewers (that fit inside straw)
- Hot glue gun
- Duct tape
- Scissors
- Four caps to water bottles
- Drill
- Razor with adult help
 Click here for a printer-friendly version of this page.
Objective You will learn about force, acceleration, velocity, and what scientist really mean when they say, “Try it again…and again…and again… until you get the result you want.” This lab uses the Iteration Technique to solving a problem, which is different than the Scientific Method, and actually much more widely used by engineers in the science field.
About the Experiment This lab is an excellent opportunity for kids to practice their resilience, because we guarantee this experiment will not work the first several times they try it. While you can certainly help the kids out, it’s important that you help them figure it out on their own. You can do this by asking questions instead of rushing in to solve their problems. For instance, when the marble flies off the track, you can step back and say:
“Hmmm… did the marble go to fast or too slow?”
“Where did it fly off?”
“Wow – I’ll bet you didn’t expect that to happen. Now what are you going to try?”
Become their biggest fan by cheering them on, encouraging them to make mistakes, and try something new (even if they aren’t sure if it will work out). One of the greatest gifts you can give your child is the expectation of their success.
The How and Why To make the roller coasters, you’ll need foam pipe insulation, which is sold by the six-foot increments at the hardware store. You’ll be slicing them in half lengthwise, so each piece makes twelve feet of track. It comes in all sizes, so bring your marbles when you select the size. The ¾” size fits most marbles, but if you’re using ball bearings or shooter marbles, try those out at the store. (At the very least you’ll get smiles and interest from the hardware store sales people.) Cut most of the track lengthwise (the hard way) with scissors. You’ll find it is already sliced on one side, so this makes your task easier. Leave a few pieces uncut to become “tunnels” for later roller coasters.
The next step is to join your track together before adding all the features like loops and curves. Join two tracks together in butt-joint fashion and press a piece of masking tape lengthwise along both the inside and the underside of the track. A third piece of tape should go around the entire joint circumferentially. Make this connection as smooth as possible, as your high-speed marble roller coaster will tend to fly off the track at the slightest bump.
Loops Swing the track around in a complete circle and attach the outside of the track to chairs, table legs, and hard floors with tape to secure in place. Loops take a bit of speed to make it through, so have your partner hold it while you test it out before taping. Start with smaller loops and increase in size to match your entrance velocity into the loop. Loops can be used to slow a marble down if speed is a problem.
Camel-Backs Make a hill out of track in an upside-down U-shape. Good for show, especially if you get the hill height just right so the marble comes off the track slightly, then back on without missing a beat.
Whirly-Birds Take a loop and make it horizontal. Great around poles and posts, but just keep the bank angle steep enough and the marble speed fast enough so it doesn’t fly off track.
Corkscrew Start with a basic loop, then spread apart the entrance and exit points. The further apart they get, the more fun it becomes. Corkscrews usually require more speed than loops of the same size.
Jump Track A major show-off feature that requires very rigid entrance and exit points on the track. Use a lot of tape and incline the entrance (end of the track) slightly while declining the exit (beginning of new track piece).
Pretzel The cream of the crop in maneuvers! Make a very loose knot that resembles a pretzel. Bank angles and speed are the most critical, with rigid track positioning a close second. If you’re having trouble, make the pretzel smaller and try again. You can bank the track at any angle because the foam is so soft. Use lots of tape and a firm surface (bookcases, chairs, etc).
Troubleshooting Marbles will fly everywhere, so make sure you have a lot of extras! If your marble is not following your track, look very carefully for the point of departure – where it flies off.
- Does the track change position with the weight of the marble, making it fly off course? Make the track more rigid by taping it to a surface.
- Is the marble jumping over the track wall? Increase your bank angle (the amount of twist the track makes along its length).
- Does your marble just fall out of the loop? Increase your marble speed by starting at a higher position. When all else fails and your marble still won’t stay on the track, make it a tunnel section by taping another piece on top the main track. Spiral-wrap the tape along the length of both pieces to secure them together.
Why does the marble stick to the track? The faster the marble travels in a loop, the more it sticks to the track. This is the same pancake feeling you get when your body gets pulled into a tight turn (whether in a car or on a roller coaster). The faster and tighter the turn, the more the “pancake feeling”. That pancake thing is called acceleration. You’re feeling a pull away from the center of the loop, which will vary depending on how fast you are going, called centrifugal force.
That’s usually enough for kids. But if you really want to be thoroughly confused, keep reading about how centripetal and centrifugal forces are NOT the same thing:
What about centripetal force? Ah, yes… these two words constantly throw college students into a frenzy, partially because there is no clear definition in most textbooks. As I best understand it, centripetal (translation = “center-seeking”) force is the force needed to keep an object following a curved path. Remember how objects will travel in a straight line unless they bump into something or have another force acting on it (gravity, drag force, etc.)? Well, when you swing a bucket of water around, the force to keep the bucket of water swinging in a curved arc is the centripetal force, which can be felt in the tension experienced by the handle (or your arm, in our case). Swinging an object around on a string will cause the rope to undergo tension (centripetal force), and if your rope isn’t strong enough, it will snap and break, sending the mass flying off in a tangent (straight) line until gravity and drag force pull the object to a stop. This force is proportional to the square of the speed… the faster you swing the object, the higher the force.
Centrifugal (translation = “center-fleeing”) force has two different definitions, which also causes confusion. The inertial centrifugal force is the most widely referred to, and is purely mathematical, having to do with calculating kinetic forces using reference frames, and is used with Newton’s laws of motion. It’s often referred to as the ‘fictitious force’.
The other kind, reactive centrifugal force, happens when objects move in a curved path. This force is actually the same magnitude as centripetal force, but in the opposite direction, and you can think of it as the reaction force to the centripetal force. Think of how you stand on the Earth… your weight pushes down on the Earth, and a reaction force (called the “normal” force) pushes up in reaction to your weight, keeping you from falling to the center of the Earth. A centrifugal governor (spinning masses that regulate the speed of an engine) and a centrifugal clutch (spinning disk with two masses separated by a spring inside) are examples of this kind of force in action.
One more example: Imagine driving a car along a banked turn. The road exerts a centripetal force on the car, keeping the car moving in a curved path (the “banked” turn). If you neglected to buckle your seat belt and the seats have a fresh coat of Armor-All (making them slippery), then as the car turns along the banked curve, you get “shoved” toward the door. But who pushed you? No one – your body wanted to continue in a straight line but the car keeps moving in your path, turning your body in a curve. The push of your weight on the door is the reactive centrifugal force, and the car pushing on you is the centripetal force.
What about the fictitious (inertial) centrifugal force? Well, if you imagine being inside the car as it is banking with the windows blacked out, you suddenly feel a magical ‘push’ toward the door away from the center of the bend. This “push” is the fictitious force invoked because the car’s motion and acceleration is hidden from you (the observer) in the reference frame moving within the car.
Click here for a printer-friendly version of this page.
Objective This noisy lab lets you experiment with the idea that sound is a vibration. By making over a dozen different noisemakers, you can explore how to change the sound speed and use everyday materials to annoy your parents.
About the Experiments Instead of starting with an explanation of how sound works, mystify your kids with it instead by picking one of the experiments that you know your kids will like. After they’ve build the project (you might want ear muffs for this lab), you can start asking them how they think it works. Give them the opportunity to figure it out by changing different things on their noisemaker (stretch the rubber band, increase the tube length, etc) to allow them a chance to hone their skills at figuring things out.
The How and Why Explanation Sound is everywhere. It can travel through solids, liquids, and gases, but it does so at different speeds. It can rustle through trees at 770 MPH (miles per hour), echo through the ocean at 3,270 MPH, and resonate through solid rock at 8,600 MPH. Sound is made by things vibrating back and forth, whether it’s a guitar string, drum head, or clarinet. The back and forth motion of an object (like the drum head) creates a sound wave in the air that looks a lot like a ripple in a pond after you throw a rock in. It radiates outward, vibrating it’s neighboring air molecules until they are moving around, too. This chain reaction keeps happening until it reaches your ears, where your “sound detectors” pick up the vibration and works with your brain to turn it into sound.
Your voice is a vibration, and you can feel it when you place a hand on your throat when you speak. As long as there are molecules around, sound will be traveling though them by smacking into each other. That’s why if you put an alarm clock inside a glass jar and remove the air, there’s no sound from the clock. There’s nothing to transfer the vibrational energy to – nothing to smack into to transfer the sound. It’s like trying to grab hold of fog – there’s nothing to hold on to.
Sound can change according to the speed at which it travels. Another word for sound speed is pitch. When the sound speed slows, the pitch lowers. With clarinet reeds, it’s high. Guitar strings can do both, as they are adjustable. If you look carefully, you can actually see the low pitch strings vibrate back and forth, but the high pitch strings move so quickly it’s hard to see. But you can detect the effects of both with your ears.
The range of your ears is about 20 – 20,000 Hz (cycles per second). Bats and dogs can hear a lot higher than we can. The image (right) is a real picture of an aircraft as it breaks the sound barrier – meaning that the aircraft is passing the speed that sounds travels at (about 700 mph). The white cloud you see in the photo is related to the shock waves that are forming around the craft as it moves into supersonic speeds. You can think of a shock wave as big pressure front, which creates clouds. In this photo, the pressure from the shock waves is condensing the water vapor in the air.
There are lots of things on earth that break the sound barrier – bullets and bullwhips, for example. The loud crack from a whip is the tip zipping faster than the speed of sound. Your air horn is a loud example of how sound waves travel through the air.
Questions to Ask When you’ve worked through most of the experiments ask your kids these questions and see how they do:
- Sound travels fastest in (a) air (b) the ocean (c) rock (d) outer space
- The hornet works because (a) the rubber band vibrates when the wind flies over it (b) you’ve trapped a real wasp in there (c) the string vibrates when you twirl it around (d) the card vibrates with the wind
- An old-fashioned telephone made from cups and string work great because (a) no batteries are required (b) the cup vibrates (c) the string vibrates (d) your voice vibrates (e) all of the above
- Knowing what you do know about sound and cups, which way do you think you would hold a cup up to your ear (open end or closed end?) to hear the conversation on the other side of a door?
- When you replaced the string with a slinky, why can’t you talk or hear voices through it anymore? What can you hear instead?
- What would you use to completely block out the sound of an alarm clock?
- Does the pitch increase or decrease when you fill a glass bottle while tapping the side with a fork?
- List out the different kinds of strings tested with the String Test, and number them in order of best to worst.
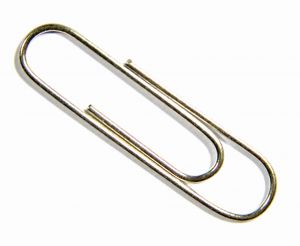
If you’ve never made a paperclips jump together and link up by themselves, turned water into ink, or made metal rings pass through solid rope, you’re missing out. Big time. We’re going to show you our set of incredible magic-show-style tricks that will make you truly amazing.
But, there is something you should know about magic…
Please login or register to read the rest of this content.
![]() This trick is one of my favorites, because it's super-easy and quick... you'll have a hard time describing to yourself how it even happened. Most scientists can't explain it either. Are you ready?
This trick is one of my favorites, because it's super-easy and quick... you'll have a hard time describing to yourself how it even happened. Most scientists can't explain it either. Are you ready?
Materials: dollar bill, two paperclips, and a rubber band.
Here's what you do:
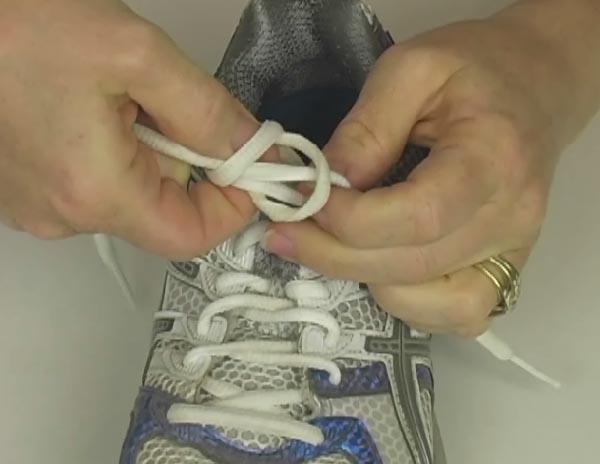
This particular trick kept me tied up for hours as a kid. I was so determined to figure this out that I eventually had a rope-impression rubbed into my skin when I finally did slide out. I’ll bet it doesn’t take you nearly as long, and you can substitute bracelets for the rope to make it more comfortable as you work. You need two kids for this trick to work. And a camera to capture the moment.
Materials: 6 feet of rope, two kids, and 4 bracelets (optional)
Here’s what you do:
Please login or register to read the rest of this content.

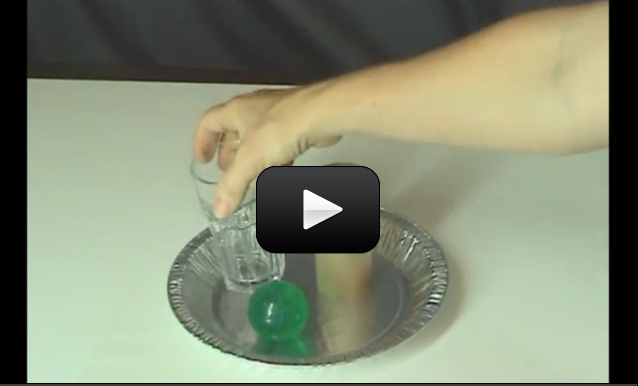
Where’s the pressure difference in this trick?
At the opening of the glass. The water inside the glass weighs a pound at best, and, depending on the size of the opening of the glass, the air pressure is exerting 15-30 pounds upward on the bottom of the card. Guess who wins? Tip, when you get good at this experiment, try doing it over a friend’s head!
Materials: a glass, and an index card large enough to completely cover the mouth of the glass.
Please login or register to read the rest of this content.
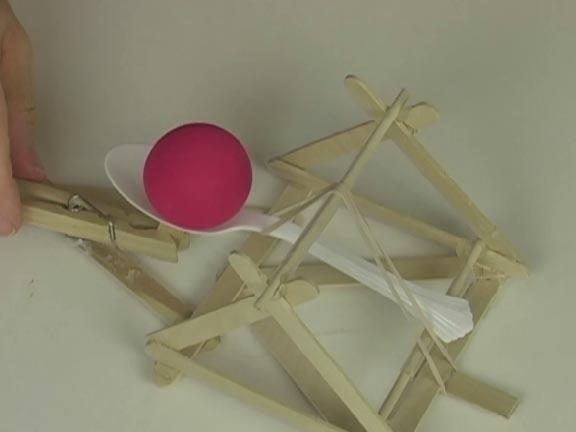
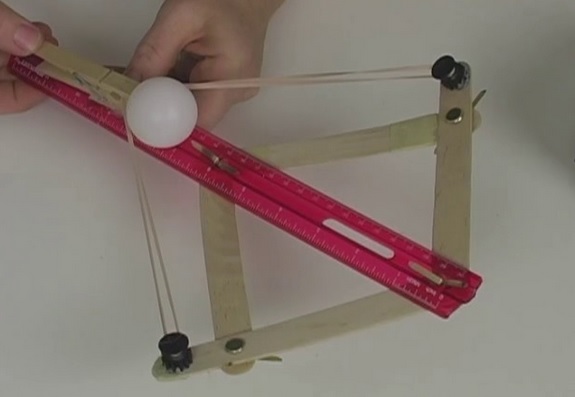
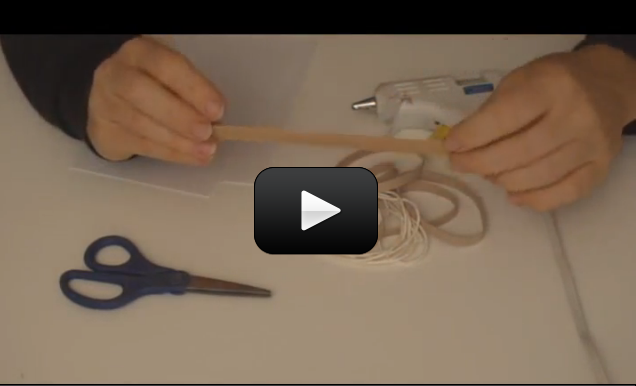
This catapult requires a little more time, materials, and effort than the Fast Catapult, but it's totally worth it. This device is what most folks think of when you say 'catapult'. I've shown you how to make a small model - how large can you make yours?
This project builds on the ideas from Unit 5: Lesson 2: Kinetic Energy.
Materials:
Please login or register to read the rest of this content.
This project builds on the ideas from Unit 5: Lesson 2: Kinetic Energy.
Materials:
- plastic spoon
- 14 popsicle sticks
- 3 rubber bands
- wooden clothespin
- straw
- wood skewer or dowel
- scissors
- hot glue gun
Please login or register to read the rest of this content.
A super-fast, super-cool car that uses the pent-up energy inside a mouse trap spring to propel a homemade car forward. While normally this is reserved for high school physics classes, it really is a fun and inexpensive experiment to do with kids of all ages.
This is a great demonstration of how energy changes form. At first, the energy was stored in the spring of the mousetrap as elastic potential energy, but after the trap is triggered, the energy is transformed into kinetic energy as rotation of the wheels.
Remember with the First Law of Thermodynamics: energy can’t be created or destroyed, but it CAN change forms. And in this case, it goes from elastic potential energy to kinetic energy.
There’s enough variation in design to really see the difference in the performance of your vehicle. If you change the size of the wheels for example, you’ll really see a difference in how far it travels. If you change the size of the wheel axle, your speed is going to change. If you alter the size of the lever arm, both your speed and distance will change. It's fun to play with the different variables to find the best vehicle you can build with your materials!
Here's what you need to do this project:
Please login or register to read the rest of this content.

 Sound can change according to the speed at which it travels. Another word for sound speed is pitch. When the sound speed slows, the pitch lowers. With clarinet reeds, it’s high. Guitar strings can do both, as they are adjustable. If you look carefully, you can actually see the low pitch strings vibrate back and forth, but the high pitch strings move so quickly it’s hard to see. But you can detect the effects of both with your ears.
Please login or register to read the rest of this content.
This is one of my absolute favorites, because it’s so unexpected and unusual… the setup looks quite harmless, but it makes a sound worse than scratching your nails on a chalkboard. If you can’t find the weird ingredient, just use water and you’ll get nearly the same result (it just takes more practice to get it right). Ready?
NOTE: DO NOT place these anywhere near your ear… keep them straight out in front of you.
Please login or register to read the rest of this content.
You can easily make a humming (or screaming!) balloon by inserting a small hexnut into a balloon and inflating. You can also try pennies, washers, and anything else you have that is small and semi-round. We have scads of these things at birthday time, hiding small change in some and nuts in the others so the kids pop them to get their treasures. Some kids will figure out a way to test which balloons are which without popping… which is what we’re going to do right now.
Please login or register to read the rest of this content.
Before CDs, there were these big black discs called records. Spinning between 33 and 45 times per minute on a turntable, people used to listened to music just like this for nearly a century. Edison, who had trouble hearing, used to bite down hard on the side of his wooden record player (called a phonograph) and “hear” the music as it vibrated his jaw.
Many people today still think that records still sound better than CDs (I think they do), especially if the record is well cared for and their players are tuned just right. Here’s a video on how a record works:
Please login or register to read the rest of this content.
Bobsleds use the low-friction surface of ice to coast downhill at ridiculous speeds. You start at the top of a high hill (with loads of potential energy) then slide down a icy hill til you transform all that potential energy into kinetic energy. It’s one of the most efficient ways of energy transformation on planet Earth. Ready to give it a try?
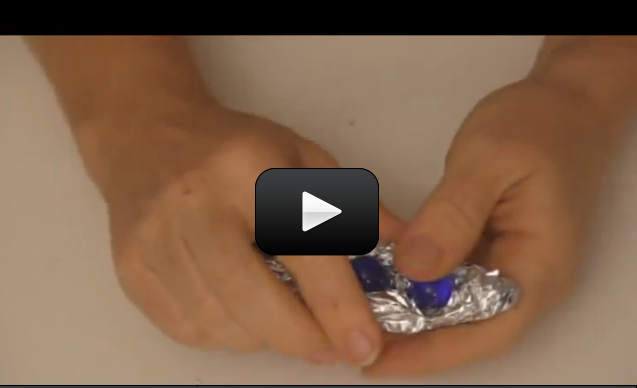
This is one of those quick-yet-highly-satisfying activities which utilizes ordinary materials and turns it into something highly unusual… for example, taking aluminum foil and marbles and making it into a racecar.
While you can make a tube out of gift wrap tubes, it’s much more fun to use clear plastic tubes (such as the ones that protect the long overhead fluorescent lights). Find the longest ones you can at your local hardware store. In a pinch, you can slit the gift wrap tubes in half lengthwise and tape either the lengths together for a longer run or side-by-side for multiple tracks for races. (Poke a skewer through the rolls horizontally to make a quick-release gate.)
Here’s what you need:
- aluminum foil
- marbles (at least four the same size)
- long tube (gift wrapping tube or the clear protective tube that covers fluorescent lighting is great)
We're going to build monster roller coasters in your house using just a couple of simple materials. You might have heard how energy cannot be created or destroyed, but it can be transferred or transformed (if you haven't that's okay - you'll pick it up while doing this activity).
Roller coasters are a prime example of energy transfer: You start at the top of a big hill at low speeds (high gravitational potential energy), then race down a slope at break-neck speed (potential transforming into kinetic) until you bottom out and enter a loop (highest kinetic energy, lowest potential energy). At the top of the loop, your speed slows (increasing your potential energy), but then you speed up again and you zoom near the bottom exit of the loop (increasing your kinetic energy), and you're off again!
Here's what you need:
A super-fast, super-cool car that uses the pent-up energy inside a mouse trap spring to propel a homemade car forward. While normally this is reserved for high school physics classes, it really is a fun and inexpensive experiment to do with kids of all ages.
This is a great demonstration of how energy changes form. At first, the energy was stored in the spring of the mousetrap as elastic potential energy, but after the trap is triggered, the energy is transformed into kinetic energy as rotation of the wheels.
Remember with the First Law of Thermodynamics: energy can’t be created or destroyed, but it CAN change forms. And in this case, it goes from elastic potential energy to kinetic energy.
There’s enough variation in design to really see the difference in the performance of your vehicle. If you change the size of the wheels for example, you’ll really see a difference in how far it travels. If you change the size of the wheel axle, your speed is going to change. If you alter the size of the lever arm, both your speed and distance will change. It's fun to play with the different variables to find the best vehicle you can build with your materials!
Here's what you need to do this project:
Please login or register to read the rest of this content.
This is a great demonstration of how energy changes form. At first, the energy was stored in the spring of the mousetrap as elastic potential energy, but after the trap is triggered, the energy is transformed into kinetic energy as rotation of the wheels.
Remember with the First Law of Thermodynamics: energy can’t be created or destroyed, but it CAN change forms. And in this case, it goes from elastic potential energy to kinetic energy.
There’s enough variation in design to really see the difference in the performance of your vehicle. If you change the size of the wheels for example, you’ll really see a difference in how far it travels. If you change the size of the wheel axle, your speed is going to change. If you alter the size of the lever arm, both your speed and distance will change. It's fun to play with the different variables to find the best vehicle you can build with your materials!
Here's what you need to do this project:
Please login or register to read the rest of this content.
Ever wonder how magicians work their magic? This experiment is worthy of the stage with a little bit of practice on your end.
Here’s how this activity is laid out: First, watch the video below. Next, try it on your own. Make sure to send us your photos of your inventions here!
Please login or register to read the rest of this content.
 Sound is everywhere. It can travel through solids, liquids, and gases, but it does so at different speeds. It can rustle through trees at 770 MPH (miles per hour), echo through the ocean at 3,270 MPH, and resonate through solid rock at 8,600 MPH.
Sound is made by things vibrating back and forth, whether it’s a guitar string, drum head, or clarinet. The back and forth motion of an object (like the drum head) creates a sound wave in the air that looks a lot like a ripple in a pond after you throw a rock in. It radiates outward, vibrating it’s neighboring air molecules until they are moving around, too. This chain reaction keeps happening until it reaches your ears, where your “sound detectors” pick up the vibration and works with your brain to turn it into sound.
You can illustrate this principle using a guitar string – when you pluck the string, your ears pick up a sound. If you have extra rubber bands, wrap them around an open shoebox to make a shoebox guitar. You can also cut a hole in the lid (image left) and use wooden pencils to lift the rubber band off the surface of the shoebox.
Please login or register to read the rest of this content.
Your voice is a vibration, and you can feel it when you place a hand on your throat when you speak. As long as there are molecules around, sound will be traveling though them by smacking into each other.
That’s why if you put an alarm clock inside a glass jar and remove the air, there’s no sound from the clock. There’s nothing to transfer the vibrational energy to – nothing to smack into to transfer the sound. It’s like trying to grab hold of fog – there’s nothing to hold on to.
Please login or register to read the rest of this content.