Here’s a neat experiment you can do to measure the rate of photosynthesis of a plant, and it’s super-simple and you probably have most of what you need to do it right now at home!


You basically take small bits of a leaf like spinach, stick it in a cup of water that has extra carbon dioxide in it, and shine a light on it. The plant will take the carbon dioxide from the water and the light from the lamp and make oxygen bubbles that stick to it and lift it to the surface of the water, like a kid holding a bunch of helium balloons. And you time how long this all takes and you have the rate of photosynthesis for your leaf.


Here are the steps for the experiment:


[am4show have=’p8;p9;p27;p54;p153;p65;p78;p86;’ guest_error=’Guest error message’ user_error=’User error message’ ]


[/am4show]


If you’re thinking sunlight, you’re right. Natural light is best for plants for any part of the plant’s life cycle. But what can you offer indoor plants?


In Unit 9 we learned how light contains different colors (wavelengths), and it’s important to understand which wavelengths your indoor plant prefers.


Plants make their food through photosynthesis: the chlorophyll transforms carbon dioxide into food. Three things influence the growth of the plant: the intensity of the light, the time the plant is exposed to light, and the color of the light.


When plants grow in sunlight, they get full intensity and the full spectrum of all wavelengths. However, plants only really use the red and blue wavelengths. Blue light helps the leaves and stems grow (which means more area for photosynthesis) and seedlings start, so fluorescent lights are a good choice, since they are high in blue wavelengths.


[am4show have=’p8;p9;p27;p54;p65;p69;’ guest_error=’Guest error message’ user_error=’User error message’ ]


For my fourth grade science project, I placed a box over a plant and poked different colored lights into each upper corner to see which way the plant grew. It turned out that my plant grew toward the blue light the most.  When I turned off the red light, my little plant stopped flowering, but started flowering again when the red light turned on.


After doing my homework, I learned that chemicals in my plant respond to light and dark conditions, which means that my little plant could “tell time” by using chemistry. Not the 12-hour clock that we use to tell time with, but they know time over a longer period, like when to flower in a season and when to conserve energy for winter.


I know now that if I had indoor plants, I’d choose fluorescent bulbs high in the blue wavelengths, and I’d also add an incandescent bulb if my plant had flowers I wanted to blossom. Since incandescent also produces heat, I’d also try playing with red LED lights which weren’t available to me when I did my project, but would make an interesting study today!


Here’s a video on what happens if you use a black light with indoor plants:


The scientific method is used by scientists to answer questions and solve problems. Often, good scientific questions are best on things we already know. For example, we know plants need light to grow because the light allows them to make their own food, but what color of light is best? Use the scientific method in the lab below to figure it out.


Experiment:


  • Place four plants in an area that will get minimal natural lighting.
  • Do some colors of light help plants grow better than plain white light? Make a hypothesis about this question.
  • To test things out, grow one plant with plain white light. Grow the other plants with colored light, either by using colored bulbs or by covering white bulbs with tissue paper.
  • Make daily observations. Which plant grew best? Was your hypothesis correct?

[/am4show]


Six-foot zucchini? Ten-foot carrots? Are giant veggies just a photography trick, or are they real?


The happy news is that yes, they’re real! Expert horticulturists have accumulated a great wealth of knowledge about different climates and dirt conditions. They must know about the different chemical, physical and biological properties of gardens and do multiples of experiments dozens of plants. We found an incredible horticulturist, John Evans, who has accumulated over 180 first places in both quality and giant vegetable categories, with 18 State and 7 World Records.


According to John Evans: “If you could, imagine what it would be like to dig up a carrot from your garden and not knowing how big it is until the last minute, and then finding out that it’s 19 lbs. Now that’s exciting!”


John has spent many years developing fertilizers, bio-catalysts, and growing techniques to grow 76-lb cabbages (photo shown left), 20-lb carrots, 29-lb kale, 60-lb zucchini,  43-lb beets, 35-lb broccoli and cauliflowers, and 70-lb swiss chard that was over 9 feet tall and took three people to carry it to the trailer!


Here’s a video on growing giant flowers by a passionate community gardening club:
[am4show have=’p8;p9;p27;p54;p69;’ guest_error=’Guest error message’ user_error=’User error message’ ]


So what makes the plants grow so large? Apart from good soil and climate conditions, there are a few tricks you can do in order to encourage growth in plants.The video above shows the effects of using gibberellic acid. So what is that stuff, anyway?


Hormones are chemicals that send messages causing changes in living things.  Gibberellic acid is a hormone that makes some pretty noticeable changes. This hormone changes the RNA of plants.  RNA is an important molecule that affects which proteins are produced by an organism.  By changing proteins, the characteristics of the organism can be changed.  In the case of Gibberellic acid, the change in RNA makes cells grow faster and longer. When added to a plant, it makes the plant grow larger than it otherwise would grow.  See for yourself!


  1. Plant two lettuce seeds in similar soil in the same general area.
  2. Spray one seed with Gibberellic Acid.
  3. Make daily observations.
  4. How did the control plant (no acid) compare to the experimental plant (with acid)?

Gibberellic acid is very potent, and does occur naturally in plants to controls their development. This is a place where a little bit goes a long way. In fact, if you use only a couple of drops, you’ll see a big effect… too much and the reverse will happen (hardly any growth at all).


Gibberellic acid can do several things, including stimulate rapid growth in the root and stem and trigger mitosis in the leaves. Scientists have used gibberellic acid to start germination in dormant seeds. You’ll also find it used by farmers who need larger clusters of grapes and cherries. Since plants get ‘used to’ gibberellic acid and become less responsive to it over time, you’ll want to use only a little bit on your plants.


[/am4show]


When we think about the parts of plants, we often thing about stems, leaves, seeds, or flowers. Many plants have these parts. However a plant does not need to have any of these parts to be considered a true plant. So, instead of talking about parts that all plants have, we’ll talk about parts that some plants have. Then, as we talk about different groups of plants, we’ll talk about which parts they do or do not have.


Many plants have a waxy layer called a cuticle. The cuticle helps keep water in the plant, and prevents water loss. However, the cuticle also keeps gases from entering or exiting the plant.


This is a pretty big problem, when you think about how important photosynthesis is in plants. Remember that in photosynthesis, carbon dioxide has to come in and oxygen has to go out. So, plants have small openings called stomata. Stomata can open when the weather is cool to allow gases in and out. When the weather is hot, stomata close up, conserving water and keeping it from escaping.


[am4show have=’p8;p9;p27;p54;’ guest_error=’Guest error message’ user_error=’User error message’ ]


Stomata are found on all land plants (except liverworts). Some have more stomata on the lower epidermis than the upper epidermis. In plants with floating leaves, stomata may be found only on the upper epidermis; submerged leaves may lack stomata entirely.


It may seem that pathogens can easily enter this “hole” in the leaf without any trouble. However, scientists have recently discovered that stomata are able to detect most (if not all) pathogens. A curious side note: in one experiment, the bacteria that was placed on the plant leaves released the chemical which forced the stomata open.


[/am4show]


It drives me crazy it when my store-bought tomatoes go straight from unripe to mush. After talking with local farmers in my area, I discovered a few things that might help you enjoy this fruit without sacrificing taste and time.


Grocery store owners know that their products are very perishable. If the tomatoes arrive ripe, they might start to rot before they can get on the shelf for the customer. Ripe tomatoes are near impossible to transport, which means that farmers often pick unripe (green and therefore very firm) tomatoes to put on the truck. Grocery stores prefer hard, unripe tomatoes so their customers can get them home safely.


The problem is, how do you enjoy a tomato if it’s not ready?


Scientists and food experts ripen tomatoes quickly with ethylene while they are in storage. As the gas surrounds the green tomato, it chemical reacts to speed up the ripening process, causing the tomato to soften and change color to red or orange.


[am4show have=’p8;p9;p27;p54;p78;’ guest_error=’Guest error message’ user_error=’User error message’ ]
The color change in this video is subtle – can you tell the difference between the beginning and end?


Another hormone involved in plants is ethylene. Ethylene is an unusual hormone because it is a gas. What does this mean? Find out using a fruit with plenty of ethylene, a ripe banana.


Materials:


  • green banana
  • very ripe banana
  • paper bag

Experiment:


  1. Place one green banana in a paper bag.
  2. Place another green banana in a paper bag, along with a very ripe banana.
  3. Make daily observations about each banana.
  4. What’s causing the differences you see? (Hint: Think about ethylene and how it can travel.)

What’s Happening: In the bag with two bananas, the gas travels from one to the other, ripening it.


Ethylene, a hydrocarbon gas like propane and butane, is generated by other fruits like bananas. When you store a banana next to a tomato, the banana’s gas triggers the ripening process in the tomato. Scientists have found that tomatoes ripened this way keep longer, but farmers and customers have found that these tomatoes have less flavor and mushier texture.


If you’ve noticed the recent vine-ripened tomato trend at the grocery store, it’s because those tomatoes tend to have more flavor than the green ones picked from the vine and stored in a room of ethylene gas.


When you’re at home, keep fully ripe tomatoes out of the refrigerator, as they are best kept at room temperature on your counters. If you stick a tomato in the fridge, you’ll find it less flavorful and starting to have a starchier texture.


Experiment:


  1. Place a green tomato in a bag with a banana.
  2. Make daily observations about the tomato and banana.
  3. How did the banana take to ripen?

The bottom line? Use the banana-gas trick for tomatoes you cook or bake with, and enjoy your fresh tomatoes straight from the vine and stored on your countertop.


[/am4show]


Art and science meet in a plant press. Whether you want to include the interesting flora you find in your scientific journal, or make a beautiful handmade greeting card, a plant press is invaluable. They are very cheap and easy to make, too!


[am4show have=’p8;p9;p27;p54;p153;p65;p78;p86;’ guest_error=’Guest error message’ user_error=’User error message’ ]


Here’s what you need:


  • Newspaper
  • Cardboard
  • Belt buckle or large, strong rubber bands
  • Sheets of paper


Download Student Worksheet & Exercises


Here’s how you make it:


  1. Cut the cardboard into square pieces.
  2. Cut or fold the sheets of newspaper into squares the same size as the cardboard.
  3. Place 4 sheets of newspaper between each piece of cardboard. You can also use white copy paper.
  4. Place the plants you want to press in between the newspaper.
  5. If you want, you can sandwich the plant press with the wood planks for added pressure.
  6. Bind it tightly with the rubber bands or a belt buckle.
  7. Leave it in a dry place for two to four days.

How does it work? The pressure from the rubber band/string pushes the water from the plants. The water is then absorbed by the newspaper. Since the pressure is the key to the press, it’s important not to open the press for at least two days (more is better).


Troubleshooting: The press works by pushing the moisture out of the plants, so any way moisture can stay in (or get back in) to the plants will make the press less effective. First, storing the press in a dry place is essential. If the press is left in a moist area not only will in not work, but it will grow mold and ruin the press and the plants. Conversely, if the pressure is not great enough, the moisture will not be pressed out. Thus make sure that the plants fit in the press, are bound tightly, and that the press is stored in a dry area for at very least two days.


Exercises


  1. Draw and describe the functions of the following plant parts: root, stem.
  2. What two major processes happen at the leaf?
  3. Why are flowers necessary?
  4. Do all plants have roots, stems, leaves and flowers?

[/am4show]


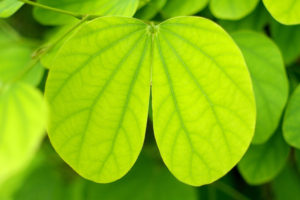
Flowering plants can be divided into monocotyledons and dicotyledons (monocots and dicots). The name is based on how many leaves sprout from the seed, but there are other ways to tell them apart. For monocots, these will be in multiples of three (wheat is an example of a monocot). If you count the number of petals on the flower, it would have either three, six, nine, or a multiple of three. For dicots, the parts will be in multiples of four or five, so a dicot flower might have four petals, five petals, eight, ten, etc.

Let's start easy...grab a bunch of leaves and lets try to identify them. Here's what you need to know:

[am4show have='p8;p9;p27;p54;p65;' guest_error='Guest error message' user_error='User error message' ]

Materials:

  • lettuce or celery
  • sharp knife with adult help
  • cutting board
  • microscope with slides
  • flowers of your choice

Download Transpiration Lab (for Monocots & Dicots)

Further Experiments:

  1. Source: Wiki

    Most monocots have veins that are parallel, running side by side. To see an example of this, look at a blade of grass. Most dicots have leaves with veins that form networks. Look at the leaf of lettuce, or a leaf from an oak or maple tree. This is not an absolute test, but it will usually put you on the right path.

  2. Another test involves cutting the plant's stem. Use a sharp knife to cut through the stem, and then examine it with a magnifying glass or microscope. You are looking for the vascular tissue that carries food and water through the plant. For dicots, the vascular tissue are arranged in rings or lines. For an easy example of that, chop some celery. The "strings" in the celery is the vascular tissue, and you will find them lined up in a nice row. That tells us that celery is a dicot. For monocots, the vascular bundles are spread through the entire stem. While you are chopping your celery, chop some hearts of palm or some bamboo shoots. Neither will have that distinctive row of vascular tubes, since palms and bamboo are both monocots.
  3. Head for your local grocery store. Look through the produce section, and you should find a wide variety of both monocots and dicots. Most groceries also have a section for live flowers, which will give you a great chance to count some petals.
  4. Look at your flowers. Which are monocots and which are dicots? Why?


[/am4show]


Mass and energy are conserved. This means you can’t create or destroy them, but you can change their location or form.


Most people don’t understand that the E energy term means all the energy transformations, not just the nuclear energy.


The energy could be burning gasoline, fusion reactions (like in the sun), metabolizing your lunch, elastic energy in a stretched rubber band… every kind of energy stored in the mass is what E stands for.


For example, if I were to stretch a rubber band and somehow weigh it in the stretched position, I would find it weighed slightly more than in the unstretched position.


Why? How can this be? I didn’t add any more particles to the system – I simply stretched the rubber band. I added energy to the system, which was stored in the electromagnetic forces inside the rubber band, which add to the mass of the object (albeit very slightly). Read more about this in Unit 7: Lesson 3.


[am4show have=’p8;p9;p27;p54;p69;p86;p87;’ guest_error=’Guest error message’ user_error=’User error message’ ]


For plants, this means that energy from captured sunlight, combined with carbon dioxide and water, both of which have mass, make the plant heavier. Let’s find out how Einstein would have planted a garden while thinking about his big ideas.


Materials:


  • scale for weighing your plant
  • pot with soil
  • plant (not potted yet)
  • water
  • time
  • notebook and pencil to record your findings


Download Student Worksheet & Exercises


  1. Prepare a pot with dirt. Add a measured amount (like 1 cup) of water to dampen the soil. Weigh the pot filled with soil (but no plant).
  2. Add a plant to the pot and weigh the whole thing.
  3. Subtract the weight you found in step 1 from step 2 to find out how much the plant weighs.
  4. You’ll be weighing your pot each day. Weigh the plant before watering (water it the same amount each day) and write it down in your notebook . If you’re giving it water and sunlight, the plant should be getting heavier.
  5. Where does this mass come from? You can’t create mass, and yet the plant is getting heavier. How?

You and I get heavier when we eat food. You aren’t giving the plant food, but it is getting food. How? Where does its food come from? The energy from the sun is changed to sugars during photosynthesis, increasing the mass of the plant.


Exercises


  1. Where does this mass come from? You can’t create mass, and yet the plant is getting heavier. How?
  2. Can energy be created?
  3. Can energy be destroyed?

[/am4show]


Plants need light, water, and soil to grow. If you provide those things, you can make your own greenhouse where you can easily observe plants growing. Here’s a simple experiment on how to use the stuff from your recycling bin to make your own garden greenhouse.


We’ll first look at how to make a standard, ordinary greenhouse. Once your plants start to grow, use the second part of this experiment to track your plant growth. Once you’ve got the hang of how to make a bottle garden, then you can try growing a carnivorous greenhouse.
[am4show have=’p8;p9;p27;p54;p65;p78;p87;’ guest_error=’Guest error message’ user_error=’User error message’ ]


Materials:


  • 2 liter bottle
  • scissors or razor
  • gravel or sand
  • spanish moss
  • dish or plate
  • seeds of your choice

Experiment:


  1. Using an exacto knife or scissors, cut the label from the soda bottle. Carefully cut the bottle in half so that the bottom (container) piece is deep enough to hold soil and plants. Poke a few holes into the bottom of the container for drainage.
  2. Fill the bottom of the bottle with a half cup of sand or gravel to provide drainage. Use playground sand, aquarium gravel or small stones picked up from a hike. If sand or gravel isn’t available, crush an old clay pot and use that. (Let an adult crush the pot.)
  3. Place a 1-inch layer of Spanish or Spaghnum moss in the mini greenhouse to keep the soil from mixing with the rock layer. Place a thick layer of potting soil on top of the moss, at least 4 inches deep or 1 inch from the top. Tamp down lightly with your finger
  4. Put the top half of the soda bottle back on, tucking inside the edges of the container. If necessary, you can cut small slits into the upper portion to make it fit. Leave the cap on.
  5. Place atop a waterproof plate in a sunny spot and water sparingly. The lid retains moisture and heat, so your seeds should sprout quickly. Because the plastic is clear, you’ll be able to see the roots beneath the surface of the soil. If the greenhouse gets too steamy, you can remove the lid once in a while. When your seedlings get big enough, transplant to the garden, and plant a new crop!

Tracking Plant Growth

You know that plants grow… but when a plant grows, is the entire stem getting longer, like rolling dough, or is only the tip growing, like squeezing the end of a toothpaste tube?


This simple experiment can give you the answer. Ready?


  1. Tie string around the edge of a plants stem, between the last leaf at the end, and the next leaf.
  2. Make observations as the plant grows.

What’s going on? If the entire stem grows, your string will always stay at the end. If just the tip grows, the string will become further and further from the edge. Which is it? Are you surprised?


Carnivorous Greenhouse

Was the last activity too tame for you? You’ll need to order carnivorous plant seeds. Carnivorous plants are heterotrophs. As you learned, this means they must get their energy from other organisms instead of the sun. Such plants are good at catching small animals, such as insects, to eat. Used the video below to learn how to plant the seeds that will produce these carnivores, and how to care for them once they have sprouted.


Download Student Worksheet & Exercises


Exercises


  1. What is a carnivorous plant?
  2.  What is another name for a carnivorous plant?
  3.  What does a carnivorous plant need to thrive?
  4.  Should we fertilize a carnivorous plant? Why or why not?

[/am4show]


Broccoli, like all plants, has chlorophyll, making it green. You can really “see” the chlorophyll when you boil broccoli. This is such a simple experiment that you can do this as you prepare dinner tonight with your kids. Make sure you have an extra head of broccoli for this experiment, unless you really like to eat overcooked broccoli.

[am4show have='p8;p9;p27;p54;p69;' guest_error='Guest error message' user_error='User error message' ]

First, boil a pot of water. Add some cut up broccoli, and immediately observe the color. Allow the broccoli to cook for 15 minutes, and observe the color again.

What’s happening? When you first put the broccoli in the boiling water, the hot water allowed air bubbles to escape. This allowed you to clearly view chlorophyll, the chemical that makes broccoli green, so the broccoli should have appeared very bright.

After 15 minutes of cooking, chlorophyll undergoes a chemical change and the broccoli becomes a duller color. The heat makes it easy for the chlorophyll to lose magnesium. The magnesium is replaced by hydrogen from natural acids in the plant. This chemical change causes the color to change.

[/am4show]


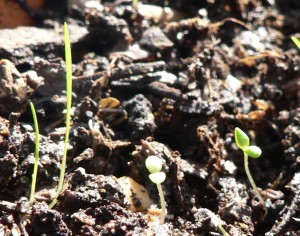
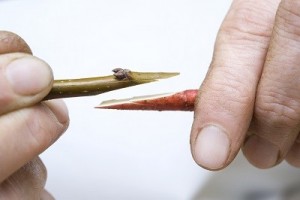
If you have a backyard garden, be sure to give it plenty of sunshine, water, and garbage.


Wait… garbage?  Yes, you read that right.


Garbage like rotting food and coffee grounds, made into compost, can be highly beneficial to garden plants.  Why? It all has to do with nitrogen.


Plants need nitrogen in order to survive.  There is plenty of nitrogen in the atmosphere; the problem is that plants can’t use it in the form found in the atmosphere.  For this, bacteria are needed.  Bacteria “fix” nitrogen, meaning that they change it into a usable form.


[am4show have=’p8;p9;p27;p54;p78;’ guest_error=’Guest error message’ user_error=’User error message’ ]


This is where the garbage comes in.  Bacteria break down the garbage by eating it.  When other organisms living in the soil, particularly worms, eat the bacteria, the nutrients they have stored up are released.  The result is soil far more rich in nutrients.


So, how do you create your own compost pile to create plenty of garbage for your garden’s bacteria to enjoy?  Well, you already have the garbage, which is a good first start.  Next, you’ll want to get a compost bin.  Garden supply stores sell bins, although you could also make one with wood and chicken wire.  For even simpler compost bins, a pit in the ground or plastic garbage bag with holes in it will work, although you’ll need to be sure to air out the plastic bag every couple days.


Fill your bin with 1/3 brown material (dead leaves or plants are good), 1/3 vegetation, and 1/3 soil.  Then, pile on the garbage!  Add kitchen waste, grass clippings, dry leaves, dead plants, shredded newspaper, lint from your clothes dryer, and pet hair.  The ideal compost heap will have a 25 to one ratio of things like dead leaves and newspapers, which are high in carbon to grass and other plants, which are high in nitrogen.  Adding cattle, horse, or chicken manure is a great idea.  Trash to avoid are bones, meat, and fat (all of which can attract pests), human or pet waste (which can spread disease), and weeds or diseased plants (which can re-introduce the weed or disease into your garden.)


[/am4show]


Keep your compost heap moist, but not soggy and turn it with a pitchfork or spade to add air into the mix.  Once your compost bin is going strong, you can add it to your garden for improved plant growth!


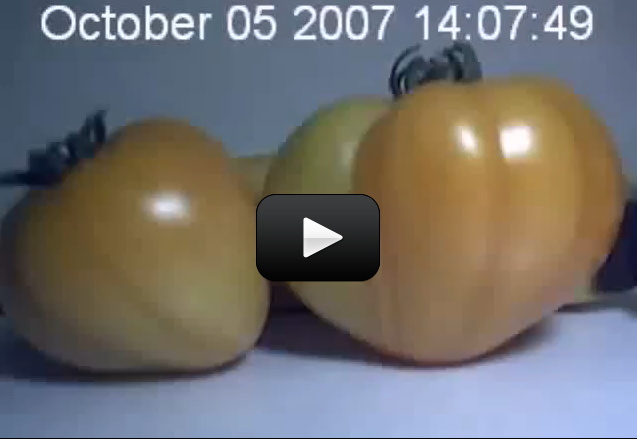
If you’ve ever eaten fruits or vegetables (and let’s hope you have), you have benefited from plants as food.  Of course, the plants we eat have been highly modified by growers to produce larger and sweeter fruit, or heartier vegetables.


There are three basic ways to create plants with new, more desirable traits:


[am4show have=’p8;p9;p27;p54;p69;p78;’ guest_error=’Guest error message’ user_error=’User error message’ ]


Grafting

Grafting takes advantage of the fact that trees have the ability to heal themselves.  In this method, a branch of a tree is cut off and replaced with the branch of a different tree.  Wait a season and, voila, a new tree with the traits of the branch that was added on, or grafted, is growing on the original tree.


There are many reasons for grafting.  First, it allows growers to produce a tree with more than one type of fruit.  Peaches, plums, and apricots can all be found on the same tree after grafting has occurred.  Grafting of the same fruit can also beneficial.  Sweet oranges are preferred for taste, but trees that produce these types of oranges are at greater risk for disease.  Also, sweet oranges often have no seeds, making it impossible for them to reproduce naturally.  By grafting sweet oranges onto sour orange trees, both problems can be avoided.


 Hybridization

You’ve probably noticed that children look like their parents, and that brothers and sisters tend to look alike as well.  We share more traits with the people we are most closely related to.  This is the basic idea of the branch of science called genetics.  It’s not just true with people, though.  Plants will share traits with their offspring.


Breeders have been using the ideas of genetics for years.  They have been forcing plants with traits people find desirable to breed, hoping that the offspring will share those traits.  Traits such as resistance to disease, large size, and sweetness, are bred for.  When breeders began doing this, they didn’t know about genes, the factors that carry traits from parents to offspring.  As this became known, breeders became better at making crosses that would produce the traits they were looking for.


Transgenics

Every living thing has a genome.  A genome is the complete sequence of genes the organism has.  The genes of each organism are different, which is why a bacterium is different than, say, a tomato.  For the most part, that’s a good thing.  We wouldn’t want our tomatoes to be much like bacteria.  But what if we did?  At least a little.  If there was something in bacteria that would be helpful to tomatoes, would there be a way to add the bacteria gene to the tomato genome?  It turns out that the answer is yes, and transgenics refers to the process of adding something helpful to another organism’s genome.


In the case of the bacteria and the tomato, some bacteria have a gene that would give tomatoes resistance to disease.  This gene has been placed in many tomatoes.  Some people have concerns about transgenics, worrying that adding to genomes could have unintended consequences.  Nevertheless, this process has become very common.


[/am4show]