[am4show have='p8;p9;p11;p38;p72;p77;p92;' guest_error='Guest error message' user_error='User error message' ]

Getting Started

Taught from a college-level, secular perspective, this course prepares students to engage with real science the way professional astronomers do.

Students will explore planets, stars, black holes, galaxies, and more through interactive labs, stargazing, real science projects, and weekly assignments that spark curiosity and build confidence.

Whether your student dreams of becoming a scientist or just loves looking at the night sky, this course is designed to ignite their passion for space and help them think like a real astronomer.

Each week, students will have a lesson with a teacher (watch live or recorded), build hands-on projects, and complete homework assignments. It's important that students complete each set of projects and assignments, as weeks will build on each other in complexity and content.

Near the end of the term, students will complete their capstone project. Students will have the opportunity to participate in scientific research that contributes to the real astronomical community—by measuring stars and submitting their findings for publication in a scientific journal.

Students may take part in real research opportunities and have the chance to publish their work in scientific journals—an impressive accomplishment to highlight on college applications. (No telescope required.)

Special Concern: How Can Faith-Based Homeschool Students Succeed in Secular College Science Courses?

How to Help Students Transition to Mainstream Science Without Undermining Their Beliefs

If your student is from a faith-based family, you might feel hesitant about their participation in this course. We completely understand, and wanted to share our perspective to help address your concerns.

Students who are taught how to think, rather than what to think—by learning to observe, reason logically, and evaluate evidence—tend to transition more easily into college-level science, even if their earlier learning was faith-based.

By gradually introducing mainstream scientific models in high school and focusing on real-world skills like data analysis and problem-solving, students gain the tools to engage thoughtfully with new material. Helping them decode the vocabulary and explore multiple viewpoints respectfully prepares them to enter any science course with both confidence and clarity.

While the rest of the Supercharged Science program is creation- and evolution-neutral (focusing on observable science), this astronomy course is taught from a secular perspective based on current scientific models and evidence, the same content you'd find in a college course. Click for details.

Whether you’re still deciding if this course is the right fit or you’re ready to dive in, we’ve created resources to make the process easy to understand. Start by downloading the course info packet (below) to learn what to expect, and jump into the first lesson and see how your student does with the program!

[/am4show]


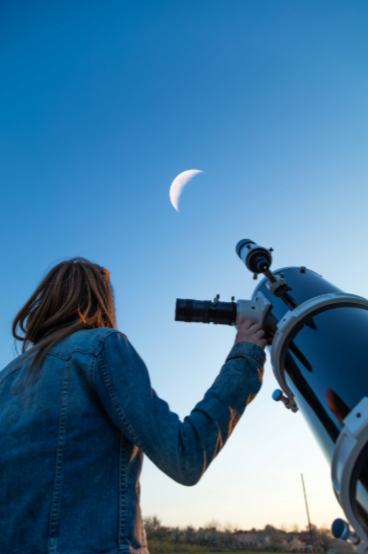
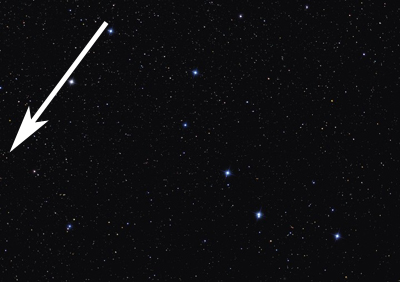
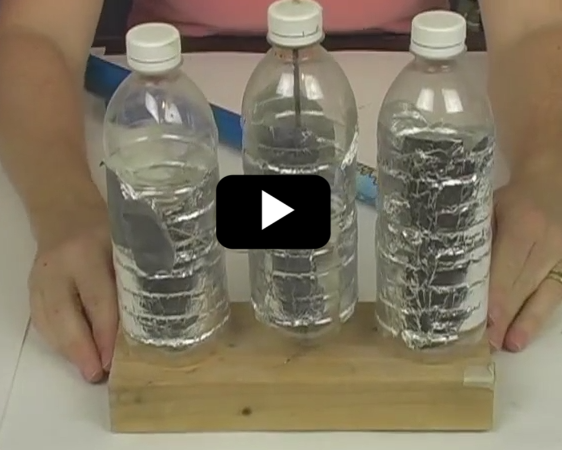
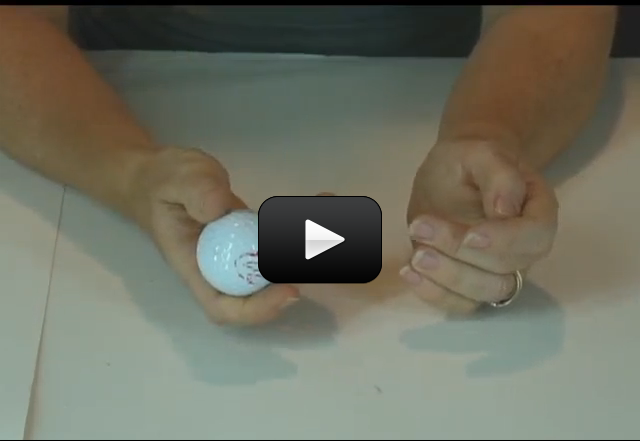
How do astronomers find planets around distant stars? If you look at a star through binoculars or a telescope, you’ll quickly notice how bright the star is, and how difficult it is to see anything other than the star, especially a small planet that doesn’t generate any light of its own! Astronomers look for a shift, or wobble, of the star as it gets gravitationally “yanked” around by the orbiting planets. By measuring this wobble, astronomers can estimate the size and distance of larger orbiting objects.


Doppler spectroscopy is one way astronomers find planets around distant stars. If you recall the lesson where we created our own solar system in a computer simulation, you remember how the star could be influenced by a smaller planet enough to have a tiny orbit of its own. This tiny orbit is what astronomers are trying to detect with this method.
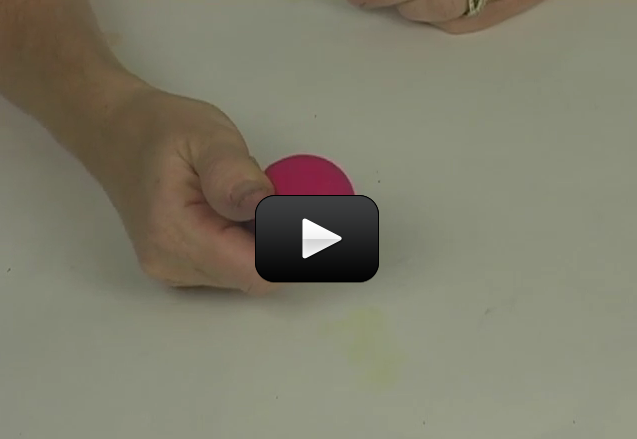

Materials


  • Several bouncy balls of different sizes and weights, soft enough to stab with a toothpick
  • Toothpicks

[am4show have=’p8;p9;p11;p38;p92;p17;p44;p83;’ guest_error=’Guest error message’ user_error=’User error message’ ]


Download Student Worksheet & Exercises


  1. Does your ball have a number written on it? If so, that’s the weight, and you can skip measuring the weight with a scale.
  2. If not, weigh each one and make a note in the data table.
  3. Take the heaviest ball and spin it on the table. Can you get it to spin in place? That’s like a Sun without any planets around it.
  4. Insert a toothpick into the ball. Now insert the end of the toothpick into the smallest weight ball. Now spin the original ball. What happened?

What’s Going On?

Nearly half of the extrasolar (outside our solar system) planets discovered were found by using this method of detection. It’s very hard to detect planets from Earth because planets are so dim, and the light they do emit tends to be infrared radiation. Our Sun outshines all the planets in our solar system by one billion times.


This method uses the idea that an orbiting planet exerts a gravitational force on the Sun that yanks the Sun around in a tiny orbit. When this is viewed from a distance, the star appears to wobble. Not only that, this small orbit also affects the color of the light we receive from the star. This method requires that scientists make very precise measurements of its position in the sky.


Exercises


  1. For homework tonight, find out how many extrasolar planets scientists have detected so far.
  2. Also for homework, find out the names (they will probably be a string of numbers and letters together) of the 3 most recent extrasolar planet discoveries.

[/am4show]


mysolarsystem-thumbnail
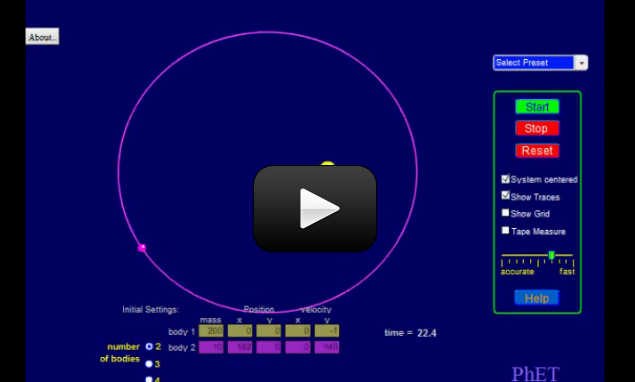
What would happen if our solar system had three suns?  Or the Earth had two moons? You can find out all these and more with this lesson on orbital mechanics. Instead of waiting until you hit college, we thought we’d throw some university-level physics at you… without the hard math.
[am4show have=’p8;p9;p17;p44;’ guest_error=’Guest error message’ user_error=’User error message’ ]
To get you experienced with the force of gravity without getting lost in the math, there’s an excellent computer program that allows you to see how multi-object systems interact. Most textbooks are limited to the interaction between a very large object, like the Earth, and much smaller objects that are very close to it, like the Moon. This seriously cuts out most of the interesting solar systems that are out there in the real universe.


The University of Colorado at Boulder designed a great system to do the hard math for you. Don’t be fooled by the simplistic appearance – the physics behind the simulation is rock-solid… meaning that the results you get are exactly what scientists would predict to happen.


How do I design a solar system?

Go to the My Solar System simulation on the PhET website and carefully follow the instructions for each activity. Answer the questions and record your results before going on to the next activity. Click here to RUN the simulation on the internet.


Here’s what you should see and do:


Download Student Worksheet & Exercises


Exercises:


  1. What effect does changing the mass of orbiting planet have on the diameter of the orbit?
  2. What effect does changing the speed have on a planet’s orbit?
  3. What happens to the planet’s orbit when you increase the initial distance between the planet and the Sun?
  4. Find the mass values needed for a stable orbit. Circle the values on the table that make a stable orbit.
  5. Why don’t a feather and a brick hit the ground at the same time?

[/am4show]


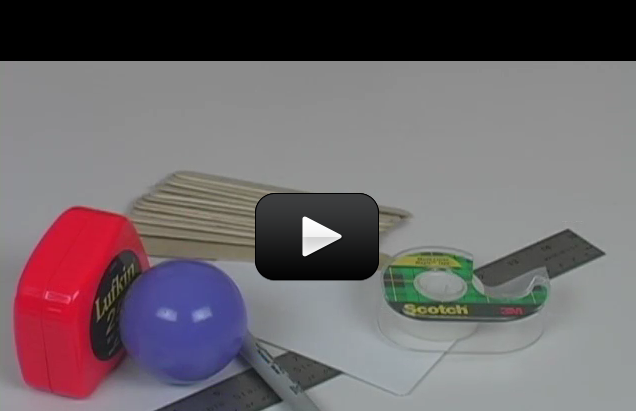
Ever wonder exactly how far away the planets really are?  Here’s the reason they usually don’t how the planets and their orbits to scale – they would need a sheet of paper nearly a mile long!


To really get the hang of how big and far away celestial objects really are, find a long stretch of road that you can mark off with chalk.  We’ve provided approximate (average) orbital distances and sizes for building your own scale model of the solar system.


When building this model, start by marking off the location of the sun (you can use chalk or place the objects we have suggested below as placeholders for the locations).  Are you ready to find out what’s out there?  Then let’s get started.


Materials:


  • measuring tape (the biggest one you have)
  • tape or chalk to mark off the locations
  • 2 grains of sand or white sugar
  • 12″ beach ball
  • 3 peppercorns
  • golf or ping pong ball
  • shooter-size marble
  • 2 regular-size marbles

[am4show have=’p8;p9;p11;p38;p92;p17;p44;p96;p73;’ guest_error=’Guest error message’ user_error=’User error message’ ]


Download Student Worksheet & Exercises


All distances are measured from the center of the sun. (In some cases, you might just want to use the odometer in your car to help you measure the distance!


Sun (12″ beach ball) at the starting point.


Mercury (grain of sand) is 41 feet from the sun.


Venus (single peppercorn) is 77 feet from the sun.


Earth (single peppercorn) is 107 feet from the sun.


Mars (half a peppercorn) is 163 feet from the sun.


Jupiter (golf or ping pong ball) is 559 feet from the sun.


Saturn (shooter-size marble) is 1,025 feet from the sun.


Uranus (regular-size marble) is 2,062 feet from the sun.


Neptune (regular marble) is 3,232 feet from the sun.


Pluto (grain of sand) is 4,248 feet from the sun.


Nearest Star (Alpha Centauri) is 5500 miles from the sun.


Is Your Solar System Too Big?

If these distances are too large for you, simply shrink all objects to the size of the period at the end of this sentence and you’ll get your solar system to fit inside your house using these measurements below.


First, draw a tiny dot for the Sun.  The diameter of the sun for this scale model is 0.1″, but we’re going to ignore this and all other planet diameters so we can fit this model within a 35′ scale.


We’re going to ignore the sizes of the planets and just focus on how far apart everything is. All distances listed below are measured from the sun.  Start by marking off the position of the sun with the tip of a sharp pencil.


Here are the rest of the distances you need to mark off:


Mercury is 4 inches from the sun.


Venus is 7.75 inches from the sun.


Earth is 10 inches from the sun.


Mars is 1′ 4″ from the sun.


Jupiter is 4′ 8″ from the sun.


Saturn is 8′ 6.5″ from the sun.


Uranus is 17′ 2″ from the sun.


Neptune is 26′ 11″ from the sun.


Pluto is 35′ 5″ from the sun.


Our nearest star, Alpha Centauri, is approximately 46 miles from the sun.


Did You Notice…?

Are you mind-boggled yet? Did you notice how the solar system is really just ’empty space’? Our models shown here are too small to start bringing in the moons, but you can see why posters showing the planets are not drawn to scale.  What are your thoughts on this experiment? Tell us in the comment area below!


For Advanced Students:

[/am4show][am4show have=’p9;p44;’ guest_error=’Guest error message’ user_error=’User error message’ ]


If you really want to play with the different distances on your own, use this orbital calculator online to help convert the distances for you.


[/am4show]


The stars rise and set just like our sun, and for people in the northern hemisphere, the Big Dipper circles the north star Polaris once every 24 hours. Would you like to learn how to tell time by the stars?


[am4show have=’p8;p9;p17;p44;’ guest_error=’Guest error message’ user_error=’User error message’ ]


From the northern hemisphere, the Big Dipper is above the horizon for most of the year. In the spring time (especially in March), it’s fun and easy to learn how to tell time by the stars!


First, go outside after sunset and find the Big Dipper. Use a compass if you need to to find NORTH, then tilt your head back and look up from the horizon for seven bright stars.


Draw a line through two bowl stars (furthest from the handle) and extend that line so it hits the north “pole” star Polaris.


The “sky clock” is a 24-hour clock, not a 12-our clock like the one in your house. Polaris is the center of the clock, and the hour hand is the line you drew from the Big Dipper to Polaris.


Now use this simple formula: The current TIME = the clock reading MINUS twice the number of months after March 6. (You can use March 1 to make it easier to figure out.) Imagine we’re in March right now, so that “number of months past March” is ZERO. (See why it’s easy in March?) So go look up at the sky clock and read what time it is!


Notice how we read the sky clock COUNTERCLOCKWISE. This is opposite of the clock in your kitchen.


Let’s take another example. Suppose it’s Dec. 1st.


Dec 1 is close to Dec 6, so let’s figure about 9 months (to be exact, it would be 8.75 months, but let’s make it easy to calculate this time through). The night sky looks like the second image (without the clock superimposed over it). Can you tell me what time it is?


ANSWER:
The clock reads 2PM. The correction is 2 x 9 = 18. That is 18 hours we will need to SUBTRACT from 2PM.


So the time I read on the clock is about 2am (you could say 1:30am, but I am trying to make it easier here).


Now subtract 12 hours to make that PM into AM.


Now we only need to subtract 6 more hours.


Subtract 6 hours from 2AM to get 8PM!


The more you practice this, the easier it will be!
[/am4show]


One common misconception is that the seasons are caused by how close the Earth is to the Sun. Today you get to do an experiment that shows how seasons are affected by axis tilt, not by distance from the Sun. And you also find out which planet doesn’t have sunlight for 42 years.


The seasons are caused by the Earth’s axis tilt of 23.4o from the ecliptic plane.


Materials


  • Bright light source (not fluorescent)
  • Balloon
  • Protractor
  • Masking tape
  • 2 liquid crystal thermometers
  • Ruler, yardstick or meter stick
  • Marker

[am4show have=’p8;p9;p11;p38;p92;p17;p44;p67;p73;’ guest_error=’Guest error message’ user_error=’User error message’ ]


Download Student Worksheet & Exercises


  1. For a light source, try lamps with 100W bulbs (without lamp shades). Make sure there’s room to walk all the way around it. You’ll want to circle the lamp at a distance of about 2 feet away.
  2. Mark on the floor with tape and label the four positions: winter, spring, summer, and fall. They should be at the 12, 3, 6, and 9 o’clock positions. Winter is directly across from summer. The Earth rotates counterclockwise around the Sun when viewed from above.
  3. Blow up your balloon so it’s roughly round-shaped (don’t blow it up all the way). Mark and label the north and south poles with your marker. Draw an equator around the middle circumference.
  4. The Earth doesn’t point its north pole straight up as it goes around the Sun. It’s tilted over 23.4o. here’s how you find this point on your balloon:
    1. Put the South Pole mark on the table, with north pointing straight up. Find the midway point between the equator and the North Pole and make a tiny mark. This is the 45o latitude point. You’ll need this to find the 23o mark.
    2. Find the midway point between the 45o and the North Pole and make another mark, larger this time and label it with 23o. When this mark is pointing up, the Earth is tilted over the right amount.
    3. You’ll need to do this three more times so you can draw a line connecting the dots. You want to draw the latitude line at 23o so you can rotate the balloon as you move around to the different seasons. The line will always be pointed up.
  5. Place the thermometers on the balloon at these locations:
    1. Find the halfway point between the South Pole and the equator. Put one thermometer on this mark.
    2. Put the other thermometer on the northern hemisphere’s 45o mark from above.
  6. Make sure your lamp is facing the balloon as you stand on summer. Let the balloon be heated by the lamp for a couple of minutes and then record the temperature in the data table.
  7. Rotate the lamp to point to fall. Move your balloon to fall, rotating the balloon so that the thermometers are facing the lamp. Wait a few more minutes and take another reading.
  8. Rotate the lamp to point to winter. Move your balloon to winter, rotating the balloon so that the thermometers are facing the lamp. Wait a few more minutes and take another reading.
  9. Rotate the lamp to point to spring. Move your balloon to spring, rotating the balloon so that the thermometers are facing the lamp. Wait a few more minutes and take another reading. You’ve completed a data set for planets with an axis tilt of about 23o, which includes the Earth, Mars, Saturn and Neptune.
  10. Repeat steps 1-9 for Mercury. Note that Mercury does not have an axis tilt, so the North Pole really points straight up. Jupiter (3.1o axis tilt) and Venus (2.7o) are very similar. The Moon’s axis tilt is 6.7o, so you can approximate these four objects with a 0o axis tilt.
  11. Repeat steps 1-9 for Uranus. Since the axis tilt is 97.8o, you can approximate this by pointing the north pole straight at the Sun during summer (90o axis tilt). The orbit for Uranus is 84 years, which means 21 years passes between each season. The north pole will experience continued sunlight for 42 years from spring through fall, then darkness for 42 years.

What’s Going On?

The north and south poles only experience two seasons: winter and summer. During a South Pole winter, the Sun will not rise for several months, and also the Sun does not set for several months in the summer. We go into more detail about how this works in a later lesson entitled: Star Trails and Planet Patterns.


At the equator, there’s a wet season and a dry season due to the tropical rain belt. Since the equator is always oriented at the same position to the Sun, it receives the same amount of sunlight and always feels like summer.


The changing of the seasons is caused by the angle of the Sun. For example, in June during summer solstice, the Sun is high in the sky for longer periods of time, which makes warmer temperatures for the Northern Hemisphere. During the December winter solstice, the Sun spends less time in the sky and is positioned much lower. This makes the winters colder. (Don’t forget that seasons are also affected by oceans and winds, though this is out of the scope of this particular activity.)


Exercises


  1. What is the main reason we have seasons on Earth?
  2. Why are there no sunsets on Uranus for decades?
  3. Are there seasons on Venus?

[/am4show]


If the cell has a nucleus, the DNA is located in the nucleus.  If not, it is found in the cytoplasm.  DNA is the genetic material that has all the information about a cell.


DNA is a long molecule found in the formed by of two strands of genes. DNA carries two copies—two “alleles”—of each gene. Those alleles can either be similar to each other (homozygous), or dissimilar (heterozygous).


We’re going to learn how to extract DNA from any fruit or vegetable you have lying around the fridge. Are you ready?


[am4show have=’p8;p9;p26;p53;p87;’ guest_error=’Guest error message’ user_error=’User error message’ ]


Materials:


  • pumpkin OR apple OR squash OR bananas OR carrots OR anything else you might have in the fridge
  • dishwashing detergent
  • 91% isopropyl alcohol
  • coffee filter and a funnel (or use paper towels folded into quarters)
  • water
  • blender
  • clear glass cup


Download Student Worksheet & Exercises


Procedure:


Step 1: First, grab your fruit or vegetable and stick it in your blender with enough water to cover. Add a tablespoon of salt and blend until it looks well-mixed and like applesauce. Don’t over-blend, or you’ll also shred the DNA strands!


Step 2: Pour this into a bowl and mix in the detergent. Don’t add this in your mixer and blend or you’ll get a foamy surprise that’s a big mess. You’ll find that the dishwashing detergent and the salt help the process of breaking down the cell walls and dissolving the cell membranes so you can get at the DNA.


Step 3: Place a coffee filter cone into a funnel (or use a paper towel folded into quarters) and place this over a cup. Filter the mixture into the cup. When you’re done, simply throw away the coffee filter. Note: Keep the contents in the cup!


Step 4: Be careful with this step! You’ll very gently (no splashing!) pour a very small about of alcohol into the cup (like a tablespoon) so that the alcohol forms a layer above the puree.


Step 5: Observe! Grab your compound microscope and take a sample from the top. You’ll want a piece from the ghostly layer between the puree and the alcohol – this is your DNA.


What’s going on?


Veggies and fruits are made of water, cellulose, sugars, proteins, salts, and DNA. To get at the DNA, you first need to get inside the cells and separate it out from the other parts. The blender breaks up the fibers that hold the cells together.


The salt and detergent are added next so they can break down the cell walls. Cell walls of plants are made of cellulose. Inside that cellulose is another cell wall (cell membrane). This membrane has an outer later of sugar and an inner layer of fat.


The detergent is a special molecule that has an attraction to water and fats (which is why it works to get your dishes clean). The end of the molecule that is attracted to fat attaches to the fat part of the cell membrane. When you stir up the mixture, it breaks up the membrane (since the other end likes water). It wedges itself inside and  opens the cell up… which causes the DNA to flow out.


Since DNA dissolves in water, it stays in the vegetable juice. When alcohols is added, the DNA “comes out” of solution as the ghostly white strands seen at the bottom of the alcohol layer.


For Advanced Students:


For advanced students, here’s a set of videos that detail the cell walls, the basic biological molecules, DNA and RNA and how everything works together.


First watch this video below to see how we broke down the cell walls in the DNA extraction experiment:


Here’s a video on how DNA and RNA work:


Here’s a video that describes how the four biological molecules (proteins, lipids, carbohydrates, and nucleic acids) work:


Exercises


  1. What are fruits and veggies made of?
  2.  What does DNA stand for?
  3.  What is DNA?
  4.  What is a gene?
  5.  Describe the structure of DNA.

[/am4show]


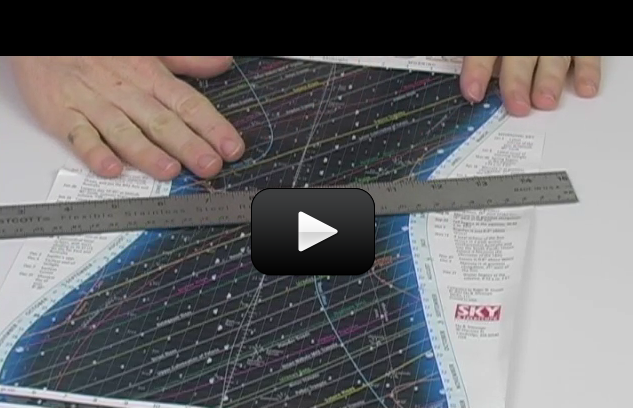
Today you get to learn how to read an astronomical chart to find out when the Sun sets, when twilight ends, which planets are visible, when the next full moon occurs, and much more. This is an excellent way to impress your friends.


The patterns of stars and planets stay the same, although they appear to move across the sky nightly, and different stars and planets can be seen in different seasons.


Materials:


[am4show have=’p8;p9;p17;p44;p73;p82;’ guest_error=’Guest error message’ user_error=’User error message’ ]


>


Download Student Worksheet & Exercises


  1. If your chart comes on two pages, you’ll need to cut the borders off at the top and bottom and tape them together so they fit perfectly.
  2. Use your ruler as a straight edge to help locate items as you read the chart.
  3. Print out copies of the almanac by clicking the image of the Skygazer’s Almanac. You can print it full-size on two pages, or size it to fit onto a single page. Since there’s a ton of information on it, it’s best read over two pages. This is an expired calendar  to practice with.
  4. First, note the “hourglass” shape of the chart. Do you see how it’s skinnier in the middle and wider near the ends? Since it’s an astronomical chart that shows what’s up in the sky at night, the nights are shorter during the summer months, so the number of hours the stars are visible is a lot less than during the winter. You’ll find the hours of the night printed across the top and bottom of the chart (find it now) and the months and days of the year printed on the right and left side.
  5. Can you find the summer solstice on June 20? Use your finger and start on the left side between June 17 and June 24. The 20th is between those two dates somewhere. Here’s how you tell exactly…
  6. Look at the entire chart – do you see the little dots that make up little squares all over the chart, like a grid? Each dot in the vertical direction represents one day. There are eight dots on the vertical side of the box.
  7. Let’s say you want to find out what time Neptune rises on June 17. Go back to June 17, which has its own little set of dots. Follow the dots with your finger until you hit the line that says Neptune Rises. Stop and trace it up vertically to the top scale to read just after 11 p.m.
  8. Look again at the dot boxes. Each horizontal dot is 5 minutes apart, and every six dots there is a vertical line representing the half-hour. The line crosses between the second and third dot, so if you lived in a place where you can clearly see the eastern horizon and looked out at 11:07, you’d see Neptune just rising. Since Uranus and Neptune are so far away, though, you’d need a telescope to see them. So let’s try something you can find with your naked eye.
  9. Look at Oct 21. What time does Saturn set? (5:30p.m.).
  10. What other two planets set right afterward? (Mercury at 6:03 p.m. and Mars sets at 7:12 p.m.).
  11. When does Jupiter rise? (7:32 p.m.).
  12. What is Neptune doing that night of Oct. 21? (Neptune transits, or is directly overhead, at 8:07 p.m. and sets at 1:30 a.m.)
  13. What other interesting things happen on Oct. 21? (Betelgeuse, one of the bright stars in the constellation Orion, rises at 9:23 p.m. Sirius, the dog star, rises at 11:06 p.m. The Pleiades, also known as the Seven Sisters, are overhead at 1:42 a.m.)
  14. Let’s find out when the Moon rises on Oct. 21. You’ll find a half circle representing the Moon centered on 11:05 p.m. Which phase is the Moon at? First or third quarter? (First. You can tell if you look at the next couple of days to see if the Moon waxes or wanes. Large circles indicate one of the four main phases of the Moon.)
  15. When does the Sun rise and set for Oct. 21? First, find the nearest vertical set of dots and read the time (5:30 p.m.). Now subtract out the 5-minute dots until you get to the edge. You should read three dots plus a little extra, which we estimate to be 17 minutes. Sunset is at 5:13 p.m. on Oct 21.
  16. Note the fuzzy, lighter areas on both sides of the hourglass. That represents the twilight time when it’s not quite dark, but it’s not daylight either. There’s a thin dashed line that runs up and down the vertical, following the curve of the hourglass offset by about an hour and 35 minutes. That’s the official time that twilight ends and the night begins.
  17. Can you find a meteor shower? Look for a starburst symbol and find the date right in the center. Those are the peak times to view the shower, and it’s usually in the wee morning hours. The very best meteor showers are when there’s also a new Moon nearby.
  18. Notice how Mercury and Venus stay close by the edges of the twilight. You’ll find a half-circle symbol representing the day that they are furthest from the Sun as viewed from the Earth, which is the best date to view it. For Venus, the * indicates the day that it’s the brightest.
  19. What do you think the open circle means at sunset on May 20? (New Moon)
  20. Students that spot the “Sun slow” or “Sun fast” marks on the chart always ask about it. It’s actually rather complicated to explain, but here’s the best way to think about it. Imagine that the vertical timeline running down the center means noon, not midnight. Do you see a second line weaving back and forth across the noon line throughout the year? That’s the line that shows the when the Sun crosses the meridian. On Feb 5, the Sun crosses that meridian at 12:14, so it’s “running slow,” because it “should have” crossed the meridian at noon. This small variation is due to the axis tilt of the Earth. Note that it never gets much more than 15 minutes fast or slow. The wavy line that represents this effect is called the Equation of Time. We’ll be using that later when we make our own sundials and have to correct for the Sun not being where it’s supposed to be.
  21. Look at Mars and Saturn both setting around the same time on Aug. 14. When two event lines cross, you’ll find nearby an open circle with a line coming from the top right side, accompanied by a set of arrows pointing toward each other. This means conjunction, and is a time when you can see two objects at once. Usually the symbol isn’t right at the intersection, because one of the objects is rising or setting and isn’t clearly visible. On Aug. 14, you’ll want to view them a little before they set, so the symbol is moved to a time where you can see them both more clearly.
  22. Important to note: If your area uses daylight savings time, you’ll need to add one hour to the times shown on the chart.
  23. Time corrections for advanced students: This chart was made for folks living on the 40o north latitude and 90o west longitude lines (which is Peoria, Ill.).
    1. If you live near the standardized longitudes for Eastern Time (75o), Central (90o), Mountain (105o) or Pacific (120o), then you don’t have to correct the chart times you read. However, if you live a little west or east of these standardized locations, you need a correction, which looks like this:
      1. For every degree west, add four minutes to the time you read off the chart.
      2. For every degree east, subtract four minutes from the time.
      3. For example, if you lived in Washington, D.C. (which is 77o longitude), note that this is 2o west of the Eastern Time, so you’d add 8 minutes to the time you read off the chart. Memorize your particular adjustment and always use it.
    2. If your latitude isn’t 40o north, then you need to adjust the rise and set times like this:
      1. If you live north of 40o, then the object you are viewing will be in the sky for longer than the chart shows, as it will rise earlier and set later.
      2. If you live south of 40o, then the object you are viewing will be in the sky for less time than the chart shows, as it will rise later and set earlier.
      3. The easiest way to calculate this is to note what time an object should rise, and then watch to see when it actually appears against a level horizon. This is your correction for your location.

    What’s Going On?

    This is one of the finest charts I’ve ever used as an astronomer, as it has so much information all in one place. You’ll find the rise and set times for all eight planets, peak times for annual meteor showers, moon phases, sunrise and set times, and it gives an overall picture of what the evening looks like over the entire year. Kids can clearly see the planetary movement patterns and quickly find what they need each night. I keep one of these posted right by the door for everyone to view all year long.

Exercises


  1.  Is Mercury visible during the entire year?
  2.  In general, when and where should you look for Venus?
  3.  When is the best time to view a meteor shower?
  4.  Which date has the most planets visible in the sky?

[/am4show]


soccerball1This experiment is one of my favorites in this acceleration series, because it clearly shows you what acceleration looks like.


The materials you need is are:


  • a hard, smooth ball (a golf ball, racket ball, pool ball, soccer ball, etc.)
  • tape or chalk
  • a slightly sloping driveway (you can also use a board for a ramp that’s propped up on one end)

For advanced students, you will also need: a timer or stopwatch, pencil, paper, measuring tape or yard stick, and this printout.


Grab a friend to help you out with this experiment – it’s a lot easier with two people.


Are you ready to get started really discovering what acceleration is all about?


Here’s what you do:
[am4show have=’p8;p9;p11;p38;p12;p39;p92;’ guest_error=’Guest error message’ user_error=’User error message’ ]
1. Place the board on the books or whatever you use to make the board a slight ramp. You really don’t want it to be slanted very high. Only an inch or less would be fine. If you wish, you can increase the slant later just to play with it.


2. Put a line across the board where you will always start the ball. Some folks call this the “starting line.”


3. Start the timer and let the ball go from the starting line at the same exact time.


4. Now, this is the tricky part. When the timer hits one second, mark where the ball is at that point. Do this several times. It takes a while to get the hang of this. I find it easiest to have another person do the timing while I follow the ball with my finger. When the person says to stop, I stop my finger and mark the board at that point.


5. Do the exact same thing but this time, instead of marking the place where the ball is at one second, mark where it is at the end of two seconds.


6. Do it again but this time mark it at 3 seconds.


7. Continue marking until you run out of board or driveway.


Download Student Worksheet & Exercises


Take a look at your marks. See how they get farther and farther apart as the ball continues to accelerate? Your ball was constantly increasing speed and as such, it was constantly accelerating. By the way, would it have mattered what the mass of the ball was that you used? No. Gravity accelerates all things equally. This fact is what Galileo was proving when he did this experiment. The the weight of the ball doesn’t matter but the size of the ball might. If you used a small ball and a large ball you would probably see differences due to friction and rotational inertia. The bigger the ball, the more slowly it begins rolling. The mass of the ball, however, does not matter.


Exercises


  1. Was the line a straight line?
  2. It should be close now, and the slope represents the acceleration it experienced going down the ramp. Calculate the slope of this line.
  3. What do you think would happen if you increased the height of the ramp?
  4. Knowing what you do about gravity, what is the highest acceleration it can reach?

[wpc_button]


For Advanced Students…

[/am4show][am4show have=’p9;p39;’ guest_error=’Guest error message’ user_error=’User error message’ ]
Now if you want to whip out your calculators you can find out how fast your ball was accelerating. Take your measuring tape and measure the distance from the starting line to the line you made for the distance the ball traveled in one second.


Let’s say for example that my ball went 6 inches in that first second. Dust off those old formulas and lets play with d=1/2gt² where d is distance, g is acceleration due to gravity and t is time.


We can’t use g here because the object is not in free fall, so instead of g let’s call it “a” for acceleration. Gravity is the force pulling on our ball but due to the slope, the ball is falling at some acceleration less then 32 ft/s².


In this case, d is 6 inches, t is 1 second and a is our unknown.


With a little math we see:


a = 12in/sec² (So our acceleration for our ramp is 12 in/sec² or we could say 1ft/s².)


With a little more math we can see how far our ball should have traveled for each time trial that we did. For one second we see that our ball should have traveled d=1/2 12(12) or d= 6 inches (we knew that one already didn’t we?).


For two seconds we can expect to see that d=1/2 12(22) or d=24 inches.
For three seconds we expect d=1/2 12(32) or d= 54 inches.


Do you see why we need a pretty long board for this?


Now roll the ball down the ramp and actually measure the distance it travels after two and three seconds. Do your calculations match your results? Probably not. Our nasty little friend friction has a sneaky way of messing up results. You should definitely see the distance the ball travels get greater with each second however. So make yourself a table or use one of ours to record your data and jot down your calculations and chart your results like a real scientist.


Advanced students: Download your Driveway Races Lab here.


[wpc_button]


[/am4show]


Newton’s Second Law is one of the toughest of the laws to understand but it is very powerful. In its mathematical form, it is so simple, it’s elegant. Mathematically it is F=ma or Force = Mass x Acceleration. An easy way to remember that is to think of your mother trying to get you out of bed in the morning. Force equals MA’s coming to get you! (I did mention how bad physics jokes are, right?)


[am4show have=’p8;p9;p11;p38;p12;p39;p92;’ guest_error=’Guest error message’ user_error=’User error message’ ]


Newton’s Second Law

In English, Newton’s Second Law can be stated a few different ways:


The more mass something has and/or the faster it’s accelerating, the more force it will put on whatever it hits. F=ma For example, a car colliding at 30 mph will hit a lot harder then a fly colliding at 30 mph.


The more mass something has, the more force that’s needed to get it to accelerate. a=F/m This, by the way, is a mathematical definition for acceleration. For example, it is a lot harder to get a train to accelerate than it is to get a ping pong ball to accelerate.


So force = mass X acceleration. Let’s try a couple of things and see if we can make that make sense.


Now, time to do an experiment. You will need:


  • something slightly slanted, like a slanted driveway or a long board (or even a table propped up on one end)
  • something to move down the slant, like a toy car or ball
  • a stopwatch
  • pen and paper

I’m going to assume you’re using the toy car and a driveway. Feel free to modify the experiment for whatever you are using.


1. Take the toy car to the top of the driveway.


2. Let it go.


3. Watch it carefully as it rolls.


4. If you’d like, you can time the car and mark how far it goes every second like we did in this acceleration experiment.


5. If you time it, measure the distances it went each second and write them down.


Download Student Worksheet & Exercises


What I’m hoping you will see here is that the car accelerates from zero to a certain velocity but then stays at that velocity as it continues down the driveway. In other words, it reaches its terminal velocity. If you timed and marked the distances you should see that the car goes the same distance each second if it is indeed staying at a constant velocity. If the object you are using to roll down the slant, continues to accelerate down the entire ramp, see if you can find something that has more friction to it (a toy car that doesn’t roll quite to easily, for example).


Ok, so what’s going on? F=ma right? Acceleration can’t happen without force. What two forces are effecting the car? (Imagine the Jeopardy theme song here). If you said gravity and friction, give yourself a handshake. When the car is going at a constant velocity, is it accelerating? Nope, acceleration is a change in speed or direction.


“But you just said two forces are effecting my little car and that force causes acceleration and yet my car is not accelerating. Why not?”


Well, there’s one little thing I haven’t mentioned yet, which is why we did this experiment. In this case, the force of gravity pulling on the car and the force of friction pushing on the car is equal (remember, that’s terminal velocity right?). So the net force on the car is zero. The pulling force is equal to the pushing force so there is zero force on the car. Force is measured in Newton’s (name sounds familiar right?) so imagine that there are 3 Newtons of force pulling on the car due to gravity and 3 Newtons of force pushing on the car due to friction. 3 – 3 = 0. Zero force equals zero acceleration because you need force to have acceleration. By the way, 1 Newton is about the same amount of force that it takes to lift a full glass of milk.


Advanced Students: Download your Downhill Races Lab here.


Exercises 


  1. You should notice a difference between these graphs and the ones from the driveway races. What is it? (Hint: look to second half of the graph.)
  2.  The first graph doesn’t continue to curve, but straightens out.  What does this mean about the velocity?
  3.  in the second graph, the slope flattens out completely, what does this mean about the acceleration?
  4.  If the acceleration is zero, what does that mean about the net force?
  5.  What are the forces acting on the toy car as it is going down the ramp?
  6.  Name 3 other examples

[/am4show]


Measuring Photosynthesis of a Leaf

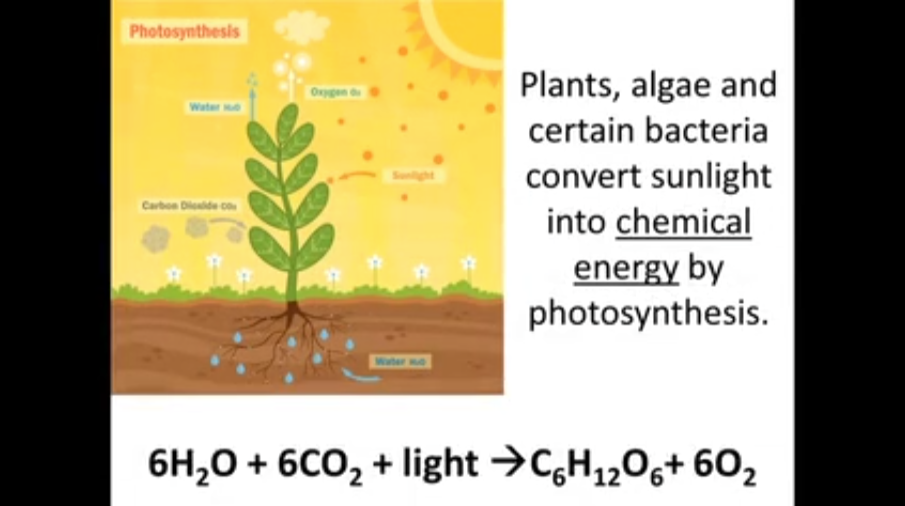
All organisms, from tigers to tulips, need energy. Even bacteria need energy. To get this energy, organisms access stored energy by eating food. Cows eat grass. Lions eat cows. But if you look closely at it, all the food energy actually can be traced back to the light from the sun.

All energy we have available on earth actually comes from the sun. When sun falls on the trees and grass, they use it to make chemical energy it can use later for things it needs. That energy is transferred to the animals that eat the plants.

The main part of the oxygen cycle on earth is photosynthesis, which converts sunlight into energy for the plant and oxygen for our atmosphere. Plants, green algae and a number of micro-organisms take light, six molecules of water, six molecules of carbon dioxide to make one sugar molecule and six oxygen molecules.

For plants, carbon dioxide enters through the breathing pores on the surface of a plant's leaves (called the stomata), and the water and nutrients enter through the roots. The oxygen gas leaves the leaf through the stomata pores and the sugar (glucose) is distributed to the rest of the plant.

We’re going to measure the rate of photosynthesis of a plant. You basically take small bits of a leaf like spinach, stick it in a cup of water that has extra carbon dioxide in it, and shine a light on it. The plant will take the carbon dioxide from the water and the light from the lamp and make oxygen bubbles that stick to it and lift it to the surface of the water, like a kid holding a bunch of helium balloons. And you time how long this all takes and you have the rate of photosynthesis for your leaf.

Once you’ve got this experiment working, think about other things that might affect the rate of photosynthesis. What about the color of the light (is red better, or yellow, blue, green, UV…?)  Does it matter how far the light is from the heat sink? Does the type of leaf matter?

Lab Time:

  1. Cut out small samples using hole punch
  2. Place leaves in a cup of water (or use a water-filled syringe)
  3. Get the leaves to sink by pressing out all air bubbles (plunge syringe several times).
  4. Add a tsp of a carbon source (like baking soda)
  5. Place a heat sink on top of the first cup (like another clear cup of water)
  6. Place in direct sunlight or under a lamp
  7. Your leave “chads” should rise to the surface if they are generating enough oxygen bubbles!
  8. Try different leaves, add more/less carbon, change water temp… and have fun!


Additional Notes for the Lab:

Make sure you don’t shine your light directly on the leaf or the glass of water it’s in, or you’ll be adding heat, not just light, to your experiment. Use a clear glass for the main cup of water, and then put a second glass of water on top, and shine your light through the top glass into the lower glass. We don’t want to heat up the water with the leaves because that will change our experiment.

The leaf will absorb energy from the light and convert H2O to make oxygen bubbles. When enough oxygen bubbles are attached to the leaf, the leaf floats to the top and you can time how long it takes that leave to float to the drop from when you first drop it in and switch on the light.

Also, not every kind of leaf is going to work for this experiment. My favorite leaf to use is spinach, but again, go ahead and try different varieties. You know you’ve done it right when the leaves fall to the bottom of the syringe. You can also try pressing the leaf underwater between your thumb and the side of the glass, or leaving it in a dark cupboard overnight to soak in the water. If it still doesn’t sink, discard it and try a different kind of leaf.


Exercises:

1. Plants, algae and certain bacteria convert sunlight _______________________ into  by photosynthesis.


2. Write out what each one of these means in plain everyday words:

          6 H2O  +  6 CO2  +  light    -->  C6H12O6     +   6 O2


[am4show have='p8;p9;p10;p11;p38;p37;' guest_error='Guest error message' user_error='User error message' ]

Chemistry Fundamentals


This is a recording of a recent live teleclass I did with thousands of kids from all over the world. I've included it here so you can participate and learn, too!

Materials:

  • Chemistry Worksheet
  • Aluminum pie plate
  • Bowl
  • Clear glue or white glue
  • Disposable cups
  • Goggles & gloves
  • Hydrogen peroxide
  • OPTIONAL: Instant reusable hand warmer (containing sodium acetate )
  • Liquid soap
  • Popsicle sticks
  • Scissors or pliers
  • Sodium tetraborate (also called “Borax”)
  • Water bottle
  • Yeast
  • Yellow highlighter

Optional: If you want to see your experiments glow in the dark, you'll need a fluorescent UV black light (about $10 from the pet store - look in cleaning supplies under "Urine-Off" for a fluorescent UV light). UV flashlights and UV LEDs will not work.

Click here to go to next lesson on Chemistry Review.

[/am4show]


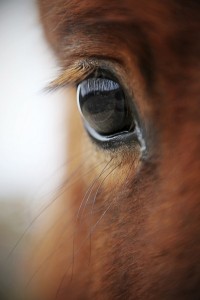
How does the eye work? If you are amazed as I am about how the different parts of the eye are put together, then this is the lab for you! It's important not only to learn how to take apart video cameras and blenders to find out how they work, but also to be fascinated by how the different parts of living creatures work ... like the eye!

In today’s dissection, we’ll be looking at a cow eye. Because cow eyes are so similar to humans eyes, you’ll learn a lot about your own eyes by dissecting the cow eye. Eyes are a very special organ that form images from the world around you and then send the images to your brain for processingYou will be able to see the cornea, iris, pupil, connecting muscles and veins, and other features.

Materials:

[am4show have='p8;p9;p28;p55;' guest_error='Guest error message' user_error='User error message' ]

Here’s what to do:

  1. Take a good look at the outside of the eye.  Try to find as many of the external parts as you can.  You might notice the sclera, which covers the eyeball.  You’ll also notice fat and muscle around the eye.  Covering the front of the eye is the cornea, which was clear when the cow was alive but may look cloudy now.  Next, look through the cornea to the iris (the colored part of the eye) and the iris (the dark center.)
  2. Cut away the fat and muscle, then use a scalpel to cut the cornea.  (Get adult supervision whenever you are cutting.)  The liquid that comes out is called aqueous humor.  It is mostly water and helps the cornea keep its shape.
  3. Now make an incision into the sclera on the side opposite the cornea, and continue to cut with scissors until you end up with two halves, one with the cornea and one without.
  4. Place the side with the cornea on the cutting surface and cut through the cornea.  You’ll hear a crunching sound.  This is the sound of the many layers of tissue that make up the thick, protective cornea.
  5. Pull out the iris.  It may be stuck to the cornea or may be back with the rest of the eye.  Try to get it out in one piece.  Notice that there is a hole in the center.  This is the pupil, which lets in light.  The pupil becomes larger or smaller to let in more or less light.
  6. Next, remove the lens, which looks kind of like a marble.  Look through the lens and try putting it on some newspaper and looking through it to read the newspaper.  What do you notice?  You’ll likely see an upside down image of what you’re looking at.  The lens of a cow (and human) eye, gather bits of light that bounce off an image and project those points of light as an image.
  7. Now go back to the rest of the eye.  There may be some clear gel, called vitreous humor, in the eye.  This liquid helped keep the shape of the lens.  If it’s still in eye, dump it out so you can easily see the back the eye.  There, you’ll see some blood vessels and a thin film.  This is called the retina.  When the cow looked at something, light went through the lens, and the image showed up on the retina.  The retina then sent a message to the brain, through the optic nerve, and the brain interpreted what was being seen.
  8. If you move the retina around, you’ll find that it is only stuck to the eye in one spot.  This is where the optic nerve was.  If you can find the optic nerve, try pinching it with your fingers.  A white substance called myelin may come out.  Myelin surrounds nerves and helps messages move along more quickly.
  9. Behind the retina, you may find a blue-green substance called tapetum.  This shiny material makes the eyes of some animals, like cows and cats, shine when light is shown on them.

Here are the basic steps to observe:

  1. Observe the external anatomy of the eye. See if you can locate the following:
    1. Sclera
    2. Cornea
    3. Optic nerve
    4. Excess fat and muscle tissue
  2. Remove the excess fat from the eye using a sharp scalpel. Then, cut through the sclera around the middle of the eye and see if you can locate the following:
    1. Posterior half of eye
      1. Optic nerve
      2. Retina
      3. Optic disc
      4. Choroid coat
        1. Tapetum lucidum
    2. Anterior half of eye
      1. Cornea
      2. Lens
      3. Iris
      4. Ciliary body
    3. Vitreous humor
  3. Cut the cornea from the eye and observe the following:
    1. Aqueous humor
    2. Cornea
    3. Sclera
    4. Iris
    5. Lens
    6. Ciliary body

[/am4show]

Click here to go to part:28 Finale!


Dissection in biology provides a hands-on education above and beyond reading a textbook. By seeing, touching and exploring different organs, muscles and tissues inside an animal and seeing how they work together allows you to really understand your own body and appreciate the amazing world around us. And it's not hard  - you can dissect a kidney right at home using an inexpensive specimen with a dissection guide and simple dissection tools! Many doctors, surgeons and veterinarians report that their first fascination with the body started with a biology dissection class.

In today’s dissection, we’ll be looking at a kidney. Kidneys are critical for removing toxic waste and regulating the levels of water, sugars, salts, and acids in the bodies of mammals. There are many things that make a kidney interesting, including its unique bean shape and the fact that it contains about a million microscopic structures called nephrons that are key in the blood filtration process.

Materials:

[am4show have='p8;p9;p28;p55;p153;p65;p78;p86;p87;' guest_error='Guest error message' user_error='User error message' ]

  1. Observe the external anatomy of the kidney. See if you can locate the following:
    1. Cortex
    2. Renal artery
    3. Renal vein
    4. Ureter
  2. Cut the kidney in half longitudinally, as seen in figure 1 (incision 1). Look for the following in the cross section from incision 1:
    1. Cortex
    2. Medulla
    3. Pyramid
    4. Renal pelvis
  3. Cut the kidney in half again, as seen in figure 2 (incision 2). Look for the following, this time as a cross section from incision 2:
    1. Cortex
    2. Medulla
    3. Pyramid
    4. Renal pelvis

[/am4show]

Click here to go to part 27:Cow Eye Dissection


Dissection in biology provides a hands-on education above and beyond reading a textbook. By seeing, touching and exploring different organs, muscles and tissues inside an animal and seeing how they work together allows you to really understand your own body and appreciate the amazing world around us. And it's not hard  - you can dissect a sheep brain right at home using an inexpensive specimen with a dissection guide and simple dissection tools! Many doctors, surgeons and veterinarians report that their first fascination with the body started with a biology dissection class.

In today’s dissection, we’ll be looking at a sheep brain. Brains, while still not entirely understood by biologists or psychologists, are critical for movement, respiration, thought, memory, processing sensory signals, and more. What we talk about in today’s dissection just scratches the surface of all there is to know about the brain, which is the most complex organ in the human body.

Materials:

[am4show have='p8;p9;p28;p55;p153;p65;p78;p86;p87;' guest_error='Guest error message' user_error='User error message' ]

  1. Observe the external anatomy of the brain. See if you can locate the following:
    1. Arachnoid mater
    2. Pia mater
    3. Dura mater (may not be present on specimen)
    4. Sulci
    5. Gyri
    6. Cerebrum
    7. Cerebellum
    8. Left and right hemispheres
    9. Longitudinal fissure
    10. Transverse fissure
    11. Olfactory bulbs
    12. Optic chiasm
    13. Spinal cord
    14. Medulla oblongata
    15. Infundibulum
    16. Hypothalamus
    17. Pons
    18. Nerves: abducens, trigeminal, oculomotor
  2. Cut the brain in half longitudinally. Look for the following in the cross section from incision 1:
    1. Arbor vitae
    2. Sulci
    3. Gyri
    4. Cerebrum
    5. Cerebellum
    6. Olfactory bulbs
    7. Spinal cord
    8. Medulla oblongata
    9. Hypothalamus
    10. Thalamus
    11. Pons
    12. Corpus callosum
      1. Inferior colliculus
      2. Superior colliculus
    13. Pineal gland
    14. Nerves: abducens, trigeminal, oculomotor
  3. Cut the brain in half again, perpendicular to your first cut. Look for the following, this time as a cross section from the second incision:
    1. White matter
    2. Gray matter

[/am4show]

Click here to go to part:26 Sheep Kidney Dissection


Dissection in biology provides a hands-on education above and beyond reading a textbook. By seeing, touching and exploring different organs, muscles and tissues inside an animal and seeing how they work together allows you to really understand your own body and appreciate the amazing world around us. And it's not hard  - you can dissect a heart right at home using an inexpensive specimen with a dissection guide and simple dissection tools! Many doctors, surgeons and veterinarians report that their first fascination with the body started with a biology dissection class.

In today’s dissection, we’ll be looking at a sheep heart. Like humans, sheep have four-chambered hearts. Hearts are an essential organ--they pump blood through your body to keep you alive!

Materials:

[am4show have='p8;p9;p28;p55;p153;p65;p78;p86;p87;' guest_error='Guest error message' user_error='User error message' ]

  1. Observe the external anatomy of the heart. See if you can locate the following:
    1. Right ventricle
    2. Left ventricle
    3. Coronary blood vessel
    4. Apex
    5. Auricles
    6. Superior vena cava
    7. Inferior vena cava
    8. Pulmonary vein
    9. Pulmonary artery
    10. Aorta
  2. Cut the heart following incisions 1-4 in the guidebook and see if you can locate the following:
    1. Left atrium:
      1. Aorta
      2. Mitral valve
      3. Chordae tendineae
      4. Trabeculae carneae
      5. Papillary muscles
    2. Right atrium
      1. Tricuspid valve
      2. Aortic semilunar valve
      3. Pulmonary semilunar valve
  3. Now, try to draw a diagram showing how blood flows into and out of the heart. How many of the parts we identified above can you include in your diagram?

[/am4show]

Click here to go to part:25 Sheep Brain Dissection


In today’s dissection, we’ll be looking at an owl pellet. Owls are carnivores, and they eat things like moles, shrews, rodents, birds, insects, and even crayfish. Owls are unable to digest the bones and fur of these creatures, so they regurgitate (or spit up) what are called pellets--small bundles of all the indigestible parts of the owl’s prey.

Owl pellet dissection is an easy, hands-on way to learn about the eating habits of birds of prey. (Owl pellets are the regurgitated remains of an owl's meal.) But don't be grossed out - finding and piecing together the bones inside owl pellets is fascinating work for a young scientist such as yourself! As you dissect the pellet, you'll find skeletons of mice, voles, birds, and more. Synthetic pellets are available for younger children if you'd like to use a substitute.

Dissection in biology provides a hands-on education above and beyond reading a textbook. By seeing, touching and exploring different organs, muscles and tissues inside an animal and seeing how they work together allows you to really understand your own body and appreciate the amazing world around us. And it's not hard  - you can dissect a pellet right at home using an inexpensive specimen with a dissection guide and simple dissection tools! Many doctors, surgeons and veterinarians report that their first fascination with the body started with a biology dissection class.

Materials:

[am4show have='p8;p9;p28;p55;p153;p65;p78;p86;p87;' guest_error='Guest error message' user_error='User error message' ]


Procedure

  1. Observe the external anatomy of your owl pellet. See if you can identify the following:
    1. Fur
    2. Bones
  2. Gently break apart the owl pellet, separating it into two piles: one pile of fur and the other of bones.
  3. Use your prey guide to identify some or all of the following:
    1. Skull
    2. Mandible
    3. Clavicle
    4. Humerus
    5. Scapula
    6. Pelvis
    7. Femur
    8. Fibula and Tibia
    9. Radius and Ulna
    10. Bird parts
    11. Insect parts
    12. Crayfish parts
  4. See if you can piece some of the bones back together, and determine what sort of prey you are looking at--is it a mole, shrew, rodent, bird, insect, crayfish, or something else?

[/am4show]

Click here to go to part:24 Sheep Heart Dissection


Dissection in biology provides a hands-on education above and beyond reading a textbook. By seeing, touching and exploring different organs, muscles and tissues inside an animal and seeing how they work together allows you to really understand your own body and appreciate the amazing world around us. And it’s not hard  – you can dissect a frog right at home using an inexpensive specimen with a dissection guide and simple dissection tools! Many doctors, surgeons and veterinarians report that their first fascination with the body started with a biology dissection class.

In today’s dissection, we’ll be looking at a frog. Frogs are members of the Class Amphibia. There are many things that make frogs interesting: they live both in water and on land, they actually begin life in water as limbless tadpoles, and some can change color depending on their environment.

Materials

[am4show have='p8;p9;p28;p55;p153;p65;p78;p86;p87;' guest_error='Guest error message' user_error='User error message' ]

Procedure

  1. Observe the external anatomy of your frog. See if you can locate the following:
    1. Hind legs with 5 webbed digits
    2. Front legs with four digits
    3. Skin
    4. Anus
    5. Eyes
    6. Tympanum (eardrum)
    7. Mouth
      1. Vomerine teeth
      2. Maxillary teeth
  2. Cut open the frog
    1. Lay the frog on its back and pin its limbs to the tray
    2. Use forceps to lift some of the skin between the hind legs of the the frog, and use a scalpel to make a small incision
    3. Using scissors, cut up the center of the frog’s body, making sure to cut only through the skin
    4. Cut down the sides of the frog at either end of the cut, creating flaps of skin
    5. Pin the flaps to the dissection tray
    6. Repeat steps 2.3-2.5 but this time cut through the muscle of the frog
    7. Pin the muscle flaps to the dissection tray
  3. Look for the following organs:
    1. Fat bodies
    2. Eggs (female specimens only)
    3. Heart
    4. Liver
    5. Gallbladder
    6. Stomach
    7. Small intestine
    8. Pancreas
    9. Spleen
    10. Ovaries and oviducts (female specimens only)
    11. Kidneys

[/am4show]

Click here to go to part:23 Owl Pellet Dissection


Dissection in biology provides a hands-on education above and beyond reading a textbook. By seeing, touching and exploring different organs, muscles and tissues inside an animal and seeing how they work together allows you to really understand your own body and appreciate the amazing world around us. And it’s not hard – you can dissect a crayfish right at home using an inexpensive specimen with a dissection guide and simple dissection tools! Many doctors, surgeons and veterinarians report that their first fascination with the body started with a biology dissection class.

In today’s dissection, we’ll be looking at a crayfish. Crayfish are members of the phylum Arthropoda. There are many things that make crayfish interesting: they dwell at the bottom of streams, rivers, and ponds; they feed on just about anything that comes their way (that’s why they’re called freshwater scavengers); and they have many appendages that help them save energy.

Materials

[am4show have='p8;p9;p28;p55;p153;p65;p78;p86;p87;' guest_error='Guest error message' user_error='User error message' ]


Procedure

  1. Observe the external anatomy of your crayfish. See if you can locate the following:
    1. Head
    2. Thorax
    3. Abdomen
    4. Cephalothorax (region where the head is fused to the thorax)
    5. Chelipeds (claws)
    6. Jointed walking legs
    7. Swimmerets (see if you can figure out whether your crayfish is
    8. male or female)
    9. Mouth
    10. Anus
    11. Antennae
    12. Telson
  2. Remove a section of the carapace
    1. Cut 1: Cut up the length of the crayfish--from the bottom edge of the cephalothorax to just below the eyes
      1. Keep your cut parallel to the table
    2. Cut 2: Cut straight down each end of your first cut
    3. Cut 3: Cut the length of each side of the abdomen using the same technique you used in cuts 1 and 2
    4. Remove the exoskeleton
  3. Look for the following organs:
    1. Gills (connected to the walking legs)
    2. Heart
    3. Esophagus
    4. Digestive gland
    5. Cardiac stomach
    6. Pyloric stomach
    7. Intestine
    8. Anus
    9. Green glands
    10. Nerve cord
    11. Gonads

[/am4show]

Click here to go to part 22:Dissecting a Frog


Dissection in biology provides a hands-on education above and beyond reading a textbook. By seeing, touching and exploring different organs, muscles and tissues inside an animal and seeing how they work together allows you to really understand your own body and appreciate the amazing world around us. And it’s not hard – you can dissect a starfish right at home using an inexpensive specimen with a dissection guide and simple dissection tools! Many doctors, surgeons and veterinarians report that their first fascination with the body started with a biology dissection class.

In today’s dissection, we’ll be looking at a starfish. Starfish are members of the phylum Echinoderm. There are many things that make starfish interesting: their rays are symmetrical around their center (this is called radial symmetry), they use seawater instead of blood to transport nutrients through their bodies (this is called a water vascular system), and they move around using tube feet on the underside of their bodies.

Materials

[am4show have='p8;p9;p28;p55;p153;p65;p69;p86;p87;' guest_error='Guest error message' user_error='User error message' ]


Procedure

  1. Observe the external anatomy of your starfish. See if you can locate the following:
    1. Madreporite (sieve plate)
    2. The spiny skin on the top side of the starfish
    3. Tube feet
    4. Ambulacral grooves
    5. Mouth
  2. Remove a large piece of skin from one of the starfish’s rays
    1. Using your scissors, snip off a small piece of the tip of one ray
      1. Choose a ray that does not attach near the madreporite
    2. Take the point of the scissors, place it into the opening you created in step 2.1.1 above, and carefully cut up the length of the ray, around the center of the starfish, and back down the length of the ray
      1. Make your cut parallel to the table
      2. Do not cut around the madreporite, rather keep your cut to the inside of the madreporite
  3. Look for the following organs:
    1. Digestive glands
    2. Pyloric stomach and pyloric ducts
    3. Cardiac stomach
    4. Gonads (ovaries or testes)
  4. Identify the parts of the water vascular system:
    1. Madreporite
    2. Stone canal
    3. Ring canal
    4. Radial canal
    5. Ampullae
    6. Tube feet

[/am4show]

Click here to go to part:21 Dissecting a Crayfish


Dissection in biology provides a hands-on education above and beyond reading a textbook. By seeing, touching and exploring different organs, muscles and tissues inside an animal and seeing how they work together allows you to really understand your own body and appreciate the amazing world around us. And it's not hard  - you can dissect a fish right at home using an inexpensive specimen with a dissection guide and simple dissection tools! Many doctors, surgeons and veterinarians report that their first fascination with the body started with a biology dissection class

.

In today’s dissection, we’ll be looking at a perch. Perch are members of the phylum Chordata. There are many things that make perch interesting: they are bony fishes which make them “true” fishes, they live in both freshwater and saltwater, and their diets change based on how big they are.

Materials:

[am4show have='p8;p9;p28;p55;p153;p65;p78;p86;p87;' guest_error='Guest error message' user_error='User error message' ]

Observe the external anatomy of your perch. See if you can locate the following:

  1. Head
  2. Trunk
  3. Tail
  4. Fins
    1. Caudal fin
    2. Posterior dorsal fin
    3. Anterior dorsal fin
    4. Pectoral fin
    5. Pelvic fin
    6. Anal fin
  5. Operculum
  6. Eye
  7. Nostril
  8. Mandible
  9. Maxilla
  10. Anus
  11. Lateral line

Open the trunk of the fish following incisions 1-4 in the guidebook and locate the following:

  1. Gills
  2. Stomach
  3. Swim bladder
  4. Kidney
  5. Gonad
  6. Intestine
  7. Liver
  8. Pyloric caeca
  9. Spleen
  10. Gallbladder
  11. Heart

Open the skull of the fish and locate the following:

  1. Skull
  2. Fatty tissue
  3. Cerebrum
  4. Cerebellum
  5. Olfactory bulbs

[/am4show]

Click here to go to part 20:Dissecting a Starfish


Dissection in biology provides a hands-on education above and beyond reading a textbook. By seeing, touching and exploring different organs, muscles and tissues inside an animal and seeing how they work together allows you to really understand your own body and appreciate the amazing world around us. And it's not hard  - you can dissect a grasshopper right at home using this inexpensive specimen with a dissection guide and simple dissection tools! Many doctors, surgeons and veterinarians report that their first fascination with the body started with a biology dissection class.

Materials:

[am4show have='p8;p9;p28;p55;p153;p65;p78;p86;p87;' guest_error='Guest error message' user_error='User error message' ]

Procedure

  1. Observe the external anatomy of your grasshopper. See if you can locate the following:
    1. Head
      1. Antennae
      2. Eyes (compound and simple)
      3. Mouth
        1. Labrum
        2. Mandibles
        3. Maxillae
        4. Labium
        5. Labial palps
    2. Thorax
      1. Legs
        1. Femur
        2. Tibia
        3. Tarsus
        4. Spurs
      2. Wings (front and hind)
      3. Pronotum
    3. Abdomen
      1. Tympanum
      2. Spiracles
      3. Ovipositors (female specimen only)
  2. Using your scissors, detach each part of the grasshopper’s mouth
  3. Using your scissors, remove a section of the exoskeleton from the grasshopper
    1. Remove the wings and legs from the right side of the grasshopper
    2. Cut from the end of the abdomen up to the head of the grasshopper, making your cut just to the right of the mid dorsal line
    3. Cut down the right side of the exoskeleton on either end of your first cut
    4. Pin the exoskeleton to your dissection tray
  4. Look for the following organs:
    1. Heart
    2. Ovaries (female specimen only)
    3. Digestive tract
      1. Esophagus
      2. Crop
      3. Stomach
      4. Gastric caeca
      5. Intestine
      6. Rectum
    4. Malpighian tubules

[/am4show]

Click here to go to part:19 Perch Dissection


Dissection in biology provides a hands-on education above and beyond reading a textbook. By seeing, touching and exploring different organs, muscles and tissues inside an animal and seeing how they work together allows you to really understand your own body and appreciate the amazing world around us. And it's not hard  - you can dissect a worm right at home using an inexpensive specimen with a dissection guide and simple dissection tools! Many doctors, surgeons and veterinarians report that their first fascination with the body started with a biology dissection class

.

In today’s dissection, we’ll be looking at an earthworm. Earthworms play an important role in their ecosystem--when they tunnel through dirt they mix nutrients which helps make the soil healthy and able to support plant life.

Materials:

[am4show have='p8;p9;p28;p55;p153;p65;p78;p86;p87;' guest_error='Guest error message' user_error='User error message' ]

Procedure:

  1. Observe the external anatomy of your earthworm. See if you can locate the following:
    1. Anterior and posterior ends
    2. Prostomium
    3. Anus
    4. Septa
    5. Clitellum
    6. Dorsal and ventral surfaces
    7. Bristles
    8. Genital pores
  2. Pin each end of the worm to the tray with the dorsal side facing up
  3. Begin a cut about an inch below the clitellum, and cut up toward the mouth (be careful not to cut too deep and damage the internal organs)
    1. Pin the skin flaps of the worm to the tray
  4. Look for the following organs:
    1. Mouth
    2. Pharynx
    3. Esophagus
    4. Crop
    5. Gizzard
    6. Intestine
    7. Hearts
    8. Dorsal blood vessel
    9. Ventral blood vessel
    10. Ventral nerve cord
    11. Brain
    12. Seminal vesicles
    13. Seminal receptacle

[/am4show]

Click here to go to part:18 Grasshopper Dissection


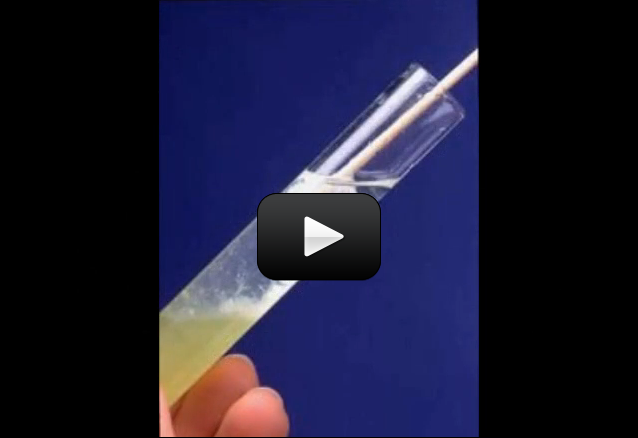
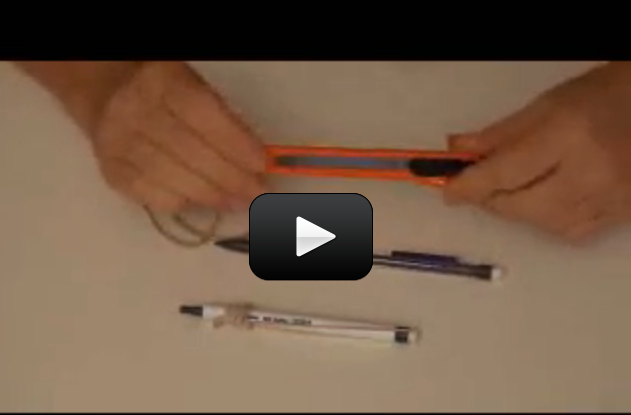
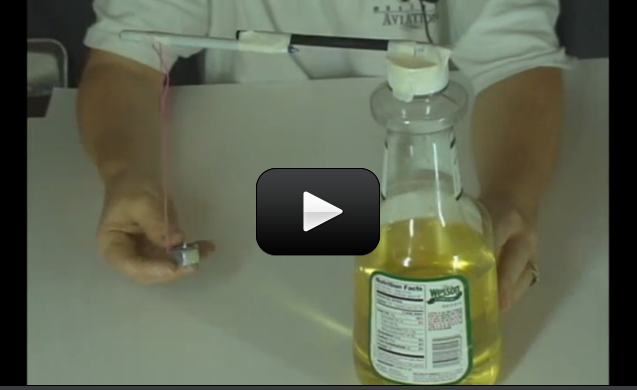
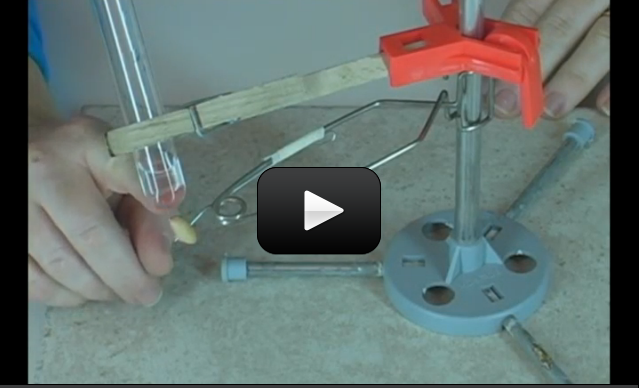
This experiment is just for advanced students. If you guessed that this has to do with electricity and chemistry, you’re right! But you might wonder how they work together. Back in 1800, William Nicholson and Johann Ritter were the first ones to split water into hydrogen and oxygen using electrolysis. (Soon afterward, Ritter went on to figure out electroplating.) They added energy in the form of an electric current into a cup of water and captured the bubbles forming into two separate cups, one for hydrogen and other for oxygen.

This experiment is not an easy one, so feel free to skip it if you need to. You don’t need to do this to get the concepts of this lesson but it’s such a neat and classical experiment (my students love it) so you can give it a try if you want to. The reason I like this is because what you are really doing in this experiment is ripping molecules apart and then later crashing them back together.

Have fun and please follow the directions carefully. This could be dangerous if you’re not careful. The image shown here is using graphite from two pencils sharpened on both ends, but the instructions below use wire.  Feel free to try both to see which types of electrodes provide the best results.

[am4show have='p9;p40;p76;p91;p58;' guest_error='Guest error message' user_error='User error message' ]

You will need:

  • 2 test tubes or thin glass or plastic something closed at one end. I do not recommend anything wider than a half inch in diameter.
  • 2 two wires, one needs to be copper, at least 12 inches long. Both wires need to have bare ends.
  • 1 Cup
  • Water
  • One 9 volt battery
  • Long match or a long thin piece of wood (like a popsicle stick) and a match
  • Rubber bands
  • Masking tape
  • Salt

Download Student Worksheet & Exercises
1. Fill the cup with water.

2. Put a tablespoon or so of salt into the water and stir it up. (The salt allows the electricity to flow better through the water.)

2. Put one wire into the test tube and rubber band it to the test tube so that it won’t come out (see picture).

3. Use the masking tape to attach both wires to the battery. Make sure the wire that is in the test tube is connected to the negative (-) pole of the battery and that the other is connected to the positive (+) pole. Don’t let the bare parts of the different wires touch. They could get very hot if they do.

4. Fill the test tube to the brim with the salt water.

5. This is the tricky part. Put your finger over the test tube, turn it over and put the test tube, open side down, into the cup of water. (See picture.)

6. Now put the other wire into the water. Be careful not to let the bare parts of the wires touch.

7. You should see bubbles rising into the test tube. If you don’t see bubbles, check the other wire. If bubbles are coming from the other wire either switch the wires on the battery connections or put the wire that is bubbling into the test tube and remove the other. If you see no bubbles check the connections on the battery.

8. When the test tube is half full of gas (half empty of salt water depending on how you look at it) light the long match or the wooden stick. Then take the test tube out of the water and let the water drain out. Holding the test tube with the open end down, wait for five seconds and put the burning stick deep into the test tube (the flame will probably go out but that’s okay). You should hear an instant pop and see a flash of light. If you don’t, light the stick again and try it another time. For some reason, it rarely works the first time but usually does the second or third.

A water molecule, as you saw before, is two hydrogen atoms and one oxygen atom. The electricity encouraged the oxygen to react with the copper wire leaving the hydrogen atoms with no oxygen atom to hang onto. The bubbles you saw were caused by the newly released hydrogen atoms floating through the test tube in the form of hydrogen gas. Eventually that test tube was part way filled with nothing but pure hydrogen gas.

But how do you know which bubbles are which? You can tell the difference between the two by the way they ignite (don’t’ worry – you’re only making a tiny bit of each one, so this experiment is completely safe to do with a grown up).

It takes energy to split a water molecule. (On the flip side, when you combine oxygen and hydrogen together, it makes water and a puff of energy. That’s what a fuel cell does.) Back to splitting the water molecule - as the electricity zips through your wires, the water molecule breaks apart into smaller pieces: hydrogen ions (positively charged hydrogen) and oxygen ions (negatively charged oxygen). Remember that a battery has a plus and a minus charge to it, and that positive and negative attract each other.

So, the positive hydrogen ions zip over to the negative terminal and form tiny bubbles right on the wire. Same thing happens on the positive battery wire. After a bit of time, the ions form a larger gas bubble. If you stick a cup over each wire, you can capture the bubbles and when you’re ready, ignite each to verify which is which.

If the match burns brighter, the gas is oxygen. If you hear a POP!, the gas is hydrogen. Oxygen itself is not flammable, so you need a fuel in addition to the oxygen for a flame. In one case, the fuel is hydrogen, and hence you hear a pop as it ignites. In the other case, the fuel is the match itself, and the flame glows brighter with the addition of more oxygen.

When you put the match to it, the energy of the heat causes the hydrogen to react with the oxygen in the air and “POP”, hydrogen and oxygen combine to form what? That’s right, more water. You have destroyed and created water! (It’s a very small amount of water so you probably won’t see much change in the test tube.)

The chemical equations going on during this electrolysis process look like this:

A reduction reaction is happening at the negatively charged cathode. Electrons from the cathode are sticking to the hydrogen cations to form hydrogen gas:

2 H+(aq) + 2e- --> H2(g)

2 H2O(l) + 2e- --> H2(g) + 2 OH-(aq)

The oxidation reaction is occurring at the positively charged anode as oxygen is being generated:

2 H2O(l)  --> O2(g) + 4 H+(aq) + 4e-

4 OH-(aq) --> O2(g) + 2 H2O(l) + 4 e-

Overall reaction:

2 H2O(l)  --> 2 H2(g) + O2(g)

Note that this reaction creates twice the amount of hydrogen than oxygen molecules. If the temperature and pressure for both are the same, you can expect to get twice the volume of hydrogen to oxygen gas (This relationship between pressure, temperature, and volume is the Ideal Gas Law principle.)

This is the idea behind vehicles that run on sunlight and water.  They use a solar panel (instead of a 9V battery) to break apart the hydrogen and oxygen and store them in separate tanks, then run them both back together through a fuel cell, which captures the energy (released when the hydrogen and oxygen recombine into water) and turns the car's motor. Cool, isn't it?

Note: We're going to focus on Alternative Energy in Unit 12 and create all sorts of various energy sources including how to make your own solar battery, heat engine, solar & fuel cell vehicles (as described above), and more!

Exercises

  1. Why are bubbles forming?
  2. Did bubbles form at both wires, or only one? What kind of bubbles are they?
  3. What would happen if you did this experiment with plain water? Would it work? Why or why not?
  4. Which terminal (positive or negative) produced the hydrogen gas?
  5. Did the reaction create more hydrogen or more oxygen?

[/am4show]


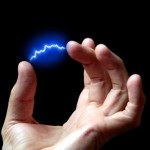
If you have a Fun Fly Stick, then pull it out and watch the video below. If not, don't worry - you can do most of these experiments with a charged balloon (one that you've rubbed on your hair). Let' play with a more static electricity experiments, including making things move, roll, spin, chime, light up, wiggle and more using  static electricity! [am4show have='p8;p9;p97;p58;' guest_error='Guest error message' user_error='User error message' ] Materials:
  • sheet of paper
  • two empty, clean soup cans
  • aluminum foil
  • long straight pin
  • three film canisters (or M&M containers or small plastic bottles)
  • penny
  • neon bulb (optional)
  • small styrofoam ball or single packing peanut
  • fishing line or thread
  • chopstick
  • foam cup
  • small aluminum pie tins or make your own from aluminum foil
  • hot glue with glue sticks
  • Fun Fly Stick (also called "Wonder Fly Stick")
This video show you how to get the most out of your Fun Fly Stick. If you don't have a Fly Stick, simply use an inflated balloon that you've rubbed on your head. In the video, the Electrostatic Lab is mounted on a foam meat tray I found at the grocery store.
  Download Student Worksheet & Exercises The triboelectric series is a list that ranks different materials according to how they lose or gain electrons. Near the top of the list are materials that take on a positive charge, such as air, human skin, glass, rabbit fur, human hair, wool, silk, and aluminum. Near the bottom of the list are materials that take on a negative charge, such as amber, rubber balloons, copper, brass, gold, cellophane tape, Teflon, and silicone rubber. When you turn on your Fun Fly Stick (or rub your head with a balloon), one end of the Fun Fly Stick takes on a positive charge and the other end holds the negative charge. When you rub your head with a balloon, the hair takes on a positive charge and the balloon takes on a negative charge. When you scuff along the carpet, you build up a static charge (of electrons). Your socks insulate you from the ground, and the electrons can’t cross your sock-barrier and zip back into the ground. When you touch someone (or something grounded, like a metal faucet), the electrons jump from you and complete the circuit, sending the electrons from you to them (or it). Exercises
  1. What is common throughout all these experiments that make them work?
  2. What makes the neon bulb light up? What else would work besides a neon bulb?
  3. Does it matter how far apart the soup cans are?
  4. Why does the foil ball go back and forth between the two cans?
  5.  Why do the pans take on the same charge as the Fly Stick?
  6.  When sticking a sheet of paper to the wall, does it matter how long you charge the paper for?
  7.  Draw a diagram to explain how the electrostatic motor works. Label each part and show where the charges are and how they make the rotor turn.
[/am4show]  


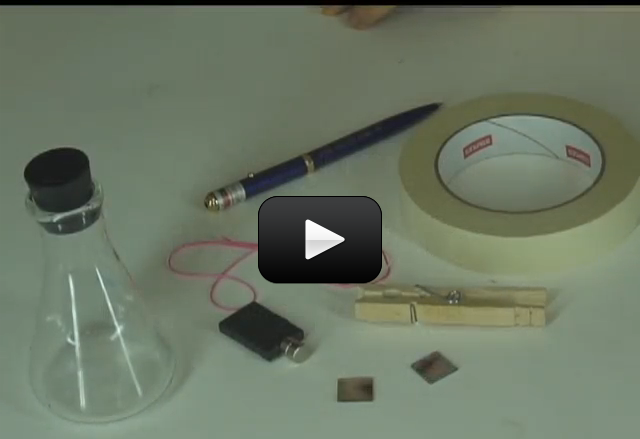
Maxwell’s Fourth Equation: Moving electrical charges (fields) generate magnetic fields AND changing magnetic fields generate electrical fields (electricity). We're going to do a couple of experiments to illustrate both of these concepts.

Magnetic fields are created by electrons moving in the same direction. A magnetic field must come from a north pole of a magnet and go to a south pole of a magnet (or atoms that have turned to the magnetic field.) Iron and a few other types of atoms will turn to align themselves with the magnetic field. Compasses turn with the force of the magnetic field.

If an object is filled with atoms that have an abundance of electrons spinning in the same direction, and if those atoms are lined up in the same direction, that object will have a magnetic force.

Materials: magnet wire, nail, magnet, compass, 12VDC motor, bi-polar LED, D-cell battery, sandpaper [am4show have='p8;p9;p10;p37;p92;' guest_error='Guest error message' user_error='User error message' ] Wrap wire around a nail and connect to power to create a simple electromagnet that can pick up paper clips.

Or you can make a galvanometer: wrap your wire around a toilet paper tube and remove the tube after you’ve got 30+ turns of wire around it. Hook up the ends of the wire to a battery and place a compass through the middle of the coil. The needle should move when you energize the coil!

Connect a standard LED to the terminals of a 12DC motor and give the shaft a spin. The LED will light up! Why is that? There is a permanent magnet and an electromagnet (coil of wire) inside the motor. When you spin the shaft, you are essentially waving a permanent magnet past the coil of wire. The two ends of the coil wire are connected to the motor terminals, which are connected to the LED. You have just made an electric generator.

A "going further" experiment: You can make a second galvanometer and connect it to your first one, and then wave a magnet through the inside of one of the coils and watch the compass move inside the other! What’s going on here? The same as previously, only this time the magnet is being passed through (back and forth) one coil, which generates electricity in the wire and powers the second coil and turns the second coil into a magnet (as indicated my movement with the compass near the second coil).

How does this work? Since many electrons are moving in one direction, you get a magnetic field! The nail helps to focus the field and strengthen it. In fact, if you could see the atoms inside the nail, you would be able to see them turn to align themselves with the magnetic field created by the electrons moving through the wire.

Find out more about this key principle in Unit 10.

[/am4show]

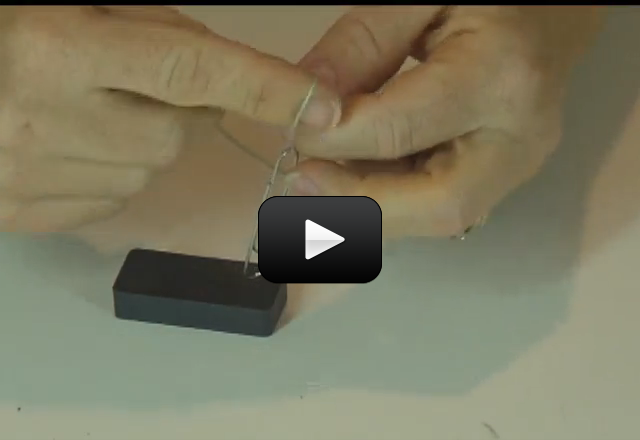
Maxwell’s Third Equation: Invisible magnetic fields exert forces on magnets AND invisible electrical fields exert forces on objects. A field is an area around a electrical, magnetic or gravitational source that will create a force on another electrical, magnetic or gravitational source that comes within the reach of the field. In fields, the closer something gets to the source of the field, the stronger the force of the field gets. This is called the inverse square law.

Materials: balloon, magnet, small objects like paper clips or iron filings

[am4show have='p8;p9;p10;p37;p92;' guest_error='Guest error message' user_error='User error message' ] To see how magnetic fields exert forces, play with a couple of magnets or place a magnet in a test tube and then in a bed of iron filings. Do you see the magnetic field? If you don't have iron filings, try noticing where on the magnet paper clips attach. Can you figure out where the lines of force occur?

Now let's take a look at invisible electric fields. Notice how your hair sticks up when you build up a static electrical charge. You can build up a charge on dry days by scuffing along the carpet in socks, rubbing your hair with a balloon, sliding down a plastic slide, or by rubbing a fluorescent bulb with a wool sweater or plastic bag. Bring these charged items next to a pile of paper shreds or packing peanuts (or even a ping pong ball on a smooth, flat surface) and you’ll find the objects follow the charged object when placed near an electrical field.

Find out more about this key principle in Unit 10.

[/am4show]

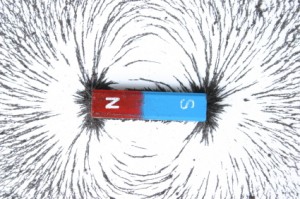
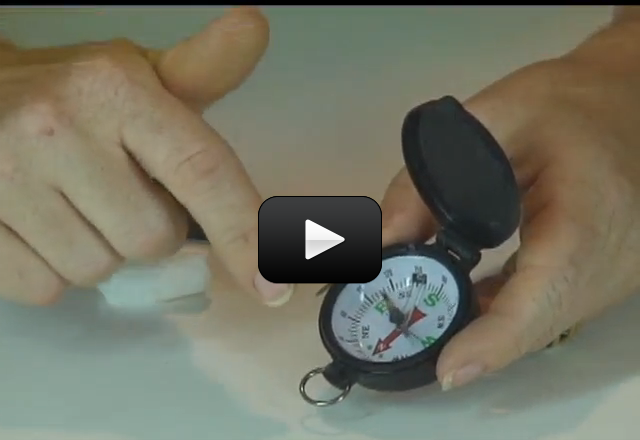
Maxwell’s Second Equation: All magnets have two poles. Magnets are called dipolar which means they have two poles. The two poles of a magnet are called north and south poles. The magnetic field comes from a north pole and goes to a south pole. Opposite poles will attract one another. Like poles will repel one another.

Materials: magnet you can break or cut in half, scissors or hammer (depending on the size of your magnet)

[am4show have='p8;p9;p10;p37;p77;p92;' guest_error='Guest error message' user_error='User error message' ] What happens if you cut (or break) a magnet in half? The new magnets will each sport their own North-South poles!

Find out more about this key principle in Unit 10.

[/am4show]

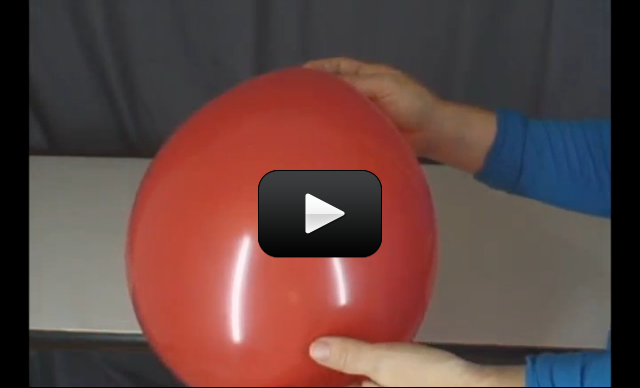
Maxwell’s First Equation: Like charges repel; opposites attract. The proton has a positive charge, the neutron has no charge (neutron, neutral get it?) and the electron has a negative charge. These charges repel and attract one another kind of like magnets repel or attract. Like charges repel (push away) one another and unlike charges attract one another. Generally things are neutrally charged. They aren’t very positive or negative, rather have a balance of both.

Materials: balloon

[am4show have='p8;p9;p10;p37;p92;' guest_error='Guest error message' user_error='User error message' ] Rub your head with a balloon and hold the charged balloon near your head so that your hair sticks to the balloon. Is there glue on the balloon? Why does your hair stick to the balloon?

Answer: The positively charged hair sticks to the negatively charged balloon.

Find out more about this key principle in Unit 10.

[/am4show]

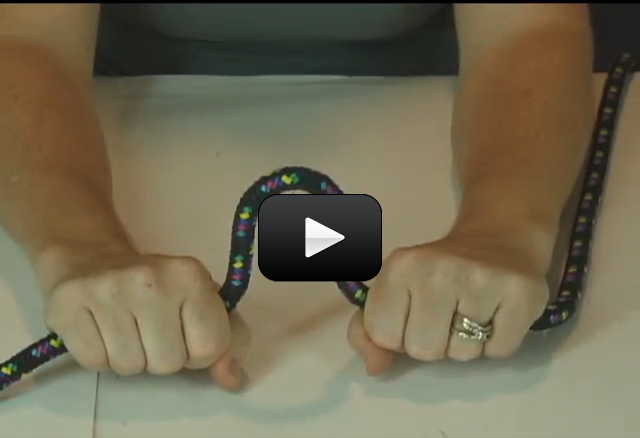
Third Law of Motion: For every action, there is an equal and opposite reaction.

Force is a push or a pull, like pulling a wagon or pushing a car. Gravity is a force that attracts things to one another. Weight is a measure of how much gravity is pulling on an object.

Gravity accelerates all things equally. Which means all things speed up (accelerate) the same amount as they fall. Acceleration is the rate of change in velocity. In other words, how fast is a change in speed and/or a change in direction happening.

Materials: balloon [am4show have='p8;p9;p11;p38;p10;p37;p109;p72;p92;' guest_error='Guest error message' user_error='User error message' ]

Hold a balloon between your fingers and let go. Which way does the air inside the balloon travel relative to the balloon itself?

Answer: The balloon travels to the right and the air inside the balloon (at least initially) travels to the left.

Find out more about this key principle in Unit 1 and Unit 2.


Download Student Worksheet & Exercises

Exercises
  1. What is Newton’s Third Law?
  2. Give three examples of forces in pairs.
  3. A rope is attached to a wall. You pick up the rope and pull with all you’ve got. A scientist walks by and adds a force meter to the rope and measures you’re pulling with 50 Newtons. How much force does the wall experience?
  4. Can rockets travel in space if there’s nothing to push off of? Explain your answer.
[/am4show]

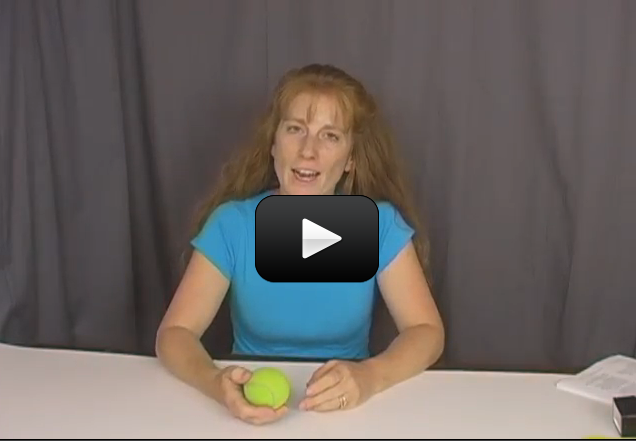
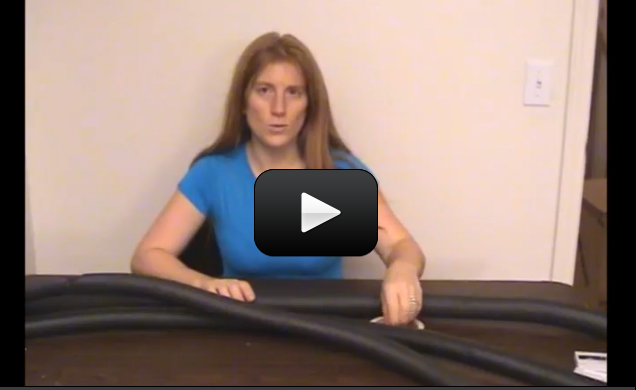
Second Law of Motion: Momentum is conserved. Momentum can be defined as mass in motion. Something must be moving to have momentum. Momentum is how hard it is to get something to stop or to change directions. A moving train has a whole lot of momentum. A moving ping pong ball does not. You can easily stop a ping pong ball, even at high speeds. It is difficult, however, to stop a train even at low speeds.

Materials: garden hose connected to a water faucet

[am4show have='p8;p9;p10;p37;p72;p92;' guest_error='Guest error message' user_error='User error message' ] Place your thumb partway over the end of a garden hose. The water shoots out faster because the same amount of “stuff” has to pass through the exit. When the exit area decreases, less mass can pass through at one time, so the velocity increases.

Mathematically, momentum is mass times velocity, or Momentum=mv.

One of the basic laws of the universe is the conservation of momentum. When objects smack into each other, the momentum that both objects have after the collision, is equal to the amount of momentum the objects had before the crash.

The next video shows you how once the two balls hit the ground, all the larger ball’s momentum transferred to the smaller ball (plus the smaller ball had its own momentum, too!) and thus the smaller ball goes zooming to the sky.


Download Student Worksheet & Exercises

Do you see how using a massive object as the lower ball works to your advantage here? What if you shrink the smaller ball even more, to say bouncy-ball size? Momentum is mass times by velocity, and since you aren’t going to change the velocity much (unless you try this from the roof, which has its own issues), it’s the mass that you can really play around with to get the biggest change in your results. So for momentum to be conserved, after impact, the top ball had to have a much greater velocity to compensate for the lower ball ’s velocity going to zero.

Find out more about this key principle in Unit 1 and Unit 2.

Advanced students: Download your Momentum lab here.

Exercises 
  1. What concept does Newton’s Second Law of Motion deal with?
  2. What is momentum?
[/am4show]

First Law of Motion: Objects in motion tend to stay in motion unless acted upon by an external force. Force is a push or a pull, like pulling a wagon or pushing a car. Gravity is a force that attracts things to one another. Gravity accelerates all things equally. Which means all things speed up the same amount as they fall.

Materials: ball

[am4show have='p8;p9;p11;p38;p10;p37;p72;p92;' guest_error='Guest error message' user_error='User error message' ] What happens when you kick a soccer ball? The ‘kick’ is your external force. The ball will continue in a straight line as long as it can, until air drag, rolling resistance, and gravity cause it to stop.

Find out more about this key principle in Unit 1 and Unit 2.


Download Student Worksheet & Exercises

Exercises 
  1. What is inertia?
  2. What is Newton’s First Law?
  3. Will a lighter or heavier race car with the same engine win a short-distance race (like the quarter-mile)?
[/am4show]

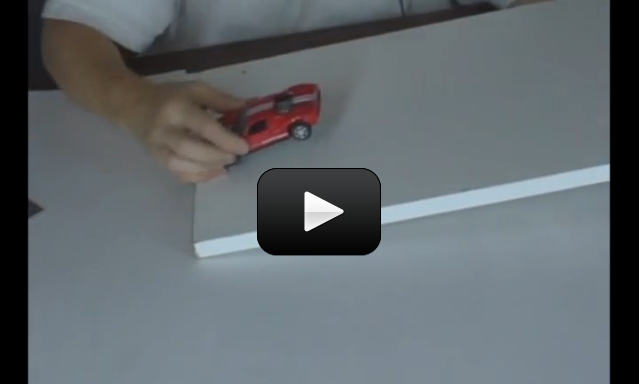
This is a nit-picky experiment that focuses on the energy transfer of rolling cars.  You’ll be placing objects and moving them about to gather information about the potential and kinetic energy.


We’ll also be taking data and recording the results as well as doing a few math calculations, so if math isn’t your thing, feel free to skip it.


Here’s what you need:


[am4show have=’p8;p9;p11;p38;p15;p42;p75;p85;p88;p92;’ guest_error=’Guest error message’ user_error=’User error message’ ]


  • a few toy cars (or anything that rolls like a skate)
  • a board, book or car track
  • measuring tape

The setup is simple.  Here’s what you do:


1. Set up the track (board or book so that there’s a nice slant to the floor).


2. Put a car on the track.


3. Let the car go.


4. Mark or measure how far it went.


Download Student Worksheet & Exercises


As you lifted the car onto the track you gave the car potential energy. As the car went down the track and reached the floor the car lost potential energy and gained kinetic energy. When the car hit the floor it no longer had any potential energy only kinetic.


If the car was 100% energy efficient, the car would keep going forever. It would never have any energy transferred to useless energy. Your cars didn’t go forever did they? Nope, they stopped and some stopped before others. The ones that went farther were more energy efficient. Less of their energy was transferred to useless energy than the cars that went less far.


Where did the energy go? To heat energy, created by the friction of the wheels, and to sound energy. Was energy lost? NOOOO, it was only changed. If you could capture the heat energy and the sound energy and add it to the the kinetic energy, the sum would be equal to the original amount of energy the car had when it was sitting on top of the ramp.


For K-8 grades, click here to download a data sheet.


For Advanced Students, click  here for the data log sheet. You’ll need Microsoft Excel to use this file.


Exercises


  1. Where is the potential energy greatest?
  2. Where is the kinetic energy greatest?
  3. Where is potential energy lowest?
  4. Where is kinetic energy lowest?
  5. Where is KE increasing, and PE is decreasing?
  6. Where is PE increasing and KE decreasing?

[/am4show]


We’re going to build monster roller coasters in your house using just a couple of simple materials. You might have heard how energy cannot be created or destroyed, but it can be transferred or transformed (if you haven’t that’s okay – you’ll pick it up while doing this activity).


Roller coasters are a prime example of energy transfer: You start at the top of a big hill at low speeds (high gravitational potential energy), then race down a slope at break-neck speed (potential transforming into kinetic) until you bottom out and enter a loop (highest kinetic energy, lowest potential energy). At the top of the loop, your speed slows (increasing your potential energy), but then you speed up again and you zoom near the bottom exit of the loop (increasing your kinetic energy), and you’re off again!


Here’s what you need:


[am4show have=’p8;p9;p11;p38;p15;p42;p151;p75;p85;p88;p92;p100;’ guest_error=’Guest error message’ user_error=’User error message’ ]


  • marbles
  • masking tape
  • 3/4″ pipe foam insulation (NOT neoprene and NOT the kind with built-in adhesive tape)

To make the roller coasters, you’ll need foam pipe insulation, which is sold by the six-foot increments at the hardware store. You’ll be slicing them in half lengthwise, so each piece makes twelve feet of track. It comes in all sizes, so bring your marbles when you select the size. The ¾” size fits most marbles, but if you’re using ball bearings or shooter marbles, try those out at the store. (At the very least you’ll get smiles and interest from the hardware store sales people.) Cut most of the track lengthwise (the hard way) with scissors. You’ll find it is already sliced on one side, so this makes your task easier. Leave a few pieces uncut to become “tunnels” for later roller coasters.


Read for some ‘vintage Aurora’ video? This is one of the very first videos ever made by Supercharged Science:


Download Student Worksheet & Exercises


Tips & Tricks

Loops Swing the track around in a complete circle and attach the outside of the track to chairs, table legs, and hard floors with tape to secure in place. Loops take a bit of speed to make it through, so have your partner hold it while you test it out before taping. Start with smaller loops and increase in size to match your entrance velocity into the loop. Loops can be used to slow a marble down if speed is a problem.


Camel-Backs Make a hill out of track in an upside-down U-shape. Good for show, especially if you get the hill height just right so the marble comes off the track slightly, then back on without missing a beat.


Whirly-Birds Take a loop and make it horizontal. Great around poles and posts, but just keep the bank angle steep enough and the marble speed fast enough so it doesn’t fly off track.


Corkscrew Start with a basic loop, then spread apart the entrance and exit points. The further apart they get, the more fun it becomes. Corkscrews usually require more speed than loops of the same size.


Jump Track A major show-off feature that requires very rigid entrance and exit points on the track. Use a lot of tape and incline the entrance (end of the track) slightly while declining the exit (beginning of new track piece).


Pretzel The cream of the crop in maneuvers. Make a very loose knot that resembles a pretzel. Bank angles and speed are the most critical, with rigid track positioning a close second. If you’re having trouble, make the pretzel smaller and try again. You can bank the track at any angle because the foam is so soft. Use lots of tape and a firm surface (bookcases, chairs, etc).


Troubleshooting Marbles will fly everywhere, so make sure you have a lot of extras! If your marble is not following your track, look very carefully for the point of departure – where it flies off.


-Does the track change position with the weight of the marble, making it fly off course? Make the track more rigid by taping it to a surface.
-Is the marble jumping over the track wall? Increase your bank angle (the amount of twist the track makes along its length).
-Does your marble just fall out of the loop? Increase your marble speed by starting at a higher position. When all else fails and your marble still won’t stay on the track, make it a tunnel section by taping another piece on top the main track. Spiral-wrap the tape along the length of both pieces to secure them together.


HOT TIPS for ULTRA-COOL PARENTS: This lab is an excellent opportunity for kids to practice their resilience, because we guarantee this experiment will not work the first several times they try it. While you can certainly help the kids out, it’s important that you help them figure it out on their own. You can do this by asking questions instead of rushing in to solve their problems. For instance, when the marble flies off the track, you can step back and say:


“Hmmm… did the marble go to fast or too slow?”


“Where did it fly off?”


“Wow – I’ll bet you didn’t expect that to happen. Now what are you going to try?”


Become their biggest fan by cheering them on, encouraging them to make mistakes, and try something new (even if they aren’t sure if it will work out).


Exercises 


  1. What type of energy does a marble have while flying down the track of a roller coaster?
  2. What type of energy does the marble have when you are holding it at the top of the track?
  3. At the top of a camel back hill, which is higher for the marble, kinetic or potential energy?
  4. At the top of an inverted loop, which energy is higher, kinetic or potential energy?

[/am4show]


Bobsleds use the low-friction surface of ice to coast downhill at ridiculous speeds. You start at the top of a high hill (with loads of potential energy) then slide down a icy hill til you transform all that potential energy into kinetic energy.  It’s one of the most efficient ways of energy transformation on planet Earth. Ready to give it a try?


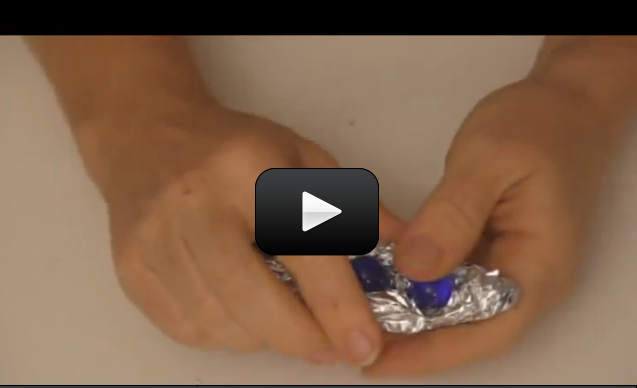
This is one of those quick-yet-highly-satisfying activities which utilizes ordinary materials and turns it into something highly unusual… for example, taking aluminum foil and marbles and making it into a racecar.


While you can make a tube out of gift wrap tubes, it’s much more fun to use clear plastic tubes (such as the ones that protect the long overhead fluorescent lights). Find the longest ones you can at your local hardware store. In a pinch, you can slit the gift wrap tubes in half lengthwise and tape either the lengths together for a longer run or side-by-side for multiple tracks for races. (Poke a skewer through the rolls horizontally to make a quick-release gate.)


Here’s what you need:


  • aluminum foil
  • marbles (at least four the same size)
  • long tube (gift wrapping tube or the clear protective tube that covers fluorescent lighting is great)

[am4show have=’p8;p9;p11;p38;p15;p42;p75;p85;p88;p92;p100;’ guest_error=’Guest error message’ user_error=’User error message’ ]


bobsledsIf you’re finding that the marbles fall out before the bobsled reaches the bottom of the slide, you need to either crimp the foil more closely around the marbles or decrease your hill height.


Check to be sure the marbles are free to turn in their “slots” before launching into the tube – if you’ve crimped them in too tightly, they won’t move at all. If you oil the bearings with a little olive oil or machine oil, your tube will also get covered with oil and later become sticky and grimy… but they sure go faster those first few times!


Download Student Worksheet & Exercises


Exercises Answer the questions below:


  1. Potential energy is energy that is related to:
    1. Equilibrium
    2. Kinetic energy
    3. Its system
    4. Its elevation
  2. If an object’s energy is mostly being used to keep that object in motion, we can say it has what type of energy?
    1. Kinetic energy
    2. Potential energy
    3. Heat energy
    4. Radiation energy
  3. True or False: Energy is able to remain in one form that is usable over and over again.
    1. True
    2. False

[/am4show]


This is a simple, fun, and sneaky way of throwing tiny objects. It’s from one of our spy-kit projects. Just remember, keep it under-cover. Here’s what you need:


  • a cheap mechanical pencil
  • two rubber bands
  • a razor with adult help

[am4show have=’p8;p9;p11;p38;p15;p42;p88;p92;’ guest_error=’Guest error message’ user_error=’User error message’ ]


Advanced students: Download your P-Shooter Lab here.


[/am4show]


This experiment is for Advanced Students.There are several different ways of throwing objects. This is the only potato cannon we’ve found that does NOT use explosives, so you can be assured your kid will still have their face attached at the end of the day. (We’ll do more when we get to chemistry, so don’t worry!)


These nifty devices give off a satisfying *POP!!* when they fire and your backyard will look like an invasion of aliens from the French Fry planet when you’re done. Have your kids use a set of goggles and do all your experimenting outside.


Here’s what you need:


[am4show have=’p8;p9;p11;p38;p42;p88;p92;p103;’ guest_error=’Guest error message’ user_error=’User error message’ ]


  • potatoes
  • an acrylic tube (clear is best so you can see what’s happening inside!)
  • wooden dowel
  • washer (this is your ‘hand-saver’)


Where is the potential energy the greatest? How much energy did your spud have at this point? Hmmm… let’s see if we can get a few actual numbers with this experiment. In order to calculate potential energy at the highest point of travel, you’ll need to figure out how high it went.


Here are instructions for making your own height-gauge:


Once you get your height gauge working right, you’ll need to track your data. Start a log sheet in your journal and jot down the height for each launch. Let’s practice a sample calculation:


If you measured an angle of 30 degrees, and your spud landed 20 feet away, we can assume that the spud when highest right in the middle of its flight, which is halfway (10 feet). Use basic trigonometry to find the height 45 degrees up at a horizontal distance ten feet away to get:


height = h = (10′) * (tan 30) = 5.8 feet
(Convert this to meters by: (5.8 feet) * (12 inches/foot) / (39.97 inches/meter) = 1.8 meters)

I measured the mass of my spud to be 25 grams (which is 0.025 kg).


Now, let’s calculate the potential energy:


PE = mgh = (0.025 kg) * (1.8 meters) * (10 m/s2) = 0.44 Joules


How fast was the spud going before it smacked into the ground? Set PE = KE to solve for velocity:


mgh = 0.5 mv2 gives v = (2gh)1/2


Plug in your numbers to get:


v = [(2) * (10) * (1.8)]2 = 6 m/s (or about 20 feet per second). Cool!


[/am4show]


When you drop a ball, it falls 16 feet the first second you release it. If you throw the ball horizontally, it will also fall 16 feet in the first second, even though it is moving horizontally… it moves both away from you and down toward the ground. Think about a bullet shot horizontally. It travels a lot faster than you can throw (about 2,000 feet each second). But it will still fall 16 feet during that first second. Gravity pulls on all objects (like the ball and the bullet) the same way, no matter how fast they go.


What if you shoot the bullet faster and faster? Gravity will still pull it down 16 feet during the first second, but remember that the surface of the Earth is round. Can you imagine how fast we’d need to shoot the bullet so that when the bullet falls 16 feet in one second, the Earth curves away from the bullet at the same rate of 16 feet each second?


Answer: that bullet needs to travel nearly 5 miles per second. (This is also how satellites stay in orbit – going just fast enough to keep from falling inward and not too fast that they fly out of orbit.)


Catapults are a nifty way to fire things both vertically and horizontally, so you can get a better feel for how objects fly through the air. Notice when you launch how the balls always fall at the same rate – about 16 feet in the first second.  What about the energy involved?


When you fire a ball through the air, it moves both vertically and horizontally (up and out). When you toss it upwards, you store the (moving) kinetic energy as potential energy, which transfers back to kinetic when it comes whizzing back down. If you throw it only outwards, the energy is completely lost due to friction.


The higher you pitch a ball upwards, the more energy you store in it. Instead of breaking our arms trying to toss balls into the air, let’s make a simple machine that will do it for us. This catapult uses elastic kinetic energy stored in the rubber band to launch the ball skyward.


[am4show have=’p8;p9;p11;p38;p15;p42;p151;p75;p85;p88;p92;’ guest_error=’Guest error message’ user_error=’User error message’ ]


Here’s what you need:


  • 9 tongue-depressor size popsicle sticks
  • four rubber bands
  • one plastic spoon
  • ping pong ball or wadded up ball of aluminum foil (or something lightweight to toss, like a marshmallow)
  • hot glue gun with glue sticks


Download Student Worksheet & Exercises


catapult1What’s going on? We’re utilizing the “springy-ness” in the popsicle stick to fling the ball around the room. By moving the fulcrum as far from the ball launch pad as possible (on the catapult), you get a greater distance to press down and release the projectile. (The fulcrum is the spot where a lever moves one way or the other – for example, the horizontal bar on which a seesaw “sees” and “saws”.)


Troubleshooting: These simple catapults are quick and easy versions of the real thing, using a fulcrum instead of a spring so kids don’t knock their teeth out. After making the first model, encourage kids to make their own “improvements” by handing them additional popsicle sticks, spoons, and glue sticks (for the hot glue guns).


If they get stuck, you can show them how to vary their models: glue a second (or third, fourth, or fifth) spoon onto the first spoon for multi-ammunition throws, increase the number of popsicle sticks in the fulcrum from 7 to 13 (or more?), and/or use additional sticks to lengthen the lever arm. Use ping pong balls as ammo and build a fort from sheets, pillows, and the backside of the couch.


Want to make a more advanced catapult? 

This catapult requires a little more time, materials, and effort than the catapult design above, but it’s totally worth it. This device is what most folks think of when you say ‘catapult’. I’ve shown you how to make a small model – how large can you make yours?


This project lends itself well to taking data and graphing your results: you and your child can jot down the distance traveled along with time aloft with further calculations for high school students for velocity and acceleration. My university students would also calculate statistics, percent error, and more. My students also mapped out the material properties of the ‘cantilevered beam’ as well as model the popsicle stick as a spring (to determine the spring constant (k) for your calculations from Hooke’s Law). You can take this project as far as you want, depending on the interest and ability of kids.


Materials:


  • plastic spoon
  • 14 popsicle sticks
  • 3 rubber bands
  • wooden clothespin
  • straw
  • wood skewer or dowel
  • scissors
  • hot glue gun


Try different ball weights (ping pong, foil crumpled into a ball, whiffle balls, marshmallows, etc) and chart out the results: make a data table that shows what ball you tried and how far it went. You can also use a stopwatch to time how long your ball was in the air.


You can also graph your results: make a chart where you plot each data point on a graph that has distance on the vertical axis and time on the horizontal axis.


Advanced Teaching Tips: For high school and college-level physics classes, you can easily incorporate these launchers into your calculations for projectile motion. Offer students different ball weights (ping pong, foil crumpled into a ball, and whiffle balls work well) and chart out the results.


Exercises Answer the questions below:


  1. How is gravity related to kinetic energy?
    1. Gravity creates kinetic energy in all systems.
    2. Gravity explains how potential energy is created.
    3. Gravity pulls an object and helps its potential energy convert into kinetic energy.
    4. None of the above
  2. If you could use your catapult to launch your ball of foil into orbit, how high would it have to go?
    1. Above the atmosphere
    2. High enough to slingshot around the moon
    3. High enough so that when it falls, the earth curves away from it
    4. High enough so that it is suspended in empty space
  3. Where is potential energy the greatest on the catapult?

[/am4show]


This is a very simple yet powerful demonstration that shows how potential energy and kinetic energy transfer from one to the other and back again, over and over.  Once you wrap your head around this concept, you’ll be well on your way to designing world-class roller coasters.


For these experiments, find your materials:


  • some string
  • a bit of tape
  • a washer or a weight of some kind
  • set of magnets (at least 6, but more is better)

[am4show have=’p8;p9;p11;p38;p15;p42;p75;p85;p88;p92;’ guest_error=’Guest error message’ user_error=’User error message’ ]


Here’s what you do:


1. Make the string into a 2 foot or so length.


2. Tie the string to the washer, or weight.


3. Tape the other end of the string to a table.


4. Lift the weight and let go, causing the weight to swing back and forth at the end of the pendulum.


Download Student Worksheet & Exercises


Watch the pendulum for a bit and describe what it’s doing as far as energy goes. Some questions to think about include:


  • Where is the potential energy greatest?
  • Where is the kinetic energy greatest?
  • Where is potential energy lowest?
  • Where is kinetic energy lowest?
  • Where is KE increasing, and PE is decreasing?
  • Where is PE increasing and KE decreasing?
  • Where did the energy come from in the first place?

Remember, potential energy is highest where the weight is the highest.


Kinetic energy is highest were the weight is moving the fastest. So potential energy is highest at the ends of the swings. Here’s a coincidence, that’s also where kinetic energy is the lowest since the weight is moving the least.


Where’s potential energy the lowest? At the middle or lowest part of the swing. Another coincidence, this is where kinetic energy is the highest! Now, wait a minute…coincidence or physics? It’s physics right?


In fact, it’s conservation of energy. No energy is created or destroyed, so as PE gets lower KE must get higher. As KE gets higher PE must get lower. It’s the law…the law of conservation of energy! Lastly, where did the energy come from in the first place? It came from you. You added energy (increased PE) when you lifted the weight.


(By the way, you did work on the weight by lifting it the distance you lifted it. You put a certain amount of Joules of energy into the pendulum system. Where did you get that energy? From your morning Wheaties!)


Chaos Pendulum

For this next experiment, we’ll be using magnets to add energy into the system by having a magnetic pendulum interact with magnets carefully spaced around the pendulum. Watch the video to learn how to set this one up.  You’ll need a set of magnets (at least one of them is a ring magnet so you can easily thread a string through it), tape, string, and a table or chair. Are you ready?


Exercises


  1. Why can we never make a machine that powers itself over and over again?
    1. Energy is mostly lost to heat.
    2. Energy is completely used up.
    3. Energy is unlimited, but is absorbed by neighboring air molecules.
    4. None of these
  2. In the pendulum, as kinetic energy increases, potential energy ______________.
    1. Increases
    2. Decreases
  3. As potential energy decreases, kinetic energy _________________.
    1. Increases
    2. Decreases

[/am4show]


There are many different kinds of potential energy.  We’ve already worked with gravitational potential energy, so let’s take a look at elastic potential energy.


[am4show have=’p8;p9;p11;p38;p15;p42;p88;p92;’ guest_error=’Guest error message’ user_error=’User error message’ ]


Materials: a rubber band


A simple way to demonstrate elastic energy is to stretch a rubber band without releasing it.  The stretch in the rubber band is your potential energy. When you let go of the rubber band, you are releasing the potential energy, and when you aim it toward a wall, it’s converted into motion (kinetic energy).


Here’s another fun example:  the rubber band can also show how every is converted from one form to another.  If you place the rubber band against a part of you that is sensitive to temperature changes (like a cheek or upper lip), you can sense when the band heats up.  Simply stretch and release the rubber band over and over, testing the temperature as you go. Does it feel warmer in certain spots, or in just one location?


[/am4show]


When you toss down a ball, gravity pulls on the ball as it falls (creating kinetic energy) until it smacks the pavement, converting it back to potential energy as it bounces up again. This cycles between kinetic and potential energy as long as the ball continues to bounce.


[am4show have=’p8;p9;p11;p38;p15;p42;p88;p92;’ guest_error=’Guest error message’ user_error=’User error message’ ]


But note that when you drop the ball, it doesn’t rise up to the same height again. If the ball did return to the same height, this means you recovered all the kinetic energy into potential energy and you have a 100% efficient machine at work. But that’s not what happens, is it? Where did the rest of the energy go? Some of the energy was lost as heat and sound. (Did you hear something when the ball hit the floor?)


[/am4show]


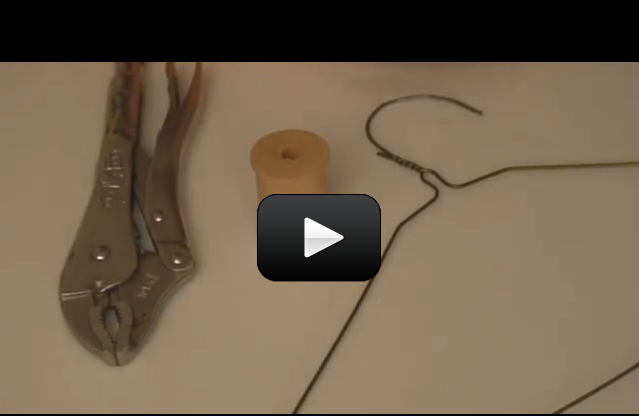
These homemade pulleys work great as long as they glide freely over the coat hanger wire (meaning that if you give them a spin, they keep spinning for a few more seconds).  You can adjust the amount of friction in the pulley by adjusting the where the metal wire bends after it emerges from the pulley.

[am4show have='p8;p9;p11;p38;p14;p41;p88;p92;' guest_error='Guest error message' user_error='User error message' ] All you need is a wire coathanger, a thread spool, and a pair of vice grips... and the video below.


Download Student Worksheet

Cut a wire coat-hanger at the lower points (at the base of the triangular shape) and use the hook section to make your pulley. Thread both straight ends through a thread spool, crossing in the middle, and bend wire downwards to secure spool in place. Be sure the spool turns freely. Use hook for easy attachment. (These pulleys work well for the return-pulley system experiment in this section.)
If you still have trouble, you can purchase pulleys from the hardware store, or more inexpensively, from a farm supply store. (We get ours from the chicken coup section – no kidding!) If you really want to go hog-wild with pulleys, get a bunch and clip them onto climbing-rated carabineer. [/am4show]

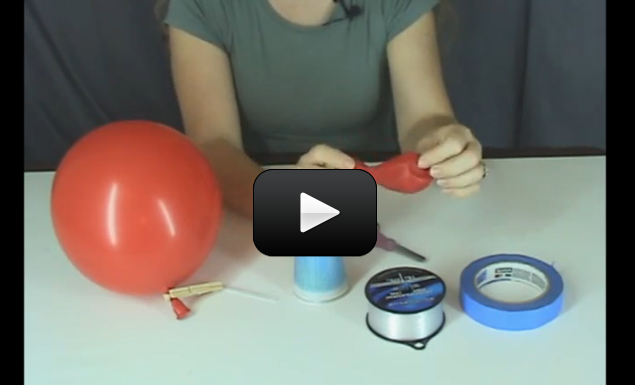
We’re going to experiment with Newton’s Third law by blowing up balloons and letting them rocket, race, and zoom all over the place. When you first blow up a balloon, you’re pressurizing the inside of the balloon by adding more air (from your lungs) into the balloon. Because the balloon is made of stretchy rubber (like a rubber band), the balloon wants to snap back into the smallest shape possible as soon as it gets the chance (which usually happens when the air escapes through the nozzle area). And you know what happens next – the air inside the balloon flows in one direction while the balloon zips off in the other.


Question: why does the balloon race all over the room? The answer is because of something called ‘thrust vectoring’, which means you can change the course of the balloon by angling the nozzle around. Think of the kick you’d feel if you tried to angle around a fire hose operating at full blast. That kick is what propels balloons and fighter aircraft into their aerobatic tricks.


We’re going to perform several experiments here, each time watching what’s happening so you get the feel for the Third Law. You will need to find:


  • balloons
  • string
  • wood skewer
  • two straws
  • four caps (like the tops of milk jugs, film canisters, or anything else round and plastic about the size of a quarter)
  • wooden clothespin
  • a piece of stiff cardboard (or four popsicle sticks)
  • hot glue gun

First, let’s experiment with the balloon. Here’s what you can do:


[am4show have=’p8;p9;p11;p38;p92;p12;p39;p109;p72;p95;’ guest_error=’Guest error message’ user_error=’User error message’ ]
1. Blow up the balloon (don’t tie it)


2. Let it go.


3. Wheeeee!


4. Tie one end of the string to a chair.


5. Blow up the balloon (don’t tie it).


6. Tape a straw to it so that one end of the straw is at the front of the balloon and the other is at the nozzle of the balloon.


7. Thread the string through the straw and pull the string tight across your room.


8. Let go. With a little bit of work (unless you got it the first time) you should be able to get the balloon to shoot about ten feet along the string.


This is a great demonstration of Newton’s Third Law – the air inside the balloon shoots one direction, and the balloon rockets in the opposite direction. It’s also a good opportunity to bring up some science history. Many folks used to believe that it would be impossible for something to go to the moon because once something got into space there would be no air for the rocket engine to push against and so the rocket could not “push” itself forward.


In other words, those folks would have said that a balloon shoots along the string because the air coming out of the balloon pushes against the air in the room. The balloon gets pushed forward. You now know that that’s silly! What makes the balloon move forward is the mere action of the air moving backward. Every action has an equal and opposite reaction.


Multi-Stage Balloon Rocket

You can create a multi-stage balloon rocket by adding a second balloon to the first just like you see here in the video:


Tie a length of string through the room, having at least twenty feet of clear length.  Thread two straws onto the string before securing the end.  Punch the bottoms out of two foam coffee cups and tape parallel to the threaded straws.


Blow up balloons while they are inside the cups, so they extend out either end.  When blowing up the second balloon, sandwich the untied end of the first inflated balloon between the second inflated balloon surface and inside the cup.  Hold the second balloon’s end with a clothespin and release!


Balloon Racecar

Now let’s use this information to create a balloon-powered racecar. You’ll need the rest of the items outlined above to build your racecar. NOTE: in the video, we’re using the popsicle sticks, but you can easily substitute in a sheet of stiff cardboard for the popsicle sticks. (Either one works great!)


Download Student Worksheet & Exercises


You now have a great grasp of Newton’s three laws and with it you understand a good deal about the way matter moves about on Earth and in space. Take a look around. Everything that moves or is moved follows Newton’s Laws.


In the next unit, we will get into Newton’s Third Law a little deeper when we discuss momentum and conservation of momentum by whacking things together *HARD*. But more on this later…


Exercises


  1. What is Newton’s Third Law of Motion?
  2. Why does the balloon stop along the string?

[/am4show]


[am4show have=’p8;p9;p11;p38;p92;’ guest_error=’Guest error message’ user_error=’User error message’ ]


Advanced students: Download your Balloon Racer Lab here.


[/am4show]


A common misconception in science is that centrifugal and centripetal force (or acceleration) are the same thing. These two terms constantly throw students into frenzy, mostly because there is no clear definition in most textbooks. Here’s the scoop: centripetal and centrifugal force are NOT the same thing!


This experiment is mostly for Advanced Students, but here’s a quick lesson you can do with your younger students…


[am4show have=’p8;p9;p11;p38;p12;p39;p92;’ guest_error=’Guest error message’ user_error=’User error message’ ]
Before we jump in, let’s recap what we’ve learned so far. A ball sitting still has a position you can chart on a map (latitude, longitude, and altitude), but no velocity or acceleration, because it’s not moving. When you kick the ball, that’s when it gets interesting. The second your toe touches the ball, things start to change. Velocity is a change of position. If you kick the ball ten feet, and it takes five seconds to go the distance, the average speed of the ball is 2 feet per second (about 1.4 MPH).


The trickier part of this scenario has to do with acceleration, which is the change in velocity. When you drive on the freeway at a constant 65 MPH, your acceleration is zero. Your speed does not change, so you have no acceleration. Your position is constantly changing, but you have constant speed. For example, when you enter the freeway, your speed changes from zero to 65 MPH in, say, ten seconds. Your acceleration is greatest when your foot first hits the gas – when your speed changes the most – when you’re moving from zero to a higher speed.


There’s an interesting effect that happens when you travel in a curve. You can feel the effect of a different type of acceleration when you suddenly turn your car to the right – you will feel a push to the left. If you are going fast enough and you take the turn hard enough, you can get slammed against the door. So – who pushed you?


Think back to the first law of motion. An object in motion tends to stay in motion unless acted upon by an external force. This is the amazing part – the car is the external force. Your body was the object in motion, wanting to stay in motion in a straight line. The car turns, and your body still tries to maintain its straight path, but the car itself gets in the way. When you slam into the car door, the car is turning itself into your path, forcing you to change direction.


This effect is true when you travel in a car or in a roller coaster. It’s the reason the water stays in the bucket when you swing it over your head. Physical motion is everywhere, challenging toddlers learning to walk as well as Olympic downhill skiers to go the distance. Here’s a quick experiment you can do right now to wrap your head around this idea:


Here’s what you need to find for these experiments:


  • bucket
  • water
  • outdoor area
  • you
  • clear tubing (about 12-18″ long)
  • nylon or metal barbed union that fits inside the tubing
  • empty soda bottle
  • clean wine cork
  • string

Bucket Splash

Fill a bucket half-full with water. Grasp the handle and swing it over your head in a circle in the vertical direction. Try spinning around while holding the handle out in front of your chest to swing it in the horizontal plane. Vary your spin speed to find the minimum!


Now let’s take a deeper look at centripetal, centrifugal, and how you can measure the g-force when taking a sharp turn in your car:


[/am4show][am4show have=’p9;p39;’ guest_error=’Guest error message’ user_error=’User error message’ ]


For Advanced Students:

Centripetal (translation = “center-seeking” ) is the force needed to keep an object following a curved path. Remember how objects will travel in a straight line unless they bump into something or have another force acting on it (gravity, drag force, etc.)? Well, to keep the bucket of water swinging in a curved arc, the centripetal force can be felt in the tension experienced by the handle (or your arm, in our case). Swinging an object around on a string will cause the rope to undergo tension (centripetal force), and if your rope isn’t strong enough, it will snap and break, sending the mass flying off in a tangent (straight) line until gravity and drag force pull the object to a stop. This force is proportional to the square of the speed – the faster you swing the object, the higher the force.


Centrifugal (translation = “center-fleeing”) force has two different definitions, which also causes confusion. The inertial centrifugal force is the most widely referred to, and is purely mathematical, having to do with calculating kinetic forces using reference frames, and is used with Newton’s laws of motion. It’s often referred to as the ‘fictitious force’.


Reactive centrifugal force happens when objects move in a curved path. This force is actually the same magnitude as centripetal force, but in the opposite direction, and you can think of it as the reaction force to the centripetal force. Think of how you stand on the Earth… your weight pushes down on the Earth, and a reaction force (called the “normal” force) pushes up in reaction to your weight, keeping you from falling to the center of the Earth. A centrifugal governor (spinning masses that regulate the speed of an engine) and a centrifugal clutch (spinning disk with two masses separated by a spring inside) are examples of this kind of force in action.


Say WHAT?!?

Don’t worry if these ideas make your brain turn into a pretzel. Most college students take three courses in this before it makes sense to them. Here’s one more example: imagine driving a car along a banked turn. The road exerts a centripetal force on the car, keeping the car moving in a curved path (the “banked” turn). If you neglected to buckle your seat belt and the seats have a fresh coat of Armor-All (making them slippery), then as the car turns along the banked curve, you get “shoved” toward the door. But who pushed you? No one – your body wanted to continue in a straight line but the car keeps moving in your path, turning your body in a curve. The push of your weight on the door is the reactive centrifugal force, and the car pushing on you is the centripetal force.


What about the fictitious (inertial) centrifugal force? Well, if you imagine being inside the car as it is banking with the windows blacked out, you suddenly feel a magical ‘push’ toward the door away from the center of the bend. This “push” is the fictitious force invoked because the car’s motion and acceleration is hidden from you (the observer) in the reference frame moving within the car.


Okay, enough talk for now. Let’s make two acceleration-measuring instruments (called ‘accelerometers’) so you can jump, run, swing, and zoom around to find out how many g’s you can pull. You’re going to make a cork-accelerometer and a g-force ring, both of which are used by my students when I teach mechanical engineering dynamics.


Cork Accelerometer

Fill an empty soda bottle to the top with water. Modify the soda bottle cap as follows: attach a string 8-10″ long to a clean wine cork. Hot glue the free end of the string to the inside of the cap. Place the cork and string inside the bottle and screw on the top (try to eliminate the air bubbles). The cork should be free to bob around when you hold the bottle upside-down.


Download Student Worksheet & Exercises


To use the accelerometer: invert the bottle and try to make the cork move about. Remember – it is measuring acceleration, which is the change in speed. It will only move when your speed changes. You can do this experiment in a car while doing your other vehicle experiment: Why Bother With Seatbelts?. The trouble with this accelerometer is that there are no measurements you can take – it’s purely visual. This next activity is more accurate at measuring the number of g-s you pull in a sharp turn (whether in a vehicle or in a roller coaster!)


G-Force Ring Accelerometer

One more university-level gadget for demonstrating the fascinating world of physical dynamics. This quick homemade device roughly measures acceleration in “g’s”. We used it to measure the g-force on roller coasters at Six Flags Magic Mountain, and it worked just as well as the expensive ones you buy in scientific catalogs!


Get about a foot of tubing – the bigger the diameter, the easier it will be to read. Also get a barbed union (plastic barbs work just fine). Fill your tube halfway with COLORED water (it’s impossible to read when it’s clear). Blue, green, red… your choice of food dye additive. Make an O-shape using your barb to water-seal the junction. Grab hold of one side and hold the circle vertical, with the barb-end pointing to the sky. The water should fill the bottom half, and air fills the top half. Make sure there are equal amounts of water and air in your tube. Make a mark on the tube where the water meets the air with a black marker. This is your 0-g reading (relative, of course). No acceleration. Not a whole lot of fun.


Now, for your 1-g mark – measure up 45 degrees from the first mark. (If the top of the circle is 90 degrees, and the 0-g mark is zero degrees, find the halfway point and label it).


The 2-g mark is 22.5 degrees up from the 1-g mark.


3-g mark is 11.25 degrees up from the last mark. And 4-g is 5.6 degrees up from the last mark. (See a pattern? You can prove this mathematically in college, and it’s kind of fun to figure out!)


Now, next time mom drives around town, hold the tube in your hand so that the water line starts at the zero mark. When she pulls a turn, see how far it sloshes up and tell her how many g’s she pulled. We also used to have contests to see who could pull the most g’s while spinning in a circle. Have fun!


Advanced Students:

Advanced Students: Download your G-Force lab here.


Exercises 


  1. Which accelerometer was better at giving a visual representation of accelerating?
  2. Which one do you prefer? Why?
  3. What activity did you do that created the most acceleration?
  4. What does that tell you about acceleration?

[/am4show]


Newton’s Second Law is one of the toughest of the laws to understand but it is very powerful. In its mathematical form, it is so simple, it’s elegant. Mathematically it is F=ma or Force = Mass x Acceleration. An easy way to remember that is to think of your mother trying to get you out of bed in the morning. Force equals MA’s coming to get you! (I did mention how bad physics jokes are, right?)


[am4show have=’p8;p9;p11;p38;p12;p39;p92;’ guest_error=’Guest error message’ user_error=’User error message’ ]


Newton’s Second Law

In English, Newton’s Second Law can be stated a few different ways:


The more mass something has and/or the faster it’s accelerating, the more force it will put on whatever it hits. F=ma For example, a car colliding at 30 mph will hit a lot harder then a fly colliding at 30 mph.


The more mass something has, the more force that’s needed to get it to accelerate. a=F/m This, by the way, is a mathematical definition for acceleration. For example, it is a lot harder to get a train to accelerate than it is to get a ping pong ball to accelerate.


So force = mass X acceleration. Let’s try a couple of things and see if we can make that make sense.


Now, time to do an experiment. You will need:


  • something slightly slanted, like a slanted driveway or a long board (or even a table propped up on one end)
  • something to move down the slant, like a toy car or ball
  • a stopwatch
  • pen and paper

I’m going to assume you’re using the toy car and a driveway. Feel free to modify the experiment for whatever you are using.


1. Take the toy car to the top of the driveway.


2. Let it go.


3. Watch it carefully as it rolls.


4. If you’d like, you can time the car and mark how far it goes every second like we did in this acceleration experiment.


5. If you time it, measure the distances it went each second and write them down.


Download Student Worksheet & Exercises


What I’m hoping you will see here is that the car accelerates from zero to a certain velocity but then stays at that velocity as it continues down the driveway. In other words, it reaches its terminal velocity. If you timed and marked the distances you should see that the car goes the same distance each second if it is indeed staying at a constant velocity. If the object you are using to roll down the slant, continues to accelerate down the entire ramp, see if you can find something that has more friction to it (a toy car that doesn’t roll quite to easily, for example).


Ok, so what’s going on? F=ma right? Acceleration can’t happen without force. What two forces are effecting the car? (Imagine the Jeopardy theme song here). If you said gravity and friction, give yourself a handshake. When the car is going at a constant velocity, is it accelerating? Nope, acceleration is a change in speed or direction.


“But you just said two forces are effecting my little car and that force causes acceleration and yet my car is not accelerating. Why not?”


Well, there’s one little thing I haven’t mentioned yet, which is why we did this experiment. In this case, the force of gravity pulling on the car and the force of friction pushing on the car is equal (remember, that’s terminal velocity right?). So the net force on the car is zero. The pulling force is equal to the pushing force so there is zero force on the car. Force is measured in Newton’s (name sounds familiar right?) so imagine that there are 3 Newtons of force pulling on the car due to gravity and 3 Newtons of force pushing on the car due to friction. 3 – 3 = 0. Zero force equals zero acceleration because you need force to have acceleration. By the way, 1 Newton is about the same amount of force that it takes to lift a full glass of milk.


Advanced Students: Download your Downhill Races Lab here.


Exercises 


  1. You should notice a difference between these graphs and the ones from the driveway races. What is it? (Hint: look to second half of the graph.)
  2.  The first graph doesn’t continue to curve, but straightens out.  What does this mean about the velocity?
  3.  in the second graph, the slope flattens out completely, what does this mean about the acceleration?
  4.  If the acceleration is zero, what does that mean about the net force?
  5.  What are the forces acting on the toy car as it is going down the ramp?
  6.  Name 3 other examples

[/am4show]


gyro1Gyroscopes defy human intuition, common sense, and even appear to defy gravity. You’ll find them in aircraft navigation instruments, games of Ultimate Frisbee, fast bicycles, street motorcycles, toy yo-yos, and the Hubble Space Telescope. And of course, the toy gyroscope (as shown here). Gyroscopes are used at the university level to demonstrate the principles of angular momentum, which is what we’re going to learn about here.


If you happen to have one of these toy gyroscopes, pull it out and play with it (although it’s not essential to this experiment). Notice that you can do all sorts of things with it when you spin it up, such as balance it on one finger (or even on a tight string). Wrap one end with string and hold the string vertically and you’ll find the gyro slowly rotates about the vertical string instead of flopping downward (as most objects do in Earth’s gravitational field). But why? Here’s the answer in plain English:


[am4show have=’p8;p9;p11;p38;p12;p39;p92;’ guest_error=’Guest error message’ user_error=’User error message’ ]
Imagine a spinning bicycle wheel hanging from a rope. Take a freeze-frame image of the wheel in your mind and make the top part of the wheel is at 12 o’clock, the left side at 9 o’clock, the bottom is 6 o’clock, and the center axle pointing toward you. And the wheel was rotating clockwise. Got it?


The 6 o’clock position wants to move to the left. When the 6 o’clock position gets to the 9 o’clock, it still wants to move left.


The original 9 o’clock position wants to move up. When the 9 o’clock position gets to 12 o’clock, it still wants to move up.


The 12 o’clock position wants to move to the right. When the 12 o’clock position moves to the 3 o’clock, it still wants to move right. See the pattern?


Okay, here’s what you want to see now: as the top and bottom (12 and 6 o’clock) positions of the wheel rotate, the forces cancel each other out. Same with the 3 and 9 o’clock positions. And because the wheel is symmetrical, this occurs for every spot on the wheel. When this happens, the bicycle wheel turns (precesses), instead of falling. This is also why a spinning gyroscope will appear to float at the end of the string instead of dangling.


One more piece to the puzzle: the wheel itself is accelerating. Any object that swings in a circle is accelerating, because in order to move in a circle, you need to be constantly changing your direction (or else you’d be off in a straight line tangent to your circular path). When you swing a bag of oranges around your head, or a yo-yo on a string, or even taking a turn in a car, acceleration is happening. We’ll talk more about that when we do our g-force experiments. For right now, let’s get our hands on a super-cool experiment that you usually only see at science museums or inside physics classrooms.


You’ll need to find:


  • a bicycle wheel (it needs to be detached from a bicycle – note that the front wheel is pretty easy to detach)
  • a piece of rope (about 2-3′)
  • and an office chair

1. Carefully hold the bicycle wheel by the axle and give it a spin. Try to get it to spin as fast as you can but be VERY careful to hold onto it tightly and don’t get your fingers in the spokes. It works well if someone else can spin it for you.


2. While it’s spinning try to move it around. You’ll find that the wheel does not want to be moved around and tries to do its own thing when you move it.


3. Take a string and loop it around one side of the axle of the wheel. Spin the wheel fast and let go of the wheel while holding onto the string. The wheel will stay spinning and defy gravity by staying straight up and down. Really! Try it, it’s very cool!


Download Student Worksheet & Exercises


This experiment demonstrates the power of Newton’s Second Law: Force equals mass times acceleration. The mass is the mass of the wheel, in particular, the mass of the tire. The acceleration is the spinning wheel. Remember, acceleration is not just change in speed but also change in direction. Every point on the spinning wheel is constantly changing direction so the wheel is accelerating.


Since acceleration times mass has to equal force, (math says so) the spinning wheel has a force. This force is strong enough to defy gravity and is what you feel when you hold the axles of the wheel and try to move it. This same force is what keeps a top spinning, why footballs are thrown with a spiral, why satellites spin and so on. It’s pretty incredible to think that a force can be created by nothing more than accelerating mass.


Best Physics Joke

A friend once told me of a funny April Fool’s joke played at his office. He worked at a company that fixed aircraft instruments, where they received all sorts of old airplane parts. One day, his office anonymously received an old instrument from a WWII bomber, and the gyro in this thing was HUGE. Then he had an idea – he removed the gyro from the outer instrument casing, fixed it, spun it up (and it would continue spin for hours), and packed it up in his boss’s briefcase. When his boss went to lunch and picked up his briefcase, can you imagine what happened? (Tell me in the comment field below!)


Exercises


  1. What did it feel like when you tried to turn the wheel after it was spun?
  2. What direction (orientation) does the wheel want to be in?
  3. When you were on the spinning chair/platform, which way did you turn?
  4. If you turned the wheel left, you should have spun the same way, where is the force coming from the pushed you in that direction?
  5. What happened to the wheel while you held on to the string? Did it stay upright, or dangle?
  6. Why do you think it stayed upright?

For Advanced Students:

[/am4show][am4show have=’p9;p39;’ guest_error=’Guest error message’ user_error=’User error message’ ]
When you grab hold of the axle of a spinning bicycle wheel, you feel a ‘push’ in an odd direction. This ‘push’ is called precession and is a wobble from the spin axis because you tried to move it in a direction it doesn’t want to go.


Precession happens when you grab a spinning object at its rotating axis (like the ends of the gyroscope or the axle of a bicycle wheel) and try to move it about. You’ll find a fierce resistance crop up. That’s precession. The question is why? Why does the gyro act like this?


Normally, this area of scientific study is enough to make most 3rd year engineering students cry. The engineering required to model this system are complex, let alone finding the solution to the mathematical differential equations that make up the model itself. So we’re not going to get into the nit-picky stuff, but instead talk about how it actually works using plain English. Here’s what’s going on:


Most gyroscopes are designed to have most of the rotating mass far away from the center axis (think of a thin disk with a heavy rim, like a bike wheel) so it can resist motion in certain directions. A spinning bike wheel stores large amounts of energy. Remember Newton’s first law of motion? (An object in motion tends to stay in motion unless something else interferes.) Any time you try to torque the bike axle, the wheel will try to ‘compensate’ for this and push in a different direction. (Parts of a car engine will also do this – think of the fast-spinning shaft or fan when you try to take a sharp turn.)


Who first thought up this stuff?

German scientist Johann Bohnenberger built the first gyroscope as a giant spinning ball near the start of the 1800s. About two decades later, Walter R. Johnson (an American) shifted the spinning solid sphere into a spinning disc, which was later upgraded to describing the Earth’s rotation by a French mathematician Pierre-Simon Laplace. Léon Foucault attempted to use the gyroscope in experiments that could detect the earth’s rotation (while still being on the planet itself), but his work lacked a frictionless mount (which was later developed), and now the famous Foucault Pendulum is in many science museums across the country. (It’s the one with the 3-story tall, 300-pound brass plumb-bob that knocks over dominoes every 6-14 minutes.)


The first industrial application for the gyroscope was for the military (marine applications, then quickly followed for aircraft) in the early 1900s, followed shortly after by the toy industry. Today gyroscopes are used mostly in navigational systems and inertial guidance systems for ballistic missiles.


You can think of the Earth as a gyro as well. Of precession is the ‘wobble’ a spinning gyro makes when a force is applied (the force in this case is the pull mostly from the sun), then the Earth ‘wobbles’ through one precession cycle about every 26,000 years. What does this mean? It means that the axial poles of the earth are scribing small, slow circles over time (the ‘wobble’). It also means that star positions will slowly change on our gridmarked area of the sky, so every so often we’ll need to update our coordinate systems so we can accurately locate the positions of the stars. (But it’s only a shift of about 1 degree very 70+ years.)


The interesting thing is that the Earth’s precession was actually discovered ages ago by the ancient Greek astronomer Hipparchus (150 B.C.), but it couldn’t be mathematically described until we had Newtonian physics to guide the way (and even then we had a few issues). For example, we had to figure out that the Earth is really not a sphere but more of an ‘squashed sphere’ (imagine squashing a ball of clay slightly between your fingers so that the middle bulges out). And both the Sun and the Moon pull on the bulge (lunisolar precession), which adds more to the ‘wobble’ of the Earth. And did I mention the Sun is not a perfect sphere, either? (It’s actually kind of flat… so that had to be accounted for as well.)


All of this can be mathematically modeled in the world of engineering through a conservation law called Angular Momentum. For those of you who really want to learn more about angular momentum (which is purely your choice, but it is out of the scope of this program because it’s a college-level topic), click here to download a chapter from an advanced textbook.


Advanced students: Download your Gyro Wheel Lab here.


[/am4show]


soccerball1This experiment is one of my favorites in this acceleration series, because it clearly shows you what acceleration looks like.


The materials you need is are:


  • a hard, smooth ball (a golf ball, racket ball, pool ball, soccer ball, etc.)
  • tape or chalk
  • a slightly sloping driveway (you can also use a board for a ramp that’s propped up on one end)

For advanced students, you will also need: a timer or stopwatch, pencil, paper, measuring tape or yard stick, and this printout.


Grab a friend to help you out with this experiment – it’s a lot easier with two people.


Are you ready to get started really discovering what acceleration is all about?


Here’s what you do:
[am4show have=’p8;p9;p11;p38;p12;p39;p92;’ guest_error=’Guest error message’ user_error=’User error message’ ]
1. Place the board on the books or whatever you use to make the board a slight ramp. You really don’t want it to be slanted very high. Only an inch or less would be fine. If you wish, you can increase the slant later just to play with it.


2. Put a line across the board where you will always start the ball. Some folks call this the “starting line.”


3. Start the timer and let the ball go from the starting line at the same exact time.


4. Now, this is the tricky part. When the timer hits one second, mark where the ball is at that point. Do this several times. It takes a while to get the hang of this. I find it easiest to have another person do the timing while I follow the ball with my finger. When the person says to stop, I stop my finger and mark the board at that point.


5. Do the exact same thing but this time, instead of marking the place where the ball is at one second, mark where it is at the end of two seconds.


6. Do it again but this time mark it at 3 seconds.


7. Continue marking until you run out of board or driveway.


Download Student Worksheet & Exercises


Take a look at your marks. See how they get farther and farther apart as the ball continues to accelerate? Your ball was constantly increasing speed and as such, it was constantly accelerating. By the way, would it have mattered what the mass of the ball was that you used? No. Gravity accelerates all things equally. This fact is what Galileo was proving when he did this experiment. The the weight of the ball doesn’t matter but the size of the ball might. If you used a small ball and a large ball you would probably see differences due to friction and rotational inertia. The bigger the ball, the more slowly it begins rolling. The mass of the ball, however, does not matter.


Exercises


  1. Was the line a straight line?
  2. It should be close now, and the slope represents the acceleration it experienced going down the ramp. Calculate the slope of this line.
  3. What do you think would happen if you increased the height of the ramp?
  4. Knowing what you do about gravity, what is the highest acceleration it can reach?

For Advanced Students…

[/am4show][am4show have=’p9;p39;’ guest_error=’Guest error message’ user_error=’User error message’ ]
Now if you want to whip out your calculators you can find out how fast your ball was accelerating. Take your measuring tape and measure the distance from the starting line to the line you made for the distance the ball traveled in one second.


Let’s say for example that my ball went 6 inches in that first second. Dust off those old formulas and lets play with d=1/2gt² where d is distance, g is acceleration due to gravity and t is time.


We can’t use g here because the object is not in free fall, so instead of g let’s call it “a” for acceleration. Gravity is the force pulling on our ball but due to the slope, the ball is falling at some acceleration less then 32 ft/s².


In this case, d is 6 inches, t is 1 second and a is our unknown.


With a little math we see:


a = 12in/sec² (So our acceleration for our ramp is 12 in/sec² or we could say 1ft/s².)


With a little more math we can see how far our ball should have traveled for each time trial that we did. For one second we see that our ball should have traveled d=1/2 12(12) or d= 6 inches (we knew that one already didn’t we?).


For two seconds we can expect to see that d=1/2 12(22) or d=24 inches.
For three seconds we expect d=1/2 12(32) or d= 54 inches.


Do you see why we need a pretty long board for this?


Now roll the ball down the ramp and actually measure the distance it travels after two and three seconds. Do your calculations match your results? Probably not. Our nasty little friend friction has a sneaky way of messing up results. You should definitely see the distance the ball travels get greater with each second however. So make yourself a table or use one of ours to record your data and jot down your calculations and chart your results like a real scientist.


Advanced students: Download your Driveway Races Lab here.


[/am4show]


This experiment is for advanced students. Circular motion is a little different from straight-line motion in a few different ways. Objects that move in circles are roller coasters in a loop, satellites in orbit, DVDs spinning in a player, kids on a merry go round, solar systems rotating in the galaxy, making a left turn in your car, water through a coiled hose, and so much more.

Velocity is always tangent to the circle in the direction of the motion, and acceleration is always directed radially inward. Because of these two things, the acceleration that arises from traveling in a circle is called centripetal acceleration (a word created by Sir Isaac Newton). There’s no direct relationship between the acceleration and velocity vectors for a moving particle.

[am4show have='p8;p9;p11;p38;p92;p38;p90;p44;' guest_error='Guest error message' user_error='User error message' ] If you have a bucket of water and you’re swinging it around your head, in order to keep a bucket of water swinging in a circle, the centripetal force can be felt in the tension experienced by the handle. Swinging an object around on a string will cause the rope to undergo tension (centripetal force), and if your rope isn’t strong enough, it will snap and break, sending the mass flying off in a tangential straight line until gravity and drag force pull the object to a stop.

Here’s a cool experiment you can do that will really show you how objects that move in a circle experience centripetal force. You can lift at least 10 balls by using only one! All you need are balls, fishing line or dental floss, and an old pen.


Download Student Worksheet!

Remember Newton’s First Law? The law of inertia? It states that objects in motion tend to stay in motion with the same speed and direction unless acted upon by an unbalanced/external force. Which means that objects naturally want to continue going their straight and merry way (like you did in a straight line when you were inside the car) until an unbalanced force causes it to turn speed up or stop. Can you see how an unbalanced force is required for objects to move in a circle? There has to be a force pushing on the object, keeping in on a circular path because otherwise, it’ll go off in a straight line!

There's a whole section just on circular motion in our advanced section here. [/am4show]

If you jump out of an airplane, how fast would you fall? What’s the greatest speed you would reach? Let’s practice figuring it out without jumping out of a plane.


This experiment will help you get the concept of velocity by allowing you to measure the rate of fall of several objects. It’s also a great experiment to record in your science journal.


First, you’ll need to find your materials:


[am4show have=’p8;p9;p11;p38;p12;p39;p72;p92;’ guest_error=’Guest error message’ user_error=’User error message’ ]


  • stop watch
  • feathers (or small pieces of paper, plastic bag or anything light and fluffy)
  • a tape measure
  • If you’re crunching numbers, you’ll also need a calculator.

Now here’s how to do the experiment:


1. Get 5 or so different light and fluffy objects. Feathers of different size, small strips of paper, parts of a plastic bag, cotton balls, whatever is handy.


2. Make a prediction by writing down the objects you chose in order of how fast you think they will fall. The fastest on top, the slowest on the bottom. Leave space to the right of your prediction so that you can write in your conclusions and then compare the two.


3. Make a table with two columns. Use one column to fill in the name of the items. Use the second column to write down the time it took each object to fall.


4. Drop the different items and time them from the moment you let go to the moment they hit the ground. Be sure to drop each item from about the same height. The higher the better. Just be sure not to fall off anything! We don’t want to measure your velocity!! You might want to drop them two or three times to get an average time.


5. Now compare the items. Which one fell the least amount of time (dropped the fastest)? Which one fell the most amount of time (dropped the slowest)? Write your results next to your hypothesis. By the way, did you find anything that dropped slower than a feather? I have seen very few things that take longer to fall straight down than a feather.


Download Student Worksheet & Exercises


Did you see how many of your objects stopped accelerating very quickly? In other words, they reached their terminal velocity soon after you let them go and they fell all the way to the ground at that same constant velocity. This is why a parachute is a sky-diver’s best friend! A human has a decent amount of air resistance but he or she can reach a lethal dose of velocity (120 mph) if dropped from a great height. The parachute increases the air resistance so that the terminal velocity of that sky-diver is quite a bit safer!


Exercises


  1. What is velocity?
  2. How do acceleration and deceleration relate to velocity?
  3. How do we know when an object has reached terminal velocity?

Taking it Further for advanced students:

[/am4show]


[am4show have=’p9;p39;’ guest_error=’Guest error message’ user_error=’User error message’ ]
We can do a little math here and figure out the actual velocity of your objects. Here’s how to do it:


Measure the height from which you dropped each object. Now take the height of the drop and divide that by the number of seconds it took for it to drop that distance. That’s the velocity of that object. For example, My “from-under-the-couch-six-month-old-dust-bunny” took 3 seconds to fall 6 feet. I take 6 feet and divide it by 3 seconds to get 2 feet/second.


The velocity of my dust bunny is 2 feet/second downward.


Remember, that velocity has a directional component as well as a number. Add a little more math, and I can predict how long my dust bunny will take to fall 15 feet. Take the distance (15 feet) and divide it by the velocity (2 feet/second) and I get 7.5 seconds. It will take my dust bunny 7.5 seconds to fall 15 feet. Hmmm, maybe we should call it a dust snail.


Have you noticed something here? In this experiment, we used a different formula to find out how far something would fall over a given time.


What’s going on? In Unit 1, we ignored their terminal velocity. Those things were in free fall and accelerating (gaining velocity) all the way to the ground. They were never going the same velocity for the entire trip. So, we needed to use the gravitational constant 32 ft/s² in the equation d=1/2 gt² to determine how far something fell in a given amount of time.


For this unit, we are dealing with things that are at an almost constant velocity, (since they reach their terminal velocity quickly) so we can use the much simpler equation d=vt (d is distance, v is velocity and t is time). In the problems we’ve done in this lesson plan, we have modified that formula to find how long the fall took so we’ve used t=d/v.


If you’d like to solve for v you would use v=d/t. Isn’t algebra fun?


Advanced students: Download your terminal velocity lab here.


[/am4show]


Ever wonder how magicians work their magic? This experiment is worthy of the stage with a little bit of practice on your end.


Here’s how this activity is laid out: First, watch the video below. Next, try it on your own. Make sure to send us your photos of your inventions here!


[am4show have=’p8;p9;p11;p38;p12;p39;p92;p100;’ guest_error=’Guest error message’ user_error=’User error message’ ]
For this incredibly easy, super-amazing experiment, you’ll need to find:


  • a plastic cup
  • hard covered book
  • toilet paper tube
  • a ball that’s a bit smaller then the opening of the cup but larger than the opening of the toilet paper tube (you can also use an egg when you really get good at this trick!)

1. Put the cup on a table.


2. Put the book on top of the cup.


3. This is the tricky part. Put the toilet paper tube upright on the book, exactly over the cup.


4. Now put the ball on top of the toilet paper tube.


5. Check again to make sure the tube and the ball are exactly over the top of the cup.


6. Now, hit the book on the side so that it moves parallel to the table. You want the book to slide quickly between the cup and the tube.


7. If it works right, the book and the tube fly in the direction you hit the book. The ball however falls straight down and into the cup.


8. If it works say TAAA DAAA!


Download Student Worksheet & Exercises


This experiment is all about inertia. The force of your hand got the book moving. The friction between the book and the tube (since the tube is light it has little inertia and moves easily) causes the tube to move. The ball, which has a decent amount of weight, and as such a decent amount of inertia, is not effected much by the moving tube. The ball, thanks to gravity, falls straight down and, hopefully, into the cup. Remember the old magician’s trick of pulling the table cloth and leaving everything on the table? Now you know how it’s done. “Abra Inertia”!


So inertia is how hard it is to get an object to change its motion, and Newton’s First Law basically states that things don’t want to change their motion. Get the connection?


Exercises 


  1. What are two different pairs of forces in this experiment?
  2. Explain where Newton’s Three Laws of motion are observed in this experiment.

[/am4show]


Next time you watch a drag race, notice the wheels. Are they solid metal discs, or do they have holes drilled through the rims? I came up with this somewhat silly, but incredibly powerful quick science demonstration to show my 2nd year university students how one set of rims could really make a difference on the racetrack (with all other things being equal).


[am4show have=’p8;p9;p11;p38;p12;p39;p92;’ guest_error=’Guest error message’ user_error=’User error message’ ]
Here’s what you need: two unopened cans of soup.


One should be clam chowder, the other chicken broth. Prop up a long table up on one end about 6-12″ (you can experiment with the height later). You’re going to roll them both down the table at the same time. Which do you expect to reach to bottom first – the chicken or the clam?


Not only do my college students need to figure out which one will win, they also have to tell me why. The secret is in how you calculate the inertia of each. Take a guess, then watch the video, do the activity, then read the explanation at the bottom (in that order) to get the most out of this experiment.


Download Student Worksheet & Exercises


Inertia & History

Inertia is a quality of an object that determines how difficult it is to get that object to move, to stop moving, or to change directions. Generally, the heavier an object is, the more inertia it has. An elephant has more inertia than a mushroom. A sumo wrestler has more inertia than a baby. Inertia is made from the Latin word “inert,” which means “lacking the ability to move”. Inertia isn’t something people have a grasp of, though, as it’s something you must mathematically calculate from an object’s mass and size.


When riding in a wagon that suddenly stops, you go flying out. Why? Because an object in motion tends to stay in motion unless acted upon by an outside force (Newton’s First Law). When you hit the pavement, your motion is stopped by the sidewalk (external force). Seatbelts in a car are designed to keep you in place and counteract inertia if the car suddenly stops.


Did you know that Newton had help figuring out this First Law? Galileo rolled bronze balls down an wood ramp and recorded how far each rolled during a one-second interval to discover gravitational acceleration. And René Descartes (the great French philosopher) proposed three laws of nature, all of which Newton studied and use in his published work.


All of these thinkers (and many more) had to overcome the long-standing publicly-accepted theories that stemmed from the Greek philosopher Aristotle, which was no small feat in those days. Aristotle had completely rejected the idea of inertia (he also thought that weight affected falling objects, which we now know to be false). But remember that back then, people argued and talked about ideas rather than performing actual experiments to discover the truth about nature. They used words and reason to navigate through their world more than scientific experimentation.


Who wins, and why?

The chicken soup wins, for a very simple reason. Imagine that the cans are transparent, so you can see what does on inside the cans as they roll down the ramp. Which one has just the can rolling down the ramp, and which has the entire contents locked together as it rolls? The can of the chicken soup will rotate around the soup itself, while the clam chowder acts as a solid cylinder and rotates together. So the inertial mass of the clam is much greater than the inertial mass of the soup, even though the cans weigh the same.


Exercises


  1. What is inertia (in your own words)?
  2. Why does one soup can always win?

For Advanced Students…

[/am4show][am4show have=’p8;p9;p11;p38;p92;p39;’ guest_error=’Guest error message’ user_error=’User error message’ ]
So, how do you calculate the inertia of the chicken soup and the clam? Here’s the mathematical formulas from the back of a Dynamics textbook (a typical course that all Engineers take during their 2nd year of college).


Inertia of a solid cylinder = 1/2 * (mr²)
Inertia of a cylindrical shell = 1/12 * (mr²)


If the radius of the soup is 6.5 cm and the mass for both is the same (345 grams, or 0.345kg), and the mass of an empty can is 45 grams, then:


(CLAM) Inertia of a solid cylinder = 1/2 * (mr²) = 1/2 * (0.345kg)*(6.5cm)² = 7.29 kg cm²
(CHICKEN) Inertia of a cylindrical shell = 1/12 * (mr²) = 1/12 * (0.045kg) *(6.5cm)² = 0.158 kg cm²


The numerical value for the solid cylinder is larger than the shell, which tells us that it has a greater resistance to rolling and will start to rotate much slower than the shell. This makes logical sense, as it’s easier to get the shell alone to rotate than move a solid cylinder. Remember, you must use the mass of the cylinder shell (empty can) when calculating the chicken’s inertia, as the broth itself does not rotate and this does not have a ‘rolling resistance’!


Advanced students: Download your Chicken and Clam Lab here.


[/am4show]


If I toss a ball horizontally at the exact same instant that I drop another one from my other hand, which one reaches the ground first? For this experiment, you need: [am4show have=’p8;p9;p11;p38;p72;p92;’ guest_error=’Guest error message’ user_error=’User error message’ ]


  • 2 rulers or paint sticks. Any thing wide and flat
  • 2 coins or poker chips
  • A sharp eye and ear
  • A partner is good for this one too


Download Student Worksheet & Exercises
1. Place one of the rulers flat so that it is diagonal across the edge of a table with half the ruler on the table and half sticking off.


2. Place one coin on the table, just in front of the ruler and just behind the edge of the table. Place the other coin on the ruler on the side where it’s off the table.


3. Put your finger right in the middle of the ruler on the table so that you are holding it in such a way that it can spin a bit under your finger. Now with the other ruler you are going to smack the end of the first ruler so that the first ruler pushes the coin off the desk and the coin that’s resting on the ruler falls to the ground.


4. Now, before you smack the ruler, make a prediction. Will the coin that falls straight down or the coin that is flying forward hit the ground first?


5. Try it. Do the test and look and listen carefully to what happens. It’s almost better to use your ears here than your eyes. Do it a couple of times.


Are you surprised by what you see and/or hear? Most people are. It’s not what you would expect.


The coins hit the ground at the SAME time. Is that odd or what?


bullet


Did you read the first sentence at the top of this lab? What do you think will happen?


The balls will hit the ground at the exact SAME time.


Gravity doesn’t care if something is moving horizontally or not. Everything falls toward the center of the Earth at the same rate.


Let me give you a better example: A bullet fired parallel to the ground from a gun and a bullet dropped from the same height at the same time will both hit the ground at the same time. Even though the one fired lands a mile away! It seems incredible, but it’s true.


Gravity doesn’t care what size something is or whether or not it is moving, Gravity treats all things equally and accelerates them the same.


Notice, that I say gravity accelerates all things equally, not gravity pulls on all things equally. Gravity does pull harder on some things than on other things. This is why I weigh more than a dog. I am made of more stuff (I have more atoms) than the average dog, so gravity pulls on me more.


Weight is nothing more than a measure of how much gravity is pulling on you. This is why you can be “weightless” on a scale in space. You are still made of stuff, but there’s a balance of the gravity that is pulling on you and the outward force due to the acceleration since you’re moving in a circle (which you do in order to remain in orbit), so it feels like you have no weight.


The larger a body is, the more gravitational pull or the larger a gravitational field it will have.


The Moon has a fairly small gravitational field (if you weighed 100 pounds on Earth, you’d only be 17 pounds on the Moon), the Earth’s field is fairly large and the Sun has a HUGE gravitational field (if you weighed 100 pounds on Earth, you’d weigh 2,500 pounds on the sun!).


As a matter of fact, both the dog and I both have gravitational fields! Since we are both bodies of mass we have a gravitational field which will pull things towards us. All bodies have a gravitational field. However, my mass is sooooo small that the gravitational field I have is miniscule. Something has to be very massive before it has a gravitational field that noticeably attracts another body.


So what’s the measurement for how much stuff you’re made of? Mass. Mass is basically a weightless measure of how much matter makes you, you. A hamster is made of a fairly small amount of stuff so she has a small mass. I am made of more stuff, so my mass is greater than the hamster’s. Your house is made of even more stuff so its mass is greater still.


So, here’s a question. If you are “weightless” in space, do you still have mass? Yes, the amount of stuff you’re made of is the same on Earth as it is in your space ship. Mass does not change but since weight is a measure for how much gravity is pulling on you, weight will change.


Did you notice that I put weightless in quotation marks? Wonder why?


Weightlessness is a myth! Believe it or not, one is never weightless. A person can be pretty close to weightless in very deep space but the astronauts in a space ship actually do have a bit of weight.


Think about it for a second. If a space ship is orbiting the Earth what is it doing? It’s constantly falling! If it wasn’t moving forward at 10’s of thousands of miles an hour it would hit the Earth. It’s moving fast enough to fall around the curvature of the Earth as it falls but, indeed, it’s falling as the Earth’s gravity is pulling it to us.


Otherwise the ship would float out to space. So what is the astronaut doing? She’s falling too! The astronaut and the space ship are both falling to the Earth at the same rate of speed and so the astronaut feels weightless in space. If you were in an elevator and the cable snapped, you and the elevator would fall to the Earth at the same rate of speed. You’d feel weightless! (Don’t try this at home!)


Exercises


  1. True or false? Gravity pulls on all things equally.
  2. True or false? Gravity accelerates all things equally.
  3. In your own words, why do the coins hit the ground at the same time? Is this what you’d expect to happen on Mars?

The rest of this experiment is for advanced students…[/am4show]


[am4show have=’p9;p38;’ guest_error=’Guest error message’ user_error=’User error message’ ]


For advanced students:

Either now, or at some point in the future you may ask yourself this question, “How can gravity pull harder (put more force on some things, like bowling balls) and yet accelerate all things equally?” When we get into Newton’s laws in a few lessons you’ll realize that doesn’t make any sense at all. More force equals more acceleration is basically Newton’s Second law.


Well, I don’t want to take too much time here since this is a little deeper then we need to go but I do feel some explanation is in order to avoid future confusion. The explanation for this is inertia. When we get to Newton’s First law we will discuss inertia. Inertia is basically how much force is needed to get something to move or stop moving.


Now, lets get back to gravity and acceleration. Let’s take a look at a bowling ball and a golf ball. Gravity puts more force on the bowling ball than on the golf ball. Soooo the bowling ball should accelerate faster since there’s more force on it. However, the bowling ball is heavier soooo it is harder to get it moving. Vice versa, the golf ball has less force pulling on it but it’s easier to get moving. Do you see it? The force and inertia thing equal out so that all things accelerate due to gravity at the same rate of speed!


Gravity had to be one of the first scientific discoveries. Whoever the first guy was to drop a rock on his foot, probably realized that things fall down! However, even though we have known about gravity for many many years, it still remains one of the most elusive mysteries of science. At this point, nobody knows what makes things move towards a body of mass.


Why did the rock drop towards the Earth and on that guy’s foot? We still don’t know. We know that it does, but we don’t know what causes a gravitational attraction between objects. Gravity is also a very weak force. Compared to magnetic forces and electrostatic forces, the gravitational force is extremely weak. How come? No one knows. A large amount of amazing brain power is being used to discover these mysteries of gravity. Maybe it will be you who figures this out!


Advanced students: Download your Forever Falling Lab here.


[/am4show]


This lesson may give you a sinking sensation but don’t worry about it. It’s only because we’re talking about gravity. You can’t go anywhere without gravity. Even though we deal with gravity on a constant basis, there are several misconceptions about it. Let’s get to an experiment right away and I’ll show you what I mean.


If I drop a ping pong ball and a golf ball from the same height, which one hits the ground first? How about a bowling ball and a marble?


Here’s what you need:


[am4show have=’p8;p9;p11;p38;p72;p92;’ guest_error=’Guest error message’ user_error=’User error message’ ]


  • ping pong ball
  • golf ball
  • you


Download Student Worksheet & Exercises


For this experiment, you’ll need:

Two objects of different weights. A marble and a golf ball, or a tennis ball and a penny for example.
A sharp eye
A partner


1. Take a careful look at both objects and make a prediction about which object will hit the ground first if they are dropped from the same height.


2. Test your prediction. Hold both objects at the same height. Make sure the bottom of both objects are the same distance from the floor.


3. Let them go as close to the same time as possible. Sometimes it’s helpful to roll them off a book.


4. Watch carefully. Which hits the ground first, the heavier one or the lighter one? Try it a couple of times and watch carefully. It will be a little easier for the person who isn’t dropping them to see what happens.


What you should see is that both objects hit the ground at the same time! Gravity accelerates both items equally and they hit the ground at the same time. Any two objects will do this, a brick and a Buick, a flower and a fish, a kumquat and a cow!


“But,” I hear you saying, “if I drop a feather and a flounder, the flounder will hit first every time!” Ok, you got me there. There is one thing that will change the results and that is air resistance.


The bigger, lighter and fluffier something is, the more air resistance can effect it and so it will fall more slowly. Air resistance is a type of friction which we will be talking about later. In fact, if you removed air resistance, a feather and a flounder would hit the ground at the same time!!!


Where can you remove air resistance? The moon!!! One of the Apollo missions actually did this (well, they didn’t use a flounder they used a hammer). An astronaut dropped a feather and a hammer at the same time and indeed, both fell at the same rate of speed and hit the surface of the moon at the same time.


Ask someone this question: Which will hit the ground first, if dropped from the same height, a bowling ball or a tennis ball? Most will say the bowling ball. In fact, if you asked yourself that question 5 minutes ago, would you have gotten it right? It’s conventional wisdom to think that the heavier object falls faster. Unfortunately, conventional wisdom isn’t always right. Gravity accelerates all things equally. In other words, gravity makes all things speed up or slow down at the same rate. We will be discussing acceleration more in a later lesson. If you would like more details on the math of this, it will be at the end of this lesson in the Deeper Lesson section.


This photo shows a statue of Aristotle, a famous Greek philosopher who contributed many ideas to science.

This is a great example of why the scientific method is such a cool thing. Many, many years ago, there was a man of great knowledge and wisdom named Aristotle. Whatever he said, most people believed to be true. The trouble was he didn’t test everything that he said. One of his statements was that objects with greater weight fall faster than objects with less weight. Everyone believed that this was true.


Hundreds of years later Galileo came along and said “Ya know…that doesn’t seem to work that way. I’m going to test it” The story goes that Galileo grabbed a melon and an orange and went to the top of the Leaning Tower of Pisa. He said, “Look out below!” and dropped them! By doing that, he showed that objects fall at the same rate of speed no matter what their size.


It is true that it was Galileo who “proved” that gravity accelerates all things equally no matter what their weight, but there is no real evidence that he actually used the Leaning Tower of Pisa to do it.


Advanced Students: Download your Gravity Lab here.


Exercises


  1. What did you notice from your data? Did heavier or lighter objects fall faster? Did more massive objects or smaller objects fall faster? What characteristic seemed to matter the most?
  2. Is gravity a two-way force, like the attractive-repulsive forces of a magnet?
  3. If I were to drop a bowling ball and a balloon filled with a gas six times heavier than air (sulfur hexafluoride SF6) and inflated to the exact size of the bowling ball from my roof, which will strike the ground first?

[/am4show]


It is very rare, especially on Earth, to have an object that is experiencing force from only one direction. A bicycle rider has the force of air friction pushing against him. He has to fight against the friction between the gears and the wheels. He has gravity pulling down on him. His muscles are pushing and pulling inside him and so on and so on.


Even as you sit there, you have at least two forces pushing and pulling on you. The force of gravity is pulling you to the center of the Earth. The chair is pushing up on you so you don’t go to the center of the Earth. So with all these forces pushing and pulling, how do you keep track of them all? That’s where net force comes in.


The net force is when you add up all of the forces on something and see what direction the overall force pushes in. The word “net”, in this case, is like net worth or net income. It’s a mathematical concept of what is left after everything that applies is added and subtracted. The next activity will make this clearer.


Here’s what you need:


[am4show have=’p8;p9;p11;p38;p92;’ guest_error=’Guest error message’ user_error=’User error message’ ]


  • a rope (at least 3 feet long is good)
  • a friend
  • a sense of caution

(Be careful with this. Don’t pull too hard and please don’t let go of the rope. This is fun but you can get hurt if you get silly.)


Download Student Worksheet Exercises


1. You and your friend each grab an opposite end of the rope.
2. Both of you pull just a bit on the rope.
3. Have your friend pull a bit harder than you. Notice the direction that you both move.
4. Now you pull harder than your friend. Now which way do you go?
5. Lastly, both of you pull with the same strength on the rope. Even though you are both pulling, neither one of you should move.


In this experiment, there were always at least three forces pulling on the rope. Can you think of the three? They are you, your friend and gravity. You were pulling in one direction. Your friend was pulling in another direction and gravity was pulling down.


When one of you pulled harder (put more force on the rope) than the other person, there was a net force in the direction of the stronger pull. The rope and you guys went in that direction.


When both of you were pulling the same amount, there was an equal force pulling the rope one way and another equal force pulling the rope the other way. Since there were two equal forces acting in two opposite directions, the net force equaled zero, so there was no movement in either direction. No net force in this case means no movement.


As you’ll see when you learn about Newton’s second law, no net force means no acceleration.


Let’s take another look at the bicycle rider we talked about earlier. To make things easier, we’ll call him Billy. For Billy to speed up, he needs to win the tug of war between all of the forces involved in riding a bicycle. In other words, his muscles need to put more force on the forward motion of the bike than all of the forces of friction that are pushing against him.


If he wants to slow down, he needs to allow the forces of friction to win the tug of war so that they will cancel out his forward motion and slow down the bike. If he wants to ride at a steady speed, he wants the tug of war to be tied. His muscles need to exert the same amount of force pushing forward as the friction forces pulling in other directions.


Advanced Students: Download your Net Forces Lab here.


Exercises:


  1. For scenario 1, in which direction did you both move?  Draw the free body diagram below
  2. For scenario 2, in which direction did you both move?  Draw the free body diagram below
  3.  For scenario 3, in which direction did you both move?  Draw the free body diagram below
  4. For scenario 4, in which direction did the rope move?  Draw the free body diagram below
  5. What was the same about question 1 and question 4?  What was different?
  6.  Even though the forces were less in question 1 than question 4, what was the net force for both?
  7.  There were always at least 3 forces acting on the rope, what were they?  Did you include the third force in your free body diagram?
  8. If the rope wasn’t moving, but you had only one force moving down, what does that tell you about the force you and your friend exerted?

[/am4show]


cereal
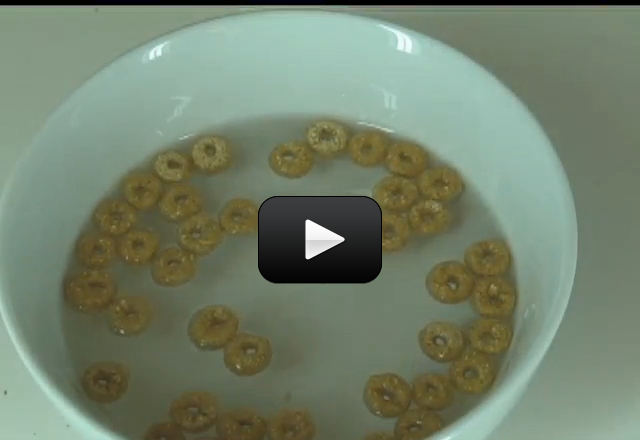
Did you know that your cereal may be magnetic? Depending on the brand of cereal you enjoy in the morning, you’ll be able to see the magnetic effects right in your bowl. You don’t have to eat this experiment when you’re done, but you may if you want to (this is one of the ONLY times I’m going to allow you do eat what you experiment with!) For a variation, pull out all the different boxes of cereal in your cupboard and see which has the greatest magnetic attraction.


[am4show have=’p8;p9;p11;p38;p72;p77;p92;’ guest_error=’Guest error message’ user_error=’User error message’ ]


Materials:


  • a bowl of cereal with milk
  • spoon


Download Student Worksheet & Exercises


  1. Fill the bowl with milk.
  2. Put about 20 pieces of cereal (not the whole box!) into the bowl.
  3. Stir up the bowl a little and watch what happens.

If you watched carefully, you saw that as the cereal “O’s” got close to one another, they attracted each other. The closer they got, the stronger was their attraction to each other and the faster they moved towards each other. If you wait and watch long enough, you get a nice tight batch of cereal all clustered together in one or two big blobs. This activity is a great illustration of what is meant by the inverse square law because the attraction between “O’s” was stronger the closer they got to each other.


I discovered this activity one morning as I was eating cereal. The same thing happens with bubbles when you’re doing the dishes. Science is everywhere! Feel free to eat the cereal!


Exercises 


  1. Why do the pieces of cereal stick to each other?
  2.  Does the cereal move slower or faster the closer the pieces come in contact with each other?
  3.  What other cereals does it work for?

[/am4show]


Have you ever been close to something that smells bad? Have you noticed that the farther you get from that something, the less it smells, and the closer you get, the more it smells? Well forces sort of work in the same way.


Forces behave according to a fancy law called the inverse-square law. To be technical, an inverse-square law is any physical law stating that some physical quantity or strength is inversely proportional to the square of the distance from the source of that physical quantity.


The inverse-square law applies to quite a few phenomena in physics. When it comes to forces, it basically means that the closer an object comes to the source of a force, the stronger that force will be on that object. The farther that same object gets from the force’s source, the weaker the effect of the force.


Mathematically we can say that doubling the distance between the object and the source of the force makes the force 1/4th as strong. Tripling the distance makes the force 1/9th as strong. Let’s play with this idea a bit.


Here’s what you need:


[am4show have=’p8;p9;p11;p38;p72;p77;p92;’ guest_error=’Guest error message’ user_error=’User error message’ ]


  • magnet
  • paper clip
  • string
  • tape

Using a magnet (the stronger the better), paper clip, string (or yarn or even dental floss!), and tape, you can make a flying paper clip.


OPTIONAL: If you happen to have a spring scale and ruler, get those out, too…otherwise, just skip these items – they are not essential to understanding the concept here.


Download Student Worksheet & Exercises


1. Tie about 4 inches of string to a paper clip.
2. Tape the magnet to the table.
3. Hold the end of the string that is not tied to the paper clip and let the paper clip dangle.
4. Slowly bring the paper clip closer and closer to the magnet.
5. Notice that the closer you get to the magnet, the stronger the force of the magnetic field is on the paper clip.


If you have a spring scale:
6. Attach the paper clip to the spring scale.
7. Move the paper clip closer to the magnet until the magnetic field affects the paper clip.
8. Measure how far the paper clip is from the magnet with a ruler.
9. Measure how much pull there is on the paper clip. Use newtons if your spring scale shows that measurement, but grams are OK if it doesn’t.
10. Bring the paper clip a half inch closer and measure the force of the pull again either in grams or Newtons.
11. Continue to get closer to the magnet half an inch at a time, measuring the force until you can’t get any closer.


What you may have noticed here was that the closer you got the paper clip to the magnet (the object causing the force field) the stronger the force was on the paper clip. You have just seen the inverse-square law in action!


Exercises: 


  1. Circle one: The closer you get to the magnet, the (stronger | weaker) the force of the magnetic field is on the paper clip.
  2. Why does it matter which way you orient the magnet in this experiment?
  3. Which magnet has the strongest magnetic field?
  4. Is the north or south pole stronger on a magnet?

[/am4show]


You are actually fairly familiar with electric fields too, but you may not know it. Have you ever rubbed your feet against the floor and then shocked your brother or sister? Have you ever zipped down a plastic slide and noticed that your hair is sticking straight up when you get to the bottom? Both phenomena are caused by electric fields and they are everywhere!


[am4show have=’p8;p9;p11;p38;p72;p76;p92;’ guest_error=’Guest error message’ user_error=’User error message’ ]
An electric field exists when at least one body is electrically charged. Atoms are filled with positively charged protons and negatively charged electrons. If an object has more electrons than protons, it will be negatively charged and if it has fewer electrons than protons, it will be positively charged. Electric fields, like magnetic fields, can attract and repel. If two bodies have the same kind of charge, that is either both are negative or both are positive, they will push themselves away from each other. If one body has a positive charge and the other has a negative charge, they will attract each other. Charged bodies can also attract bodies that are neither positive nor negative but are just neutral.


Electric fields are extremely common. If you comb your hair with a plastic comb, you cause that comb to have a small electric field. When you take off a fleece jacket or a polyester sweat shirt, you create an electric field that may be thousands of volts! Don’t worry, you can’t get hurt. There may be lots of voltage but there will be very little amperage. It’s the amperage that actually hurts you.


Here’s a simple experiment you can do that only needs four simple items:
– head of hair
– balloon
– yardstick or meterstick
– large spoon


Here’s what you do:


Download Student Worksheet & Exercises


Make sure you’ve tried out these Static Electricity experiments and learn how to light a bulb without plugging it into the wall!


Exercises 


  1. What happens if you rub the balloon on other things, like a wool sweater?
  2. If you position other people with charged balloons around the table, can you keep the yardstick going?
  3.  Can we see electrons?
  4.  How do you get rid of extra electrons?
  5.  Does the shape of the balloon matter?
  6.  Does hair color matter?
  7.  Rub a balloon on your head, and then lift it up about 6”. Why is the hair attracted to the balloon?
  8. Why does the hair continue to stand on end after the balloon is taken away?
  9. What other things does the balloon stick to besides the wall?
  10. Why do you think the yardstick moved?
  11. What other things are attracted or repelled the same way by the balloon? (Hint: try a ping pong ball.)

[/am4show]


iStock_000002030797XSmallThe electromagnetic field is a bit strange. It is caused by either a magnetic field or an electric field moving. If a magnetic field moves, it creates an electric field. If an electric field moves, it creates a magnetic field.


[am4show have=’p8;p9;p11;p38;p92;’ guest_error=’Guest error message’ user_error=’User error message’ ]
A moving electric field creates a moving magnetic field, which creates a moving electric field, which creates a moving magnetic field and on and on. Pretty strange huh? So an electromagnetic field is both an electric field and a magnetic field all rolled into one. Light, radio waves, and microwaves are examples of electromagnetic waves created by moving self-creating electronic and magnetic fields.


Until 1820, magnetic fields and electric fields were thought of as two completely separate things. A fellow by the name of Hans Christian Ørsted was preparing for a lecture when he noticed that a compass needle jumped when he flipped a switch that caused electricity to flow through some wires. This chance observation caused him to investigate further and discover that electric fields create magnetic fields and vice-versa.


Thus, through a completely random observation, electromagnetism was discovered. Without that discovery we wouldn’t have electric engines, radios, cell phones, television or Filbert the Flounder electric toothbrushes! Hooray for Ørsted!


A Summary of Force Fields and Objects

Type of Force Field Objects That Create Force Objects Are Affected By Force Force Field Can Attract and Repel
Gravitational Any object Any object Only attract
Magnetic Moving Electrons A metal that can be magnetic Attract and repel
Electric An electrically charged body Any body Attract and repel
Electromagnetic A moving magnetic field or a moving electric field A magnetic or electric field Attract and repel

The rest of this experiment (below) is for advanced students: (Hint: you need to have access to upper level content.)
[/am4show][am4show have=’p9;p38;p90;p44;’ guest_error=’Guest error message’ user_error=’User error message’ ]


Measuring the Earth’s Magnetic Pulse

When you stare at a compass, the needle that indicates the magnetic field from the Earth appears to stand still, but we’re going to find how it fluctuates and moves by creating a super-sensitive instrument using everyday materials (for comparison, you would spend over $100 for a scientific instrument that does the same thing).


Today you get to learn how to amplify tiny pulses in the Earth’s magnetic field using a laser and a couple of magnets. It’s a very cool experiment, but it does take patience to make it work right.


Materials


  • Index card or scrap of cardboard
  • 2 small mirrors
  • 2 rare earth magnets
  • Nylon filament (thin nylon thread works, too)
  • 4 doughnut magnets
  • Laser pointer (any kind will work – even the cheap key-chain type)
  • Clean glass jar (pickle, jam, mayo, etc… any kind of jar that’s heavy so it won’t knock over easily)
  • Wooden spring-type clothespin
  • Hot glue gun, scissors and tape


Download Student Worksheet & Exercises


  1. Sandwich the twine between the two rare earth magnets. These are the stronger magnets.
  2. Use a tiny dab of glue on one of the magnets and attach a mirror to the magnet. Do this on the other side for the second magnet and mirror.
  3. Lower the mirror-magnets into the container, leaving it hanging an inch above the bottom of the jar. Cut the twine at the mouth level of the container.
  4. Glue the top of the twine to the bottom of the lid, right in the center.
  5. When the glue has dried, place your mirror-magnets inside the jar and close the lid. Make sure that the mirror-magnets don’t touch the side of the jar, and are free to rotate and move.
  6. You’ve just built a compass! The small magnets will align with the Earth’s magnetic field. Slowly rotate the jar, and watch to see that the mirror-magnets inside always stay in the same configuration, just like the needle of a standard compass.
  7. Set your new compass aside and don’t touch it. You want the mirror-magnets to settle down and get very still.
  8. You are going to build the magnet array now. Stack your four doughnut magnets together in a tall stack.
  9. Fold your index card in half, and then open it back up. On one side of the crease you’re going to glue your magnets. When the magnets are attached, you’ll fold the card over so that it sits on the table like a greeting card with the magnets facing your glass jar.
  10. Tape your index card down to the table as you build your magnet array. (Otherwise the paper will jump up mid-way through and ruin your gluing while you are working.)
  11. Place a strip of glue on the bottom magnet of your stack and press it down onto the paper, gluing it into place.
  12. Lift the stack off (the bottom magnet should stay put on the paper) and place glue on the bottom magnet. Glue this one next to the first.
  13. Continue with the array so you have a rectangle (or square) arrangements of magnets with their poles oriented the same way. Don’t flip the magnets as you glue them, or you’ll have to start over to make sure they are lined up right.
    Since we live in a gigantic magnetic field that is 10,000 times more powerful than what the instrument is designed to measure, we have to “zero out” the instrument. It’s like using the “tare” or “zero” function on a scale. When you put a box on a scale and push “zero”, then the scale reads zero so it only measures what you put in the box, not including the weight of the box, because it’s subtracting the weight of the box out of the measurement. That’s what we’re going to do with our instrument: we need to subtract out the Earth’s magnetic field so we just get the tiny fluctuations in the field.
  14. Place your instrument away from anything that might affect it, like magnets or anything made from metal.
  15. Fold the card back in half and stand it on the table. We’re normally going to keep the array away from the jar, or the magnet array will influence the mirror-magnets just like bringing a magnet close to a compass does. But to zero out our instrument, we need to figure out how far away the array needs to be in order to cancel out the Earth’s field.
  16. Bring the array close to your jar. You should see the mirror-magnets align with the array.
  17. Slowly pull the magnet array away from the compass to a point where if it were any closer, the mirror-magnets would start to follow it, but any further away and nothing happens. It’s about 12 inches away. Measure this for your experiment and write it on your array or jar so you can quickly realign if needed in the future.
  18. Insert your laser pointer into the clothespin so that the jaws push the button and keep the laser on. Place it at least the same distance away as the array. You might have to prop the laser up on something to get the height just right so you can aim the laser so that it hits the mirror inside. (Note that you’ll have a reflection from the glass as well, but it won’t be nearly as bright.)
  19. Find where the laser beam is reflected off the mirror and hits the wall in your room. Walk over and tape a sheet of paper so that the dot is in the middle of the paper. Use a pen and draw right on top of the dot, and mark it with today’s date.
  20. Do you notice if it moves or it is stays put? Sometimes the dot will move over time, and other times the dot will wiggle and move back and forth. The wiggles will last a couple of seconds to a couple of minutes, and those are the oscillations and fluctuations you are looking for!
  21. Tape a ruler next to the dot so you can measure the amount of motion that the dot makes. Does it move a lot or a little when it wiggles? Two inches or six?

What’s Going On?

The reason this project works is because of tiny magnetic disturbances caused by the ripples in the ionosphere. Although these disturbances happen all the time and on a very small scale (usually only 1/10,000th of the Earth’s magnetism strength), we’ll be able to pick them up using this incredibly simple project. Your reflected laser beam acts like an amplifier and picks up the movement from the magnet in the glass.


Construction tip for experiment:
You need to use a filament that doesn’t care how hot or humid it is outside, so using one of the hairs from your head definitely won’t work. Cotton tends to be too stretchy as well. Professionals use fine quartz fibers (which are amazingly strong and really don’t care about temperature or humidity). Try extracting a single filament from a multi-stranded nylon twine length about 30″ long. If you happen to have a fine selection of nylon twine handy, grab the one that is about 25 microns (0.01″) thick. Otherwise, just get the thinnest one you can find.


You can tape a wooden clothespin down to the table and insert your laser pointer inside – the jaws will push the button of the laser down so you can watch your instrument and take your measurements. When you’re ready, tape a sheet of paper to the wall where your reflected beam (reflected from the mirror, not the glass… there will be two reflected beams!) hits the wall and mark where it hits. Over periods of seconds to minutes, you’ll see deflections and oscillations (wiggles back and forth) – you are taking the Earth’s magnetic pulse!


In order for this experiment to work properly, ALL magnets (including the penny described below) need to be in the same plane. That is, they all need to be the same height from the ground. You can, of course, rotate the entire setup 90 degrees to investigate the magnetic ripples in the other planes as well!


To make this instrument even more sensitive, glue a copper penny (make sure it’s minted before 1982, or you’ll get an alloy, not copper, penny) to the glass jar just behind the magnets (opposite the laser). When your magnets move now, they will induce eddy currents in the penny that will induce a (small) magnetic field opposite of the rotation of the magnets to dampen out “noise” oscillation. In short, add a penny to the glass to make your instrument easier to read.


Also, note that big, powerful magnets will not respond quickly, so you need a lightweight, powerful magnet.


You can walk around with your new instrument and you’ll find that it’s as accurate as a compass and will indicate north. You probably won’t see much oscillation as you do this. Because the Earth has a large magnetic field, you have to “tare” the instrument (set it to “zero”) so it can show you the smaller stuff. Use the doughnut magnets about 30 centimeters away as shown in the video.


Exercises


  1. Does the instrument work without the magnet array?
  2. Why did we use the stronger magnets inside the instrument?
  3. Which planet would this instrument probably not work on?

Advanced Students: Download your Electromagnetic Field Lab here.


[/am4show]


Remember, there are four different kinds of forces: strong nuclear force,
electromagnetism, weak nuclear force, and gravity. There are also four basic force fields that you come into contact with all the time. They are the gravitational field, the electric field, the magnetic field, and the electromagnetic field. Notice that those four force fields really only use two of the four different kinds of force: electromagnetism and gravity. Let’s take a quick look at what causes these four fields and what kind of objects they can affect, starting with the magnetic field.


Here’s what you need:
[am4show have=’p8;p9;p11;p38;p72;p92;’ guest_error=’Guest error message’ user_error=’User error message’ ]


  • you
  • a compass

You’re probably fairly familiar with magnetic fields. If you’ve ever stuck a magnet to a refrigerator, you’ve taken advantage of magnetic fields. Sticking a magnet to a refrigerator is one of those every day experiences that should just be absolutely flabbergasting. There you are holding an “I’d Rather be Relative” magnet and it sticks to the fridge! But wait a minute, if you put it on the wall… it falls off! How does it “know” what to stick to? Not only does it stick to the fridge, it also pushes some things away, attracts other things and couldn’t care less about still other things. What’s that all about?! We rarely think about what magnets do but, wow, the things they do are weird!


Magnetic fields come from objects that have a surplus of electrons all moving in the same direction. This can be an electric wire with current running through it or one of several special types of metals. Iron, nickel and cobalt are the most common metals that can be magnetic. Magnetic fields can only affect objects that can be magnetic themselves. That’s why a magnet can attract an iron nail, but it can’t attract an aluminum can. The iron nail can be magnetic, but the aluminum cannot. Magnets can also be attractive or repulsive. Two magnets with the same kind of poles facing one another will push themselves apart. Two magnets with opposite poles facing one another will pull themselves together.


Download Student Worksheet & Exercises


Using a compass and the Earth, you can do a simple experiment to detect the magnetic field of our planet. (If you don’t have a compass, just slide a magnet along the length of a needle several times (make sure you only swipe in one direction!) then stick it through a cork or bit of foam. Float the needle-foam thing in a cup of water.)


1. Look at the compass


2. Walk anywhere and keep your eye on the compass.


3. Turn around in circles and keep your eye on the compass (don’t get too dizzy).


Again a very simple little activity, but I hope you can see the point. No matter where you went or what you did, that needle always pointed the same direction! The Earth’s magnetic force field, another strange and mysterious force, always pushes that needle in the same direction. It’s invisible and you can’t feel it…but the needle can!


 Exercises 


  1. Why does the needle need the foam?
  2.  Why do we use water?
  3. What are the forces in a magnetic field?

[/am4show]


Ok, sort of a silly experiment I admit. But here’s what we’re going for – there is an invisible force acting on you and the ball. As you will see in later lessons, things don’t change the way they are moving unless a force acts on them. When you jump, the force that we call gravity pulled you back to Earth. When you throw a ball, something invisible acted on the ball forcing it to slow down, turn around, and come back down. Without that force field, you and your ball would be heading out to space right now!
[am4show have=’p8;p9;p11;p38;p92;’ guest_error=’Guest error message’ user_error=’User error message’ ]
Here’s what you need:


  • you
  • the Earth (or any planet that’s convenient)
  • a ball

[am4show have=’p8;p9;p11;p38;p92;’ guest_error=’Guest error message’ user_error=’User error message’ ]


Download Student Worksheet & Exercises


Here’s what you do:


1. Jump!
2. Carefully observe whether or not you come back down.
3. Take the ball and throw it up.
4. Again, watch carefully. Does it come down?


Gravity is probably the force field you are most familiar with. If you’ve ever dropped something on your foot you are painfully aware of this field! Even though we have known about this field for a looooong time, it still remains the most mysterious field of the four.


What we do know is that all bodies, from small atoms and molecules to gigantic stars, have a gravitational field. The more massive the body, the larger its gravitational field. As we said earlier, gravity is a very weak force, so a body really has to be quite massive (like moon or planet size) before it has much of a gravitational field. We also know that gravity fields are not choosy. They will attract anything to them.


All types of bodies, from poodles to Pluto, will will attract and be attracted to any other type of body. One of the strangest things about gravity is that it is only an attractive force. Gravity, as far as we can tell, only pulls things towards it. It does not push things away. All the other forces are both attractive (pull things towards them) and repulsive (push things away). (Gravity will be covered more deeply in a later lesson.)


Exercises 


  1. What did you determine about gravity and how it affects the rate of falling?
  2. Did changing the object affect the rate of falling? Why or why not?
  3. Did changing the variable affect the rate of falling?  Why or why not?

[/am4show]


[am4show have=’p9;p39;’ guest_error=’Guest error message’ user_error=’User error message’ ]


Advanced students: Download your Gravitational Force Lab here.


[/am4show]


[am4show have=’p8;p9;p11;p38;p92;’ guest_error=’Guest error message’ user_error=’User error message’ ]


4SHOW TEST BEGIN: p8;p9;p11;p38;p92


  • you
  • the Earth (or any planet that’s convenient)
  • a ball

4SHOW TEST END


[/am4show]


Fire is a chemical reaction (combustion) involving hot gases and plasma. The three things you need for a flame are oxygen, fuel, and a spark. When the fuel (gaseous wax) and oxygen (from the air) combine in a flame, one of the gases produced is carbon dioxide.


Most people think of carbon dioxide as dry ice, and are fascinated to watch the solid chunk sublimate from solid straight to gas, skipping the liquid state altogether. You’ve seen the curls of dry ice vapor curl down and cover the floor in a thick, wispy fog. Is carbon dioxide always more dense than air, or can we get it to float?


[am4show have=’p8;p9;p11;p38;p92;p23;p50;p88;p91;’ guest_error=’Guest error message’ user_error=’User error message’ ]
The answer is… yes! Here’s an experiment that will walk you through how to create a hot, invisible cloud of carbon dioxide and detect where that cloud is.


Materials:


  • three candles
  • adult help
  • blocks or stones
  • LARGE jar that fits over all three candles (watch video)


Download Student Worksheet & Exercises


Carbon dioxide changes volume when you heat or cool it. When you heat the CO2, the volume expands, lowering the density to less than that of air. When the CO2 cools, the cloud contracts (gets smaller), and the density increases as it falls to the floor.


Remember density is mass per unit volume. So it’s an inverse relationship – when volume goes up, density goes down. In this experiment, when the temperature goes up, the volume goes up, and the density goes down.
[/am4show]


spectrometer2
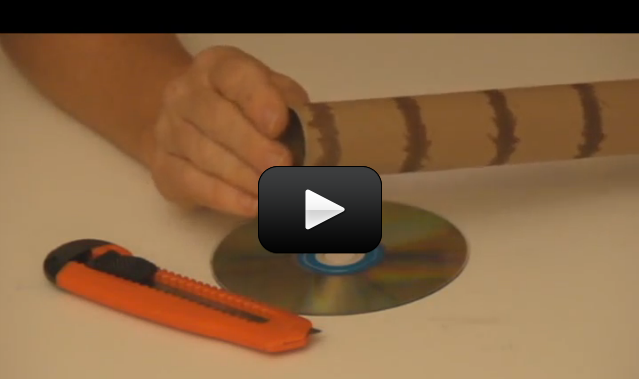
Spectrometers are used in chemistry and astronomy to measure light. In astronomy, we can find out about distant stars without ever traveling to them, because we can split the incoming light from the stars into their colors (or energies) and “read” what they are made up of (what gases they are burning) and thus determine their what they are made of. In this experiment, you’ll make a simple cardboard spectrometer that will be able to detect all kinds of interesting things!


SPECIAL NOTE: This instrument is NOT for looking at the sun. Do NOT look directly at the sun. But you can point the tube at a sheet of paper that has the sun’s reflected light on it.


Usually you need a specialized piece of material called a diffraction grating to make this instrument work, but instead of buying a fancy one, why not use one from around your house?  Diffraction gratings are found in insect (including butterfly) wings, bird feathers, and plant leaves.  While I don’t recommend using living things for this experiment, I do suggest using an old CD.


CDs are like a mirror with circular tracks that are very close together. The light is spread into a spectrum when it hits the tracks, and each color bends a little more than the last. To see the rainbow spectrum, you’ve got to adjust the CD and the position of your eye so the angles line up correctly (actually, the angles are perpendicular).


You’re looking for a spectrum (the rainbow image at left) – this is what you’ll see right on the CD itself. Depending on what you look at (neon signs, chandeliers, incandescent bulbs, fluorescent bulbs, Christmas lights…), you’ll see different colors of the rainbow. For more about how diffraction gratings work, click here.


Materials:


  • old CD
  • razor
  • index card
  • cardboard tube

[am4show have=’p8;p9;p11;p38;p92;p19;p46;p105;p83;p89;p91;p101;’ guest_error=’Guest error message’ user_error=’User error message’ ]


Download Student Worksheet & Exercises


Find an old CD and a cardboard tube at least 10 inches long.  Cut a clean slit less than 1 mm wide in an index card or spare piece of cardboard and tape it to one end of the tube.  Align your tube with the slit horizontally, and on the top of the tube at the far end cut a viewing slot about one inch long and ½” inch wide.  Cut a second slot into the tube at a 45 degree angle from the vertical away from the viewing slot.  Insert the CD into this slot so that it reflects light coming through the slit into your eye (viewing slot).


Aim the 1 mm slit at a light source such as a fluorescent light, neon sign, sunset, light bulb, computer screen, television, night light, candle, fireplace… any light source you can find.  Look through the open hole at the light reflected off the compact disk (look for a rainbow in most cases) inside the cardboard tube.


Troubleshooting: This is a quick and easy way to bypass the need for an expensive diffraction grating. Use your spectrometer to look at computer screens, laptops, night lights, neon lights, candles, campfires, fluorescent lights, incandescent lights, LEDs, stoplights, street lights, and any other light sources you can find, even the moon through a telescope.


Exercises


  1. Name three more light sources that you think might work with your spectroscope.
  2.   Why is there a slit at the end of the tube instead of leaving it open?

[/am4show]


This experiment is for advanced students. Did you know that eating a single peanut will power your brain for 30 minutes? The energy in a peanut also produces a large amount of energy when burned in a flame, which can be used to boil water and measure energy.


Peanuts are part of the bean family, and actually grows underground (not from trees like almonds or walnuts).  In addition to your lunchtime sandwich, peanuts are also used in woman’s cosmetics, certain plastics, paint dyes, and also when making nitroglycerin.


What makes up a peanut?  Inside you’ll find a lot of fats (most of them unsaturated) and  antioxidants (as much as found in berries).  And more than half of all the peanuts Americans eat are produced in Alabama. We’re going to learn how to release the energy inside a peanut and how to measure it.


[am4show have=’p8;p9;p11;p38;p92;p50;p88;p91;’ guest_error=’Guest error message’ user_error=’User error message’ ]


Materials:


  • raw peanuts
  • chemistry stand with glass test tube and holder (watch video)
  • flameproof surface (large ceramic tile or cookie sheet)
  • paper clip
  • alcohol burner or candle with adult help
  • fire extinguisher


Download Student Worksheet & Exercises


What’s Going On? There’s chemical energy stored inside a peanut, which gets transformed into heat energy when you ignite it. This heat flows to raise the water temperature, which you can measure with a thermometer.  You should find that your peanut contains 1500-2100 calories of energy!  Now don’t panic…  this isn’t the same as the number of calories you’re allowed to eat in a day.  The average person aims to eat around 2,000 Calories (with a capital “C”).  1 Calorie = 1,000 calories.  So each peanut contains 1.5-2.1 Calories of energy (the kind you eat in a day). Do you see the difference?


But wait… did all the energy from the peanut go straight to the water, or did it leak somewhere else, too?  The heat actually warmed up the nearby air, too, but we weren’t able to measure that. If you were a food scientist, you’d use a nifty little device known as a bomb calorimeter to measure calorie content.  It’s basically a well-insulated, well-sealed device that catches nearly all the energy and flows it to the water, so you get a much more accurate temperature reading. (Using a bomb calorimeter, you’d get 6.1-6.8 Calories of energy from one peanut!)


How do you calculate the calories from a peanut?

Let’s take an example measurement.  Suppose you measured a temperature increase from 20 °C to 100 °C for 10 grams of water, and boiled off 2 grams.  We need to break this problem down into two parts – the first part deals with the temperature increase, and the second deals with the water escaping as vapor.


The first basic heat equation is this:


Q = m c T


Q is the heat flow (in calories)
m is the mass of the water (in grams)
c is the specific heat of water (which is 1 degree per calorie per gram)
and T is the temperature change (in degrees)


So our equation becomes: Q = 10 * 1 * 80 = 800 calories.


If you measured that we boiled off 2 grams of water, your equation would look like this for heat energy:


Q = L m


L is the latent heat of vaporization of water (L= 540 calories per gram)
m is the mass of the water (in grams)


So our equation becomes: Q = 540 * 2 = 1080 calories.


The total energy needed is the sum of these two:


Q = 800 calories + 1080 calories = 1880 calories.


[/am4show]


This experiment is for advanced students.


Sparks flying off in all directions…that’s fun. In this lab, we will show how easy it is to produce those shooting sparks. In a sparkler you buy at the store, the filings used are either iron or aluminum.


The filings are placed in a mixture that, when dry, adheres to the metal rod or stick that is used in making the sparkler. The different colors are created by adding different powdered chemicals to the mixture before it dries. When they burn, we get red, blue, white, and green.


[am4show have=’p8;p9;p11;p38;p92;p52;p91;’ guest_error=’Guest error message’ user_error=’User error message’ ]


Materials:


  • Card stock
  • Alcohol burner
  • Iron filings
  • Gloves

It’s tempting to use a handful of filings to produce a literal shower of sparks. The effect is actually better with small amounts. To accomplish anything with a large pile of filings would require you to blow REALLY hard to make a filing cloud that will combust well. A larger reaction means more sparks flying around. The amount of filings recommended in the lab is a safe amount. Increasing the amount used increases the danger. You could take an interesting, fun, and safe lab and transform it into something that burns the hair off your arms. Besides, burning hair doesn’t smell good.


Here’s what’s going on in this experiment:


Iron + Oxygen –> Iron Oxide


Iron and Oxygen are burned to produce Iron Oxide


This is the balanced chemical equation: 2Fe + O2 –> 2FeO


C3000: Experiment 54


Download Student Worksheet & Exercises


Handling iron filings is not dangerous. Minor things that can occur, such as: Iron filings can stain your skin gray; if there is a large filing in your container, rubbing your finger against it could give you a painful splinter.


Return unused filings to your container. Any surface these filings touch turns gray, so keep your filings corralled. Cleaning your work surface with a wet paper towel is the easiest way to clean up.


Discard any unburned iron powder that is coating the area around your alcohol burner into a trash container outside. It is not toxic, but still….don’t use chemicals or experiment residue as a snack. Never a good idea.


What is going on here? When you build a campfire at the campground, why doesn’t the grill spark and burn up? The grill is iron, the filings are iron, and there is always oxygen available in the air. What’s the deal here? Combustion needs two things, fuel and fire. Not enough of either and nothing will burn. But a woodstove is made up of a lot more iron by weight than that little scoop of filings. It has to do with surface area. Take an equal weight of solid iron and iron filings. Put a match to the solid iron and all it gets is hot. Blow the same weight of iron filings into the flame and POOF! The key is surface area. Surface area can affect the way a chemical reaction occurs, and in this case, whether or not it occurs at all.


To better understand the effect of surface area, eat some candy! Put a whole Lifesaver candy in your mouth. Suck, move your tongue all over it, swish it back and forth in your mouth. You are not allowed to bite or swallow it. How long does it take to completely dissolve? Do the same thing with another Lifesaver broken into pieces. Which dissolved faster? The same thing happens with the iron. The smaller the pieces, the easier it is for the iron to burn. When you blew iron filings into the air above the flame, you increased the surface area even more by increasing the air space between the particles. An increase in surface area always makes things happen faster. Granulated sugar dissolves faster than sugar cubes, and a piece of wood burns faster after you chop it into kindling. Pay attention and you will notice other situations where increasing surface area speeds up physical changes and chemical reaction times.


An additional experiment that you can try on your own is burning steel wool. Properly prepared ahead of time, steel wool will spark as it burns up. A great emergency fire starter is a 9V battery and steel wool. Fluff up the steel wool and touch a portion of it across the terminals of the battery. The steel wool will burn just like it did with a match.


Steel wool is just a ball of really long iron filings. If you fluff out the steel wool and light it, it burns easily. If you do try this, do it outside over the lawn or an area of dirt. At some point in the combustion you will want/need to drop the steel wool or get your fingers singed.


[/am4show]


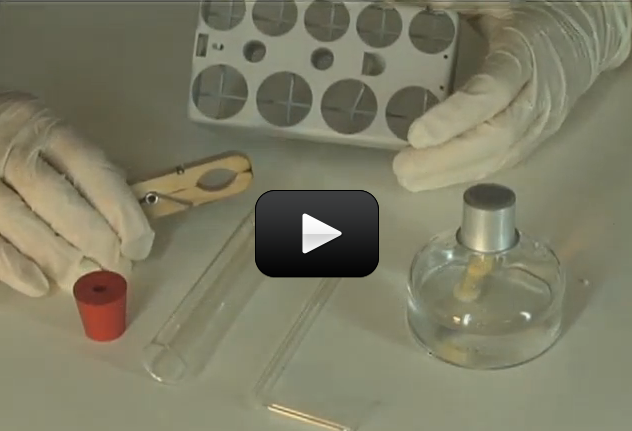
This is the experiment that your audience will remember from your chemistry magic show. Here's what happens - you call up six 'helpers' and hand each a seemingly empty test tube. Into each test tube, pour a little of the main gold-colored solution, say a few magic words, and their test tubes turn clear, black, pink, gold, yellow, and white. With a flourish, ask them to all pour their solutions back into yours and the final solution turns from inky black to clear. Voila!

I first saw a similar experiment when I was a kid, and I remembered it all the way through college, where I asked my professor how I could duplicate the experiment on my own. I was told that the chemicals used in that particular experiment were way too dangerous, and no substitute experiment was possible, especially for the color reversal at the end. I was determined to figure out an alternative. After two weeks of nothing but chemistry and experiment testing, I finally nailed it - and the best part is, you have most of these chemicals at the grocery store. (And the best part is, I can share it with you as I've eliminated the nasty chemicals so you don't have to worry about losing an eyeball or a finger.)

NOTE: This experiment requires adult help, as it uses chemicals that are toxic if randomly mixed together.  Follow the instructions carefully, and do not mix random chemicals together.


Are you ready to mix up your own rainbow?

[am4show have='p8;p9;p11;p38;p92;p18;p45;p91;p101;' guest_error='Guest error message' user_error='User error message' ]

Materials:

  • Iodine (non-clear, non-ammonia from the pharmacy)
  • Hydrogen peroxide (3% solution)
  • Vinegar (distilled white is best)
  • Cornstarch (tiny pinch) or one starch packing peanut
  • Water (distilled)
  • Sodium Thiosulfate
  • Sodium Carbonate (AKA: "washing soda")
  • Phenolphthalein (keep this out of reach of kids) - this is optional
  • Disposable plastic cups (about eight)
  • Popsicle sticks
  • Gloves for your hands
  • Goggles for your face
  • Medicine droppers (at least four)

 
Download Student Worksheet & Exercises

[/am4show]


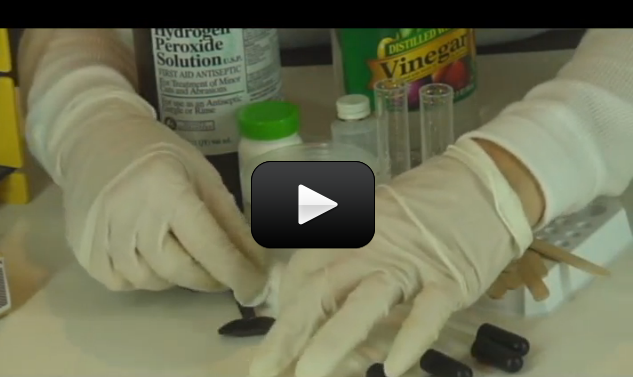
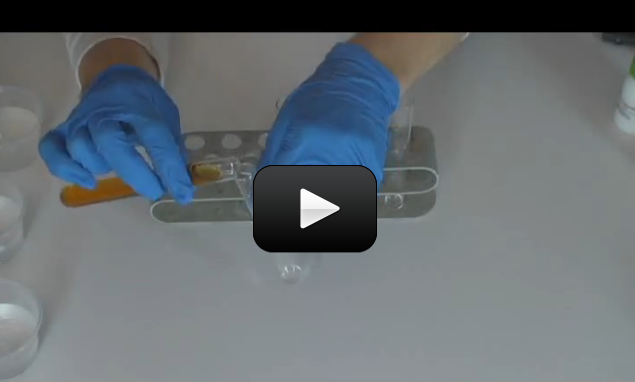
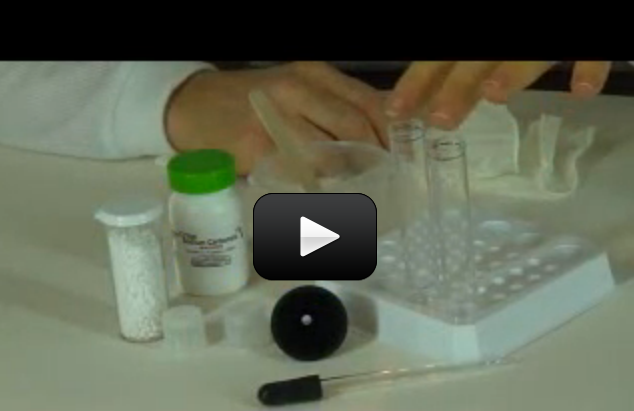
First discovered in 1886 by Hans Heinrich Landolt, the iodine clock reaction is one of the best classical chemical kinetics experiments. Here’s what to expect:  Two clear solutions are mixed. At first there is no visible reaction, but after a short time, the liquid suddenly turns dark blue.


Usually, this reaction uses a solution of hydrogen peroxide with sulfuric acid, but you can substitute a weaker (and safer) acid that works just as well:  acetic acid (distilled white vinegar). The second solution contains potassium iodide, sodium thiosulfate (crystals), and starch (we’re using a starch packing peanut, but you can also use plain old cornstarch). Combine one with the other to get the overall reaction, but note that there are actually two reactions happening simultaneously.


[am4show have=’p8;p9;p11;p38;p92;p18;p45;p91;’ guest_error=’Guest error message’ user_error=’User error message’ ]


Materials:


  • sodium thiosulfate
  • potassium iodide
  • two plastic test tubes
  • packing peanut
  • disposable droppers
  • hydrogen peroxide
  • distilled white vinegar
  • distilled water
  • four disposable cups
  • popsicle sticks
  • clock
  • measuring spoons and cups
  • goggles and gloves


Download Student Worksheet & Exercises


In the first (slow) reaction, the triiodide ion is produced:


H2O2 + 3 I + 2 H+ ? I3 + 2 H2O


In the second (fast) reaction, triiodide is reconverted to iodide by the thiosulfate.


I3 + 2 S2O32- ? 3 I + S4O62-


After some time the solution always changes color to a very dark blue, almost black (the solution changes color due to the triiodide-starch complex).


Let’s get started! Rinse everything out very thoroughly with water three times, to ensure that nothing is contaminated before the experiment so you can get a clean start.  You can use droppers or measuring spoons (dedicated just to chemistry, not used for cooking) to measure your chemicals.  For droppers, make sure you’re using one dropper per chemical, and leave the dropper in the chemical when not in use to decrease the chances of cross-contamination.


Measure out 1 cup of distilled water and pour it into your first cup. Add ½ teaspoon sodium thiosulfate and stir until all the crystals are dissolved.  Touch the cup to feel the temperature change.  Is it hotter or colder?


Measure out 1 cup of distilled water into a new container.  Drop in the starch packing peanut and stir it around until it dissolves.  Packing peanuts can be made of cornstarch (as yours is, which is why it “melts” in water) or polystyrene (which melts in acetone, not water).


Into a third cup, measure out 1 cup of hydrogen peroxide.


Into the fourth cup, measure out 1 cup of distilled white vinegar.


Fill your plastic test tube with three parts starch (packing peanut) solution.  Add two parts distilled vinegar and two parts potassium iodide.  (Make sure you don’t cross-contaminate your chemicals — use clean measuring equipment each time.)  Your solution should be clear.


Into another plastic test tube, measure out three parts starch solution. Add two parts hydrogen peroxide and two parts sodium thiosulfate solution.  If the solution in the test tube is clear, you’re ready to move on to the next step.


Your next step is to pour one solution into the other and cap it, rocking it gently to mix the solution.  While you’re doing this, have someone clock the time from when the two solutions touch to when you see a major change.


What’s going on? There are actually two reactions going on at the same time.  When you combined the two solutions, the hydrogen peroxide (H2O2) combines with the iodide ions (I) to create triiodide (I3) and water (H2O). The sodium thiosulfate (S2O32) grabs the triiodide to form iodine, which is clear.  But the sodium thiosulfate eventually runs out, allowing the triiodide to accumulate (indicated by the solution changing color).  The time you measure is actually the time it takes to produce slightly more iodide ions than the sodium thiosulfate can wipe out.


By accelerating the first reaction, you can shorten the time it takes the solution to change color. There are a few ways to do this: You can decrease the pH (increasing H+ concentration), or increase the iodide or hydrogen peroxide. To lengthen the time delay, add more sodium thiosulfate.


[/am4show]


This experiment is for advanced students.


In gas form, element #59 is deadly. However, when iodine is in liquid form, it helps heal cuts and scrapes. The iodine molecule occurs in pairs, not as a single atom (many halogens do this, and it’s called a diatomic molecule). It’s hard to find iodine in nature, though it’s essential for staying healthy… too little iodine in the body takes a heavy toll on how well the brain operates.


A chunk of iodine is blackish-blue, and will sublimate (go from a solid straight to a gas). Iodine is the heaviest element needed by living things. Iodized salt is sodium chloride fortified with iodine to prevent people from not getting enough iodine in their daily diets.


Iodine is found in seaweed (kelp) and seafood as well as vegetables that are grown in dirt that has high iodine levels. People that live inland and do not eat fish often have lower iodine levels than their coastal, fish-eating neighbors. The trick is not to get too much or too little iodine in your diet, because the symptoms of deficiency and excess levels are quite similar.


Starch (like cornstarch) are used as an indicator for detecting iodine in chemistry experiments. When combined with iodine, starch forms a blue-black color in the solution. We’re going to do this and many other activities in this lab, because this experiment is actually several labs rolled into one. First, we have to make iodine, store it, and then we get to use it in several experiments. Are you ready?


[am4show have=’p8;p9;p11;p38;p92;p52;p91;’ guest_error=’Guest error message’ user_error=’User error message’ ]


Materials:


  • Goggles
  • Gloves
  • Glass jar
  • Chemistry stand
  • Test tubes
  • Test tube holder
  • Measuring spoon
  • Corn starch peanut
  • Water cup
  • 90 degree bend glass tubing
  • One-hole rubber stopper
  • Paper towels
  • Stain-free work surface
  • Solid rubber stopper
  • Denatured alcohol
  • Dark brown glass storage bottle for iodine
  • Dropper pipettes
  • Alcohol burner
  • Lighter
  • Measuring syringe
  • Water
  • Potassium iodide KI (MSDS)
  • Potassium permanganate KMnO4 (MSDS)
  • Sodium hydrogen sulfate NaHSO4 (MSDS) AKA: Sodium Bisulfate Sodium hydrogen sulfate is very toxic. Respect it, handle it carefully and responsibly. Do not take it for granted.

NOTE: Be very careful when handling the sodium hydrogen sulfate – it’s highly corrosive and dangerous when wet. Handle this chemical only with gloves, and be sure to read over the MSDS before using.


Remember that iodine is toxic paper and harmful to the environment.
Safely shake test tube to homogenize chemicals using a solid rubber stopper and dispose of in the outside trash.


NOTE: Heat slowly and carefully. You don’t want your test tube in the flame. The end of the glass tubing should not extend into the alcohol. From time to time, touch the end of the glass tubing to the alcohol to rinse iodine from the tube into the alcohol, but the glass tubing shouldn’t reside in the alcohol. Conduct this experiment outdoors or in an extremely well ventilated area inside the house.


Follow cleanup instructions carefully for safety. These are very toxic substances we are working with.

As heating progresses, purple gas will form in the upper test tube. A brown color will begin to form in the alcohol. Heat until purple smoke disappears from the upper test tube.


C3000: Experiments


Here’s what’s going on in this experiment:


2KI + KMnO4 + NaSO4 + H2O–> I2 + MnO2 + KOH +KIO3 + Na2SO4


Potassium iodide and potassium permanganate and sodium sulfate and water are heated to produce free iodine gas and magnesium oxide and potassium hydroxide and potassium iodide and sodium sulfate.


All this to produce the iodine we need for the next several experiments.


Cleanup: We are going to clean everything thoroughly after we finish the lab. After cleaning with soap and water, rinse thoroughly. Chemists use the rule of “three” in cleaning glassware and tools. After washing, chemists rinse out all visible soap and then rinse three times more.


Storage: Place cleaned tools and glassware in their respective storage places.


Disposal: Liquids need to be filtered through a paper towel and washed down the drain with plenty of water. Solids are thrown in the outside trash.


Going Further

*Save all solutions you make in these experiments. You will use them in the other experiments.


Testing Iodine solution

After the drops of iodine are in the test tube with water, observe. Any solid particles in the test tube prove that our iodine is not soluble in water.


Addition with Iodine

Using the solution from the above experiment, adding KI will dissolve all the solids that were observed. Why did the solids disappear? Well, nothing dramatic was seen, but an addition compound was created.


I2 + KI –> KI I2


Sodium Thiosulfate

Sodium thiosulfate (Na2S2O3) solution is pipette drop by drop to above solution until it turns clear. The reaction that takes place turns our solution into sodium hypoiodite (NaOI)


Packing Peanut

We fill a glass jar with water and 10 drops of iodine and mix well. The water will be a pale brown. Dissolve a corn starch peanut in water. When we add starch solution to the iodine and water, the water turns clear, then blue. We have just created iodine starch!


Colorless Iodine

Sodium thiosulfate solution from an experiment above. Put a few droppers of this solution into the iodine starch and stir. Colorless! We have a colorless iodine solution….very cool!


Iodine and Heat

To set this one up, dropper one drop of iodine solution into a test tube half-filled with water. Then we regain our bright blue color by adding our starch solution to the iodine water.


When we add heat, The solution turns clear! But, we’re not done. The test tube goes into a half full jar of cool water. The solution in the test tube is turning blue. If you keep doing these actions over and over again, you will keep getting the same results.


Did you notice something? The reaction is ________. Think, now.
(Psst! It’s reversible!)


Colorless Iodine Without Heat

In this experiment we use alcohol to achieve a clear solution. We pour some iodine starch solution into some alcohol and the solution turns clear. The alcohol removed the iodine from the solution.


Click here to download Equilibrium Constants and Reaction Mechanisms.

[/am4show]


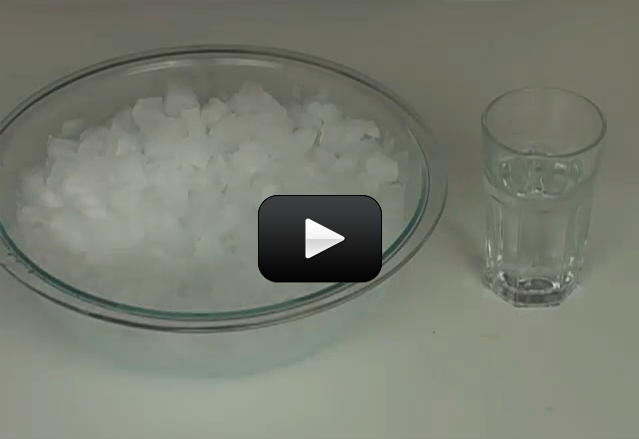
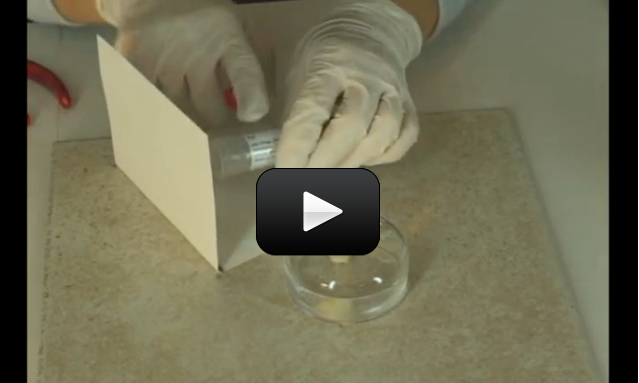
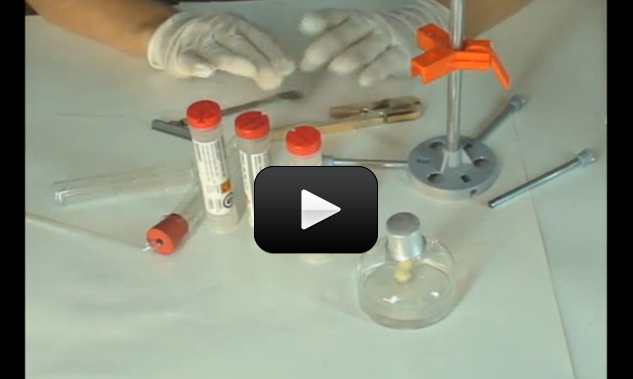
Supercooling a liquid is a really neat way of keeping the liquid a liquid below the freezing temperature. Normally, when you decrease the temperature of water below 32oF, it turns into ice. But if you do it gently and slowly enough, it will stay a liquid, albeit a really cold one!


In nature, you’ll find supercooled water drops in freezing rain and also inside cumulus clouds. Pilots that fly through these clouds need to pay careful attention, as ice can instantly form on the instrument ports causing the instruments to fail. More dangerous is when it forms on the wings, changing the shape of the wing and causing the wing to stop producing lift. Most planes have de-icing capabilities, but the pilot still needs to turn it on.


We’re going to supercool water, and then disturb it to watch the crystals grow right before our eyes! While we’re only going to supercool it a couple of degrees, scientists can actually supercool water to below -43oF!


[am4show have=’p8;p9;p11;p38;p92;p82;p84;p91;p101;p30;p57;’ guest_error=’Guest error message’ user_error=’User error message’ ]


Materials:


  • water
  • glass
  • bowl
  • ice
  • salt


Download Student Worksheet & Exercises


Don’t mix up the idea of supercooling with “freezing point depression”. Supercooling is when you keep the solution a liquid below the freezing temperature (where it normally turns into a solid) without adding anything to the solution. “Freezing point depression” is when you lay salt on the roads to melt the snow – you are lowering the freezing point by adding something, so the solution has a lower freezing point than the pure solvent.


[/am4show]


Dissolving calcium chloride is highly exothermic, meaning that it gives off a lot of heat when mixed with water (the water can reach up to 140oF, so watch your hands!). The energy released comes from the bond energy of the calcium chloride atoms, and is actually electromagnetic energy.

When you combine the calcium chloride and sodium carbonate solutions, you form the new chemicals sodium chloride (table salt) and calcium carbonate. Both of these new chemicals are solids and “fall out” of the solution, or precipitate. If you find that there is still liquid in the final solution, you didn’t have quite a saturation solution of one (or both) initial solutions.

[am4show have='p8;p9;p11;p38;p92;p18;p45;p91;' guest_error='Guest error message' user_error='User error message' ]

Materials:

  • calcium chloride (AKA: "ice melt" or "Dri-EZ")
  • sodium carbonate (AKA: "washing soda")
  • two disposable cups
  • two test tubes with caps
  • medicine dropper
  • distilled water
  • goggles and gloves

 
Download Student Worksheet & Exercises

Mix up a saturated solution of calcium chloride in one test tube and a saturated solution of sodium carbonate in the other. Here’s how to do this:

Sprinkle 1 teaspoon of calcium chloride into a disposable cup. Add in a few tablespoons of water and stir, dissolving as much of the solid into the water as possible. Add more calcium chloride until you see bits of it at the bottom that refuse to dissolve. Now pour only the liquid into your test tube; the liquid is your saturated solution. Do the same for the sodium carbonate.

Do the test tubes feel hot or cold? Pour one test tube into another.

Instant solid.

Calcium chloride is hygroscopic (absorbs moisture), exothermic (releases heat when melted or dissolved), and deliquescent (dissolves in the moisture it absorbs and retains it for a long time).

[/am4show]


Did you know that supercooled liquids need to heat up in order to freeze into a solid? It’s totally backwards, I know…but it’s true! Here’s the deal:


A supercooled liquid is a liquid that you slowly and carefully bring down the temperature below the normal freezing point and still have it be a liquid. We did this in our Instant Ice experiment.


Since the temperature is now below the freezing point, if you disturb the solution, it will need to heat up in order to go back up to the freezing point in order to turn into a solid.


When this happens, the solution gives off heat as it freezes. So instead of cold ice, you have hot ice. Weird, isn’t it?


Sodium acetate is a colorless salt used making rubber, dying clothing, and neutralizing sulfuric acid (the acid found in car batteries) spills. It’s also commonly available in heating packs, since the liquid-solid process is completely reversible – you can melt the solid back into a liquid and do this experiment over and over again!


The crystals melt at 136oF (58oC), so you can pop this in a saucepan of boiling water (wrap it in a towel first so you don’t melt the bag) for about 10 minutes to liquify the crystals.


[am4show have=’p8;p9;p11;p38;p92;p82;p84;p91;p101;p30;p57;’ guest_error=’Guest error message’ user_error=’User error message’ ]


Materials:


  • Sodium Acetate
  • Disposable aluminum pie plate


Download Student Worksheet & Exercises


You have seen this stuff before – when you combined baking soda and vinegar in a cup, the white stuff at the bottom of the cup left over from the reaction is sodium acetate. (No white stuff? Then it’s mixed in solution with the water. If you heat the solution and boil off all the water, you’ll find white crystals in the bottom of your pan.) The bubbles released from the baking soda-vinegar reaction are carbon dioxide.


[/am4show]


This experiment is for advanced students. This is a repeat of the experiment: Can Fish Drown? but now we’re going to do this experiment again with your new chemistry glassware.


The aquarium looked normal in every way, except for the fish. They were breathing very fast and sinking head first to the bottom of the tank. They would sink a few inches, then jerk into proper movement again.


The student had to figure out what was wrong. He had set up the aquarium as an ongoing science project, and it was his responsibility to maintain the fish tank. His grade depended on it.


He went to his mom for help. She looked over the setup. “Have you tested the water?”


A quizzical look on his face, the boy said, “Everything is normal nitrates, nitrites, hardness, alkalinity, and pH. The pH was a little acidic, but not outside the proper range.”


[am4show have=’p8;p9;p11;p38;p92;p52;p91;’ guest_error=’Guest error message’ user_error=’User error message’ ]


His mother said to him, “Show me how you would look if you were gasping for air and look in the mirror while you do it.”


He did, and he remarked, “I look like my fish.” I swear a light bulb actually appeared over his head and lit all up. He said, “They need air!” His mom was standing near the aquarium holding an air pump, vinyl tubing, and an air stone.


“Looking for this?” His mom said. He and his mom set up the air pump and soon his fish were jumping in the air and kissing him on the cheek. Well, maybe not that last part, but you get the idea. Water does not contain an inexhaustible amount of oxygen in it. It must be replenished if there is something in the water that is using it up.


The oxygen carrying capacity of water varies with conditions. Rainbow trout are found in cold water streams because the colder the water, the more oxygen it will hold. Rainbow trout need lots of oxygen in their water to survive. Other species of fish are found only in warmer water because they are adapted to a condition of less oxygen in the water. Still other fish can gulp the air from the surface if the water is severely depleted of oxygen. I have seen carp gulping air as they swim around in a pond looking for food on a hot summer day.


In this experiment we will discover that water does contain oxygen. We will subject the water to heat and we will see the oxygen for ourselves.


Materials:


  • Test tube rack
  • Test tube
  • Test tube holder
  • Rubber stopper
  • 90 degree bent glass tubing
  • Alcohol burner
  • Striker

Be careful not to let your water boil. Pressure will build up inside the test tube because only a small amount of pressure at a time can leave via the glass tubing. Pressure will build up and the stopper will fly off or the test tube will rupture. (Glass shrapnel and boiling water will get all over you. Not a pleasant thought.)


Inserting the glass tubing into and through the stopper is the most dangerous part of this lab or any other lab requiring this to be done. Most lab injuries, student or chemist, are due to cuts from broken glass. Proper technique will save you the pain of a deep cut. Lubricate the rubber stopper with glycerol if you have it. (It is a non-reactive laboratory grease that will not contaminate as badly as household or automotive oils and greases.) DO NOT use any other grease or oil. You probably don’t have any glycerol, so your second choice is just plain old water.


So, water on the tubing, gently start the glass tubing into the stopper. Don’t grip the glass with your hands, get a thick wash cloth, small towel, or work gloves and grab the tubing. Gently twist the tubing as you push gently on the tubing. Don’t pull to one side or the other, make your push a straight line. Once the tubing gets going, don’t stop unless you have to. Your second shot may be much more difficult because you have pushed a lot of the water off the tubing.


You are not going to see a chemical change. You are not going to work with chemicals. You are going to see for yourself that there is oxygen in water. That is, of course, what fish use up in the water. Unless it is replenished, fish can’t breath and they suffocate….not drown. The oxygen is replenished in the wild through various means. We can replenish the water with air pumps and water changes.


C3000: Experiment


Cleanup: Clean everything thoroughly after you are finished with the lab. After cleaning with soap and water, rinse thoroughly. Chemists use the rule of “three” in cleaning glassware and tools. After washing, chemists rinse out all visible soap and then rinse three times more.


Heated surfaces will be hot for awhile. Let things rest for a couple of minutes before doing your cleanup.


Your test tube probably has a blackened surface. It should wipe off easily, or will with a little soap, water, and a light touch.


Storage: Place all chemicals, cleaned tools, and glassware in their respective storage places.


Disposal: Dispose of all solid waste in the garbage. Liquids can be washed down the drain with running water. Let the water run awhile to ensure that they have been diluted and sent downstream.


The filter pump in your fish tank ‘aerates’ the water. The simple act of letting water dribble like a waterfall is usually enough to mix air back in. Which is why flowing rivers and streams are popular with fish – all that fresh air getting mixed in must feel good! The constant movement of the river replaces any air lost and the fish stay happy (and breathing). Does it make sense that fish can’t live in stagnant or boiled water?


[/am4show]


This experiment is for advanced students.


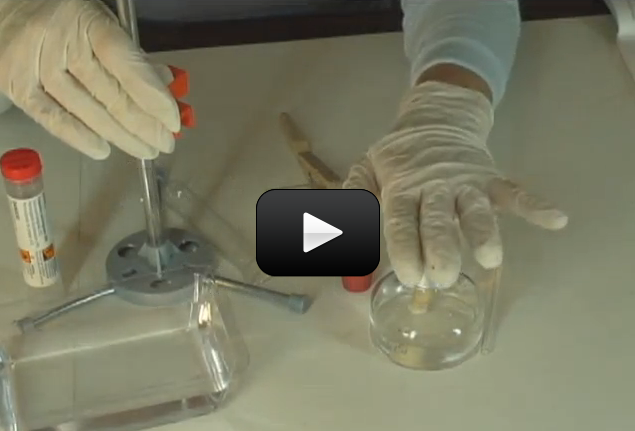
This time we’re going to use a lot of equipment… really break out all the chemistry stuff. We’ll need all this stuff to generate oxygen with potassium permanganate (KMNO4). We will work with this toxic chemical and we will be careful…won’t we?


[am4show have=’p8;p9;p11;p38;p92;p52;’ guest_error=’Guest error message’ user_error=’User error message’ ]


Oxygen is pretty important… it’s only the single most important thing that mammals need. Besides breathing, oxygen is important for so much on this world. Oxygen is used in welding, rocket fuel, and water treatment. Without oxygen, there is no oxidation and no fire. Simply put, we wouldn’t have rusty bicycles or campfires. Can your believe it?


Potassium permanganate is an important chemical in the film industry. It is used to make props like cloth, ropes, and glass, appear “old”. Some films it has been used in are “Troy”, “Indiana Jones”, and “300”. The KMnO4 stains any organic material. KMnO4 is also used as an antiseptic, and is used to treat skin ulcers and rashes. It is also used to treat foot fungus…..phew! People living in the country are sometimes plagued with an iron taste or a rotten egg smell in the water from their wells. Potassium permanganate can be used to remove the taste and smell from the water.


Materials:


  • Chemistry stand
  • Plastic tub
  • Water
  • 2 test tubes
  • Test tube clamp
  • Potassium permanganate (KMnO4) (MSDS)
  • Alcohol burner
  • Lighter
  • One-hole rubber stopper
  • Solid rubber stopper
  • 900 bend glass tube
  • Measuring spoon
  • Rubber tubing
  • Match
  • Wooden splint

Be careful inserting the glass tubing into the stopper. Wet the short end of the glass tube with water and gently push and twist the glass through the stopper. Wear work gloves and work carefully and slowly. Do not use oil or grease you have laying around the house.


When lighting the oxygen in the test tube, use a wooden splint. Wooden splints can be purchased from craft stores, or make your own by shaving thin strips from a piece of pine wood.


C3000: Experiment


Download Student Worksheet & Exercises


Here’s what’s going on in this experiment:


2KMnO4 + heat –> K2MnO4 + MnO2 + O2


Potassium permanganate is heated and produces potassium manganate, manganese dioxide, and oxygen


Oxygen is generated by heating the KMnO4, and is collected in the test tubes. We will test the contents of the tubes to see if oxygen has been generated. What do you think will happen when a glowing splint is pushed up inside the test tube? Don’t know? Do the experiment and try to figure it out. Remember, in order for there to be flame, you need fuel and oxygen. If that gas was carbon dioxide, what would happen when the glowing splint was placed inside?


Cleanup: Clean everything thoroughly after you are finished with the lab. After cleaning with soap and water, rinse thoroughly. Chemists use the rule of “three” in cleaning glassware and tools. After washing, chemists rinse out all visible soap and then rinse three times more.


Storage: Place all chemicals, cleaned tools, and glassware in their respective storage places.


Disposal: Dispose of all solid waste in the garbage. Liquids can be washed down the drain with running water. Let the water run awhile to ensure that they have been diluted and sent downstream.


[/am4show]


A ferrofluid becomes strongly magnetized when placed in a magnetic field. This liquid is made up of very tiny (10 nanometers or less) particles coated with anti-clumping surfactants and then mixed with water (or solvents). These particles don’t “settle out” but rather remain suspended in the fluid.


The particles themselves are made up of either magnetite, hematite or iron-type substance.


Ferrofluids don’t stay magnetized when you remove the magnetic field, which makes them “super-paramagnets” rather than ferromagnets. Ferrofluids also lose their magnetic properties at and above  their Curie temperature points.


Ferrofluids are what scientists call “colloidal suspensions”, which means that the substance has properties of both solid metal and liquid water (or oil), and it can change phase easily between the two. (We as show you this in the video below.) Because ferrofluids can change phases when a magnetic field is applied, you’ll find ferrofluids used as seals, lubricants, and many other engineering-related uses.


Here’s a video on toner cartridges and how to make your own homemade ferrofluid. It’s a bit longer than our usual video, but we thought you’d enjoy the extra content.


[am4show have=’p8;p9;p11;p38;p92;p21;p48;p77;p91;p101;’ guest_error=’Guest error message’ user_error=’User error message’ ]


Download Student Worksheet & Exercises


Engineering and scientists use ferrofluids to make a liquid seal in hard disks around the spinning disks to keep out dust and grit (hard drives must be kept exceptionally clean!). They do this by adding a layer of ferrofluid between the rotating shaft and magnets which surround the shaft.


You can also use ferrofluids to reduce friction, the way ice and water are used in ice skating rinks. If you coat a strong magnet with ferrofluid, you can get it to glide across a smooth surface like a hockey puck.


NASA uses ferrofluids in the flight instruments for spacecraft, also!


Each particle of ferrofluid is like a each grain or a micro-magnet, which not only interacts with magnetic fields, but also with light.


With loudspeakers, the large magnets that interacting with the coil often heat up. If we replace the magnet with ferrofluid (which is a liquid, remember!) it will actively conduct the heat away from the coil and cool it down because cold ferrofluid is more strongly attracted than hot, and thus the cooler fluid flows toward the coil, and the warmer fluid moves away from the coil.


Exercises


  1. Is the ferrofluid a solid or a liquid?
  2. Does the strength of a magnet matter?
  3. What would happen if the magnet went over the rim of the cup?
  4. Does the ferrofluid have a north and south pole?
  5. What happens if you bring a compass near the ferrofluid?
  6. Name three specific ways ferrofluid makes our lives easier. How might you use a ferrofluid if you were inventing something?

[/am4show]


This experiment is for advanced students.


Purple and white colors, making the whitewash that Tom Sawyer used, and produce an exothermic chemical reaction…..does it get any better?


Limewater is one of the compounds we work with in this experiment. Limewater was used in the old days of America. We’re talking about the 80’s…..the 1880’s.


Traveling medicine shows sold what was called “patent medicines”. These usually had no medicinal properties at all. The man in charge, the salesman of the operation, was called a “huckster”. He would have the one of the people gathered around to listen to him blow into limewater. Their exhaled breath contains carbon dioxide, and the lime water turned cloudy, just like in our experiment.


The man would hold up the glass with the cloudy limewater in it and pour in some of his fantastic remedy. As long as the “medicine” was acidic, it would turn the cloudy limewater clear. This was proof that the remedy would cure whatever ailed the person.


[am4show have=’p8;p9;p11;p38;p92;p52;’ guest_error=’Guest error message’ user_error=’User error message’ ]


Today, lime water is used in the traditional making of corn tortillas, tamales, and corn chips. People who have marine (saltwater) aquariums use lime water to assist in maintaining a healthy tank. Lime water is also used in the hide tanning process to remove hair. Parchment paper is made possible by the use of lime water as well. Here’s what you’ll need for your experiment with limewater:


Materials:


  • Granulated white sugar (MSDS)
  • Distilled water
  • Test tube rack
  • 2 test tubes
  • On-hole rubber stopper
  • Measuring spoon
  • 900 bend glass tubing
  • Test tube clamp
  • Potassium permanganate (KMnO4) (MSDS)
  • Sodium hydrogen sulfate (NaHSO4 ) (MSDS) Sodium hydrogen sulfate is very toxic. Respect it, handle it carefully and responsibly. Do not take it for granted.
  • Measuring syringe
  • Calcium hydroxide, Ca(OH)2 (MSDS) to add to H20 to make limewater (MSDS)

NOTE: Be very careful when handling the sodium hydrogen sulfate – it’s highly corrosive and dangerous when wet. Handle this chemical only with gloves, and be sure to read over the MSDS before using.


Keep the potassium permanganate solution from entering the glass tube and being transported into the limewater.


Saturated calcium hydroxide solution has been historically called lime water Ca(OH)2 . That is what we will be bubbling our carbon dioxide into. It looks like water, but isn’t. Limewater smells like dirt and has an alkaline taste. (Don’t taste to find out. Not a safe laboratory practice.)


Saturated calcium hydroxide solution has been used as paint since the early years of the settlement of America. Ever hear of Tom Sawyer and the whitewashed fence? Whitewash is another name for limewater. We’re going to be using some pretty nasty chemicals, but you already follow all the safety precautions. Just remember to remember, and be careful.


The solution in one of your test tubes is going t undergo a chemical reaction to produce carbon dioxide. Another solution will be the indicator that CO2 has been produced.


C3000: Experiment


Download Student Worksheet & Exercises


Here’s what’s going on in this experiment:


When carbon dioxide is produced and bubbled into the lime water, a chemical reaction takes place.


Ca(OH)2 + CO2 –> CaCO3 + H2O


Calcium hydroxide (lime water) and carbon dioxide yields calcium carbonate and water. A milky precipitate forms that is calcium carbonate (CaCO3).


Cleanup: Clean everything thoroughly after you are finished with the lab. After cleaning with soap and water, rinse thoroughly. Chemists use the rule of “three” in cleaning glassware and tools. After washing, chemists rinse out all visible soap and then rinse three times more.


Storage: Place all chemicals, cleaned tools, and glassware in their respective storage places.


Disposal: Dispose of all solid waste in the garbage. Liquids can be washed down the drain with running water. Let the water run awhile to ensure that they have been diluted and sent downstream.


[/am4show]


This experiment is for advanced students.


Zinc (Zn), is a metal and it is found as element #30 on the periodic table. We need a little zinc to keep our bodies balanced, but too much is very dangerous.


Zinc is just like the common, everyday substance that we all know as di-hydrogen monoxide (which is the chemical name for water). We need water to survive, but too much will kill us.


DHMO: In chemistry, “Di” equals the number 2; hydrogen is H; mono equals the number one; and oxide is derived from oxygen, and its symbol is O. Put these together and you have Di-hydrogen (H2), and mono oxygen (O). Put them together, what do you have? Water!


[am4show have=’p8;p9;p11;p38;p92;p52;p91;’ guest_error=’Guest error message’ user_error=’User error message’ ]


Materials:


  • Goggles
  • Gloves
  • Test tube rack
  • 3 test tubes
  • Burner
  • Lighter
  • Zinc powder (Zn) (MSDS)
  • Calcium hydroxide (Ca(OH)2 (MSDS)
  • Rubber tubing
  • Measuring spoon
  • Solid rubber stopper
  • Pan
  • Water
  • Chemistry stand
  • Test tube holder
  • 90o glass tubing
  • One-hole rubber stopper
  • Evaporating dish
  • Dish soap
  • Wood splint
  • Measuring syringe

Be careful of the hot test tubes! It may not look hot, but don’t find out the hard way. If a chemist wants to know if something is hot, he places the back of his hand near the surface. If he feels heat, he concludes that it is hot. That’s the same way we test a person’s forehead for a fever. The back of your hand is more sensitive than the front.


Zinc, zinc oxide, and calcium hydroxide are dangerous chemicals. Use your safety equipment. Dispose of the residue in the test tube in the outside garbage.


We will be creating hydrogen gas by making a heterogeneous mixture of zinc powder and calcium hydroxide and heat it. The hydrogen bubbles into test tube in a water bath. When we mix our test tube of hydrogen with the air the room, the hydrogen burns…it actually explodes. Our amounts are small, but you will witness a cool, small, explosion.


In the second part of the lab we will again create hydrogen. This time, we have a tricky way to add oxygen to the hydrogen and we are able to create a ration of 2 parts hydrogen to 1 part oxygen. This is the perfect ratio to make the most explosive mixture of hydrogen and oxygen. The explosion here is very cool.


C3000: Experiment 76-78


Download Student Worksheet & Exercises


Here’s what’s going on in this experiment:


In the first part of the lab we produce hydrogen by combining two dry chemicals and heating them. Now two things will happen. Calcium hydroxide, when heated, produces water.


Ca(OH)2 –> CaO + H2O


Calcium hydroxide, when heated, produces calcium oxide and water. This is an oxidation reaction because the calcium oxidizes….combines with the oxygen and releases the other elements.


Next, Zinc will react with water created by calcium hydroxide. As the Ca(OH)2 is heated and turns to water and calcium oxide, the zinc then reacts and produces zinc oxide and hydrogen gas.


Zn + H2O –> ZnO + H2


Zinc when heated in the presence of water, produces zinc oxide and hydrogen gas. This is a single replacement reaction as oxygen kicks out hydrogen and replaces it with zinc.


Here’s the safety information for the products of the reaction:


Cleanup: Clean everything thoroughly after you are finished with the lab. After cleaning with soap and water, rinse thoroughly. Chemists use the rule of “three” in cleaning glassware and tools. After washing, chemists rinse out all visible soap and then rinse three times more. Dry all equipment.


Storage: Place all chemicals, cleaned tools, and glassware in their respective storage places.


Disposal: Dispose of all solid waste in the outside garbage. Liquids can be washed down the drain.


[/am4show]


h2o2
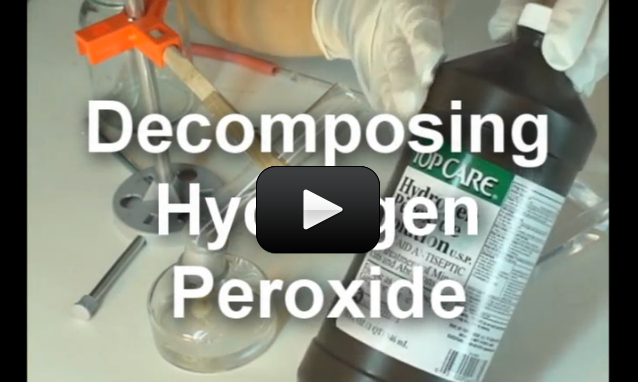
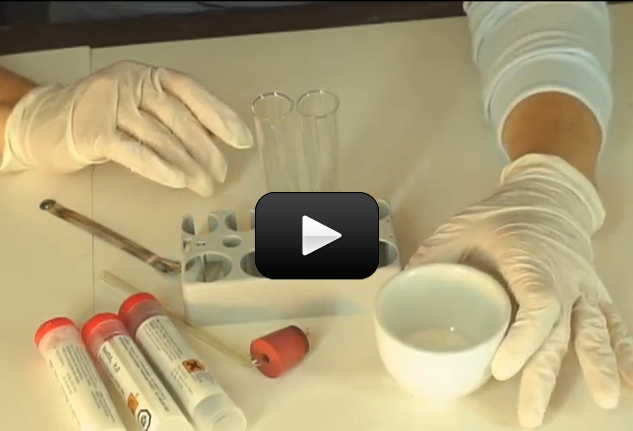
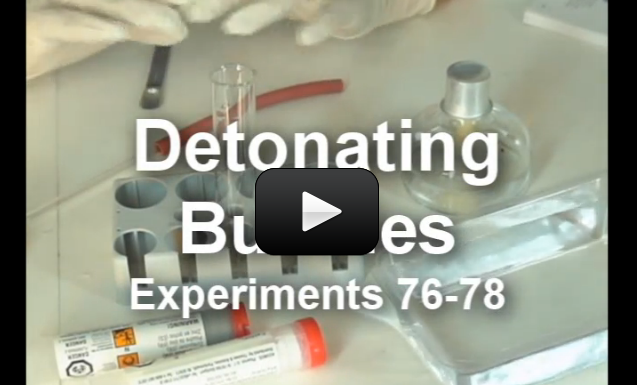
This experiment below is for advanced students. If you’ve ever wondered why hydrogen peroxide comes in dark bottles, it’s because the liquid reacts with sunlight to decompose from H2O2 (hydrogen peroxide) into H2O (water) and O2 (oxygen). If you uncap the bottle and wait long enough, you’ll eventually get a container of water (although this takes a LOOONG time to get all of the H2O2 transformed.)


Here’s a way to speed up the process and decompose it right before your eyes. For younger kids, you can modify this advanced-level experiment so it doesn’t involve flames. Here’s what you do:


[am4show have=’p8;p9;p11;p38;p92;p45;p91;’ guest_error=’Guest error message’ user_error=’User error message’ ]


Materials:


  • hydrogen peroxide
  • empty water bottle
  • balloon
  • charcoal piece

Want to do this experiment with a more dramatic flair?  Try speeding it up as shown in the video below.


IMPORTANT: DO NOT DRINK ANYTHING FROM THIS LAB!!


Pour hydrogen peroxide into an empty plastic water bottle. Add a scoop of activated charcoal (you can also smash regular charcoal with a hammer to get it to fit – the smaller the bits, the better it will work, but make sure you do NOT use charcoal pre-soaked in lighter fluid). Cap your bottle with a helium-quality latex balloon and set aside.  After several hours, you will have a balloon filled with oxygen.


[/am4show]


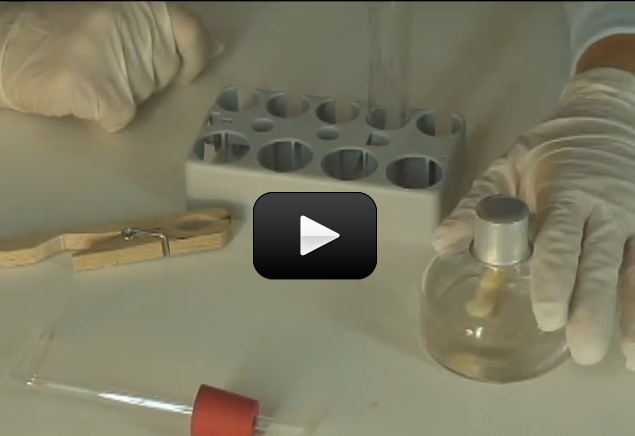
If you’ve ever owned a fish tank, you know that you need a filter with a pump. Other than cleaning out the fish poop, why else do you need a filter? (Hint: think about a glass of water next to your bed. Does it taste different the next day?)


There are tiny air bubbles trapped inside the water, and you can see this when you boil a pot of water on the stove. The experimental setup shown in the video illustrates how a completely sealed tube of water can be heated… and then bubbles come out one end BEFORE the water reaches a boiling point. The tiny bubbles smoosh together to form a larger bubble, showing you that air is dissolved in the water.


Materials:


  • test tube clamp
  • test tube
  • lighter (with adult help)
  • alcohol burner or votive candle
  • right-angle glass tube inserted into a single-hole stopper
  • regular tap water

[am4show have=’p8;p9;p11;p38;p92;p18;p45;p82;p84;p91;p30;p57;’ guest_error=’Guest error message’ user_error=’User error message’ ]


Download Student Worksheet & Exercises


The filter pump in your fish tank ‘aerates’ the water. The simple act of letting water dribble like a waterfall is usually enough to mix air back in. Which is why flowing rivers and streams are popular with fish – all that fresh air getting mixed in must feel good! The constant movement of the river replaces any air lost and the fish stay happy (and breathing). Does it make sense that fish can’t live in stagnant or boiled water?


You don’t need the fancy equipment show in this video to do this experiment… it just looks a lot cooler. You can do this experiment with a pot of water on your stove and watch for the tiny bubbles before the water reaches 212oF.


[/am4show]


Ever play with a prism? When sunlight strikes the prism, it gets split into a rainbow of colors. Prisms un-mix the light into its different wavelengths (which you see as different colors). Diffraction gratings are tiny prisms stacked together.

When light passes through a diffraction grating, it splits (diffracts) the light into several beams traveling at different directions. If you’ve ever seen the ‘iridescence’ of a soap bubble, an insect shell, or on a pearl, you’ve seen nature’s diffraction gratings.

Scientist use these things to split incoming light so they can figure out what fuels a distant star is burning. When hydrogen burns, it gives off light, but not in all the colors of the rainbow, only very specific colors in red and blue. It’s like hydrogen’s own personal fingerprint, or light signature.

While this spectrometer isn't powerful enough to split starlight, it's perfect for using with the lights in your house, and even with an outdoor campfire.  Next time you're out on the town after dark, bring this with you to peek different types of lights - you'll be amazed how different they really are. You can use this spectrometer with your Colored Campfire Experiment also.

SPECIAL NOTE: This instrument is NOT for looking at the sun. Do NOT look directly at the sun. But you can point the tube at a sheet of paper that has the the sun’s reflected light on it.

Here's what you do:

[am4show have='p8;p9;p11;p38;p92;p25;p52;p105;p91;p101;' guest_error='Guest error message' user_error='User error message' ]


Download Student Worksheet & Exercises

You will need:

  • cardboard box (ours is 10" x 5" x 5", but anything close to this will work fine)
  • linear diffraction grating (you can order one here)
  • 2 razor blades (with adult help)
  • masking tape
  • ruler
  • photocopy of a ruler (or sketch a line with 1 through 10 cm markings on it, about 4cm wide)

1. Using a small box, measure 4.5 cm from the edge of the box. Starting here, cut a hole for the double-razor slit that is 1.5 cm wide 3 cm long.

2. From the other edge (on the same side), cut a hole to hold your scale that is 11 cm wide and 4 cm tall.

3. Print out the scale and attach it to the edge of the box.

4. Very carefully line up the two razors, edge-to-edge to make a slit and secure into place with tape.

5. On the opposite side of the box, measure over 3 cm and cut a hole for the diffraction grating that is 4 cm wide and 3 cm tall.

5. Tape your diffraction grating over the hole.

Aim the razor slit at a light source such as a fluorescent light, neon sign, sunset, light bulb, computer screen, television, night light, candle, fireplace… any light source you can find. Put the diffraction grating up to your eye and look at the inner scale.  Move the spectrometer around until you can get the rainbow to be on the scale inside the box.

How to Calibrate the Spectrometer with the Scale Inside your box is a scale in centimeters. Point your slit to a fluorescent bulb, and you'll see three lines appear (a blue, a green, and a yellow-orange line). The lines you see in the fluorescent bulb are due to mercury superimposed on a rainbow continuous spectrum due to the coating. Each of the lines you see is due to a particular electron transition in the visible region of Hg (mercury). The blue line (435 nm), the green line (546 nm), and the yellow orange line (579 nm). (If you look at a sodium vapor street light you'll see a yellow line (actually 2 closely spaced) at 589 nm.)

Step 1. Line the razor slits along the length of the fluorescent tube to get the most intense lines. Move the box laterally (the lines will move due to parallax shift).

Step 2. Take scale readings at the extreme of the these movements and take the average for the scale reading. For instance, if the blue line averages to the 8.8 cm value, this corresponds to the 435 nm wavelength. Do this for the other 2 lines.

Step 3. On graph paper, plot the cm ( the ruler scale values) on the vertical axis and the wavelength (run this from 400-700 nm) on the horizontal axis. Draw the best straight lines thru the 3 points (4 lines if you use the Na (sodium) street lamp). You've just calibrated the spectrometer.

Step 4. Line the razor slits up with another light source.  Notice which lines appear and where they are on your scale.  Find the value on your graph paper. For example, if you see a line appear at 5.5 cm, use your finger to follow along to the 5.5 cm until you hit the best-fit line, and then read the corresponding value on the wavelength axis. You now have the wavelength for the line you've just seen!

Notes on Calibration and Construction: If you swap out different diffraction gratings, you will have to re-calibrate. If you make a new spectrometer, you will have to re-calibrate to the Hg (mercury) lines for each new spectrometer. If you do remake the box, use a scale that is translucent so you can see the numbers. If you use a clear plastic ruler, it may let in too much light from the outside making it difficult to read the emission line.

What other light sources work? Use your spectrometer to look at computer screens, laptops, night lights, neon lights, candles, campfires, fluorescent lights, incandescent lights, LEDs, stoplights, street lights, and any other light sources you can find. When you walk down town at night and look at various "neon" signs. Ne (neon) is a real burner! Do this with a friend who is willing to vouch for your sanity.

Question: What happens when you aim a laser through a diffraction grating? (See picture above - can you find the two dots on either side of the main later dot?)

[/am4show]


This experiment is for advanced students.


Brimstone is another name for sulfur, and if you’ve ever smelled it burn…..whoa….I’m telling you ….you will see for yourself in this lab. It is quite a smell, for sure. Sulfur is element #16 on the periodic table. Sulfur is used in fertilizer, black powder, matches, and insecticides. In pioneer times sulfur was put into patent medicines and used as a laxative.


To further the evil reputation of sulfur, or brimstone, when sulfur is burned in a coal fired power plant, sulfur dioxide is produced. The sulfur is spewed into the air, where it is reacts with moisture in the air to form sulfuric acid. The clouds get full and need to let go of this sulfuric acid. Down comes the acid rain to wreak havoc on the masonry and plant life below.


[am4show have=’p8;p9;p11;p38;p92;p52;p91;’ guest_error=’Guest error message’ user_error=’User error message’ ]


Materials:


  • Goggles
  • Gloves
  • Measuring spoon
  • Sulfur (MSDS)
  • Alcohol burner
  • Lighter
  • Test tube of O2

Be careful when bending the ends of your measuring spoon. Bend them where you need them and leave them alone. Continuing to bend, straighten, and re-bend will weaken the metal and cause your measuring spoon to break. We will do this experiment to compare the flames produced by burning sulfur in air and oxygen


C3000: Experiments: 36,60


Download Student Worksheet & Exercises


Here’s what’s going on in this experiment:


S + O2 –> SO2


Sulfur and oxygen are heated and sulfur dioxide is produced. This is a synthesis reaction because the sulfur and the oxygen react and form a new substance, sulfur dioxide. We see the flame of sulfur dioxide burn in air. Small flame, little smoke. When the flame is left lit and placed in the oxygen, the flame flares up and lots of white smoke is generated. It appears that sulfur’s flame burns brighter and stronger in pure oxygen.


Cleanup: We are going to clean everything thoroughly after we finish the lab. After cleaning with soap and water, rinse thoroughly. Chemists use the rule of “three” in cleaning glassware and tools. After washing, chemists rinse out all visible soap and then rinse three times more.


Storage: Place cleaned tools and glassware in their respective storage places.


Disposal: Liquids can be washed down the drain. Solids are thrown in the trash.


[/am4show]


A fundamental concept in science is that mass is always conserved. Mass is a measure of how much matter (how many atoms) make up an object. Mass cannot be created or destroyed, it can only change form.


Materials: paper, lighter or matches with adult help


[am4show have=’p8;p9;p11;p38;p92;p10;p37;p91;’ guest_error=’Guest error message’ user_error=’User error message’ ]


When you eat a banana, the matter is converted into energy. Ignite a sheet of paper and the paper molecules combine with oxygen through a chemical change and turn into smoke and ash.


Learn more about this concept in Unit 3.


[/am4show]


Pure substances all behave about the same when they are gases. The Ideal Gas Law relates temperature, pressure, and volume of these gases in one simple statement: PV = nRT where P = pressure, V = volume, T = temperature, n = number of moles, and R is a constant.


When temperature increases, pressure and volume increase. Temperature is basically a speedometer for molecules. The faster they are wiggling and jiggling, the higher the temperature and the higher the thermal energy that object has. Pressure is how many pushes a surface feels from the motion of the molecules.


Materials: balloon, freezer, tape measure (optional)


[am4show have=’p8;p9;p11;p38;p92;p10;p37;p91;’ guest_error=’Guest error message’ user_error=’User error message’ ]


Hold a balloon in your hands and try to stuff it into a cup. Why is this so hard? You’re decreasing the volume and therefore increasing the pressure inside the balloon. (Since a balloon is so stretchy, this is near impossible to do without laughing.) You are compressing the balloon and thus increasing both the pressure and temperature inside the balloon slightly.


Blow up a balloon and stick it in the freezer overnight.


What happened? The balloon will shrink a bit because there is less pressure pressing on the inside of the balloon surface, holding the shape of the balloon. When you decrease temperature, the pressure and volume decrease as well.


Learn more about this scientific principle in Unit 13.


[/am4show]


There are three primary states of matter: solid, liquid, and gas.


Solids are the lowest energy form of matter on Earth. Solids are generally tightly packed molecules that are held together in such a way that they can not change their position. The atoms in a solid can wiggle and jiggle (vibrate) but they can not move from one place to another. The typical characteristics that solids tend to have are that they keep their shape unless they are broken and they do not flow.


Liquids have loose, stringy bonds between molecules that hold molecules together but allow them some flexibility. Liquids will assume the shape of the container that holds it.


Gases have no bonds between the molecules. Gases can be squished (compressed), and pure gases all behave the same way. (We’re going to learn more about this with the Ideal Gas Law.)


Materials: can of soda or glass of water


[am4show have=’p8;p9;p11;p38;p92;p37;p91;’ guest_error=’Guest error message’ user_error=’User error message’ ]


Grab a can of soda. Can you identify the states? The tin can is the solid, the drink is the liquid, and the bubbles are the gas.


There are two more states of matter: You’ll find plasma in the sun, neon signs, fluorescent lights, and small bits in a flame. The fifth state of matter has only been shown to exist in a lab (which was first discovered in the 1990s) and it occurs only in a very short temperature range near absolute zero.


Learn more about this scientific principle in Unit 3 and Unit 8.


[/am4show]


What comes to mind when you think about empty space? (You should be thinking: “Nothing!”) One of Einstein’s greatest ideas was that empty space is not actually nothing – it has energy and can be influenced by objects in it. It’s like the T-shirt you’re wearing. You can stretch and twist the fabric around, just like black holes do in space.


Today, you will get introduced to the idea that gravity is the structure of spacetime itself. Massive objects curve space. How much space curves depends on how massive the object is, and how far you are from the massive object.


Materials


  • Two buckets with holes in the bottom
  • 2 bungee cords
  • 3 different sizes of marbles
  • 2.5 lb weight
  • 0.5 lb weight
  • 3 squares of stretchy fabric
  • Rubber band
  • 4 feet of string
  • Fishing bobber
  • Drinking straws
  • Softball
  • Playdough (optional)

[am4show have=’p8;p9;p11;p38;p92;p44;p104;’ guest_error=’Guest error message’ user_error=’User error message’ ]


Download Student Worksheet & Exercises


Making the Buckets Ready for the Lab


  1. What is gravity? How does it work? That’s what today’s lab is all about.
  2. Stretch the bungee cord around the circumference of the bucket. Do this for both buckets.
  3. On one bucket, tuck in the stretchy fabric under the cord. If your cords are loose, tie another knot near the end so they fit snugly around the bucket. The fabric is stretched like a drum head. This is the “fabric of space” – it’s around us everywhere.
  4. Push the bottom of the bobber so the hook opens on the other end. Push your string in.
  5. Place it in the center of the squares of fabric. Fasten it with your rubber band.
  6. Thread the ends of your string through the bottom holes of your second bucket and tie it securely on the bottom.
  7. Tuck in your corners under the bungee cord. This is your black hole bucket.
  8. The first lab uses two buckets, neither of which is a black hole. We’re going to convert the black hole bucket to a regular spacetime fabric bucket. For now, place a second piece of fabric over the black hole bucket and tuck it under the cord so that it looks like the first bucket you used.
  9. Now, we’re ready for our lab.

Exploring How Space Curves


  1. Place a mid-sized weight in the middle of one of the buckets. What happens to the fabric when you put a weight on the fabric?
  2. Place the heavy 2.5lb lead weight in the center of the fabric of the second bucket. Did it curve more or less than the first weight?
  3. The heavier weight is like the Sun, and the lighter weight is like the Earth. Which has more mass?
  4. Which has more gravitational attraction?
  5. Is space more or less curved further from the object?
  6. Where is space curved the most?
  7. Grab your marbles. These are your space probes. If we place one probe at the edge of each bucket, which do you expect it to fall toward the middle faster?
  8. Why?
  9. This is what we mean when we say the force of gravity depends on how much mass something has, since mass curves space. More massive objects curve space more, so the gravitational attraction is more with more massive objects.
  10. Take two marbles of different sizes and drop them at the same time onto the edge of the bucket. You can drop them on opposite sides so they don’t knock into each other. What happens?
  11. The Moon is like a giant marble. Why doesn’t it fall to Earth?
  12. Why is it orbiting?
  13. Remove all weights from the fabric. Roll a marble across the surface (do it slowly without bouncing – planet’s don’t bounce!). Does it roll straight or curved?
  14. Place the heavy weight on the fabric. Try to make the marble go in a straight line. Did it work?
  15. Can you roll the marble so that it escapes from the weight that represents the Sun?
  16. In the second bucket, place a smaller weight and do steps 23 and 24 again. How is this different?
  17. Planets orbit the Sun because space is curved around the Sun. The Moon orbits the Earth without falling in because space is curved around Earth. How fast the moon moves through space and how much the Earth curves space depends on the Earth’s mass and how far away the moon is.
  18. If the Moon was in closer to the Earth, would it have to move faster or slower to maintain its orbit?
  19. Let’s find out: Place two marbles, one closer to the weight and one near the edge of the bucket, and make them orbit the weight. Which one orbits faster? Why?
  20. Replace the weight in the second bucket with a lightweight mass. Now, what if Earth was less massive? How would this change the Moon’s orbit?
  21. Notice this: When you roll a ball in orbit around a weight, do you see the weight move slightly also? All orbiting objects yank on each other. The Moon pulls on the Earth just as the Earth pulls on the Moon. All massive objects cause space to move: planets, stars, black holes, comets, etc.

Exploring Black Holes


  1. Place a weight in each bucket, one representing the Earth and the other representing the Moon.
  2. Place a marble next to each weight. These marbles are your rocket ships. Do you think that you can launch your rockets and escape the pull of gravity? Grab a straw and try to blow the marble away from the weight (launch the rocket off the Earth and moon). What happened? Why?
  3. What if we start the rockets in space? Do you think you can escape the pull of the objects now? Start the marbles orbiting and then blow them the straws. Can you fire your rockets at the right time to get your rockets to escape the orbit?
  4. Let’s launch a probe out of a black hole! Remove the fabric from the black hole bucket and place a marble in the black hole. Can you use your straw to blow the marble out of the black hole?
  5. Let’s see the difference between the Sun and a black hole. Grab an 8-ounce weight and the softball. These have the same mass, but they are different sizes. The softball is the Sun, and the weight is the black hole. Which is going to curve space more when you place it on the fabric? Guess before you try it:
  6. Replace the fabric over the black hole bucket.
  7. Place the softball on one of the buckets, and the 8-ounce weight on the other bucket.
  8. Roll a marble near the edge of each bucket. This is where our Earth would be orbiting. Notice that although the weight curves space more near it, at the edge, the curvature is the same. So if the Sun were suddenly replaced by a black hole of the same mass, the Earth wouldn’t notice it (gravitationally, at least. It would get dark and cold, though.),
  9. Remove the second fabric from the black hole bucket so you have the vortex exposed.
  10. Take two marbles and start them orbiting at the edge of the black hole. What happens? Why?
  11. Make a rocket shape out of clay or playdough. Bring the rocket close to the black hole bucket and get prepared to show your teammates what happens if it goes into the black hole. First, it stretches (pull the rocket into a longer shape), then it gets shredded (crumple it up) and finally added to the black hole’s mass (shove it into the bucket).

What’s Going On?

Massive objects are truly massive. If our solar system was the size of a quarter, the Milky Way would be the size of North America.


The Milky Way has an estimated 100 billion stars. That’s hard to imagine, so try this: Imagine a football field piled 4’ deep in birdseed. Now scatter those seeds over North America and space them 25 miles deep. Each seed is a Sun. Stars are very far apart!


If the mass of the Sun was one birdseed, then the mass of a black hole would be 22 gallons of birdseed shoved into the volume of a single birdseed.


It’s time to explore how black holes interact with the universe. There are four animations to watch. Let the students know that these are scientific simulations which used actual data to create them – they are not artist’s concepts or fantasy. They are based on solid physics. The reason they are animations is because these videos happen over such a long period of time, and our view is limited in some cases.


Exercises


  1.  What is the event horizon?
  2.  Does a more massive object curve space more or less than a smaller object? What does this    mean for the gravitational field?
  3.  Does an object feel more or less gravitational attraction as the object moves closer to a  massive object?
  4.  Where is space most curved?
  5.  What is mass?

[/am4show]


So you've played with lenses, mirrors, and built an optical bench. Want to make a real telescope? In this experiment, you'll build a Newtonian and a refractor telescope using your optical bench.

Materials:

  • optical bench
  • index card or white wall
  • two double-convex lenses
  • concave mirror
  • popsicle stick
  • mirror
  • paper clip
  • flash light
  • black garbage bag
  • scissors or razor
  • rubber band
  • wax paper
  • hot glue

[am4show have='p8;p9;p11;p38;p92;p19;p46;p105;p89;p90;' guest_error='Guest error message' user_error='User error message' ]

 
Download Student Worksheet & Exercises

[/am4show]


When I was in grad school, I needed to use an optical bench to see invisible things. I was trying to ‘see’ the exhaust from a  new kind of F15 engine, because the aircraft acting the way it shouldn’t – when the pilot turned the controls 20o left, the plane only went 10o. My team had traced the problem to an issue with the shock waves, and it was my job to figure out what the trouble was. (Anytime shock waves appear, there’s an energy loss.)


Since shock waves are invisible to the human eye, I had to find a way to make them visible so we could get a better look at what was going on. It was like trying to see the smoke generated by a candle – you know it’s there, but you just can’t see it. I wound up using a special type of photography called Schlieren.


An optical table gives you a solid surface to work on and nails down your parts so they don’t move. This is an image taken with Schlieren photography. This technique picks up the changes in air density (which is a measure of pressure and volume).


The air above a candle heats up and expands (increases volume), floating upwards as you see here. The Schlieren technique shines a super-bright xenon arc lamp beam of light through the candle area, bounces it off two parabolic mirrors and passes it through a razor-edge slit and a neutral density filter before reaching the camera lens. With so many parts, I needed space to bolt things down EXACTLY where I wanted them. The razor slit, for example, just couldn’t be anywhere along the beam – it had to be right at the exact point where the beam was focused down to a point.


I’m going to show you how to make a quick and easy optical lab bench to work with your lenses. Scientists use optical benches when they design microscopes, telescopes, and other optical equipment. You’ll need a bright light source like a flashlight or a sunny window, although this bench is so light and portable that you can move it to garage and use a car headlight if you really want to get creative. Once your bench is set up, you can easily switch out filters, lenses, and slits to find the best combination for your optical designs. Technically, our setup is called an optical rail, and the neat thing about it is that it comes with a handy measuring device so you can see where the focal points are for your lenses. Let’s get started:
[am4show have=’p8;p9;p11;p38;p92;p19;p46;p105;p66;p89;’ guest_error=’Guest error message’ user_error=’User error message’ ]


Materials:


  • lenses (glass or plastic), magnifying lenses work also
  • two razor blades (new)
  • index cards (about four)
  • razor
  • old piece of wood
  • single hair from your head
  • tape
  • aluminum foil
  • clothespins (2-4)
  • laser pointer
  • popsicle sticks (tongue-depressor size)
  • hot glue gun
  • scissors and a sharp razor
  • meter sticks (2)
  • bright light source (ideas for this are on the video)

Your lenses are curved pieces of glass or plastic designed to bend (refract) light. A simple lens is just one piece, and a compound lens is like the lens of a camera – there’s lots of them in there. The first lenses were developed by nature – dewdrops on plant leaves are natural lenses. The light changes speed and bends when it hits the surface of the drop, and things under the drop appear larger. (Read more about refraction here.) The earliest written records of lenses are found in the Greek archives and described as being glass globes filled with water.


Concave Lenses

Concave lenses are shaped like a ‘cave’ and curve inward like a spoon. Light that shines through a concave lens bends to a point (converging beam). Ever notice how when you peep through the hole in a door (especially in a hotel), you can see the entire person standing on the doorstep? There’s a concave lens in there making the person appear smaller.


You’ll also find these types of lenses in ‘shoplifting mirrors’. Store owners post these mirrors around help them see a larger area than a flat mirror shows, although the images tend to be a lot smaller.


If you have a pair of near-sighted glasses, chances are that the lenses are concave. Near-sighted folks need help seeing things that are far away, and the concave lenses increase the focal point to the right spot on their retina.


Concave lenses work to make things look smaller, so there not as widely used as convex lenses. You’ll find concave lenses inside camera lenses and binoculars to help clear weird optical problems that happen around the edges of a convex lens (called aberration).


Here’s a video on lenses, both convex and concave:


Convex lenses bulge outwards, bending the light out in a spray (diverging beam). A hand-held magnifying glass is a single concave lens with a handle. These lenses have been used as ‘burning glasses’ for hundreds of years – by placing a small piece of paper at its focal point and using the sun as a light source, you can focus the light energy so intensely that you reach the flash point of the paper (the paper auto-ignites around 450oF).


When you stack a large convex lens above a solar panel, the magnification effect makes it so you can get away with using a smaller photovoltaic cell to get the same amount of energy from the sun. You’ll find convex lenses in telescopes, microscopes, binoculars, eyeglasses, and more.


Mirrors

lenses-part1What if you coat one side of the lens with a reflecting silver coating? You get a mirror!


Stick wooden skewers into a piece of foam to simulate how the light rays reflect off the surface of the mirror. Note that when the mirror (foam) is straight, the light rays are straight (which is what you see when you look in the bathroom mirror). The light bounces off the straight mirror and zips right back at you, remaining parallel.


lenses-part2 copyNow arch the foam. Notice how the light ways (skewers) come to a point (focal point).


After the focal point, the rays invert, so the top skewer is now at the bottom and the bottom is now at the top.  This is your flipped (inverted) image. This is what you’d see when you look into a concave mirror, like the inside of a metal spoon. You can see your face, but it’s upside-down.


Slits

A slit allows light from only one source to enter. If you have light from other sources, your light beam is more scattered and your images and lines become blurry. Thin slits can be easily made by placing the edges of two razor blades very close together and securing into place. We’re going to use an anti-slit using a piece of hair, but you can substitute a thin needle.


Here’s a video on using filters and slits with your laser:


Filters

There are hundreds of different types of filters, used in photography, astronomy, and sunglasses. A filter can change the amount and type of light allowed through it. For example, if you put on red-tinted glasses, suddenly everything takes on a reddish hue. The red filter blocks the rest of the incoming wavelengths (colors) and only allows the red colors to get to your eyeball. There are color filters for every wavelength, even IR and UV.


UV filters reduce the haziness in our atmosphere, and are used on most high-end camera lenses, while IR filters are heat-absorbing filters used with hot light sources (like near incandescent bulbs or in overhead projectors).


A neutral density (ND) filter is a grayish-colored filter that reduces the intensity of all colors equally. Photographers use these filters to get motion blur effects with slow shutter speeds, like a softened waterfall.


Build an Optical Bench

It’s time to put all these pieces together and make cool optical stuff – are you ready?


Download Student Worksheet & Exercises


Click here for more experiments on building your own microscope and telescope.


Cat’s Eyes

Corner reflectors are U-turns for light beams. A corner mirror made from three mirrors will reflect the beam straight back where it came from, no matter what angle you hit it at.  Astronauts placed these types of mirrors on the moon so scientists could easily bounce laser beams off the moon and have them return to the same place on Earth. They used these reflected laser beams to measure the speed of light.


You’ll find corner mirrors in “cat’s eye” reflectors on the road. Car headlights illuminate the reflectors and send the beam straight back the same way – right at the driver.


Exercises


  1. Using only the shape, how can you tell the difference between a convex and a concave lens?
  2.  Which type of lens makes objects viewed through it appear smaller?
  3.  Which type of lens makes the objects viewed through it appear larger?
  4.  How do you get the f number?

[/am4show]


Today you get to concentrate light, specifically the heat, from the Sun into a very small area. Normally, the sunlight would have filled up the entire area of the lens, but you’re shrinking this down to the size of the dot.


Magnifying lenses, telescopes, and microscopes use this idea to make objects appear different sizes by bending the light. When light passes through a different medium (from air to glass, water, a lens…) it changes speed and usually the angle at which it’s traveling. A prism splits incoming light into a rainbow because the light bends as it moves through the prism. A pair of eyeglasses will bend the light to magnify the image.


Materials


  • Sunlight
  •  Glass jar
  • Nail that fits in the jar
  •   12” thread
  •   Hair from your head
  • 12” string
  • 12” fishing line
  • 12” yarn
  •  Paperclip
  • Magnifying glass
  •  Fire extinguisher
  •  Adult help

[am4show have=’p8;p9;p11;p38;p92;p17;p44;p90;p89;’ guest_error=’Guest error message’ user_error=’User error message’ ]


Download Student Worksheet & Exercises


  1. You’re going to concentrate the power of the Sun on a flammable surface.
  2. Please do this on a fireproof surface! This experiment will damage tables, counters, carpets, and floors. Do this experiment on a fireproof surface, like concrete or blacktop.
  3. Hold the magnifier above the leaf and bring it down toward the leaf until you see a bright spot form on its surface. Adjust it until you see the light as bright and as concentrated as possible. First, you’ll notice smoke, then a tiny flame as the leaf burns.
  4. You are concentrating the light, specifically the heat, from the Sun into a very small area. Normally, the sunlight would have filled up the entire area of the lens, but you’re shrinking this down to the size of the dot that’s burning the leaf.
  5. Thermoelectric power plants use this principle to power entire cities by using this principle of concentrating the heat from the Sun.
  6. Never look through anything that has lenses in it at the Sun, including binoculars or telescopes, otherwise what’s happening to the leaf right now is going to happen to your eyeball.
  7. Now for the next part of the lab, do not use water bottles – you want something that doesn’t melt, like a glass jar from the pickles or the mayo.
  8. Remove the lid and punch a hole in the center. Use a drill with a ¼” drill bit or smaller, or a hammer and nail.
  9. Screw the lid on the jar.
  10. Tie one end of the thread to the paperclip.
  11. Poke the other end of the thread inside the hole on the lid.
  12. Unscrew the lid and tie a nail to the other end of the thread. You want the nail to be hanging above the bottom of the jar by an inch or two, so adjust the height as needed.
  13. Bring your jar outside.
  14. Question: Without breaking the glass or removing the lid, how can you get the nail to drop to the bottom of the jar?

What’s Going On?

Magnifying lenses, telescopes, and microscopes use this idea to make objects appear different sizes by bending the light. When light passes through a different medium (from air to glass, water, a lens…) it changes speed and usually the angle at which it’s traveling. A prism splits incoming light into a rainbow because the light bends as it moves through the prism. A pair of eyeglasses will bend the light to magnify the image.


Exercises


  1. What happened to the leaf? Why?
  2. How did you get the nail to drop?
  3. Which material ignited the quickest?

[/am4show]


Ever play with a prism? When sunlight strikes the prism, it gets split into a rainbow of colors. Prisms un-mix the light into its different wavelengths (which you see as different colors). Diffraction gratings are tiny prisms stacked together.

When light passes through a diffraction grating, it splits (diffracts) the light into several beams traveling at different directions. If you've ever seen the 'iridescence' of a soap bubble, an insect shell, or on a pearl, you've seen nature's diffraction gratings.

Scientist use these things to split incoming light so they can figure out what fuels a distant star is burning. When hydrogen burns, it gives off light, but not in all the colors of the rainbow, only very specific colors in red and blue. It's like hydrogen's own personal fingerprint, or light signature.

Astronomers can split incoming light from a star using a spectrometer (you can build your own here) to figure out what the star is burning by matching up the different light signatures.

Materials:

  • feather
  • old CD or DVD

[am4show have='p8;p9;p11;p38;p92;p19;p46;p66;p89;p90;' guest_error='Guest error message' user_error='User error message' ]


Here's what you do: Take a feather and put it over an eye. Stare at a light bulb or a lit candle. You should see two or three flames and a rainbow X. Shine a flashlight on a CD and watch for rainbows. (Hint – the tiny “hairs” on the feather are acting like tiny prisms… take your homemade microscope to look at more of the feather in greater detail and see the tiny prisms for yourself!

What happens when you aim a laser through a diffraction grating? Here's what you do:

Materials:

 
Download Student Worksheet & Excercises

Exercises

  1. Which light source gave the most interesting results?
  2. What happens when you aim a laser beam through the diffraction grating?
  3. How is a CD different and the same as a diffraction grating?
  4. Why does the feather work?

[/am4show]


When high energy radiation strikes the Earth from space, it’s called cosmic rays. To be accurate, a cosmic ray is not like a ray of sunshine, but rather is a super-fast particle slinging through space. Think of throwing a grain of sand at a 100 mph… and that’s what we call a ‘cosmic ray’. Build your own electroscope with this video!


[am4show have=’p8;p9;p11;p38;p92;p17;p44;p76;p90;p58;’ guest_error=’Guest error message’ user_error=’User error message’ ]
Materials:


  • Clean glass jar with a lid
  • Wire coat hanger and sand paper
  • Aluminum foil
  • Vice grips or a hacksaw
  • Scissors
  • Balloon or other object to create a static charge
  • Hot glue gun (optional)


Download Student Worksheet & Exercises


Troubleshooting: This device is also known as an electroscope, and its job is to detect static charges, whether positive or negative.  The easiest way to make sure your electroscope is working is to rub your head with a balloon and bring it near the foil ball on top – the foil “leaves” inside the jar should spread apart into a V-shape.


Exercises


  1. How does this detector work?
  2. Do all particles leave the same trail?
  3. What happens when the magnet is brought close to the jar?

[/am4show]


You are going to start observing the Sun and tracking sunspots across the Sun using one of two different kinds of viewers so you can figure out how fast the Sun rotates. Sunspots are dark, cool areas with highly active magnetic fields on the Sun’s surface that last from hours to months. They are dark because they aren’t as bright as the areas around them, and they extend down into the Sun as well as up into the magnetic loops.

Materials

  • Tack and 2 index cards  OR a Baader film from Agena Astro (this works better than the tacks and card)

[am4show have='p8;p9;p11;p38;p92;p44;p73;p90;p105;' guest_error='Guest error message' user_error='User error message' ]


Download Student Worksheet & Exercises

We’re going to learn two different ways to view the Sun. First is the pinhole projector and the second is using a special film called a Baader filter. The quickest and simplest way to do this is to build a super-easy pinhole camera that projects an image of the Sun onto an index card for you to view.

If the Sun is not available, you can use images from a satellite that’s pointed right at the Sun while orbiting around the Earth called “SOHO.” SOHO gets clear, unobstructed views of the Sun 24 hours a day, since it’s above the atmosphere of the Earth. Download the very latest image of the Sun from NASA’s SOHO page (choose the SDO/HMI Continuum filter for the best sunspot visibility) and hand them out to the students to track the sunspots.

Solar Pinhole Projector

  1. With your tack, make a small hole in the center of one of the cards.
  2. Stack one card about 12″ above the other and go out into the Sun.
  3. Adjust the spacing between the cards so a sharp image of the Sun is projected onto the lower paper.
  4. The Sun will be about the size of a pea.
  5. You can experiment with the size of the hole you use to project your image.
  6. What happens if your hole is really big? Too small?
  7. What if you bend the lower card while viewing? What if you punch two holes? Or three?

Baader Filter

  1. Using a Baader filter, you’re going to look straight through the filter right at the Sun. Put the filter between you and the Sun, right up close to your eye and look through it. It takes a little while to get the hang of seeing the Sun through this filter, but it’s totally worth it.

Taking Data:

  1. Using either the Baader filter or the solar pinhole projector (or both), you will track the sunspot activity using the mapping grid. You will be charting the Sun for two weeks using the mapping grid.
  2. Each day, step outside at the same time each day and look at the Sun using one of the two filter methods.
  3. Draw what you see on the mapping grid.
  4. Draw the sunspot(s) with the date of the month next to it. For example, on March 13, write a “13” right next to the sunspot picture you drew. If there’s more than one sunspot, pick the largest one to track. If you’d like to track all of them, label them A-13, B-13, C-13…etc. The next day, label the set A-14, B-14, C-14. For multiple sunspots, use one mapping grid per day.

What's Going On?

The Sun rotates differentially, since it’s not solid but rather a ball of hot gas and plasma. The equator rotates faster than the poles, and in one of the experiments in this section, you’ll actually get to measure the Sun’s rotation. This differential rotation causes the magnetic fields to twist and stretch. The Sun has two magnetic poles (north and south) that swap every 11 years as the magnetic fields reach their breaking point, like a spinning top that’s getting tangled up in its own string. When they flip, it’s called “solar maximum,” and you’ll find the most sunspots dotting the Sun at this time.

You know you’re not supposed to look at the Sun, so how can you study it safely? I’m going to show you how to observe the Sun safely using a very inexpensive filter. I actually keep one of these in the glove box of my car so I can keep track of certain interesting sunspots during the week!

The visible surface of the Sun is called the photosphere, and is made mostly of plasma (electrified gas) that bubbles up hot and cold regions of gas. When an area cools down, it becomes darker (called sunspots). Solar flares (massive explosions on the surface), sunspots, and loops are all related the Sun’s magnetic field. While scientists are still trying to figure this stuff out, here’s the latest of what they do know…

The Sun is a large ball of really hot gas – which means there are lots of naked charged particles zipping around. And the Sun also rotates, but the poles and the equator move and different speeds (don’t forget – it’s not a solid ball but more like a cloud of gas). When charged particles move, they make magnetic fields (that’s one of the basic laws of physics). And the different rotation rates allow the magnetic fields to “wind up” and cause massive magnetic loops to eject from the surface, growing stronger and stronger until they wind up flipping the north and south poles of the Sun (called ‘solar maximum’). The poles flip every 11 years.

The Sun rotates, but because it’s not a solid body but a big ball of gas, different parts of the Sun rotate at different speeds. The equator (once every 27 days) spins faster than the poles (once every 31 days). Sunspots are a great way to estimate the rotation speed.

Sunspots usually appear in groups and can grow to several times the size of the Earth. Galileo was the first to record solar activity in 1613, and was amazed how spotty the Sun appeared when he looked at the projected image on his table.

There have been several satellites especially created to observe the Sun, including Ulysses (launched 1990, studied solar wind and magnetic fields at the poles), Yohkoh (1991-2001, studied X-rays and gamma radiation from solar flares), SOHO (launched 1995, studies interior and surface), and TRACE (launched 1998, studies the corona and magnetic field). And as of August 2017, Astronomers have figured out that the surface of the sun rotates slower than its core (by about four times as much!) by studying surface acoustic waves in the sun's atmosphere.

Exercises

  1.  How many longitude degrees per day does the sunspot move?
  2.  Do all sunspots move at the same rate?
  3.  Did some of the sunspots change size or shape, appear or disappear?

[/am4show]


The Moon appears to change in the sky. One moment it’s a big white circle, and next week it’s shaped like a sideways bike helmet. There’s even a day where it disappears altogether. So what gives?


The Sun illuminates half of the Moon all the time. Imagine shining a flashlight on a beach ball. The half that faces the light is lit up. There’s no light on the far side, right? For the Moon, which half is lit up depends on the rotation of the Moon. And which part of the illuminated side we can see depends on where we are when looking at the Moon. Sound complicated? This lab will straighten everything out so it makes sense.


Materials


  • ball
  • flashlight

[am4show have=’p8;p9;p11;p38;p92;p17;p44;p105;p67;p90;’ guest_error=’Guest error message’ user_error=’User error message’ ]


This first video will show you how the moon changes it’s appearance over the course of its cycle:


This video will show you how to demonstrate why the moon changes it’s appearance over the course of its cycle:


Download Student Worksheet & Exercises


  1. This lab works best if your room is very dark. Button down those shades and make it as dark as you can.
  2. Assign one person to be the Sun and hand them the flashlight. Stay standing up about four feet away from the group. The Sun doesn’t move at all for this activity.
  3. Assign one person to be the Moon and hand them the ball. Stay standing up, as you’ll be circling the Earth.
  4. The rest of the people are the Earth, and they stand or sit right the middle (so they don’t get a flashlight in their eyes as the Moon orbits).
  5. Start with a new Moon. Shine the flashlight above the heads of the Earth. Move the Moon (ball) into position so that the ball blocks all the light from the flashlight. Ask the Earth kids how much light they can see on their side of the Moon (should be none). Which phase of the Moon is this?
  6. Now the Moon moves around to the opposite side of the Earth so that the Earth kids can see the entire half of the ball lit up by the flashlight. Ask the Earth kids how much light they can see on their side of the Moon (should be half the ball). Which phase of the Moon is this?
  7. Now find the positions for first quarter. Where does the Moon need to stand so that the Earth kids can see the first quarter Moon?
  8. Continue around in a complete circle and fill out the diagram. Color in the circles to indicate the dark half of the Moon. For example, the new Moon should be completely darkened.
  9. Now it’s time to investigate why Venus and Mercury have phases. Put the Sun in the center and assign a student to be Venus. Venus gets the ball.
  10. Venus should be walking slowly around the Sun. The Sun is going to have to rotate to always face Venus, since the Sun normally gives off light in every direction.
  11. The Earth kids need to move further out from the Sun than Venus, so they will be watching Venus orbit the Sun from a distance of a couple of feet.
  12. Earth kids: What do you notice about how the Sun lights up Venus from your point of view? Is there a time when you get to see Venus completely illuminated, and other times when it’s completely dark?
  13. Draw a diagram of what’s going on, labeling Venus’s full phase, new phase, half phases, crescent, and gibbous phases. Label the Sun, Earth, and all eight phases of Venus.

Reading


The Sun illuminates half of the Moon all the time. Imagine shining a flashlight on a beach ball. The half that faces the light is lit up. There’s no light on the far side, right? So for the Moon, which half is lit up depends on the rotation of the Moon. And which part of the illuminated side we can see depends on where we are when looking at the Moon. Sound complicated? This lab will straighten everything out so it makes sense.


One question you’ll hear is: Why don’t we have eclipses every month when there’s a new Moon? The next lesson is all about eclipses, but you can quickly answer their questions by reminding them that the Moon’s orbit around the Earth is not in the same plane as the Earth’s orbit around the Sun (called the ecliptic). It’s actually off by about 5o. In fact, only twice per month does the Moon pass through the ecliptic.


The lunar cycle is approximately 28 days. To be exact, it takes on average 29.53 days (29 days, 12 hours, 44 minutes) between two full moons.  The average calendar month is 1/12 of a year, which is 30.44 days. Since the Moon’s phases repeat every 29.53 days, they don’t quite match up. That’s why on Moon phase calendars, you’ll see a skipped day to account for the mismatch.


A second full Moon in the same month is called a blue Moon. It’s also a blue Moon if it’s the third full Moon out of four in a three-month season, which happens once every two or three years.


The Moon isn’t the only object that has phases. Mercury and Venus undergo phases because they are closer to the Sun than the Earth. If we lived on Mars, then the Earth would also have phases.


Exercises


  1. Does the sun always light up half the Moon?
  2. How many phases does the Moon have?
  3. What is it called when the Moon appears to grow?
  4. What is it called when you see more light than dark on the Moon?
  5. How long does it take for a complete lunar cycle?

[/am4show]