When you drop a ball, it falls 16 feet the first second you release it. If you throw the ball horizontally, it will also fall 16 feet in the first second, even though it is moving horizontally… it moves both away from you and down toward the ground. Think about a bullet shot horizontally. It travels a lot faster than you can throw (about 2,000 feet each second). But it will still fall 16 feet during that first second. Gravity pulls on all objects (like the ball and the bullet) the same way, no matter how fast they go.

What if you shoot the bullet faster and faster? Gravity will still pull it down 16 feet during the first second, but remember that the surface of the Earth is round. Can you imagine how fast we’d need to shoot the bullet so that when the bullet falls 16 feet in one second, the Earth curves away from the bullet at the same rate of 16 feet each second?

Answer: that bullet needs to travel nearly 5 miles per second. (This is also how satellites stay in orbit – going just fast enough to keep from falling inward and not too fast that they fly out of orbit.)

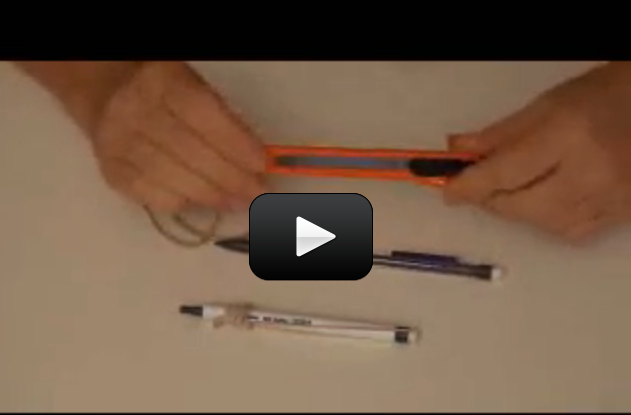
Catapults are a nifty way to fire things both vertically and horizontally, so you can get a better feel for how objects fly through the air. Notice when you launch how the balls always fall at the same rate – about 16 feet in the first second.  What about the energy involved?

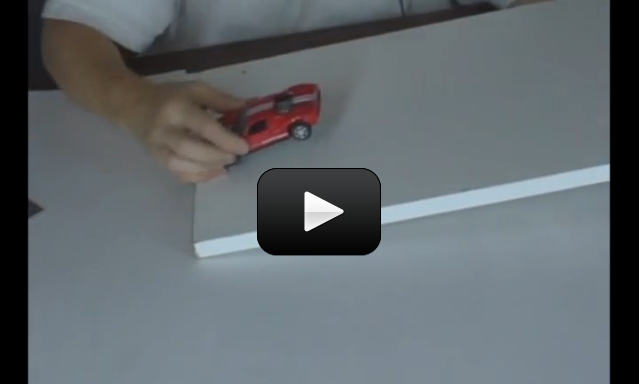
When you fire a ball through the air, it moves both vertically and horizontally (up and out). When you toss it upwards, you store the (moving) kinetic energy as potential energy, which transfers back to kinetic when it comes whizzing back down. If you throw it only outwards, the energy is completely lost due to friction.

The higher you pitch a ball upwards, the more energy you store in it. Instead of breaking our arms trying to toss balls into the air, let's make a simple machine that will do it for us. This catapult uses elastic kinetic energy stored in the rubber band to launch the ball skyward.

[am4show have='p8;p9;p15;p42;p151;p75;p85;p88;p92;' guest_error='Guest error message' user_error='User error message' ]

Here's what you need:

  • 9 tongue-depressor size popsicle sticks
  • four rubber bands
  • one plastic spoon
  • ping pong ball or wadded up ball of aluminum foil (or something lightweight to toss, like a marshmallow)
  • hot glue gun with glue sticks

Download Student Worksheet & Exercises

catapult1What’s going on? We’re utilizing the “springy-ness” in the popsicle stick to fling the ball around the room. By moving the fulcrum as far from the ball launch pad as possible (on the catapult), you get a greater distance to press down and release the projectile. (The fulcrum is the spot where a lever moves one way or the other – for example, the horizontal bar on which a seesaw “sees” and “saws”.)

Troubleshooting: These simple catapults are quick and easy versions of the real thing, using a fulcrum instead of a spring so kids don’t knock their teeth out. After making the first model, encourage kids to make their own “improvements” by handing them additional popsicle sticks, spoons, and glue sticks (for the hot glue guns).

If they get stuck, you can show them how to vary their models: glue a second (or third, fourth, or fifth) spoon onto the first spoon for multi-ammunition throws, increase the number of popsicle sticks in the fulcrum from 7 to 13 (or more?), and/or use additional sticks to lengthen the lever arm. Use ping pong balls as ammo and build a fort from sheets, pillows, and the backside of the couch.


Want to make a more advanced catapult? 

This catapult requires a little more time, materials, and effort than the catapult design above, but it's totally worth it. This device is what most folks think of when you say 'catapult'. I've shown you how to make a small model - how large can you make yours?

This project lends itself well to taking data and graphing your results: you and your child can jot down the distance traveled along with time aloft with further calculations for high school students for velocity and acceleration. My university students would also calculate statistics, percent error, and more. My students also mapped out the material properties of the 'cantilevered beam' as well as model the popsicle stick as a spring (to determine the spring constant (k) for your calculations from Hooke's Law). You can take this project as far as you want, depending on the interest and ability of kids.

Materials:

  • plastic spoon
  • 14 popsicle sticks
  • 3 rubber bands
  • wooden clothespin
  • straw
  • wood skewer or dowel
  • scissors
  • hot glue gun

Try different ball weights (ping pong, foil crumpled into a ball, whiffle balls, marshmallows, etc) and chart out the results: make a data table that shows what ball you tried and how far it went. You can also use a stopwatch to time how long your ball was in the air.

You can also graph your results: make a chart where you plot each data point on a graph that has distance on the vertical axis and time on the horizontal axis.

Advanced Teaching Tips: For high school and college-level physics classes, you can easily incorporate these launchers into your calculations for projectile motion. Offer students different ball weights (ping pong, foil crumpled into a ball, and whiffle balls work well) and chart out the results.

Exercises Answer the questions below:

  1. How is gravity related to kinetic energy?
    1. Gravity creates kinetic energy in all systems.
    2. Gravity explains how potential energy is created.
    3. Gravity pulls an object and helps its potential energy convert into kinetic energy.
    4. None of the above
  2. If you could use your catapult to launch your ball of foil into orbit, how high would it have to go?
    1. Above the atmosphere
    2. High enough to slingshot around the moon
    3. High enough so that when it falls, the earth curves away from it
    4. High enough so that it is suspended in empty space
  3. Where is potential energy the greatest on the catapult?

[/am4show]


This experiment is for Advanced Students.There are several different ways of throwing objects. This is the only potato cannon we’ve found that does NOT use explosives, so you can be assured your kid will still have their face attached at the end of the day. (We’ll do more when we get to chemistry, so don’t worry!)


These nifty devices give off a satisfying *POP!!* when they fire and your backyard will look like an invasion of aliens from the French Fry planet when you’re done. Have your kids use a set of goggles and do all your experimenting outside.


Here’s what you need:


[am4show have=’p9;p42;p88;p92;p103;’ guest_error=’Guest error message’ user_error=’User error message’ ]


  • potatoes
  • an acrylic tube (clear is best so you can see what’s happening inside!)
  • wooden dowel
  • washer (this is your ‘hand-saver’)


Where is the potential energy the greatest? How much energy did your spud have at this point? Hmmm… let’s see if we can get a few actual numbers with this experiment. In order to calculate potential energy at the highest point of travel, you’ll need to figure out how high it went.


Here are instructions for making your own height-gauge:


Once you get your height gauge working right, you’ll need to track your data. Start a log sheet in your journal and jot down the height for each launch. Let’s practice a sample calculation:


If you measured an angle of 30 degrees, and your spud landed 20 feet away, we can assume that the spud when highest right in the middle of its flight, which is halfway (10 feet). Use basic trigonometry to find the height 45 degrees up at a horizontal distance ten feet away to get:


height = h = (10′) * (tan 30) = 5.8 feet
(Convert this to meters by: (5.8 feet) * (12 inches/foot) / (39.97 inches/meter) = 1.8 meters)

I measured the mass of my spud to be 25 grams (which is 0.025 kg).


Now, let’s calculate the potential energy:


PE = mgh = (0.025 kg) * (1.8 meters) * (10 m/s2) = 0.44 Joules


How fast was the spud going before it smacked into the ground? Set PE = KE to solve for velocity:


mgh = 0.5 mv2 gives v = (2gh)1/2


Plug in your numbers to get:


v = [(2) * (10) * (1.8)]2 = 6 m/s (or about 20 feet per second). Cool!


[/am4show]


This is a simple, fun, and sneaky way of throwing tiny objects. It’s from one of our spy-kit projects. Just remember, keep it under-cover. Here’s what you need:


  • a cheap mechanical pencil
  • two rubber bands
  • a razor with adult help

[am4show have=’p8;p9;p15;p42;p88;p92;’ guest_error=’Guest error message’ user_error=’User error message’ ]


Advanced students: Download your P-Shooter Lab here.


[/am4show]


Bobsleds use the low-friction surface of ice to coast downhill at ridiculous speeds. You start at the top of a high hill (with loads of potential energy) then slide down a icy hill til you transform all that potential energy into kinetic energy.  It’s one of the most efficient ways of energy transformation on planet Earth. Ready to give it a try?


This is one of those quick-yet-highly-satisfying activities which utilizes ordinary materials and turns it into something highly unusual… for example, taking aluminum foil and marbles and making it into a racecar.


While you can make a tube out of gift wrap tubes, it’s much more fun to use clear plastic tubes (such as the ones that protect the long overhead fluorescent lights). Find the longest ones you can at your local hardware store. In a pinch, you can slit the gift wrap tubes in half lengthwise and tape either the lengths together for a longer run or side-by-side for multiple tracks for races. (Poke a skewer through the rolls horizontally to make a quick-release gate.)


Here’s what you need:


  • aluminum foil
  • marbles (at least four the same size)
  • long tube (gift wrapping tube or the clear protective tube that covers fluorescent lighting is great)

[am4show have=’p8;p9;p15;p42;p75;p85;p88;p92;p100;’ guest_error=’Guest error message’ user_error=’User error message’ ]


bobsledsIf you’re finding that the marbles fall out before the bobsled reaches the bottom of the slide, you need to either crimp the foil more closely around the marbles or decrease your hill height.


Check to be sure the marbles are free to turn in their “slots” before launching into the tube – if you’ve crimped them in too tightly, they won’t move at all. If you oil the bearings with a little olive oil or machine oil, your tube will also get covered with oil and later become sticky and grimy… but they sure go faster those first few times!


Download Student Worksheet & Exercises


Exercises Answer the questions below:


  1. Potential energy is energy that is related to:
    1. Equilibrium
    2. Kinetic energy
    3. Its system
    4. Its elevation
  2. If an object’s energy is mostly being used to keep that object in motion, we can say it has what type of energy?
    1. Kinetic energy
    2. Potential energy
    3. Heat energy
    4. Radiation energy
  3. True or False: Energy is able to remain in one form that is usable over and over again.
    1. True
    2. False

[/am4show]


We're going to build monster roller coasters in your house using just a couple of simple materials. You might have heard how energy cannot be created or destroyed, but it can be transferred or transformed (if you haven't that's okay - you'll pick it up while doing this activity).

Roller coasters are a prime example of energy transfer: You start at the top of a big hill at low speeds (high gravitational potential energy), then race down a slope at break-neck speed (potential transforming into kinetic) until you bottom out and enter a loop (highest kinetic energy, lowest potential energy). At the top of the loop, your speed slows (increasing your potential energy), but then you speed up again and you zoom near the bottom exit of the loop (increasing your kinetic energy), and you're off again!

Here's what you need:

[am4show have='p8;p9;p15;p42;p151;p75;p85;p88;p92;p100;' guest_error='Guest error message' user_error='User error message' ]

  • marbles
  • masking tape
  • 3/4" pipe foam insulation (NOT neoprene and NOT the kind with built-in adhesive tape)

To make the roller coasters, you'll need foam pipe insulation, which is sold by the six-foot increments at the hardware store. You'll be slicing them in half lengthwise, so each piece makes twelve feet of track. It comes in all sizes, so bring your marbles when you select the size. The ¾” size fits most marbles, but if you’re using ball bearings or shooter marbles, try those out at the store. (At the very least you’ll get smiles and interest from the hardware store sales people.) Cut most of the track lengthwise (the hard way) with scissors. You’ll find it is already sliced on one side, so this makes your task easier. Leave a few pieces uncut to become “tunnels” for later roller coasters.

Read for some 'vintage Aurora' video? This is one of the very first videos ever made by Supercharged Science:

Download Student Worksheet & Exercises

Tips & Tricks

Loops Swing the track around in a complete circle and attach the outside of the track to chairs, table legs, and hard floors with tape to secure in place. Loops take a bit of speed to make it through, so have your partner hold it while you test it out before taping. Start with smaller loops and increase in size to match your entrance velocity into the loop. Loops can be used to slow a marble down if speed is a problem.

Camel-Backs Make a hill out of track in an upside-down U-shape. Good for show, especially if you get the hill height just right so the marble comes off the track slightly, then back on without missing a beat.

Whirly-Birds Take a loop and make it horizontal. Great around poles and posts, but just keep the bank angle steep enough and the marble speed fast enough so it doesn’t fly off track.

Corkscrew Start with a basic loop, then spread apart the entrance and exit points. The further apart they get, the more fun it becomes. Corkscrews usually require more speed than loops of the same size.

Jump Track A major show-off feature that requires very rigid entrance and exit points on the track. Use a lot of tape and incline the entrance (end of the track) slightly while declining the exit (beginning of new track piece).

Pretzel The cream of the crop in maneuvers. Make a very loose knot that resembles a pretzel. Bank angles and speed are the most critical, with rigid track positioning a close second. If you’re having trouble, make the pretzel smaller and try again. You can bank the track at any angle because the foam is so soft. Use lots of tape and a firm surface (bookcases, chairs, etc).

Troubleshooting Marbles will fly everywhere, so make sure you have a lot of extras! If your marble is not following your track, look very carefully for the point of departure – where it flies off.

-Does the track change position with the weight of the marble, making it fly off course? Make the track more rigid by taping it to a surface.
-Is the marble jumping over the track wall? Increase your bank angle (the amount of twist the track makes along its length).
-Does your marble just fall out of the loop? Increase your marble speed by starting at a higher position. When all else fails and your marble still won’t stay on the track, make it a tunnel section by taping another piece on top the main track. Spiral-wrap the tape along the length of both pieces to secure them together.

HOT TIPS for ULTRA-COOL PARENTS: This lab is an excellent opportunity for kids to practice their resilience, because we guarantee this experiment will not work the first several times they try it. While you can certainly help the kids out, it’s important that you help them figure it out on their own. You can do this by asking questions instead of rushing in to solve their problems. For instance, when the marble flies off the track, you can step back and say:

“Hmmm… did the marble go to fast or too slow?”

“Where did it fly off?”

“Wow – I’ll bet you didn’t expect that to happen. Now what are you going to try?”

Become their biggest fan by cheering them on, encouraging them to make mistakes, and try something new (even if they aren’t sure if it will work out).

Check out this cool roller coaster from one of our students!

Exercises 

  1. What type of energy does a marble have while flying down the track of a roller coaster?
  2. What type of energy does the marble have when you are holding it at the top of the track?
  3. At the top of a camel back hill, which is higher for the marble, kinetic or potential energy?
  4. At the top of an inverted loop, which energy is higher, kinetic or potential energy?

[/am4show]


This is a nit-picky experiment that focuses on the energy transfer of rolling cars.  You’ll be placing objects and moving them about to gather information about the potential and kinetic energy.


We’ll also be taking data and recording the results as well as doing a few math calculations, so if math isn’t your thing, feel free to skip it.


Here’s what you need:


[am4show have=’p8;p9;p15;p42;p75;p85;p88;p92;’ guest_error=’Guest error message’ user_error=’User error message’ ]


  • a few toy cars (or anything that rolls like a skate)
  • a board, book or car track
  • measuring tape

The setup is simple.  Here’s what you do:


1. Set up the track (board or book so that there’s a nice slant to the floor).


2. Put a car on the track.


3. Let the car go.


4. Mark or measure how far it went.


Download Student Worksheet & Exercises


As you lifted the car onto the track you gave the car potential energy. As the car went down the track and reached the floor the car lost potential energy and gained kinetic energy. When the car hit the floor it no longer had any potential energy only kinetic.


If the car was 100% energy efficient, the car would keep going forever. It would never have any energy transferred to useless energy. Your cars didn’t go forever did they? Nope, they stopped and some stopped before others. The ones that went farther were more energy efficient. Less of their energy was transferred to useless energy than the cars that went less far.


Where did the energy go? To heat energy, created by the friction of the wheels, and to sound energy. Was energy lost? NOOOO, it was only changed. If you could capture the heat energy and the sound energy and add it to the the kinetic energy, the sum would be equal to the original amount of energy the car had when it was sitting on top of the ramp.


For K-8 grades, click here to download a data sheet.


For Advanced Students, click  here for the data log sheet. You’ll need Microsoft Excel to use this file.


Exercises


  1. Where is the potential energy greatest?
  2. Where is the kinetic energy greatest?
  3. Where is potential energy lowest?
  4. Where is kinetic energy lowest?
  5. Where is KE increasing, and PE is decreasing?
  6. Where is PE increasing and KE decreasing?

[/am4show]