Never polish your tarnished silver-plated silverware again! Instead, set up a ‘silverware carwash’ where you earn a nickel for every piece you clean. (Just don’t let grandma in on your little secret!)


We’ll be using chemistry and electricity together (electrochemistry) to make a battery that reverses the chemical reaction that puts tarnish on grandma’s good silver.  It’s safe, simple, and just needs a grown-up to help with the stove.


Please login or register to read the rest of this content.

Click here to go to next lesson on Batteries storing energy

If you don’t have equipment lying around for this experiment, wait until you complete Unit 10 (Electricity) and then come back to complete this experiment. It’s definitely worth it!


Electroplating was first figured out by Michael Faraday. The copper dissolves and shoots over to the key and gets stuck as a thin layer onto the metal key. During this process, hydrogen bubbles up and is released as a gas. People use this technique to add material to undersized parts, for place a protective layer of material on objects, to add aesthetic qualities to an object.


Materials:


  • one shiny metal key
  • 2 alligator clips
  • 9V battery clip
  • copper sulfate (MSDS)
  • one copper strip or shiny copper penny
  • one empty pickle jar
  • 9V battery
Please login or register to read the rest of this content.

Click here to go to next lesson on Electrochemical cells and voltage

This experiment is just for advanced students. If you guessed that this has to do with electricity and chemistry, you’re right! But you might wonder how they work together. Back in 1800, William Nicholson and Johann Ritter were the first ones to split water into hydrogen and oxygen using electrolysis. (Soon afterward, Ritter went on to figure out electroplating.) They added energy in the form of an electric current into a cup of water and captured the bubbles forming into two separate cups, one for hydrogen and other for oxygen.


This experiment is not an easy one, so feel free to skip it if you need to. You don’t need to do this to get the concepts of this lesson but it’s such a neat and classical experiment (my students love it) so you can give it a try if you want to. The reason I like this is because what you are really doing in this experiment is ripping molecules apart and then later crashing them back together.


Have fun and please follow the directions carefully. This could be dangerous if you’re not careful. The image shown here is using graphite from two pencils sharpened on both ends, but the instructions below use wire.  Feel free to try both to see which types of electrodes provide the best results.


Please login or register to read the rest of this content.

Click here to go to next lesson on Electroplating


Electricity. Chemistry. Nothing in common, have nothing to do with each other. Wrong! Electrochemistry has been a fact since 1774. Once electricity was applied to particular solutions, changes occurred that scientists of the time did not expect.


In this lab, we will discover some of the same things that Farraday found over 300 years ago. We will be there as things tear apart, particles rush about, and the power of attraction is very strong. We’re not talking about dancing, we’re talking about something much more important and interesting….we’re talking about ELECTROCHEMISTRY!


Please login or register to read the rest of this content.

Click here to go to next lesson on Electrolysis

If you guessed that electrochemistry has to do with electricity and chemistry, you’re right! But you might wonder how they work together. Back in 1800, William Nicholson and Johann Ritter were the first ones to split water into hydrogen and oxygen using electrolysis. (Soon afterwards, Ritter went on to figure out electroplating.) They added energy in the form of an electric current into a cup of water and captured the bubbles forming into two separate cups, one for hydrogen and other for oxygen.
Please login or register to read the rest of this content.


Click here to go to next lesson on More on Electrochemistry

This is a cool video from a Teacher’s Educational Channel in Europe I thought you might enjoy about the science of fireworks:


You can view the full video here.


Click here to go to your next lesson in Electrochemistry.

Charcoal crystals uses evaporation to grow the crystals, which will continue to grow for weeks afterward.  You’ll need a piece of very porous material, such as a charcoal briquette, sponge, or similar object to absorb the solution and grow your crystals as the liquid evaporates.  These crystals are NOT for eating, so be sure to keep your growing garden away from young children and pets! This project is exclusively for advanced students, as it more involves toxic chemicals than just salt and sugar.


Please login or register to read the rest of this content.

Click here to go to next lesson on Science of Fireworks


Potassium perchlorate is usually safer than chlorate salt, but it sometimes is hard to get it. In the past, the only supplier in the US makes ammonium perchlorate, the oxidizer that was used with the space shuttle booster rockets, and each shuttle launch required 1.5 million pounds of it, which was twice the annual consumption rate, so when there were a lot of shuttle launches, the fireworks market took a hit and it was near impossible to get any potassium perchlorate.
Please login or register to read the rest of this content.


Click here to go to next lesson on Charcoal Crystals


Second Law of Thermodynamics: Heat flows from hot to cold. Heat is the movement of thermal energy from one object to another. Heat can only flow from an object of a higher temperature to an object of a lower temperature. Heat can be transferred from one object to another through conduction, convection and radiation.


Temperature is basically a speedometer for molecules. The faster they are wiggling and jiggling, the higher the temperature and the higher the thermal energy that object has. Your skin, mouth and tongue are antennas which can sense thermal energy. When an object absorbs heat it does not necessarily change temperature.


Materials: hot cup of cocoa


Please login or register to read the rest of this content.

Click here to go to next lesson on Fireworks


First Law of Thermodynamics: Energy is conserved. Energy is the ability to do work. Work is moving something against a force over a distance. Force is a push or a pull, like pulling a wagon or pushing a car. Energy cannot be created or destroyed, but can be transformed.


Materials: ball, string


Please login or register to read the rest of this content.

Click here to go to next lesson on Thermodynamics: Second law


What do you do if you don’t know the concentration of a solution? We use a method called titration to determine how many moles are present in the solution of an acid or a base by neutralizing it. A titration curve is when you graph out the pH as you drop it in the solution.


Please login or register to read the rest of this content.

Click here to go to next lesson on pH and solubility

This experiment is for advanced students. All chemical reactions are equilibrium reactions. This experiment is really cool because you’re going to watch how a chemical reaction resists a pH change.


Please login or register to read the rest of this content.

Click here to go to next lesson on Titrations and pH curves

Cobalt chloride (CoCl2) has a dramatic color change when combined with water, making it a great water indicator. A concentrated solution of cobalt chloride is red at room temperature, blue when heated, and pale-to-clear when frozen. The cobalt chloride we’re using is actually cobalt chloride hexahydrate, which means that each CoCl2 molecule also has six water molecules (6H2O) stuck to it.

Please login or register to read the rest of this content.

Click here to go to next lesson on Potassium Hexacynoferrate


If you love the idea of mixing up chemicals and dream of having your own mad science lab one day, this one is for you. You are going to mix up each solid with each liquid in a chemical matrix.


In a university class, one of the first things you learn in chemistry is the difference between physical and chemical changes. An example of a physical change happens when you change the shape of an object, like wadding up a piece of paper. If you light the paper wad on fire, you now have a chemical change. You are rearranging the atoms that used to be the molecules that made up the paper into other molecules, such as carbon monoxide, carbon dioxide, ash, and so forth.


How can you tell if you have a chemical change? If something changes color, gives off light (such as the light sticks used around Halloween), or absorbs heat (gets cold) or produces heat (gets warm), it’s a chemical change.


What about physical changes? Some examples of physical changes include tearing cloth, rolling dough, stretching rubber bands, eating a banana, or blowing bubbles.


About this experiment: Your solutions will turn red, orange, yellow, green, blue, purple, hot, cold, bubbling, foaming, rock hard, oozy, and slimy, and they’ll crystallize and gel — depending on what you put in and how much!


This is the one set of chemicals that you can mix together without worrying about any lethal gases.  I do recommend doing this OUTSIDE, as the alcohol and peroxide vapors can irritate you. Always have goggles on and gloves on your hands, and a hose handy in case of spills. Although these chemicals are not harmful to your skin, they can cause your skin to dry out and itch. Wear gloves (latex or similar) and eye protection (safety goggles), and if you’re not sure about an experiment or chemical, just don’t do it. (Skip the peroxide and cold pack if you have small kids.)


Materials:
• sodium tetraborate (borax, laundry aisle)
• sodium bicarbonate (baking soda, baking aisle)
• sodium carbonate (washing soda, laundry aisle)
• calcium chloride (AKA “DriEz” or “Ice Melt”)
• citric acid (spice section, used for preserving and pickling)
• ammonium nitrate (single-use disposable cold pack)
• isopropyl rubbing alcohol
• hydrogen peroxide
• acetic acid (distilled white vinegar)
• water
• liquid dish soap (add to water)
• muffin tin or disposable cups
• popsicle sticks for stirring and mixing
• tablecloths (one for the table, another for the floor)
• head of red cabbage (indicator)


Please login or register to read the rest of this content.

Click here to go to next lesson on Cobalt Colors

Phenolphthalein is a weak, colorless acid that changes color when it touches acidic (turns orange) or basic (turns pink/fuchsia) substances. People used to take it as a laxative (not recommended today, as ingesting high amounts may cause cancer). Use gloves when handling this chemical, as your skin  can absorb it on contact. I’ll show you how:


Please login or register to read the rest of this content.

Click here to go to next lesson on Acid-base Matrix

You can go your whole life without paying any attention to the chemistry behind acids and bases. But you use acids and bases all the time! They are all around you. We identify acids and bases by measuring their pH.


Every liquid has a pH. If you pay particular attention to this lab, you will even be able to identify most acids and bases and understand why they do what they do. Acids range from very strong to very weak. The strongest acids will dissolve steel. The weakest acids are in your drink box. The strongest bases behave similarly. They can burn your skin or you can wash your hands with them.


Acid rain is one aspect of low pH that you can see every day if you look for it. This is a strange name, isn’t it? We get rained on all the time. If people were dissolving, if the rain made their skin smoke and burn, you’d think it would make headlines, wouldn’t you? The truth is acid rain is too weak to harm us except in very rare and localized conditions. But it’s hard on limestone buildings.


Please login or register to read the rest of this content.

Click here to go to next lesson on Water to Wine

You can go your whole life without paying any attention to the chemistry behind acids and bases. But you use acids and bases all the time! They are all around you. We identify acids and bases by measuring their pH.


Every liquid has a pH. If you pay particular attention to this lab, you will even be able to identify most acids and bases and understand why they do what they do. Acids range from very strong to very weak. The strongest acids will dissolve steel. The weakest acids are in your drink box. The strongest bases behave similarly. They can burn your skin or you can wash your hands with them.


Acid rain is one aspect of low pH that you can see every day if you look for it. This is a strange name, isn’t it? We get rained on all the time. If people were dissolving, if the rain made their skin smoke and burn, you’d think it would make headlines, wouldn’t you? The truth is acid rain is too weak to harm us except in very rare and localized conditions. But it’s hard on limestone buildings.


Please login or register to read the rest of this content.

Click here to go to next lesson on Making Litmus Paper


Strong acids and strong bases (which we’ll talk about in a minute) all have one thing in common: they break apart (completely dissociate) into ions when placed in water. This means that once you dunk the acid molecule in water, it splits apart and does not exist as a whole molecule in water. Strong acids form H+ and a negative ion

The seven strong acids are: hydrochloric acid (HCl), nitric acid (HNO3) used in fireworks and explosives, sulfuric acid (H2SO4) which is the acid in your car battery, hydrobromic acid (HBr), hydroiodic acid (HI), and perchloric acid (HClO4). The record-holder for the world’s strongest acid are the carborane (CAR-bor-ane) superacids (over a million times stronger than concentrated sulfuric acid).

Please login or register to read the rest of this content.

Click here to go to next lesson on Making Litmus Paper


Strong acids and strong bases (which we’ll talk about in a minute) all have one thing in common: they break apart (completely dissociate) into ions when placed in water. This means that once you dunk the acid molecule in water, it splits apart and does not exist as a whole molecule in water. Strong acids form H+ and a negative ion


The seven strong acids are: hydrochloric acid (HCl), nitric acid (HNO3) used in fireworks and explosives, sulfuric acid (H2SO4) which is the acid in your car battery, hydrobromic acid (HBr), hydroiodic acid (HI), and perchloric acid (HClO4). The record-holder for the world’s strongest acid are the carborane (CAR-bor-ane) superacids (over a million times stronger than concentrated sulfuric acid).


Please login or register to read the rest of this content.

Click here to go to next lesson on K w and the pH scale


First discovered in 1886 by Hans Heinrich Landolt, the iodine clock reaction is one of the best classical chemical kinetics experiments. Here’s what to expect:  Two clear solutions are mixed. At first there is no visible reaction, but after a short time, the liquid suddenly turns dark blue.


Usually, this reaction uses a solution of hydrogen peroxide with sulfuric acid, but you can substitute a weaker (and safer) acid that works just as well:  acetic acid (distilled white vinegar). The second solution contains potassium iodide, sodium thiosulfate (crystals), and starch (we’re using a starch packing peanut, but you can also use plain old cornstarch). Combine one with the other to get the overall reaction, but note that there are actually two reactions happening simultaneously.


Please login or register to read the rest of this content.

Click here for the next lesson in Iodine.


Chemical equilibrium is the condition that happens when the concentration of the reactants and products don’t have any net change over time. This doesn’t mean that the reaction stops, just that the producing and consuming of the molecules is in balance.


Most chemical reactions are reversible, just like phases changes. Do you remember the hot icicle experiment? Do you remember how to get it back to the starting point? You have to add energy to the solid sodium acetate to turn it back into a liquid, so it can turn back into a solid again. Then let that experiment sit for a bit (overnight or about 12 hours) and in the morning, you’ll have crystals growing on your pipe cleaner. Now if you want to reverse this reaction, all you have to do is add energy to the system and the crystals will dissolve back into the solution. You can heat it up in the microwave or in a pot of water on the stove, and the crystals will disappear.
Please login or register to read the rest of this content.


Click here to go to next lesson on Iodine Clock reaction

Chemical equilibrium is the condition that happens when the concentration of the reactants and products don’t have any net change over time. This doesn’t mean that the reaction stops, just that the producing and consuming of the molecules is in balance.


Most chemical reactions are reversible, just like phases changes. Do you remember the hot icicle experiment? Do you remember how to get it back to the starting point? You have to add energy to the solid sodium acetate to turn it back into a liquid, so it can turn back into a solid again. Then let that experiment sit for a bit (overnight or about 12 hours) and in the morning, you’ll have crystals growing on your pipe cleaner. Now if you want to reverse this reaction, all you have to do is add energy to the system and the crystals will dissolve back into the solution. You can heat it up in the microwave or in a pot of water on the stove, and the crystals will disappear.
Please login or register to read the rest of this content.


Click here to go to next lesson on Le Chatelier’s principle


Chemists want to control not only what comes out of a chemical reaction, but how fast the reaction occurs. For example, scientists are working to slow down the depletion rate of the ozone in the upper level of our atmosphere, so we stay protected from harmful UV rays.


The rate of the chemical reaction of a nail rusting is slow compared to how fast baking soda reacts with vinegar. Different factors affect the speed of the reaction, but the main idea is that the more collisions between particles, the faster the reaction will take place.
Please login or register to read the rest of this content.


Click here to go to next lesson on Dinosaur Toothpaste

This experiment is for advanced students. Hydrolysis is a chemical reaction that involves breaking a molecular bond using water. In chemistry, there are three different types of hydrolysis: sat hydrolysis, acid hydrolysis, and base hydrolysis. In nature, living organisms survive by making their energy from processing food. The energy converted from food is stored in ATP molecules. To release the energy stored in food, a phosphate group breaks off an ATP molecule (and becomes ADP) using hydrolysis and releases energy from the bonds.


Please login or register to read the rest of this content.

Click here to go to next lesson on Catalysts


Hydrolysis is a chemical reaction that happens when a molecule splits into two parts when water is added. One part gains a hydrogen (H+) and the other gets the hydroxyl (OH–) group. The reaction in the experiment forms starch from glucose, and when we add water, it breaks down the amino acid components just like the enzymes do in your stomach when they digest food.


Please login or register to read the rest of this content.

Click here to go to next lesson on Hydrolysis

Plasma makes up a very large percentage of the matter in the universe. Not much of it is on Earth and the plasma that is here is very short lived or stuck in a tube. Plasma is basically what happens when you add enough energy to a gas that the atoms move and vibrate around so energetically that they smack into each other and rip electrons off each other, so you have positively charged atoms (called ions) that lost their electrons, and also the electrons themselves which are negatively charged, all zinging around in the gas.
Please login or register to read the rest of this content.


Click here for the next lesson in Osmosis.

This experiment is for advanced students.Have you ever taken a gulp of the ocean? Seawater can be extremely salty! There are large quantities of salt dissolved into the water as it rolled across the land and into the sea. Drinking ocean water will actually make you thirstier (think of eating a lot of pretzels). So what can you do if you’re deserted on an island with only your chemistry set?


Let me show you how to take the salt out of water with this easy setup.


Please login or register to read the rest of this content.

Click here to go to next lesson on Other states of matter

Instead of using glue as a polymer (as in the slime recipes above), we're going to use PVA (polyvinyl alcohol). Most liquids are unconnected molecules bouncing around. Monomers (single molecules) flow very easily and don't clump together. When you link up monomers into longer segments, you form polymers (long chains of molecules).

Polymers don't flow very easily at all - they tend to get tangled up until you add the cross-linking agent, which buddies up the different segments of the molecule chains together into a climbing-rope design.

Please login or register to read the rest of this content.

Click here to go to next lesson on Desalination


When you think of slime, do you imagine slugs, snails, and puppy kisses? Or does the science fiction film The Blob come to mind? Any way you picture it, slime is definitely slippery, slithery, and just plain icky — and a perfect forum for learning real science.


But which ingredients work in making a truly slimy concoction, and why do they work? Let’s take a closer look…


Imagine a plate of spaghetti. The noodles slide around and don’t clump together, just like the long chains of molecules (called polymers) that make up slime. They slide around without getting tangled up. The pasta by itself (fresh from the boiling water) doesn’t hold together until you put the sauce on. Slime works the same way. Long, spaghetti-like chains of molecules don’t clump together until you add the sauce … until you add something to cross-link the molecule strands together.


The sodium-tetraborate-and-water mixture is the “spaghetti” (the long chain of molecules, also known as a polymer), and the “sauce” is the glue-water mixture (the cross-linking agent). You need both in order to create a slime worthy of Hollywood filmmakers.


Please login or register to read the rest of this content.

Click here to go to next lesson on PVA


The glue is a polymer, which is a long chain of molecules all hooked together like tangled noodles. When you mix the two solutions together, the water molecules start linking up the noodles together all along the length of each noodle to get more like a fishnet. Scientists call this a polymetric compound of sodium tetraborate and lactated glue. We call it bouncy putty.


Here’s what you do:


Please login or register to read the rest of this content.

Click here to go to next lesson on Glowing Slime


This is one of those ‘chemistry magic show’ type of experiments to wow your friends and family. Here’s the scoop: you take a cup of clear liquid, add it to another cup of clear liquid, stir for ten seconds, and you’ll see a color change, a state change from liquid to solid, and you can pull a rubber-like bouncy ball right out of the cup.


Please login or register to read the rest of this content.

Click here to go to next lesson on Bouncy Putty

Imagine a plate of spaghetti. The noodles slide around and don’t clump together, just like the long chains of molecules (called polymers) that make up slime. They slide around without getting tangled up. The pasta by itself (fresh from the boiling water) doesn’t hold together until you put the sauce on. Slime works the same way. Long, spaghetti-like chains of molecules (called polymers) don’t clump together until you add the sauce – something that cross-links the molecule strands (polymer) together.
Please login or register to read the rest of this content.


Click here to go to next lesson on Bouncy Ball

Did you know that supercooled liquids need to heat up in order to freeze into a solid? It’s totally backwards, I know…but it’s true! Here’s the deal:


A supercooled liquid is a liquid that you slowly and carefully bring down the temperature below the normal freezing point and still have it be a liquid. We did this in our Instant Ice experiment.


Since the temperature is now below the freezing point, if you disturb the solution, it will need to heat up in order to go back up to the freezing point in order to turn into a solid.


When this happens, the solution gives off heat as it freezes. So instead of cold ice, you have hot ice. Weird, isn’t it?


Sodium acetate is a colorless salt used making rubber, dying clothing, and neutralizing sulfuric acid (the acid found in car batteries) spills. It’s also commonly available in heating packs, since the liquid-solid process is completely reversible – you can melt the solid back into a liquid and do this experiment over and over again!


The crystals melt at 136oF (58oC), so you can pop this in a saucepan of boiling water (wrap it in a towel first so you don’t melt the bag) for about 10 minutes to liquify the crystals.


Please login or register to read the rest of this content.

Click here to go to next lesson on Water

Find a low pressure (like the pressure you feel right now – it’s called 1 atm). Put your finder on the 1 mark on the vertical side (next to the “P”, which stands for Pressure) and follow the dashed line straight across. As you move across, so you notice how at low temperatures you’re in the ice region, but when you hit zero, you turn to water, and for temperatures below 100 deg C you’re only in the liquid water phase?


Please login or register to read the rest of this content.

Click here to go to next lesson on Enthalpy and Heat Capacity Calculations.

While this isn’t actually an air-pressure experiment but more of an activity in density, really, it’s still a great visual demonstration of why Hot Air Balloons rise on cold mornings.


Imagine a glass of hot water and a glass of cold water sitting on a table, side by side. Now imagine you have a way to count the number of water molecules in each glass. Which glass has more water molecules?


The glass of cold water has way more molecules… but why? The cold water is more dense than the hot water. Warmer stuff tends to rise because it’s less dense than colder stuff and that’s why the hot air balloon in experiment 1.10 floated up to the sky.


Clouds form as warm air carrying moisture rises within cooler air. As the warm, wet air rises, it cools and begins to condense, releasing energy that keeps the air warmer than its surroundings. Therefore, it continues to rise. Sometimes, in places like Florida, this process continues long enough for thunderclouds to form. Let’s do an experiment to better visualize this idea.


Please login or register to read the rest of this content.

Click here to go to next lesson on Supercooling.

Indoor Rain Clouds

Making indoor rain clouds demonstrates the idea of temperature, the measure of how hot or cold something is. Here’s how to do it:


Take two clear glasses that fit snugly together when stacked. (Cylindrical glasses with straight sides work well.)


Fill one glass half-full with ice water and the other half-full with very hot water (definitely an adult job – and take care not to shatter the glass with the hot water!). Be sure to leave enough air space for the clouds to form in the hot glass.


Please login or register to read the rest of this content.

Click here to go to next lesson on Genie in a Bottle


When something changes state, goes from like a liquid to a solid, all of the substance must change to the next state. For example, at 100° C all the water must change from a liquid to a gas. The temperature stays constant until it’s completely changed state. It’s kind of weird when you think about it.


If you were able to take the temperature of water as it changed from a solid (ice) to a liquid you would notice that the temperature stays at 32° F until that piece of ice was completely melted. The temperature would not increase at all.


Even if that ice was in an oven, the temperature would stay the same. Once all the solid ice had disappeared, then you would see the temperature of the puddle of water increase.
Please login or register to read the rest of this content.


Click here to go to next lesson on freeze swap

As promised, here’s the Liquid Nitrogen Ice Cream Social video that was only available to a handful of participants at our live summer camp last week! This is probably one of the last times Dr. Tom Frey will be doing this presentation, so we didn’t want to miss the opportunity to record it and share it with you!


Dr. Tom Frey just retired as a chemistry professor at Cal Poly State University, where he taught courses (including how to make your own lab glassware) for 42 years. He’s not only a mentor of mine, but a close personal friend and I am happy to share his talent and passion for science with you through this special, one of a kind video.


I really hope you enjoy it!


Please login or register to read the rest of this content.

Click here to go to next lesson on Phase changes and temperature

A liquid has a definite volume (meaning that you can’t compress or squish it into a smaller space), but takes the shape of its container. Think of a water-filled balloon. When you smoosh one end, the other pops out. Liquids are generally incompressible, which is what hydraulic power on heavy duty machinery (like excavators and backhoes) is all about.


Please login or register to read the rest of this content.

Click here to go to next lesson on Liquid Nitrogen

Can we really make crystals out of soap?  You bet!  These crystals grow really fast, provided your solution is properly saturated.  In only 12 hours, you should have sizable crystals sprouting up.


You can do this experiment with either skewers, string, or pipe cleaners.  The advantage of using pipe cleaners is that you can twist the pipe cleaners together into interesting shapes, such as a snowflake or other design.  (Make sure the shape fits inside your jar. )


Please login or register to read the rest of this content.

Click here to go to next lesson on Liquids


Solids
What makes the solids, liquids, gases etc. different is basically the energy (motion) of the atoms. From BEC, where they are so low energy that they are literally blending into one another, to plasma, where they are so high energy they can emit light. Solids are the lowest energy form of matter that exist in nature (BEC only happens under laboratory conditions).


In solids, the atoms and molecules are bonded (stuck) together in such a way that they can’t move easily. They hold their shape. That’s why you can sit in a chair. The solid molecules hold their shape and so they hold you up. The typical characteristics that solids tend to have are they keep their shape unless they are broken and that they do not flow.


Please login or register to read the rest of this content.

Click here to go to next lesson on Borax Crystals

An average can of soda at room temperature measures 55 psi before you ever crack it open. (In comparison, most car tires run on 35 psi, so that gives you an idea how much pressure there is inside the can!)


If you heat a can of soda, you’ll run the pressure over 80 psi before the can ruptures, soaking the interior of your house with its sugary contents. Still, you will have learned something worthwhile: adding energy (heat) to a system (can of soda) causes a pressure increase. It also causes a volume increase (kaboom!).
How about trying a safer variation of this experiment using water, an open can, and implosion instead of explosion?


Materials – An empty soda can, water, a pan, a bowl, tongs, and a grown-up assistant.


NOTE: If you can get a hold of one, use a beer can – they tend to work better for this experiment. But you can also do this with a regular old soda can. And no, I am not suggesting that kids should be drinking alcohol! Go ask a parent to find you one – and check the recycling bin.


Please login or register to read the rest of this content.

Click here to go to next lesson on Solids


Now let’s take a look at the forces between the molecules themselves. There are four main interactions which really come down to different ways of having opposite charges attract each other.


Please login or register to read the rest of this content.

Click here to go to next lesson on Vapor pressure and Changes in State


A molecule is the smallest unit of a compound that still has the compound’s properties attached to it. Molecules are made up of two or more atoms held together by covalent bonds.


In the space where electrons from different atoms interact with each other, chemical bonds form. The electrons in the outermost shell are the ones that form the bonds with other atoms.


When the atoms share the electron(s), a covalent bond is formed. Electrons aren’t perfect, though, and usually an electron is more attracted to one atom than another, which forms a polar covalent bond between atoms (like in water, H2O).


While it may seem a bit random right now, with a little bit of study, you’ll find you can soon understand how molecules are formed and the shapes they choose once you figure out the types of bonds that can form.


Please login or register to read the rest of this content.

Click here to go to next lesson on Intermolecular Forces

This experiment is for advanced students.Have you ever taken a gulp of the ocean? Seawater can be extremely salty! There are large quantities of salt dissolved into the water as it rolled across the land and into the sea. Drinking ocean water will actually make you thirstier (think of eating a lot of pretzels). So what can you do if you’re deserted on an island with only your chemistry set?


Let me show you how to take the salt out of water with this easy setup.


Please login or register to read the rest of this content.

Click here to go to next lesson on Covalent Bonds and Polarity


We’re going to take two everyday materials, salt and vinegar, and use them to grow crystals by creating a solution and allowing the liquids to evaporate.  These crystals can be dyed with food coloring, so you can grow yourself a rainbow of small crystals overnight.


The first thing you need to do is gather your materials.  You will need:


Please login or register to read the rest of this content.

Please login or register to read the rest of this content.

Click here to go to next lesson on Desalination


We’re going to take two everyday materials, salt and vinegar, and use them to grow crystals by creating a solution and allowing the liquids to evaporate.  These crystals can be dyed with food coloring, so you can grow yourself a rainbow of small crystals overnight.


The first thing you need to do is gather your materials.  You will need:


Please login or register to read the rest of this content.

Please login or register to read the rest of this content.

Click here to go to next lesson on Rock Candy


There are different kinds of bonds that can form in a molecule. When two atoms approach each other close enough for their electron clods to interact, the electrons of one repels the electrons in the other, and the same thing happens within the nucleus of the atoms. At the same time, each atom’s negatively charged electron is attracted to the other atom’s positively charged nucleus. If the atoms still come closer, the attractive forces offset the repulsive and the energy of the atom decreases and bonds are formed – the atom sticks together. When the energy decrease is small, the bonds are van der Waals. When the energy decrease is larger, we have chemical bonds, either ionic or covalent.


Please login or register to read the rest of this content.

Click here to go to next lesson on Salt and Sugar Crystals


If you’ve ever had a shot, you know how cold your arm feels when the nurse swipes it with a pad of alcohol. What happened there? Well, alcohol is a liquid with a fairly low boiling point. In other words, it goes from liquid to gas at a fairly low temperature. The heat from your body is more then enough to make the alcohol evaporate.


As the alcohol went from liquid to gas it sucked heat out of your body. For things to evaporate, they must suck in heat from their surroundings to change state. As the alcohol evaporated you felt cold where the alcohol was. This is because the alcohol was sucking the heat energy out of that part of your body (heat was being transferred by conduction) and causing that part of your body to decrease in temperature.


As things condense (go from gas to liquid state) the opposite happens. Things release heat as they change to a liquid state. The water gas that condenses on your mirror actually increases the temperature of that mirror. This is why steam can be quite dangerous. Not only is it hot to begin with, but if it condenses on your skin it releases even more heat which can give you severe burns. Objects absorb heat when they melt and evaporate/boil. Objects release heat when they freeze and condense.


Do you remember when I said that heat and temperature are two different things? Heat is energy – it is thermal energy. It can be transferred from one object to another by conduction, convection, and radiation. We’re now going to explore heat capacity and specific heat. Here’s what you do:


Please login or register to read the rest of this content.

Click here for your next lesson on Triple Point.

They can have a thermal energy but they can’t have heat. Heat is really the transfer of thermal energy. Or, in other words, the movement of thermal energy from one object to another.


If you put an ice cube in a glass of lemonade, the ice cube melts. Which way does heat flow?


The thermal energy from your lemonade moves to the ice cube.


The movement of thermal energy is called heat. The ice cube receives heat from your lemonade. Your lemonade gives heat to the ice cube.


Please login or register to read the rest of this content.

Click here to go to next lesson on Measuring Heat.

Read the temperature from the thermometer… what do you get? This thermometer is reading in Celsius.


We’ll cover thermometers and the four temperature scales in a bit when we get to thermochemistry, but I just wanted to make sure we’re all on the same page when it comes to reading a thermometer, especially now that so many are digital and some kids may have not yet had the experience of reading a temperature scale.


Please login or register to read the rest of this content.

Click here to go to next lesson on What is Heat?.


First invented in the 1600s, thermometers measure temperature using a sensor (the bulb tip) and a scale. Temperature is a way of talking about, measuring, and comparing the thermal energy of objects. We use three different kinds of scales to measure temperature. Fahrenheit, Celsius, and Kelvin. (The fourth, Rankine, which is the absolute scale for Fahrenheit, is the one you’ll learn about in college.)


Mr. Fahrenheit, way back when (18th century) created a scale using a mercury thermometer to measure temperature. He marked 0° as the temperature ice melts in a tub of salt. (Ice melts at lower temperatures when it sits in salt. This is why we salt our driveways to get rid of ice). To standardize the higher point of his scale, he used the body temperature of his wife, 96°.


As you can tell, this wasn’t the most precise or useful measuring device. I can just imagine Mr. Fahrenheit, “Hmmm, something cold…something cold. I got it! Ice in salt. Good, okay there’s zero, excellent. Now, for something hot. Ummm, my wife! She always feels warm. Perfect, 96°. ” I hope he never tried to make a thermometer when she had a fever.


Just kidding, I’m sure he was very precise and careful, but it does seem kind of weird. Over time, the scale was made more precise and today body temperature is usually around 98.6°F.


Later, (still 18th century) Mr. Celsius came along and created his scale. He decided that he was going to use water as his standard. He chose the temperature that water freezes at as his 0° mark. He chose the temperature that water boils at as his 100° mark. From there, he put in 100 evenly spaced lines and a thermometer was born.


Last but not least Mr. Kelvin came along and wanted to create another scale. He said, I want my zero to be ZERO! So he chose absolute zero to be the zero on his scale.


Absolute zero is the theoretical temperature where molecules and atoms stop moving. They do not vibrate, jiggle or anything at absolute zero. In Celsius, absolute zero is -273 ° C. In Fahrenheit, absolute zero is -459°F (or 0°R). It doesn’t get colder than that!


As you can see, creating the temperature scales was really rather arbitrary:


“I think 0° is when water freezes with salt.”
“I think it’s just when water freezes.”
“Oh, yea, well I think it’s when atoms stop!”


Many of our measuring systems started rather arbitrarily and then, due to standardization over time, became the systems we use today. So that’s how temperature is measured, but what is temperature measuring?


Temperature is measuring thermal energy which is how fast the molecules in something are vibrating and moving. The higher the temperature something has, the faster the molecules are moving. Water at 34°F has molecules moving much more slowly than water at 150°F. Temperature is really a molecular speedometer.


Let’s make a quick thermometer so you can see how a thermometer actually works:


Please login or register to read the rest of this content.

Click here to go to next lesson on Temperature.

This experiment is for advanced students. There are many different elements inside of a star. But they are so far away that we can’t get close enough to study them… or can we? By studying the special light signature (called “spectral lines”) astronomers can figure out not only which element, but also the approximate temperature and density of the element within the star, in addition to getting an idea of what the magnetic fields look like, which tells us about stellar wing and what the planets might be doing around the star, or if there might be another companion star.


Spectroscopy is a very complicated science, so let’s get started by actually doing it, and we’ll figure out what’s going on along the way.


Please login or register to read the rest of this content.

Click here for Homework Problem Set #6

You’re going to try to determine what is happening during the flame test when you see different colors. Think about what particles are found in the chemicals you’re using, and why the different chemicals emit different colors of light? Where else have you seen colorful light emissions?


Please login or register to read the rest of this content.

Click here to go to next lesson on Spectral Chemical Analysis Part 2.

Ever play with a prism? When sunlight strikes the prism, it gets split into a rainbow of colors. Prisms un-mix the light into its different wavelengths (which you see as different colors). Diffraction gratings are tiny prisms stacked together.

When light passes through a diffraction grating, it splits (diffracts) the light into several beams traveling at different directions. If you’ve ever seen the ‘iridescence’ of a soap bubble, an insect shell, or on a pearl, you’ve seen nature’s diffraction gratings.

Scientist use these things to split incoming light so they can figure out what fuels a distant star is burning. When hydrogen burns, it gives off light, but not in all the colors of the rainbow, only very specific colors in red and blue. It’s like hydrogen’s own personal fingerprint, or light signature.

While this spectrometer isn't powerful enough to split starlight, it's perfect for using with the lights in your house, and even with an outdoor campfire.  Next time you're out on the town after dark, bring this with you to peek different types of lights - you'll be amazed how different they really are. You can use this spectrometer with your Colored Campfire Experiment also.

SPECIAL NOTE: This instrument is NOT for looking at the sun. Do NOT look directly at the sun. But you can point the tube at a sheet of paper that has the the sun’s reflected light on it.

Here's what you do:

Please login or register to read the rest of this content.

Click here to go to next lesson on Spectral Chemical Analysis.


Did you aim your razor slit at a light source such as a fluorescent light, neon sign, sunset, light bulb, computer screen, television, night light, candle, fireplace… ? Make sure that the diffraction grating does right up to your eye.  Move the spectrometer around until you can get the rainbow to be on the scale inside the tube.


Once you’ve got the hang of it, you might be wondering, wow – cool… but what am I looking at exactly? Ok – so those lines you saw inside the tube – those are spectral lines. Can you see how there are brighter lines? Which frequencies are those? Well we need a ruler to measure those. Can you see how if we lined up a ruler as could tell what the frequencies are?


Please login or register to read the rest of this content.

Click here to go to next lesson on simple.

spectrometer2
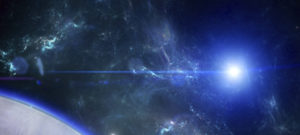
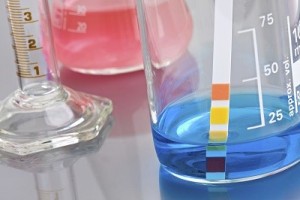
Spectrometers are used in chemistry and astronomy to measure light. In astronomy, we can find out about distant stars without ever traveling to them, because we can split the incoming light from the stars into their colors (or energies) and “read” what they are made up of (what gases they are burning) and thus determine their what they are made of. In this experiment, you’ll make a simple cardboard spectrometer that will be able to detect all kinds of interesting things!


SPECIAL NOTE: This instrument is NOT for looking at the sun. Do NOT look directly at the sun. But you can point the tube at a sheet of paper that has the sun’s reflected light on it.


Usually you need a specialized piece of material called a diffraction grating to make this instrument work, but instead of buying a fancy one, why not use one from around your house?  Diffraction gratings are found in insect (including butterfly) wings, bird feathers, and plant leaves.  While I don’t recommend using living things for this experiment, I do suggest using an old CD.


CDs are like a mirror with circular tracks that are very close together. The light is spread into a spectrum when it hits the tracks, and each color bends a little more than the last. To see the rainbow spectrum, you’ve got to adjust the CD and the position of your eye so the angles line up correctly (actually, the angles are perpendicular).


You’re looking for a spectrum (the rainbow image at left) – this is what you’ll see right on the CD itself. Depending on what you look at (neon signs, chandeliers, incandescent bulbs, fluorescent bulbs, Christmas lights…), you’ll see different colors of the rainbow. For more about how diffraction gratings work, click here.


Materials:


  • old CD
  • razor
  • index card
  • cardboard tube
Please login or register to read the rest of this content.

Click here to go to next lesson on Calibrated.


Glow sticks generate light with very little heat, just like the glow you see from fireflies, jellyfish, and a few species of fungi. Chemiluminescence means light that comes from a chemical reaction. When this happens in animals and plants, it’s called bioluminescence.


In a glow stick, when you bend it to activate it, you’re breaking a little glass tube inside which contains hydrogen peroxide (H2O2). The tube itself is filled with another chemical (phenyl oxalate ester and a fluorescent dye) that is kept separate from the H2O2, because as soon as they touch, they begin to react. The dye in the light stick is what gives the light its color.


Please login or register to read the rest of this content.

Click here to go to next lesson on Spectrometer.

Which one of these things you see on the screen now is radioactive? Most kids think that anything that glows must be radioactive, but it turns out that there’s a lot of things that glow that aren’t radioactive at all. Many minerals (called phosphors) glow after being exposed to sunlight which contains UV light. In 1897, Henri Becquerel was studying phosphorescence when he accidentally discovered radioactivity. Naturally radioactive elements emit energy without absorbing it first. Let me explain…


Cold light refers to the light from a glow stick, called luminescence. A chemical reaction (chemiluminescence) starts between two liquids, and the energy is released in the form of light. On the atomic scale, the energy from the reaction bumps the electron to a higher shell, and when it relaxes back down it emits a photon of light. Glow sticks generate light with very little heat, just like the glow you see from fireflies, jellyfish, and a few species of fungi. Chemiluminescence means light that comes from a chemical reaction.
Please login or register to read the rest of this content.


Click here to go to next lesson on Cold Light.

Photoelectric Effect
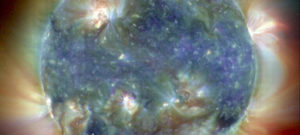
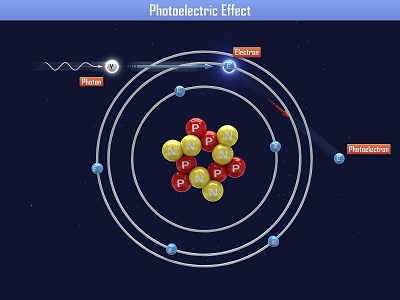
Einstein received a Nobel Prize for figuring out what happens when you shine blue light on a sheet of metal.  When he aimed a blue light on a metal plate, electrons shot off the surface. (Metals have electrons which are free to move around, which is why metals are electrically conductive. More on this in Unit 10).

When Einstein aimed a red light at the metal sheet, nothing happened.  Even when he cranked the intensity (brightness) of the red light, still nothing happened.  So it was the energy of the light (wavelength), not the number of photons (intensity) that made the electrons eject from the plate. This is called the ‘photoelectric effect’. Can you imagine what happens if we aim a UV light (which has even more energy than blue light) at the plate?

This photoelectric effect is used by all sorts of things today, including solar cells, electronic components, older types of television screens, video camera detectors, and night-vision goggles.

This photoelectric effect also causes the outer shell of orbiting spacecraft to develop an electric charge, which can wreck havoc on its internal computer systems.

A surprising find was back in the 1960s, when scientists discovered that moon dust levitated through the photoelectric effect. Sunlight hit the lunar dust, which became (slightly) electrically charged, and the dust would then lift up off the surface in thin, thread-like fountains of particles up ¾ of a mile high.

Please login or register to read the rest of this content.

Click here to go to next lesson on Fluorescence, Phosphorescence, and Chemiluminescence.


These are the scientific concepts students learn, separated by grade level according to both the national standards for science and Aurora’s personal experience in working with kids for nearly two decades. The scientific concepts are organized into categories within each grade level. You’ll find some areas span more than one grade level, so you will see some experiments listed for multiple grade levels.

PRE-K & K

Material properties, introduction to forces and motion, plants and animals, and basic principles of earth science.

First Grade

States of matter, weather, sound energy, light waves, and experimenting with the scientific method.

Second Grade

Chemical reactions, polymers, rocks and minerals, genetic traits, plant and animal life cycles, and Earth's resources.

Third Grade

Newton's law of motion, celestial objects, telescopes, measure the climate of the Earth and discover the microscopic world of life.

Fourth Grade

Electricity and magnetism, circuits and robotics, rocks and minerals, and the many different forms of energy.

Fifth Grade

Chemical elements and molecules, animal and plant biological functions, heat transfer, weather, planetary and solar astronomy.

Sixth Grade

Heat transfer, convetion currents, ecosystems, meteorology, simple machines, and alternative energy.

Seventh Grade

Cells, genetics, DNA, kinetic and potential, thermal energy, light and lasers, and biological structures.

Eighth Grade

Acceleration, forces projectile motion chemical reactions, deep space astronomy, and the periodic table.

High School (Advanced)

Alternative energy, astrophysics, robotics, chemistry, electronics, physics and more. For high school & advanced 5-8th students.

Teaching Resources

Tips and tricks to getting the science education results you want most for your students.

Science Fair Projects

Hovercraft, Light Speed, Fruit Batteries, Crystal Radios, R.O.V Underwater Robots and more!


This is a recording of a recent live class I did with an entire high school astronomy class. I've included it here so you can participate and learn, too! Light is energy that can travel through space. How much energy light has determines what kind of wave it is. It can be visible light, x-ray, radio, microwave, gamma or ultraviolet. The electromagnetic spectrum shows the different energies of light and how the energy relates to different frequencies, and that's exactly what we're going to cover in class. We're going to talk about light, what it is, how it moves, and it's generated, and learn how astronomers study the differences in light to tell a star's atmosphere from  millions of miles away. I usually give this presentation at sunset during my live workshops, so I inserted slides along with my talk so you could see the pictures better. This video below is long, so I highly recommend doing this with friends and a big bowl of popcorn. Ready? Please login or register to read the rest of this content.

Click here to go to next lesson on Photons and Energy.


Energy can take one of two forms: matter and light (called electromagnetic radiation). Light is energy that can travel through space. When you feel the warmth of the sun on your arm, that’s energy from the sun that traveled through space as infrared radiation (heat). When you see a tree or a bird, that’s light from the sun that traveled as visible light (red, orange… the whole rainbow) reflecting and bouncing off objects to get to your eye. Light can travel through objects sometimes… like the glass in a window.


Light can take the form of either a wave or a particle, depending on what you’re doing with it. It’s like a reversible coat – fleece on the inside, windbreaker on the outside. It can adapt to whatever environment you put it in.
Please login or register to read the rest of this content.


Click here to go to next lesson on Atomic spectra of hydrogen and energy levels.

This experiment is for advanced students. Here is another way to detect cosmic rays, only this time you’ll actually see the thin, threadlike vapor trails appear and disappear. These cobwebby trails are left by the particles within minutes of creating the detector. (Be sure to complete the Cosmic Ray Detector first!)


In space, there are powerful explosions (supernovas) and rapidly-spinning neutron stars (pulsars), both of which spew out high energy particles that zoom near the speed of light. Tons of these particles zip through our atmosphere each day. There are three types of particles: alpha, beta, and gamma.


Did you know that your household smoke alarm emits alpha particles? There’s a small bit (around 1/5000th of a gram) of Americium-241, which emits an alpha particle onto a detector. As long as the detector sees the alpha particle, the smoke alarm stays quiet. However, since alpha particles are easy to block, when smoke gets in the way and blocks the alpha particles from reaching the detector, you hear the smoke alarm scream.


Please login or register to read the rest of this content.

Click here to go to next lesson on Properties of light and study of waves.


Naturally radioactive elements emit energy without absorbing it first. Fluorescence for example – the atom absorbs a photon before emitting another photon. You have to “charge it up” or mix chemicals together before light comes out. With radioactive materials, they emit energy on their own, sometimes in the form of light, but sometimes they emit other particles. Let me explain.


Chemical reactions usually deal with only electron or atom exchanges. Nuclear reactions deal with changes inside the nucleus of an atom.
Please login or register to read the rest of this content.


Click here to go to next lesson on Alpha Particle Detector.

The periodic table is more like a filing cabinet that tells you everything about the structure of the atom, its properties and how it behave in chemical reactions. With just a quick glance, you will soon be able to tell how the electrons are organized around the nucleus and also predict how the atom will interact with others.


Please login or register to read the rest of this content.

Click here to go to next lesson on Ionization Energy.

Find the group (vertical column) 1A. These are alkali metals, and all react with water. Now hydrogen really isn’t part of this group – it should be detached and sitting up a little ways from the alkali metals. Anyway, each one of the alkali metals reacts with water, and the further you go down the column, the more explosive the reaction.


Please login or register to read the rest of this content.

Click here to go to next lesson on Table Arrangement based on Electronic Properties.


The number of electrons in the outermost shell tells you how reactive the atom is because it tells you how many it needs to feel full, or how many it can lose. Valence electrons are the highest energy and furthest out electrons. In general, elements are less reactive when their outermost shell is full.


Please login or register to read the rest of this content.

Click here to go to next lesson on Alkali Metals here.

Molecules are the building blocks of matter.


You’ve probably heard that before, right? But that does it mean? What does a molecule look like? How big are they?


While you technically can measure the size of a molecule, despite the fact it’s usually too small to do even with a regular microscope, what you can’t do is see an image of the molecule itself. The reason has to do with the limits of nature and wavelengths of light, not because our technology isn’t there yet, or we’re not smart enough to figure it out. Scientists have to get creative about the ways they do about measuring something that isn’t possible to see with the eyes.


Here’s a cool experiment you can do that will approximate the size of a molecule. Here’s what you need:


Please login or register to read the rest of this content.

Click here to go to next lesson on Valence electrons and Lewis dot structures.


One of the dreams of early chemists was to figure out how to transform lead into gold. Lead has 82 protons in its core whereas gold contains only 79. So conceivably all you’d need to do is remove three protons and presto! So how do you do that? Since protons can’t be stripped off with a chemical reaction, you need to smack it hard with something to knock off just the right amount. Lead, however, if a very stable element, so it’s going to require a lot of energy to remove three protons. How about a linear accelerator?


In a linear accelerator, a charged particle moves through a series of tubes that are charged by electrical and/or magnetic fields. The accelerated particle smacks the target, knocking free protons or neutrons and making a new element (or isotope). Glenn Seaborg (I actually met him!), 1951 Nobel Laureate in Chemistry, actually succeeded in transmuting a tiny quantity of lead into gold in 1980. He actually discovered (or helped discover) 10 elements on the periodic table, 100 new isotopes, and while he was still living (which usually doesn’t happen), they named an element after him (Seaborgium – 106).


Please login or register to read the rest of this content.

Click here to go to next lesson on Measure a Molecule.


The Bohr model is useful when we want to tell how reactive an element is, but it doesn’t really work to explain how the electrons are organized around the nucleus. The quantum model is the one used today by scientists.


Please login or register to read the rest of this content.

Click here to go to next lesson on Electron configuration.

Atoms are held together by bonds, and bonds take energy, so an atom that is bonded has less energy than if it was free floating around on its own. Energy is required to break a bond (bond energy). Energy is released when a bond is created. (We’ll use this idea again later when we talk about Lewis Dot structures.) Each molecule has its own bond energy which you can look up in a table in your chemistry book. For example, C-H bonds take about 100kcal of energy to break 1 mol of C-H bonds, so you’ll find bond energies listed in kcal per mol. If you look up C-C bonds, you’ll find 80 kcal/mol. And a double C-C bond is 145 kcal per mol.

Please login or register to read the rest of this content.

Click here for Homework Problem Set #5


A combustion reaction gives off energy, usually in the form of heat and light.  The reaction itself includes oxygen combining with another compound to form water, carbon dioxide, and other products.


A campfire is an example of wood and oxygen combining to create ash, smoke, and other gases. Here’s the reaction for the burning of methane (CH4) which gives carbon dioxide (CO2) and water (H2O):


Please login or register to read the rest of this content.

Click here to go to next lesson on Bond energies.


This experiment is for advanced students.


Zinc (Zn), is a metal and it is found as element #30 on the periodic table. We need a little zinc to keep our bodies balanced, but too much is very dangerous.


Zinc is just like the common, everyday substance that we all know as di-hydrogen monoxide (which is the chemical name for water). We need water to survive, but too much will kill us.


DHMO: In chemistry, “Di” equals the number 2; hydrogen is H; mono equals the number one; and oxide is derived from oxygen, and its symbol is O. Put these together and you have Di-hydrogen (H2), and mono oxygen (O). Put them together, what do you have? Water!


Please login or register to read the rest of this content.

Click here to go to next lesson on Fire Orange.


What state of matter is fire? Is it a liquid? I get that question a LOT, so let me clarify. The ancient scientists (Greek, Chinese… you name it) thought fire was a fundamental element. Earth, Air Water, and Fire (sometimes Space was added, and the Chinese actually omitted Air and substituted Wood and Metal instead) were thought to be the basic building blocks of everything, and named it an element. And it’s not a bad start, especially if you don’t have a microscope or access to the internet.


Today’s definition of an element comes from peeking inside the nucleus of an atom and counting up the protons. In a flame, there are lots of different molecules from NO, NO2, NO3, CO, CO2, O2, C… to name a few. So fire can’t be an element, because it’s made up of other elements. So, what is it?


Please login or register to read the rest of this content.

Click here to go to next lesson on Detonating Bubbles.


A combustion reaction gives off energy, usually in the form of heat and light.  The reaction itself includes oxygen combining with another compound to form water, carbon dioxide, and other products.


A campfire is an example of wood and oxygen combining to create ash, smoke, and other gases. Here’s the reaction for the burning of methane (CH4) which gives carbon dioxide (CO2) and water (H2O):
CH4 + 2 O2  CO2 + 2 H2O
Please login or register to read the rest of this content.


Click here to go to next lesson on What is Fire?

First Law of Thermodynamics: Energy is conserved. Energy is the ability to do work. Work is moving something against a force over a distance. Force is a push or a pull, like pulling a wagon or pushing a car. Energy cannot be created or destroyed, but can be transformed.


Materials: ball, string


Please login or register to read the rest of this content.

Click here to go to next lesson on 1st law of thermodynamics.

By knowing the value of the bond energy, we can predict if a chemical reaction will be exothermic or endothermic. If the bonds in the products are stronger than the bonds in the reactants, then the products are more stable and the reaction will give off heat (exothermic).


Exothermic chemical reactions release energy as heat, light, electrical or sound (or all four). Usually when someone says it’s an exothermic reaction, they usually just mean energy is being released as heat.


Some release heat gradually (for example, a disposable hand-warmer), while others are more explosive (like burning magnesium). The energy comes from breaking the bonds within the chemical reaction.


Please login or register to read the rest of this content.

Click here to go to next lesson on Hess’s Law.


Dissolving calcium chloride is highly exothermic, meaning that it gives off a lot of heat when mixed with water (the water can reach up to 140oF, so watch your hands!). The energy released comes from the bond energy of the calcium chloride atoms, and is actually electromagnetic energy.


When you combine the calcium chloride and sodium carbonate solutions, you form the new chemicals sodium chloride (table salt) and calcium carbonate. Both of these new chemicals are solids and “fall out” of the solution, or precipitate. If you find that there is still liquid in the final solution, you didn’t have quite a saturation solution of one (or both) initial solutions.


Please login or register to read the rest of this content.

Click here to go to next lesson on endo/exo reactions.

This experiment is for advanced students. Did you know that eating a single peanut will power your brain for 30 minutes? The energy in a peanut also produces a large amount of energy when burned in a flame, which can be used to boil water and measure energy.


Peanuts are part of the bean family, and actually grows underground (not from trees like almonds or walnuts).  In addition to your lunchtime sandwich, peanuts are also used in woman’s cosmetics, certain plastics, paint dyes, and also when making nitroglycerin.


What makes up a peanut?  Inside you’ll find a lot of fats (most of them unsaturated) and  antioxidants (as much as found in berries).  And more than half of all the peanuts Americans eat are produced in Alabama. We’re going to learn how to release the energy inside a peanut and how to measure it.


Please login or register to read the rest of this content.

Click here to go to next lesson on Endothermic and exothermic reactions.

This experiment is for advanced students. Did you know that eating a single peanut will power your brain for 30 minutes? The energy in a peanut also produces a large amount of energy when burned in a flame, which can be used to boil water and measure energy.


Peanuts are part of the bean family, and actually grows underground (not from trees like almonds or walnuts).  In addition to your lunchtime sandwich, peanuts are also used in woman’s cosmetics, certain plastics, paint dyes, and also when making nitroglycerin.


What makes up a peanut?  Inside you’ll find a lot of fats (most of them unsaturated) and  antioxidants (as much as found in berries).  And more than half of all the peanuts Americans eat are produced in Alabama. We’re going to learn how to release the energy inside a peanut and how to measure it.


Please login or register to read the rest of this content.

Click here to go to next lesson on Law of conservation of energy, work, and internal energy.


Do you remember when I said that heat and temperature are two different things? Heat is energy – it is thermal energy. It can be transferred from one object to another.


Here’s what you do:


  • Find your balloon.
  • Put the balloon under the faucet and fill the balloon with a couple of tablespoons of water. Not too much!
  • Now blow up the balloon and tie it, leaving the water in the balloon.
  • You should have an inflated balloon with a tablespoon or two of water at the bottom of it.
  • Have your adult helper carefully light the candle. Don’t do this next to your computer… do it in the sink.
  • Hold the balloon over the candle carefully for a couple of seconds.
  • Did it pop?
Please login or register to read the rest of this content.

Click here to go to next lesson on Fire Balloon.

If you’ve ever had a shot, you know how cold your arm feels when the nurse swipes it with a pad of alcohol. What happened there? Well, alcohol is a liquid with a fairly low boiling point. In other words, it goes from liquid to gas at a fairly low temperature. The heat from your body is more then enough to make the alcohol evaporate.


As the alcohol went from liquid to gas it sucked heat out of your body. For things to evaporate, they must suck in heat from their surroundings to change state. As the alcohol evaporated you felt cold where the alcohol was. This is because the alcohol was sucking the heat energy out of that part of your body (heat was being transferred by conduction) and causing that part of your body to decrease in temperature.


As things condense (go from gas to liquid state) the opposite happens. Things release heat as they change to a liquid state. The water gas that condenses on your mirror actually increases the temperature of that mirror. This is why steam can be quite dangerous. Not only is it hot to begin with, but if it condenses on your skin it releases even more heat which can give you severe burns. Objects absorb heat when they melt and evaporate/boil. Objects release heat when they freeze and condense.


Do you remember when I said that heat and temperature are two different things? Heat is energy – it is thermal energy. It can be transferred from one object to another by conduction, convection, and radiation. We’re now going to explore heat capacity and specific heat. Here’s what you do:


Please login or register to read the rest of this content.

Click here to go to next lesson on Energy from a peanut.


Is it hot where you live in the summer? What if I gave you a recipe for making ice cream that doesn’t require an expensive ice cream maker, hours of churning, and can be made to any flavor you can dream up? (Even dairy-free if needed?)


If you’ve got a backyard full of busy kids that seem to constantly be in motion, then this is the project for you.  The best part is, you don’t have to do any of the churning work… the kids will handle it all for you!


This experiment is simple to set up (it only requires a trip to the grocery store), quick to implement, and all you need to do guard the back door armed with a hose to douse the kids before they tramp back into the house afterward.


One of the secrets to making great ice cream quickly is Please login or register to read the rest of this content.


Click here to go to next lesson on Heat Capacity and Specific Heat.


You can think of enthalpy as the total potential energy of a system given by this equation:


ΔΔΔ(pV)  (U = internal energy, p = pressure, V = volume)


Since for most experiments, pressure is constant, that equation becomes:


ΔΔ+ pΔV


The heat transfer of a system is given by and it can be positive or negative. A hot cup of coffee on a cold morning is warmer than its environment, so heat will flow from the coffee to the cooler surrounding air, since heat always flows from hot to cold, so q is negative. If you have ice-cold lemonade on a hot day, heat flows from the environment to the lemonade, so is positive. The mathematical equation for heat is:


Δ− (W = work)


When you combine the equations to find the relationship between heat and enthalpy, you find that:


Δ= q  when pressure is constant. Now let’s learn how to use this equation in chemistry to find the energy in a chemical reaction.


Please login or register to read the rest of this content.

Thermal energy is how much the molecules are moving inside an object. The faster molecules move, the more thermal energy it has.


Objects whose molecules are moving very quickly are said to have high thermal energy or high temperature. Like a cloud of steam, for example. The higher the temperature, the faster the molecules are moving.
Please login or register to read the rest of this content.


Click here to go to next lesson on Make ice cream.