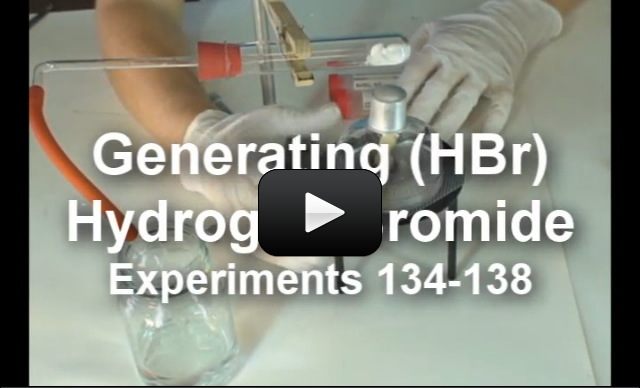
WARNING!! THIS EXPERIMENT IS PARTICULARLY DANGEROUS!! (No kidding.) This experiment is for advanced students.
We’ve created a video that shows you how to safely do this experiment, although if you’re nervous about doing this one, just watch the video and skip the actual experiment.
Bromine is a particularly nasty chemical, so be sure to very carefully follow the steps we’ve outlined in the video. You MUST do this experiment outdoors. We’ll be making a tiny amount to show how the chemical reactions involving bromine work.
[am4show have=’p8;p9;p11;p38;p92;p52;p91;’ guest_error=’Guest error message’ user_error=’User error message’ ]
Isn’t it interesting how many ways we can use the same techniques and, by just changing a few chemicals, we can learn about so many different chemical reactions? This lab is similar in technique to the Generating Hydrochloric Acid lab. Using the same techniques, we will produce hydrogen bromide.
Hydrogen bromide (HBr) was used as a sedative in the late 1800s and early 1900s. Once they found out how poisonous it really was (after enough people became blind and/or dead), someone had the wonderful idea that maybe we shouldn’t use it anymore. It was also used to control epilepsy until the substitute Phenobarbital came on the scene in 1911. HBr is still used to treat epilepsy in dogs. In cats HBr causes inflammation of the lungs and makes for a very unhappy cat.
Materials:
- Alcohol burner
- Lighter
- Wire screen
- Tripod stand
- Glass jar
- Rubber tubing
- 900 Glass tubing
- One-hole rubber stopper
- Chemistry stand
- Test tube holder
- Test tube
- Potassium bromide (KBr) (MSDS)
- Sodium hydrogen sulfate (NaHSO4) (MSDS) Sodium hydrogen sulfate is very toxic. Respect it, handle it carefully and responsibly. Do not take it for granted.
- Burette
- Water
- Sodium carbonate (Na2CO3) (MSDS)
- Silver nitrate (AgNO3) (MSDS)
NOTE: Be very careful when handling the sodium hydrogen sulfate – it’s highly corrosive and dangerous when wet. Handle this chemical only with gloves, and be sure to read over the MSDS before using.
Maintain good and proper lab techniques. We are working with some nasty stuff in this lab. We need to perform this lab outdoors if possible, or indoors with lots of ventilation. The reaction advances in stages:
- Bubbles in the burette tell us the reaction is occurring.
- Brown streaks will appear in the water contained in the glass jar as gas collects there.
- Brown vapor will begin to appear in the test tube. When the reaction is complete, the test tube will contain lots of brown vapor.
After we produce HBr, we will perform a number of tests to see if it is an acid or a base.
- Test contents of test tube with blue litmus paper. Red color change indicates an acid.
- Add baking soda to the HBr. Bubbles and the solution turning white. HBr is an acid in this test because it is obviously reacting with a base.
- If a magnesium strip placed in the HBr corrodes, or starts to dissolve, then HBr is an acid.
- With the addition of silver nitrate to the HBr, if a white cloudiness occurs and crystals form in the bottom of the test tube, then HBr is an acid.
C3000: Experiments 134-138
Download Student Worksheet & Exercises
Here’s what’s going on in this experiment:
KBr + NaHSO4 –> HBr + KNaSO4
Potassium bromide and sodium hydrogen sulfate, when heated, produce hydrogen bromide and potassium sodium sulfate.
Cleanup: We are going to clean everything thoroughly after we finish the lab. After cleaning with soap and water, rinse thoroughly. Chemists use the rule of “three” in cleaning glassware and tools. After washing, chemists rinse out all visible soap and then rinse three times more.
Storage: Place cleaned tools and glassware in their respective storage places.
Disposal: Liquids can be washed down the drain. Solids are thrown in the trash.
[/am4show]
You will need one for chemistry labs.
what if we dont have a alcohol burner thanks Tarlah (‘-‘)