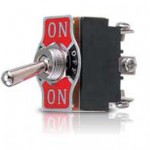
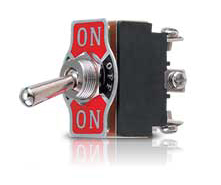
 Once you’ve made a a simple switch, you’re ready to use more advanced electrical components, such as the DPDT switch you picked up from an electronics store (refer to shopping list for this section). When you wire up this nifty device, you’ll be able to get your motors to go forward, reverse, and stop… all with the flip of a switch.
You can use this component along with a potentiometer so you can not only control the direction but also the speed of a motor, like in a robot or laser light show. And don’t feel limited on using this switch just with motors – it works with bi-polar LEDs and other things as well. For example, you can hook this up so that when it’s in the UP position, the buzzer sounds, and the DOWN position makes the headlights go on. Are you ready to learn how to wire this one up?
Please login or register to read the rest of this content.


I’m not sure what you mean. What did you want to put on different sides?
what if you put them on different sides.
The homemade switch provides a conductive path for electricity by moving the paperclip back and forth. Inside a real switch is a long piece of metal that provides a conductive path for electricity.
The long piece of metal works like a teeter totter you would find in a playground. The middle connection on the switch is like the support at the middle of the teeter totter. The lever (also called a toggle) on the outside of the switch moves the teeter totter up and down. This provides a conductive path from the middle connection of the switch to one side or the other…just like the homemade switch.
Since this experiment is an example of a DPDT switch, there are actually two separate metal teeter totters in this switch. They aren’t electrically connected to each other but they do move up and down at the same time.
How does the real switch relate to the home made switch besides all the wirers and what it does? how does it work?
Try re-watching the video so you can see how it’s done!
where would you hok the wires?
How about a thumbtack with a little hot glue on the pointy end after poking it through the paper?
what can you substitute for a brass-fastener?
Yes, it’s the same circuit – good eye! You want to use the same *wiring* but with a real switch, not paper (which will get soggy with your water robot) and brass fasteners.
canI use this for the r.o.v robot