Hans Lippershey was the first to peek through his invention of the refractor telescope in 1608, followed closely by Galileo (although Galileo used his telescope for astronomy and Lippershey’s was used for military purposes). Their telescopes used both convex and concave lenses.
A few years later, Kepler swung into the field and added his own ideas: he used two convex lenses (just like the ones in a hand-held magnifier), and his design the one we still use today. We're going to make a simple microscope and telescope using two lenses, the same way Kepler did. Only our lenses today are much better quality than the ones he had back then!
You can tell a convex from a concave lens by running your fingers gently over the surface – do you feel a “bump” in the middle of your hand magnifying lens? You can also gently lay the edge of a business card (which is very straight and softer than a ruler) on the lens to see how it doesn't lay flat against the lens.
Your magnifier has a convex lens – meaning the glass (or plastic) is thicker in the center than around the edges. The image here shows how a convex lens can turn light to a new direction using refraction. You can read more about refraction here.
A microscope is very similar to the refractor telescope with one simple difference – where you place the focus point. Instead of bombarding you with words, let’s make a microscope right now so you can see for yourself how it all works together. Are you ready?
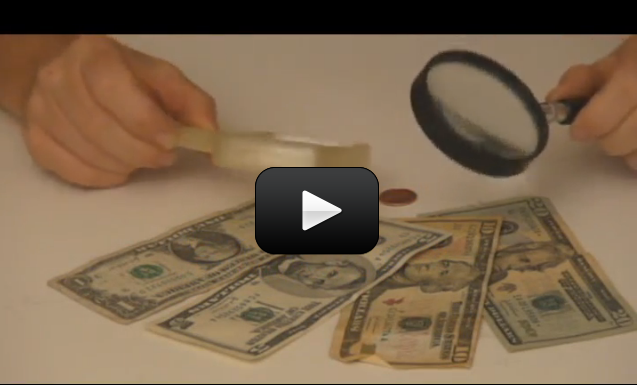
The penny used in this video shows the Lincoln Memorial. If you magnify the penny, you can see the statue of president Lincoln.
who was on the penny? i dont have two lenses
thanks
Anything under $100 for a microscope is going to be junk and frustrate you you enough to throw it away. I’d stick with a nice pair of binoculars (around $100-150) before buying a telescope to be sure you’re really ready for one. The minimum for a telescope is around $400-600. Usually your local astronomy club will have “loaner” scopes for you to take home and test out before you buy one if you are a member of their club.
how much is the investment
You can find my microscope recommendations here: https://www.sciencelearningspace2.com/category/unit-16-life-science-part-1/microscopes/microscopes-shop-list/ And yes, it’s an investment. You can also sell it when you’re done to minimize the cost. If you get anything under $100, chances are very good that it’s a waste of money and will frustrate your students and turn them off to science even more.
we are in the price range of 50$ do you khow any good microscope recmondations for our price range??????????????
I’ve have my team connect with you!
When will the suppies that come with the prtogram come?
If the glass is curved, like a magnifier, you’ll be able to see a flipped image when you place it after the focal point. Can you describe it a little more if that’s not quite what you had in mind?
We did something at a friend’s house once and I don’t know quite remember how it went but we could see the writing of something upside down when it was placed on the other side of a glass. Do you know how to do that experiment?
Yes – hand them a silverware spoon and tell them to find their reflection in it. On one side, they’ll see their face right-side up, and the other upside down. It was to do with the way the mirrored surface is curved.
Now jump to this experiment on Light and Optics – do you see where it says ‘Mirrors’? You can use a simple piece of soft foam with skewers in it to show how the light changes depending on the mirror surface. The foam is the ‘mirror’ and the skewers are the ‘light rays’. Ask your child to show you how this model is just like the spoon. By having them explain it back to you, you’ll be able to see how much of this concept makes sense to them.
A reflector (Newtonian) telescope uses a mirror just like the inside of the spoon, which flips the image. The secondary mirror is a small, flat mirror used to redirect the image to your eye. Does that help? Let me know how it goes!
I’m intrigued by the image flipping when used as a telescope. Is there any explanation I can give to my child to help understand this?
We have the exact same microscope as in the picture.