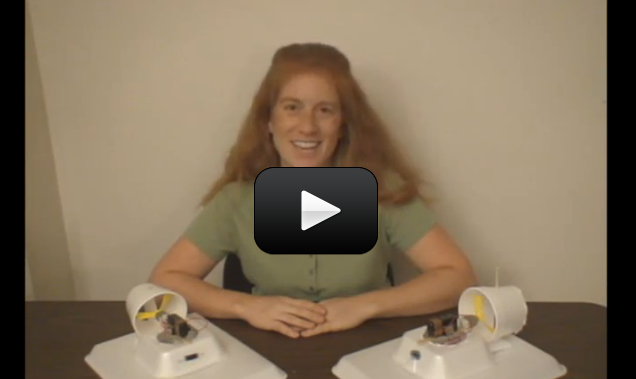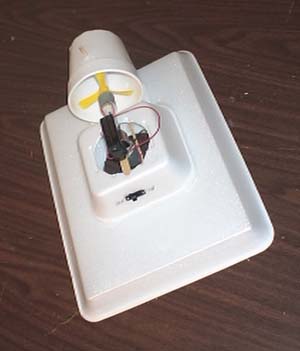
Hovercraft transport people and their stuff across ice, grass, swamp, water, and land. Also known as the Air Cushioned Vehicle (ACV), these machines use air to greatly reduce the sliding friction between the bottom of the vehicle (the skirt) and the ground. This is a great example of how lubrication works – most people think of oil as the only way to reduce sliding friction, but gases work well if done right.
In this case, the readily-available air is shoved downward by the hover motor and the skirt traps the air and keeps it inside, thus lifting the vehicle slightly. The thruster motor’s job is to propel the craft forward. Most hovercraft use either two motors (one on each side) for steering, or just one with a rudder that can deflect the flow (as your project does).
The first hovercraft were thought about in the 1800s, but it wasn’t until the 1950s that real ones were first tested. Today, the military use them for patrolling hard-to-drive areas, scientists use them for swamp research studies, and businesses use them to transport toys and food across rough and icy areas. Scientists are already planning future ACVs to use magnetic levitation in addition to the air power… but it’s still on the drawing board.
Are you ready to make your own? We have TWO different models to choose from. Click this link for the Easy Balloon-Powered Model, or keep reading below for the advanced version.
[am4show have=’p8;p9;p11;p38;p72;p76;p92;’ guest_error=’Guest error message’ user_error=’User error message’ ]
You will need:
- 1 wood skewer
- 1 wood popsicle stick
- 1 straw
- 16 oz. styrofoam cup (the kind used for sodas). Note that waxed paper cups will not work!
- 1 foam hamburger container (the one in the video is 5.5″ square and 3″ high when closed)
- 1 foam meat tray (the one in the video is approx. 10″x12″x1″ – it does not need to be these exact dimensions – try a few different sizes out to see what happens! You can get them for free if you ask for a clean one from your butcher.
- Two 3VDC motors (use this motor for the thruster and this motor for the hover motor)
- 2 propellers (the ones in the video are 3″ diameter, so check your local hobby store and get a variety to test out) – read comments below for ideas on where to get props!
- 9V battery clip with wires
- 9V battery (get a good kind, like Duracell or Energizer)
- 9V battery holder (looks like a “C”) OR use tape to attach the battery to your hovercraft
- a couple of extra wires (speaker wire, alligator clips, etc.)
- 1 SPST switch
Download Student Worksheet & Exercises
- First, we’ll work to make the hovercraft hover. Start by finding the center of the Styrofoam meat tray. This will be your base.
- Use the ruler to measure the diameter of your cup to make sure it’s 3.5 inches. If it measures correctly, use the cup and pen to draw a circle in the middle of the tray
- Carefully cut out the circle, supporting the bottom of the foam.
- Cut your skewer into three pieces, making sure they are longer than the cut-out circle is wide.
- Use the hot glue gun to attach the lip of the round motor onto the skewer pieces, keeping them as parallel as possible.
- Gently attach the skewers onto the foam.
- Attach a propeller onto the shaft of the motor which is now attached to the skewers and foam tray.
- Now we will work with the takeout container. Open it and cut it in half and place one half to the side.
- Check the diameter of the bottom of the foam cup to ensure it’s about 2 ¼ inches. Then you can trace it with a pen on the top of the hamburger container half.
- Cut out the circle and discard it.
- Using the slide switch as a guide, cut out a small rectangle in the front for the switch. Reinforce it with hot glue, being careful to NOT get hot glue in the switch. Make sure it still slides back and forth.
- Rest the hamburger half on top – we aren’t going to attach it just yet.
- Find the small motor and look for the small contacts (they are very small and fragile – they are copper and look a little like foil). Gently bend them up a little in the back.
- Hot glue the motor onto the end of the popsicle stick with the shaft pointing away from the stick and the contacts pointing up.
- Use hot glue to secure the stick across the top of the hole in the hamburger box.
- Attach a propeller and give it a spin to make sure it will spin.
- Find the 9-volt battery clip and hot glue the bottom of it onto the middle of the popsicle stick.
- Cut your wire into two equal length pieces. Remove the insulation from the ends (about ¾ of an inch to an inch – get adult help if you need it). Twist the exposed wires together. Do this for both wires.
- If you aren’t going to solder the project, you’ll need to cut off the metal ends of the 9 volt battery clip’s wires and strip the wire insulation. Twist these wires together as well.
- Now we’ll work on wiring the inside motor. Take the end of one wire and put it halfway through one of the posts. Bend it up and twist it around itself very well to ensure it’s connected well. Do this with the other wire and connection.
- One of these wires will go to the switch. Thread the wire through a tab and twist it around itself.
- Attach the black wire from your 9-volt battery clip to the other tab on the switch.
- Thread your remaining wires (the red one from the battery clip and the remaining red wire from the first, hovering motor) up through the hamburger tray to attach them to the second motor. This is the thruster motor.
- Now that everything is wired, glue the hamburger tray to the bottom tray by placing hot glue at each of the four corners and pressing down gently.
- To test, grab your 9-volt battery. Check to make sure everything is wired correctly – the hovercraft should hover, not be sucked down to the table, and you should feel air blowing if you hold your hand in front of the thruster motor. Switch the appropriate wires if you note any issues during testing.
- Now we’ll build a shroud around the thruster motor. You’ll need the cup, the last piece of wooden skewer, the straw, and the remaining big piece of foam. Measure about halfway down the cup and cut it all the way around – essentially cutting it in half. You’ll be using the top of the cup – the cuff-like portion. It should fit around the propeller.
- Starting on the cut side of the foam, cut out a rectangle to use as a shim. Hot glue the rectangle down to the hovercraft. Then hot glue the cup cuff down to the rectangle.
- If the propeller is hitting the Styrofoam, you can move the cup around and hot glue as needed to make sure there is room for movement.
- Make a vein from a rectangular piece of Styrofoam that fits inside the cup cuff.
- Glue the straw onto the long end of this piece and trim the straw down. The wooden skewer should fit right through the straw.
- Push the wooden skewer down through the top of the cup. Pierce the bottom of the cup but DO NOT pierce the bottom of the hovercraft.
- Put the straw and Styrofoam piece in, and then thread the skewer back down through the straw.
- Troubleshooting: make sure the bottom of the hovercraft – the tray’s lip – is as smooth as possible. You can sand it down lightly if you need to. You’ll need a clean, smooth, flat surface to hover on as well! You might also double check the motor directions. If necessary, you can lightly weigh down the front of the hovercraft to balance out the weight from the back.
- Modification: Once the hovercraft is operational, you can hot glue foam tubing to the bottom to make a water hovercraft. However, it will no longer work on land!
Exercises:
1. What happens if you use a larger meat tray?
2. Add another 9V battery?
3. se a 12VDC motor for the 3VDC motor?
4. Remove the battery pack entirely and add longer wires so you can hold the battery in your hand as the hovercraft zooms down the hallway?
[/am4show]
Yep, this is related to maglev. However, the concept of combining air cushions with maglev is a newer concept.
“Scientists are already planning future ACVs to use magnetic levitation in addition to the air power… but it’s still on the drawing board.”
Is that different from Maglev that has been in use since 1984? If different how?
This kit is included with the Science Mastery Diamond program that we offer.
https://www.superchargedscience.com/shop/science-mastery/
How do I get the kit?
Yes, its okay if both motors are round. You just need to be sure to secure them against the foam. For the foam tray, you can check with the butcher counter as your grocery store. They’ll often just give you one.
Aurora, I lost the package [with the hovercraft props] that comes with our 2nd month of enrollment. HELP.
Is it okay if both of my motors are round? Also, where can I get the meat tray? Getting a 2-hotdog deal
and a shake from Cookout provided me with the foam [hamburger] container and the 16-oz cup.
Feel free to substitute anything you have on hand, just keep it lightweight and easy to work with.
What if I don’t have those pieces