 We’re going to continue our adventure in biology with this next set of videos and experiments. The materials you need for this set is already included in the shopping list on the previous page. If you need to jump to the next section, please use the links below:
Lesson 14: Bioluminescence
Lesson 15: Cool Blue Light experiment
Lesson 16: Ecosystems
Lesson 17: Terra Aqua experiment
Lesson 18: Astrobiology
Lesson 19: Cells
Lesson 20: Measuring the Size of a Molecule Experiment
Lesson 21: Osmosis
Lesson 22: Carrot Osmosis experiment
Lesson 23: DNA
Quick Links:
Biology Part 1
Biology Part 3
[am4show have=’p154;’ guest_error=’Guest error message’ user_error=’User error message’ ]
Lesson 14: Bioluminescence
Bioluminescence is when a living organism produces (and emits) light. It’s a form of chemiluminescence, and it’s everywhere in biology!
Lesson 15: Cool Blue Light experiment
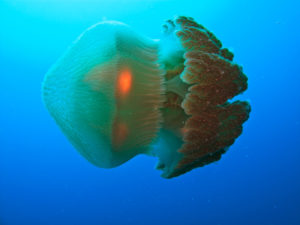
Glow sticks generate light with very little heat, just like the glow you see from fireflies, jellyfish, and a few species of fungi. Chemiluminescence means light that comes from a chemical reaction. When this happens in animals and plants, it’s called bioluminescence.
In a glow stick, when you bend it to activate it, you’re breaking a little glass tube inside which contains hydrogen peroxide (H2O2). The tube itself is filled with another chemical (phenyl oxalate ester and a fluorescent dye) that is kept separate from the H2O2, because as soon as they touch, they begin to react. The dye in the light stick is what gives the light its color.
Materials:
- Cool Blue Light Kit
- Corroded Penny
- Paper towels
- Water
You’ll need a really dark room to see this reaction take place, as the amount of light it gives off is low, but it’s still there! Allow your eyes to adjust to the darkness for about 10 minutes, and you’ll definitely see a blue glow in the liquid.
The light comes from the copper sulfate reacting with the luminol, and will continue until one of the reactants is used up.
Lesson 16: Ecosystems
Ecology studies nature and how the whole ecosystem works. An ecosystem is a community of interacting living things in their environment.
Lesson 17: Terra Aqua experiment
How does salt affect plant growth, like when we use salt to de-ice snowy winter roads? How does adding fertilizer to the soil help or hurt the plants? What type of soil best purifies the water? All these questions and more can be answered by building a terrarium-aquarium system to discover how these systems are connected together.
Here’s what you need:
- two 2-liter soda bottles, empty and clean
- two bottle caps
- scissors and razor with adult help
- tape
- water, soil, and plants
Here’s what you do:
Download Student Worksheet & Exercises
Water drips off the roof of your house, down your driveway, over your toothbrush and down the sink, through farm fields, and into rivers, lakes and oceans. While traveling, this water picks up litter, nutrients, salts, oil, and also gets purified by running through soil. All of this has an affect on fish and animals that live in the oceans. The question is, how does it affect the marine ecosystem? That’s what this experiment will help you discover.
Land and aquatic plants are excellent indicators of changes in your terraqua system. By using fast-germinating plats, you’ll see the changes in a relatively short about of time. You can also try grass seeds (lawn mixes are good, too), as well as radishes and beans. Pick seeds that have a life cycle of less than 45 days.
How to Care for your TAC (Terra-Aqua Column) EcoSystem:
- Keep the TAC out of direct sunlight.
- Keep your cotton ball very wet using only distilled water. Your plants and triops are very sensitive to the kind of water you use.
- Feed your triops once they hatch (see below for instructions)
- Keep an eye on plant and algae growth (see below for tips)
About the plants and animals in your TAC:
-
- Carnivorous plans are easy to grow in your TAC, as they prefer warm, boggy conditions, so here are a few tips: keep the TAC out of direct sunlight but in a well-lit room. Water should condense on the sides of the column, but if lots of black algae start growing on the soil and leaves, poke more air holes! Water your soil with distilled water, or you will burn the roots of your carnivorous plants. Trim your plants if they crowd your TAC.
- If you run out of fruit flies, place a few slices of banana or melon in an aluminum cup or milk jig lid at the bottom of a soda bottle (which has the top half cut off). Invert the top half and place it upside down into the bottom part so it looks like a funnel and seal with tape so the flies can’t escape. Make a hole in the cap small enough so only one fly can get through. The speed of a fruit fly’s life cycle (10-14 days) depends on the temperature range (75-80 degrees). Transfer the flies to your TAC. If you have too many fruit flies, discard the fruit by putting it outside (away from your trash cans) or flush it down the toilet.
- You can’t feed a praying mantis too much, and they must have water at all times. You can place 2-3 baby mantises in a TAC at one time with the fruit flies breeding below. When a mantis molts, it can get eaten by live crickets, so don’t feed if you see it begin to molt. When you see wings develop, they are done fully mature. Adult mantises will need crickets, houseflies, and roaches in addition to fruit flies.
- Baby triops will hatch in your TAC aquarium. The first day they do not need food. Crush a green and brown pellet and mix together. Feed your triop half of this mixture on the 2nd and the other half on the 4th day (no food on day 3). After a week, feed one pellet per day, alternating between green and brown pellets. You can also feed them shredded carrot or brine shrimp to grow them larger. If you need to add water (or if the water is too muddy), you can replace half the water with fresh, room temperature distilled water. You can add glowing beads when your triop is 5 days old so you can see them swimming at night (poke these through the access hole).
Lesson 18: Astrobiology
If you were an astrobiologist, you would be working with space scientists and marine biologists also, because you would need to understand how life works here on earth in extreme environments in order to help you understand what you find out there in space.
Lesson 19: Cells
Animals, plants and other living things look different, and contain many different kinds of cells, but when you get down to it, all of us are just a bunch of cells – and that makes cells pretty much the most important thing when it comes to life!
Lesson 20: Measuring the Size of a Molecule Experiment
Molecules are the building blocks of matter.
You’ve probably heard that before, right? But that does it mean? What does a molecule look like? How big are they?
While you technically can measure the size of a molecule, despite the fact it’s usually too small to do even with a regular microscope, what you can’t do is see an image of the molecule itself. The reason has to do with the limits of nature and wavelengths of light, not because our technology isn’t there yet, or we’re not smart enough to figure it out. Scientists have to get creative about the ways they do about measuring something that isn’t possible to see with the eyes.
Here’s a cool experiment you can do that will approximate the size of a molecule. Here’s what you need:
Materials:
-
-
- liquid dish soap
- chalk dust
- medicine dropper
- pie pan
- ruler
- water
- calculator
-
Download student worksheet and exercises here!
-
-
- Place water in the pie pan and sprinkle in the chalk dust. You want a light, even coating on the surface.
- Place dish soap inside the medicine dropper and hold it up.
- Squeeze the medicine dropper carefully and slowly so that a single drop forms at the tip. Don’t let it fall!
- Hold the ruler up and measure the drop. Record this in your data sheet.
- Hold the tip of the dropper over the pie pan near the surface and let it drop onto the water near the center of the pie pan.
- Watch it carefully as it spreads out to be one molecule thick!
- Quickly measure and record the diameter of the layer of the detergent on your data sheet.
- Use equations for sphere and cylinder volume to determine the height (which we assume to be one molecule thick) of the soap when it’s spread out. That’s the approximate width of the molecule!
-
Lesson 21: Osmosis
Osmosis is how water moves through a membrane. A carrot is made up of cells surrounded by cell membranes. The cell membrane’s job is to keep the cell parts protected. Water can pass through the membrane, but most things can’t.
Lesson 22: Carrot Osmosis experiment
The carrot itself is a type of root—it is responsible for conducting water from the soil to the plant. The carrot is made of cells. Cells are mostly water, but they are filled with other substances too (organelles, the nucleus, etc).
We’re going to do two experiments on a carrot: first we’re going to figure out how to move water into the cells of a carrot. Second, we’ll look at how to move water within the carrot and trace it. Last, we’ll learn how to get water to move out of the carrot. And all this has to do with cells!
Osmosis is how water moves through a membrane. A carrot is made up of cells surrounded by cell membranes. The cell membrane’s job is to keep the cell parts protected. Water can pass through the membrane, but most things can’t.
And water always moves through cell membranes towards higher chemical concentrations. For example, a carrot sitting in salt water causes the water to move into the salty water. The water moves because it’s trying to equalize the amount of water on both the inside and outside of the membrane. The act of salt will draw water out of the carrot, and as more cells lose water, the carrot becomes soft and flexible instead of crunchy and stiff.
You can reverse this process by sticking the carrot into fresh water. The water in the cup can diffuse through the membrane and into the carrot’s cells. If you tie a string around the carrot, you’ll be able to see the effect more clearly! Here’s what you do:
Download Student Worksheet & Exercises
Experiment #1: Water moving INTO the carrot via osmosis and UP the carrot.
In this experiment we will see the absorption of water by a carrot. Make note of differences between the carrot before the experiment, and the carrot afterward.
Materials
-
-
- 2 carrots
- Sharp knife (be careful!)
- Cutting board
- Glass
- Water
- Food coloring
-
Procedure :
Step 1: Cut the tip off of a carrot (with adult supervision).
Step 2: Place the carrot in a glass half full of water
Step 3: Place the carrot somewhere where it can get some sunshine.
Step 4: Observe the carrot over several days.
What’s going on?
When surrounded by pure water, the concentration of water outside the carrot cells is greater than the concentration inside. Osmosis makes water move from greater concentrations to lesser concentrations. This is why the carrot grows in size—it fills with water!
Procedure:
Step 1: Re-do the four steps above in a new cup, and this time put several (10-12) drops of food coloring into the water.
Step 2: With the help of an adult, cut the carrot in half length-wise.
What’s going on?
Carrots are roots. They conduct water from the soil to the plant. If we were to repeat this experiment several times—first cutting the carrot at half a day, then one day, then one day and a half, etc—we would see the movement of the water up the root.
Experiment #2: Water moving OUT of the carrot via osmosis
In this experiment we answer the question “what if the concentration of water is greater inside the carrot?”
Materials
-
-
- Large carrot
- 3 tablespoons of salt
- Two glasses
- String
- water
-
Procedure
Step 1: Snap the carrot in half and tie a piece of string around each piece of carrot (make sure they’re tied tightly).
Step 2: Place each half in a glass half full of warm water.
Step 3: In one of the glasses, dissolve the salt.
Step 4: Leave overnight.
Step 5: The next morning pull on the strings. What do you observe?
What’s going on?
The salt-water carrot shrunk while the non-salt-water carrot bloated!
This is because of osmosis. Carrots are made up of cells. Cells are full of water. When the concentration of water outside the cell is greater than the concentration of water inside the cell, the water flows into the cell. This is why the non-salt-water carrot bloated—the concentration was greater outside the cell than inside. The concentration of water was greater inside the salt-water carrot than outside (because there was so much salt!) so the water flowed out of the cell. This made the salt-water carrot shrink.
Questions to Ask:
-
-
- What happens if you try different vegetables besides carrots?
- How do you think this relates to people? Do we really need to drink 8 glasses of water a day?
- What happens (on the osmosis scale) if humans don’t drink water?
- Use your compound microscope to look at a sample and draw the cells (both before and after taking a bath in the solution) in your science journal.
- What did you expect to happen to the string? What really happened to the string?
- Which solution made the carrot rubbery? Why?
- Did you notice a change in the cell size, shape, or other feature when soaked in salt water? (Check your journal!)
- Why did we bother tying a string? Would a rubber band have worked?
- What would happen to a surfer who spent all day in the ocean without drinking water?
- What do you expect to happen to human blood cells if they were placed in a beaker of salt water?
-
Lesson 23: DNA
We are all made of trillions of cells, and each cell as a job to do, like detecting light, sensing touch, carry oxygen, digest food… there are over 200 different jobs just in your own body alone for cells to do! DNA are the instructions that tell cells what their job is.
Click Here to go to Next Lesson!
[/am4show]