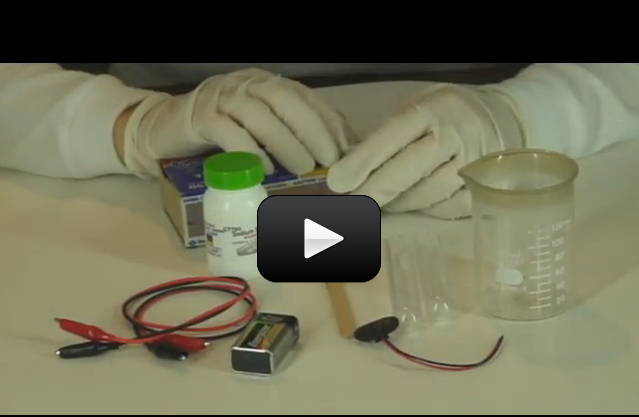
This is a recording of a recent live teleclass I did with thousands of kids from all over the world. I’ve included it here so you can participate and learn, too! (Click here if you’re looking for the more recent version that also includes Chemical Engineering.)


When you think of slime, do you imagine slugs, snails, and puppy kisses? Or does the science fiction film The Blob come to mind? Any way you picture it, slime is definitely slippery, slithery, and just plain icky — and a perfect forum for learning real science. But which ingredients work in making a truly slimy concoction, and why do they work? Let’s take a closer look…


Materials:


  • Sodium tetraborate (also called “Borax” – it’s a laundry whitener) – about 2 tablespoons
  • Clear glue or white glue (clear works better if you can find it) – about 1/2 cup
  • Yellow highlighter
  • Pliers or sharp razor (with adult help). (PREPARE: Use this to get the end off your highlighter before class starts so you can extract the ink-soaked felt inside. Leave the felt inside highlighter with the end loosely on (so it doesn’t dry out))
  • Resuable Instant Hand Warmer that contains sodium acetate (Brand Name: EZ Hand Warmer) – you’ll need two of these
  • Scissors
  • Glass half full of COLD water (PREPARE: put this in the fridge overnight)
  • Mixing bowl full of ice (PREPARE: leave in freezer)
  • Salt
  • Disposable aluminum pie place or foil-wrapped paper plate
  • Disposable cups for solutions (4-6)
  • Popsicle sticks for mixing (4-6)
  • Rubber gloves for your hands
  • Optional: If you want to see your experiments glow in the dark, you’ll need a fluorescent UV black light (about $10 from the pet store – look in cleaning supplies under “Urine-Off” for a fluorescent UV light). UV flashlights and UV LEDs will not work.


[am4show have=’p8;p9;p11;p38;p101;’ guest_error=’Guest error message’ user_error=’User error message’ ]


Key Concepts

If you’ve ever mixed together cornstarch and water, you know that you can get it to be both a liquid and a solid at the same time. (If you haven’t you should definitely try it! Use a 2:1 ratio of cornstarch:water.) The long molecular chains (polymers) are all tangled up when you scrunch them together (and the thing feels solid), but the polymers are so slick that as soon as you release the tension, they slide free (and drips between your fingers like a liquid).


Scientists call this a non-Newtonian fluid. You can also fill an empty water bottle or a plastic test tube half-full with this stuff and cap it. Notice that when you shake it hard, the slime turns into a solid and doesn’t slosh around the tube. When you rotate the tube slowly, it acts like a liquid.


Long, spaghetti-like chains of molecules (called polymers) don’t clump together until you cross-link the molecule strands (polymers) together into something that looks more like a fishnet. This is how we’re going to make slime.


What’s Going On?

Imagine a plate of spaghetti. The noodles slide around and don’t clump together, just like the long chains of molecules (called polymers) that make up slime. They slide around without getting tangled up. The pasta by itself (fresh from the boiling water) doesn’t hold together until you put the sauce on. Slime works the same way. Long, spaghetti-like chains of molecules don’t clump together until you add the sauce – something to cross-link the molecule strands together.


The borax mixture holds the glue mixture together in a gloppy, gelatinous mass. In more scientific terms, the sodium tetraborate cross-links the long polymer chains in the glue to form the slime.


Why does the slime glow? Note that a black light emits high-energy UV light. You can’t see this part of the spectrum (just as you can’t see infrared light, found in the beam emitted from the remote control to the TV), which is why “black lights” were named that. Stuff glows because fluorescent objects absorb the UV light and then spit light back out almost instantaneously. Some of the energy gets lost during that process, which changes the wavelength of the light, which makes this light visible and causes the material to appear to glow.


Questions to Ask

  1. What happens when you freeze your slime? Is there a color change?
  2. How long does it take to thaw your slime in the microwave?
  3. Do you see the little bubbles in your slime?
  4. How many states of matter do you have in your slime now?
  5. Does this work with any laundry detergent, or just borax?
  6. What happens if you omit the water in the 50-50- glue-water mixture, and just use straight glue? (Hint – use the glow juice with the borax to keep the glowing feature.)
  7. Does your slime pick up newsprint from a newspaper?
  8. What other kinds of glue work well with this slime?

[/am4show]


Chemistry is all about studying chemical reactions and the combinations of elements and molecules that combine to give new stuff.  Chemical reactions can be written down as a balanced equation that shows how much of each molecule and compound are needed for that particular reaction. Here’s how you do it:


[am4show have=’p9;p52;p91;’ guest_error=’Guest error message’ user_error=’User error message’ ]


[/am4show]


Chemical Data & Safe Handling Information Sheet

What do I really need to know first? First of all, the chemicals in this set should be stored out of reach of pets and children. Grab the chemicals right now and stuff them in a safe place where accidents can’t happen. Do this NOW!


If you haven’t already done so, make sure to watch the introductory video for the Intermediate Chemistry and Advanced Chemistry lessons. They contain important information about the chemicals and lab equipment you’ll be using. When you’re done storing your chemicals out of reach, watch this video:


[am4show have=’p8;p9;p25;p52;’ guest_error=’Guest error message’ user_error=’User error message’ ]


[/am4show]


You can go your whole life without paying any attention to the chemistry behind acids and bases. But you use acids and bases all the time! They are all around you. We identify acids and bases by measuring their pH.


Every liquid has a pH. If you pay particular attention to this lab, you will even be able to identify most acids and bases and understand why they do what they do. Acids range from very strong to very weak. The strongest acids will dissolve steel. The weakest acids are in your drink box. The strongest bases behave similarly. They can burn your skin or you can wash your hands with them.


Acid rain is one aspect of low pH that you can see every day if you look for it. This is a strange name, isn’t it? We get rained on all the time. If people were dissolving, if the rain made their skin smoke and burn, you’d think it would make headlines, wouldn’t you? The truth is acid rain is too weak to harm us except in very rare and localized conditions. But it’s hard on limestone buildings.


[am4show have=’p8;p9;p25;p52;p68;p80;’ guest_error=’Guest error message’ user_error=’User error message’ ]


Acids are liquids with a pH less than seven. A pH of seven is considered neutral. Bases are liquids with a pH greater than seven.


The combustion of fossil fuels such as oil, gasoline, and coal, create acid rain. Rain, normally at a pH of about 5.6, is always at least slightly acidic. Carbon dioxide is released into the air reacts with moisture in the air to form carbonic acid (HCO3). Sulfur dioxide and nitrogen oxides are released into the air by fossil fuel combustion. They react with the slightly acidic rain and form sulfuric acid (H2SO4) and nitric acid (HNO3).


We’re going to have fun with color changes in this experiment. We will make magic paper that changes color to tell us important things about liquids. It’s called litmus paper.


Litmus is harvested from a plant called a lichen, and bottled up as a powder. We’ll take the powder and make an acid-base indicator with it. Then we will use what we make to test solutions. And if you exercise your mind a bit, you will discover ways to use your litmus paper to discover things about the house and the world around you.


Materials:


  • Test tube rack
  • 2 Test tubes
  • Test tube stopper
  • Distilled water
  • Ruler
  • Litmus powder (MSDS)
  • Measuring spoon
  • Denatured alcohol (MSDS)
  • Pipette
  • Sodium carbonate (Na2CO3) (MSDS)
  • Sodium hydrogen sulfate (NaHSO4) (MSDS) Sodium hydrogen sulfate is very toxic. Respect it, handle it carefully and responsibly. Do not take it for granted.
  • Scissors
  • Filter paper (or paper towel or coffee filter)
  • Impervious surface

NOTE: Be very careful when handling the sodium hydrogen sulfate – it’s highly corrosive and dangerous when wet.  Handle this chemical only with gloves, and be sure to read over the MSDS before using.


We will be using a ruler to measure the amount of water in a test tube. Ordinarily, chemists use more accurate measurement tools than a ruler. For the first part of this lab, making litmus solution, all we need is an approximate volume of water.


We will also be shaking a liquid in a test tube. Ever leave the top of a blender off when the “on” button is depressed? If not, just believe that it’s not a good idea. There is a certain technique t use when shaking up a liquid. We’ll place a stopper on a test tube and shake vigorously. Remember to do that as a chemist would do.


In a laboratory, whenever a chemist stoppers a solution and shakes it, it will be done the same way no matter if it is a toxic substance or just salt and water. That way, they are in the habit of doing it one way, the right way, so a mistake is not made at any time. A mistake at the wrong time could even be fatal.


Stopper the test tube firmly. Seat it well, but don’t grind down on the stopper. A test tube is thin-walled glassware, and as we grip harder it could collapse in our hand and now we have open cuts, blood, and toxic chemical is now entering your bloodstream. Stoppered firmly, we hold the test tube in our hand and place our thumb over the stopper for added security. To top off our safety measures, point the test tube, with a thumb firmly on top, away from us or anyone else and shake to our heart’s content.


We need to be careful with our chemicals. After using a chemical, cap the container to prevent spillage and contamination. Clean everything thoroughly after you are finished with the lab, or if you are going to reuse a tool. To dip a measuring spoon into one chemical after another, contaminates the chemicals and will affect your results.


C1000: Experiments 1-10
C3000: Experiments 5-18


Download Student Worksheet & Exercises


Clean everything thoroughly after you are finished with the lab. After cleaning with soap and water, rinse thoroughly. Chemists use the rule of “three” in cleaning glassware and tools. After washing, chemists rinse out all visible soap and then rinse three times more.


Place all chemicals, cleaned tools, and glassware in their respective storage places.


Dispose of all solid waste in the garbage. Liquids can be washed down the drain with running water. Let the water run awhile to ensure that they have been diluted and sent downstream.


You can test how acidic different substances are with an acid-base indicator like litmus paper.


Using the litmus powder in the chemistry set, we will make litmus paper. Our litmus paper is going to start out blue, and will turn red when an acid is placed on it. You can turn it back to blue by placing a few drops of a basic solution on it.


Let’s look a little further into the chemistry behind acids and bases. An acid produces hydronium ions (example: H3O+) when dissolved in water. The + or notation on a molecule tells us that after a chemical reaction creates it, the molecule is left with a net positive (electrons have been lost) or net negative charge (electrons have been added). Now, the ion could have more than just a +1 or -1 charge. Often, we will discover molecules with positive or negative charges of 2, 3, or 4.


Every liquid has a pH, and some of them may surprise you. Fruits contain citric acid, malic acid, and ascorbic acids, and the distilled white vinegar in your kitchen is a weak form of acetic acid. You’ll find carbonic acids in sodas, and lactic acid in buttermilk. And remember that acids taste sour and bases taste bitter? Don’t taste your chemicals, but the sour taste of vinegar and lemons and the bitter taste of club soda water and baking soda are familiar to people.


Generally, acids are sour in taste, change litmus paper from blue to red, react with metals to produce a metal salt and hydrogen, react with bases to produce a salt and water, and conduct electricity. Strong acids often produce a stinging feeling on mucus membranes (don’t ever taste an acid, or any chemical for that matter!).


Acids are proton donors (they produce H+ ions). Strong acids and bases all have one thing in common: they break apart (completely dissociate) into ions when placed in water.  This means that once you dunk the acid molecule in water, it splits apart and does not exist as a whole molecule in water. Strong acids form H+ and an anion, such as sulfuric acid:


H2SO4 –> H++ HSO4


There are six strong acids:


  • hydrochloric acid (HCl)
  • nitric acid (HNO3) used in fireworks and explosives
  • sulfuric acid (H2SO4) which is the acid in your car battery
  • hydrobromic acid (HBr)
  • hydroiodic acid (HI)
  • perchloric acid (HClO4)

The record-holder for the world’s strongest acid are the carborane superacids (over a million times stronger than concentrated sulfuric acid). Carborane acids are not highly corrosive even though are super-strong. Here’s the difference between acid strength and corrosiveness: the carborane acid is quick to donate protons, making it a super-strong acid.  However, it not as reactive (negatively charged) as hydrofluoric (HF) acid, which is so corrosive that it will dissolve glass, many metals, and most plastics.


What makes the HF so corrosive is the highly reactive Fl ion. Even though HF is super-corrosive, it’s not a strong acid because it does not completely dissociate (break apart into H+ and Fl) in water. Do you see the difference? Weak acids only partly dissociate in water, such as acetic acid (CH3COOH).


On the other hand, bases taste bitter (again, don’t even think about putting these in your mouth!), feel slippery (don’t touch bases with your bare hands!), don’t change the color of litmus paper, but can turn red litmus back to blue, conduct electricity when in a solution, and react with acids to form salts and water. Soaps and detergents are usually bases, along with house cleaning products like ammonia.


Bases are also electron pair donors (they produce OH ions). Strong bases also completely dissociate into the OH (hydroxide ion) and a cation. LiOH (lithium hydroxide), NaOH (sodium hydroxide), KOH (potassium hydroxide), RbOH (rubidium hydroxide), CsOH (cesium hydroxide), Ca(OH)2 (calcium hydroxide), Sr(OH)2 (strontium hydroxide), and Ba(OH)2 (barium hydroxide).  Weak bases only partly dissociate in water, such as ammonia (NH3)


pH stands for “power of hydrogen” and is a measure of how acidic a substance is.  We can make homemade indicators to test how acidic (or basic) something is by squeezing out a special kind of juice (dye) called anthocyanin. Certain flowers have anthocyanin in their petals, which can change color depending on how acidic the soil is (hibiscus, hydrangeas, and marigolds for example).  The more acidic a substance, the more red the indicator will become.


Going Further

Experiment: What household items are acidic or basic? Test various liquids to see. You may be surprised. Liquids you should be sure to test are vinegar, lemon or orange juice, baking soda, and cola. Use a dropper to place drops onto the paper instead of dunking the strip into your entire carton of orange juice. Litmus flavored orange juice is not my first choice in the morning.


Experiment: Collect soil samples from various places. Not the types of plants growing in the immediate area you are sampling from. Place about an inch of dirt in the bottom of a test tube. Fill the test tube near the top with water. Use distilled water if you have it for more accuracy. Stopper the tube and shake vigorously. Use your pipette to place drops of the water on your litmus paper and see if the soil is acidic or basic. Is there a correlation between the acidity of the soil and the plants that grow there?


Note: Litmus paper will not be able to indicate how acidic the rain in your area is, because the acid content in the water droplet is not high enough to register on the indicator. The effects of acid rain take time to develop and require more sensitive equipment to detect. [/am4show]


Magnesium is one of the most common elements in the Earth’s crust. This alkaline earth metal is silvery white, and soft. As you perform this lab, think about why magnesium is used in emergency flares and fireworks. Farmers use it in fertilizers, pharmacists use it in laxatives and antacids, and engineers mix it with aluminum to create the BMW N52 6-cylinder magnesium engine block. Photographers used to use magnesium powder in the camera’s flash before xenon bulbs were available.


Most folks, however, equate magnesium with a burning white flame. Magnesium fires burn too hot to be extinguished using water, so most firefighters use sand or graphite.


We’re going to learn how to (safely) ignite a piece of magnesium in the first experiment, and next how to get energy from it by using it in a battery in the second experiment. Are you ready?


[am4show have=’p8;p9;p25;p52;p80;p91;’ guest_error=’Guest error message’ user_error=’User error message’ ]


Materials:


  • magnesium strip (MSDS)
  • matches with adult help
  • tile or concrete surface (something non-flammable)
  • gloves, goggles

Burning magnesium produces ultraviolet light. This isn’t good for your eyes, and the brightness of the flame is another danger for your eyes. Avoid looking directly into the flame.


Burning magnesium is so hot that if it gets on your skin it will burn to it and not come off. As difficult as burning magnesium is to put out, avoid letting the burning metal come in contact with you or anything else that might catch fire.


As explained later in this lab, magnesium burns in carbon dioxide. Therefore, a CO2 fire extinguisher won’t work to put it out. Water won’t work, CO2 won’t work. It takes a dry chemical fire extinguisher to put it out, or just wait for it to burn up completely on its own.


Magnesium is a metal, and in this experiment, you’ll find that some metals can burn. The magnesium in this first experiment combines with the oxygen in the air to produce a highly exothermic reaction (gives off heat and light). The ash left from this experiment is magnesium oxide:


2Mg (s) + O2 (g) –> 2Mg O (s)


Not all the magnesium from this experiment turned directly into the ash on the table – some of it transformed into the smoke that escaped into the air.


Caution: Do NOT look directly at the white flame (which also contains UV), and do NOT inhale the smoke from this experiment!


C3000: Experiment 52


Download Student Worksheet & Exercises


Here’s what’s going on in this experiment:


As you burn your magnesium, you will get your very own fireworks show….a little one, but still cool.


2Mg + O2 –> 2MgO


Magnesium burned in oxygen yields magnesium oxide. Because the temperature of burning magnesium is so high, small amounts of magnesium react with nitrogen in the air and produce magnesium nitride.


3Mg + N2 –> 2Mg3N2


Magnesium plus nitrogen yield magnesium nitride.  Magnesium will also burn in a beaker of dry ice instead of in air (oxygen).


2Mg + CO2 –> 2MgO + C


Magnesium burned in carbon dioxide yields magnesium oxide and carbon (ash, charcoal, etc.)


Cleanup: Rinse off and pat dry the rest of the magnesium strip.


Storage: Place everything back in its proper place in your chemistry set.


Disposal: Dispose of all solid waste in the garbage.


Magnesium Battery

Now let’s see how to make a battery using magnesium, table salt, copper wire, and sodium hydrogen sulfate (AKA sodium bisulfate).


Materials:


  • magnesium strip
  • test tube and rack
  • light bulb (from a flashlight)
  • 2 pieces of wire
  • measuring cup of water
  • salt (sodium chloride)
  • copper wire (no insulation, solid core)
  • measuring spoon
  • sodium hydrogen sulfate (NaHSO4) (MSDS) Sodium hydrogen sulfate is very toxic. Respect it, handle it carefully and responsibly. Do not take it for granted.
  • gloves, goggles

NOTE: Be very careful when handling the sodium hydrogen sulfate – it’s highly corrosive and dangerous when wet.  Handle this chemical only with gloves, and be sure to read over the MSDS before using.

C1000: Experiment 75
C3000: Experiment 295


We’re going to do another electrolysis experiment, but this time using magnesium instead of zinc. In the previous electrolysis experiment, we used electrical energy to start a chemical reaction, but this time we’re going to use chemical energy to generate electricity.  Using two electrodes, magnesium and copper, we can create a voltaic cell.


TIP: Use sandpaper to scuff up the surfaces of the copper and magnesium so they are fresh and oxide-free for this experiment.  And do this experiment in a DARK room.


How cool is it to generate electricity from a few strips of metal and salt water? Pretty neat! This is the way carbon-core batteries work (the super-cheap brands labeled ‘Heavy Duty’ are carbon-zinc or ‘dry cell’ batteries). However, in dry cell batteries scientists use a crumbly paste instead of a watery solution (hence the name) by mixing in additives.


In this chemical reaction, when the magnesium metal enters into the solution, it leaves 2 electrons behind and turns into a magnesium ion:


Oxidation: Mg (s) –> Mg2+(aq) + 2e


The magnesium strip takes on a negative charge (cathode), and the copper strip takes on a positive charge (anode).  The copper strip snatches up the electrons:


Reduction: Cu2+(aq) + 2e –> Cu (s)


and you have a flow of electrons that run through the wire from surplus (cathode) to shortage (anode), which lights up the bulb.


Note: You can substitute a zinc strip or aluminum strip for the magnesium strip and a carbon rod (from a pencil) for the copper wire.


Going further: You can expand on this experiment by substituting copper sulfate and a salt bridge to make a voltaic cell from two half-cells in Experiment 16.5 of the Illustrated Guide to Home Chemistry Experiments.


[/am4show]


In this lab, we’re going to investigate the wonders of electrochemistry. Electrochemistry became a new branch of chemistry in 1832, founded by Michael Faraday. Michael Faraday is considered the “father of electrochemistry”. The knowledge gained from his work has filtered down to this lab. YOU will be like Michael Faraday. I imagined he would have been overjoyed to do this lab and see the results. You are soooo lucky to be able to take an active part in this experiment. Here’s what you’re going to do…


You will be “creating” metallic copper from a solution of copper sulfate and water, and depositing it on a negative electrode. Copper is one of our more interesting elements. Copper is a metal, and element 29 on your periodic table. It conducts heat and electricity very well.


Many things around you are made of copper. Copper wire is used in electrical wiring. It has been used for centuries in the form of pipes to distribute water and other fluids in homes and in industry. The Statue of Liberty is a wonderful example of how beautiful 180,000 pounds of copper can be. Yes, it is made of copper, and no, it doesn’t look like a penny…..on the surface. The green color is copper oxide, which forms on the surface of copper exposed to air and water. The oxide is formed on the surface and does not attack the bulk of the copper. You could say that copper oxide protects the copper.


[am4show have=’p8;p9;p25;p52;’ guest_error=’Guest error message’ user_error=’User error message’ ]


Our bodies use copper to our advantage, but in a proper form that is not toxic. Too much copper will make you sick and could kill you. Remember…don’t eat your chemistry set!


Materials:


  • Carbon rod (MSDS)
  • Copper sulfate (CuSo4) (MSDS)
  • Aluminum foil
  • 9V battery with clip
  • 2 wires
  • Disposable cup
  • Water

You are going to make a saturated solution of copper sulfate (CuSO4) in water. Pour a measuring spoon of granulated copper sulfate in the measuring cup of water. Stir well. Continue adding a spoonful and stirring until no more crystals will go into solution. The solution is saturated when no more crystals will dissolve and there are undissolved crystals at the bottom of the container.


C1000: Experiment 74

C3000: Experiment 121, 289


Download Student Worksheet & Exercises


Here’s what’s going on in this experiment:


CuSO4 + H2O (Copper sulfate is added to water)


CuSO4 + H2O à Cu2+ + SO42- (Copper sulfate plus water yields positively charged carbon ion and negatively charged sulfate ion)


When mixed with water, copper sulfate dissociates into copper and sulfate ions. Notice that the ions, now separated, take on negative and positive charges.


Next, 9V of electricity is passed through the solution with an electrode of carbon and an electrode of aluminum foil inserted into the solution. As electricity flows from one electrode to another, the copper ions, being positively charged, are attracted to the negative electrode. You can confirm this in two ways. One, if litmus paper, held close to an electrode, turns blue, that is the negative electrode. The other way is to just follow the negative lead from the battery to the negative electrode.


As the process moves along, the negative electrode gains copper ions. Evidence of this is seen on the surface of the electrode.


Here’s the breakdown of the entire process:

When the copper sulfate (CuSO4) mixed with water (H2O), the copper sulfate dissociated:


CuSO4 –> Cu2+ + SO42-


When power is added to the solution, the copper ions move toward the negative cathode (carbon rod) and take electrons from it, forming solid copper right on the electrode:


Cu2++ 2e –> Cu(s)


On the positive anode (the aluminum foil), you’ll see bubbles instead of a solid forming. The anode attracted electrons from the water molecule to form oxygen bubbles:


6H2O –> O2 + 4H3O+ + 4e


Let’s put these two reactions together to get the overall reaction of:


2Cu2+ + 6H2O –> 2Cu + O2 + 4H3O+


Note the difference between galvanic cells and electrolytic cells: galvanic use spontaneous chemical reactions (like in a car battery) to generate electricity, and electrolytic cells use electricity to make the chemical reaction to occur and move electrons to move in a way they would go on their own (like in this experiment).


Clean up: Clean everything thoroughly after you are finished with the lab. After cleaning with soap and water, rinse thoroughly. Chemists use the rule of “three” in cleaning glassware and tools. Rinse three times, wash with soap, rinse three times.


Wipe off the carbon rod to remove the copper. The aluminum goes in the trash, but the solution and solids at the bottom cannot. The liquid contains copper, a toxic heavy metal that needs proper disposal and safety precautions. Another chemical reaction needs to be performed to remove the heavy metal from the copper sulfate.  Add a thumb sized piece of steel wool to the solution. The chemical reaction will pull out the copper out of the solution. The liquid can be washed down the drain. The solids cannot be washed down the drain, but they can be put in the trash. Use a little water to rinse the container free of the solids.


Place all chemicals, cleaned tools, and glassware in their respective storage places.


Dispose of all solid waste in the garbage. Liquids can be washed down the drain with running water. Let the water run awhile to ensure that they have been diluted and sent downstream.


Going Further

Here is a link to information about making your own geode (crystal lined rock) of copper sulfate crystals:


http://chemistry.about.com/od/growingcrystals/ht/geode.htm


[/am4show]


If we don’t have salt, we die. It’s that simple. The chemical formula for salt is NaCl. Broken down, we have Na (sodium) and Cl (chlorine). Either one of these can be fatal in sufficient quantities. When chemically combined, these two deadly elements become table salt. What once could kill now keeps us alive. Isn’t chemistry awesome?


Chlorine, element 17, is called a halogen as are all the elements in the 17th row. All halogens have similar chemical properties. They are highly reactive nonmetals, and react easily with most metals. Sodium is a metal, and is bonded with sodium in the table salt used in this lab. Besides being found in salt, chlorine has many uses in our world such as killing bacteria in our water, making plastic, cleaning products, and the list goes on. A very useful chemical, and is among the top ten chemicals produced in the United States. Ever since its discovery in 1774, chlorine has been very useful. It is found in nature in sodium chloride, but in very small concentrations. Seawater, the most abundant source of chlorine, has a concentration of only 19g of chlorine per liter.


[am4show have=’p8;p9;p25;p52;p91;’ guest_error=’Guest error message’ user_error=’User error message’ ]
Although chlorine is abundant in nature (about 2% of the mass of the ocean is chloride ions), scientists have developed a safe way to make chlorine. Chlorine has been manufactured for a hundred years through different processes: Membrane Cell, Diaphragm Cell, and Mercury Cell processes. In the first two processes, salt water (NaCl + H2O) and caustic soda (NaOH) are used along with a power supply to generate chlorine and hydrogen gas.


Molecules that contain chlorine that find their way into the upper atmosphere can destroy the ozone layer. The ozone-oxygen cycle is a chemical process that transforms the harmful UV light (240-310nm) from the sun into heat. The oxygen and ozone molecules are constantly being switched back and forth as the sun’s UV breaks down the ozone and the oxygen molecules reacts with other oxygen atoms.


This reaction converts UV radiation into thermal energy which heats up the atmosphere (this reaction happens slowly):


O3 –> O2 + O


If two free oxygen atoms meet, they form a new oxygen molecule:


2O –> O2


If this new molecule meets another free oxygen, it creates another ozone molecule:


O2 + O –> O3


If an ozone and an oxygen molecule meet, they form two oxygen, and this process removes ozone from the atmosphere. This process is very slow, however, so the naturally occurring reaction of:


O3 + O –> 2O2


is nothing to worry about. It’s when this reaction gets sped up by catalysts that we have to pay close attention. There are many catalysts that can speed up the removal of ozone, such as chlorine, bromine, and nitric oxide (NO3). And since they are catalysts in the reaction (meaning they simply speed up the reaction without getting used), they can do this over and over again before they move out of the atmosphere completely. One chlorine atom can speed up (catalyze) tens of thousands of ozone removal reactions before it moves out of the stratosphere. Scary, huh?


CFCs (chlorofluorocarbons) such as aerosols, refrigerants (R-12), and solvents have been banned because of their damaging effect on the atmosphere. When sunlight hits a CFC, it splits off a chlorine ion:


CCl3F –> CCl2F + Cl


This free chlorine ion catalyzes the ozone into oxygen:


O3 + O + Cl –> 2 O2 + Cl


The chlorine we’re going to generate in our experiment is a minuscule amount. Even so, it is still a good idea to perform this experiment in an area with good ventilation or outdoors.


Remember to wear your gloves and goggles. True, the amount of chlorine produced is small and pretty harmless. But there are several factors that make it prudent to wear your protection. Not everyone has the same sensitivity to chemicals. Even in this lab, a person could get their skin irritated to some degree. Eyes are very sensitive organs, and I know I don’t want any amount of chlorine contacting my eyes.


Here’s what you’re going to need to do this experiment:


Materials:


  • 9V battery clip
  • carbon rod
  • wires
  • disposable cup
  • salt
  • water
  • aluminum foil
  • gloves, goggles

We will be observing a decomposition reaction. A decomposition reaction separates a substance into two or more substances that may differ from each other and from the original substance.


ZcQr –> Zc + Qr


When separated, the free elements to the right of the equation become ions, one positively charged and one negatively charged.


A very important concept to learn in this lab is that charged particles (ions) will move toward either a positive or negative electrode. The ions that move toward the anode (positive terminal) are anions, and the ones that move toward the cathode (negative) are cations.


Decomposition of any kind is the breaking down of the whole into smaller parts that were once part of the whole.


Download Student Worksheet & Exercises


Here’s what’s going on in this experiment:


An electrical charge is passing through a saturated solution of salt (NaCl). It will sit there and just be salt unless that electrical charge is imposed on it. The electrical charge excites the molecules, and causes the molecules of salt to decompose, to pull apart, to break into simpler parts. These ions are negatively and positively charged. Negatively charges particles have more electrons than protons and seek a balance. In order to have an electric current, you need to have positive and negative electrodes. Opposites attract, so the negative ions move to the positive electrode and the positive ions are attracted to the negative electrode.


NaCl –> Na+ + Cl


Sodium chloride decomposes into sodium and chlorine ions.


The anode (positive, carbon rod) soaks up free electrons, which get pumped to the cathode (negative, aluminum foil) and released into the solution. If you press litmus paper against the aluminum strip, you’ll find it’s blue (basic), and red when pressed to the anode (carbon rod). The bubbles on the carbon rod are made of chlorine. The chlorine ions in the solution are attracted to the positive pole (carbon rod) and quickly combine to form chlorine gas:


2Cl –> Cl2


The sodium ions move toward the aluminum foil and split the water molecule into ions:


H2O –> H+ + OH


The hydrogen ions are converted into hydrogen gas:


2H+ –> H2


The sodium ions (Na+) that remain in the solution combine with the OH- ions to create sodium hydroxide which turns the litmus paper blue:


Na+ + OH –> NaOH


The main concept I want you to understand with this experiment is that charged particles (ions) will move toward either a positive or negative electrode. The ions that move toward the anode (positive terminal) are anions, and the ones that move toward the cathode (negative) are cations.


Before you dispose of the solution, try this variation on the experiment: remove the foil and hold a salt-water filled test tube (filled to the top with salt water and capped with a gloved thumb and submerged into the solution). Place the cathode wire into the tube and you’ll see bubbles rising up into the tube. What type of gas is it? (Hint: wait until the tube is nearly full before removing it and using a match to test.)


For C3000 Students: Use this experiment as the basis for Experiment 123.


Cleanup: Clean everything thoroughly after you are finished with the lab. After cleaning with soap and water, rinse thoroughly. Chemists use the rule of “three” in cleaning glassware and tools. After washing, chemists rinse out all visible soap and then rinse three times more.


Storage: Place all chemicals, cleaned tools, and glassware in their respective storage places.


Disposal: Dispose of all solid waste in the garbage. Liquids can be washed down the drain with running water. Let the water run awhile to ensure that they have been diluted and sent downstream.


[/am4show]


Electricity. Chemistry. Nothing in common, have nothing to do with each other. Wrong! Electrochemistry has been a fact since 1774. Once electricity was applied to particular solutions, changes occurred that scientists of the time did not expect.


In this lab, we will discover some of the same things that Farraday found over 300 years ago. We will be there as things tear apart, particles rush about, and the power of attraction is very strong. We’re not talking about dancing, we’re talking about something much more important and interesting….we’re talking about ELECTROCHEMISTRY!


[am4show have=’p8;p9;p25;p52;p91;’ guest_error=’Guest error message’ user_error=’User error message’ ]


Materials:


  • Test tube rack
  • 9V battery clip
  • 9V battery
  • Flashlight lamp
  • Gloves
  • Electrical wires
  • Aluminum foil
  • Water
  • Sugar
  • Salt
  • Sodium carbonate (MSDS)
  • Measuring spoon

When the salt sodium chloride (NaCl) mixes with water, it separates into its positively (Na+) and negatively (Cl-) charged particles (ions). When a substance mixes with water and separates into its positive and negative parts, it’s called a ‘salt’.


Salts can be any color of the rainbow, from the deep orange of potassium dichromate to the vivid purple of potassium permanganate to the inky black of manganese dioxide. Did you know that MSG (monosodium glutamate) is a salt? Most salts are not consumable, as in the lead poisoning you’d get if you ingested lead diacetate.


If you pass a current through the solution of salt and water, opposites attract: the positive ions are attracted tot he negative pole and the negative ions go toward the positive pole. These migrations ions allow electricity to flow, which is why ‘salt’ solutions conduct electricity.


C1000: Experiments 66-70


Download Student Worksheet & Exercises


Here’s what’s going on in this experiment:


Our experiment uses a saturated solution of table salt that is just sitting in a container minding its own business. That just won’t do! We must intervene. Our 9V battery pushes its voltage through the saltwater. That electric current tears the sodium from the chlorine. These positively and negatively charged ions rush about, looking for something they are attracted to. Opposites attract, so positively charged sodium ions find spending time with the negative electrode a treat. They are very happy together. Negatively charged chlorine ions are attracted to the positive electrode. The match is wonderful, and the negativity and the positivity somehow enjoy the time spent with each other.


NaCl –> Na+ + Cl


Sodium chloride decomposes into sodium and chlorine ions


Cleanup: Clean everything thoroughly after you are finished with the lab. After cleaning with soap and water, rinse thoroughly. Chemists use the rule of “three” in cleaning glassware and tools. After washing, chemists rinse out all visible soap and then rinse three times more.


Storage: Place all chemicals, cleaned tools, and glassware in their respective storage places.


Disposal: Dispose of all solid waste in the garbage. Liquids can be washed down the drain with running water. Let the water run awhile to ensure that they have been diluted and sent downstream.


[/am4show]


Ammonia has been used by doctors, farmers, chemists, alchemists, weightlifters, and our families since Roman times. Doctors revive unconscious patients, farmers use it in fertilizer, alchemists tried to use it to make gold, weightlifters sniff it into their lungs to invigorate their respiratory system and clear their heads prior to lifting tremendous loads. At home, ammonia is used to clean up the ketchup you spilled on the floor and never cleaned up.


The ammonia molecule (NH3) is a colorless gas with a strong odor – it’s the smell of freshly cleaned floors and windows. Mom is not cleaning with straight ammonia (it’s gas at room temperature because it boils at -28oF, so the stuff she cleans with is actually ammonium hydroxide, a solution of ammonia and water).  Ammonia is found when plans and animals decompose, and it’s also in rainwater, volcanoes, your kidneys (to neutralize excess acid), in the ocean, some fertilizers, in  Jupiter’s lower cloud decks, and trace amounts are found in our own atmosphere (it’s lighter than air).


[am4show have=’p8;p9;p25;p52;’ guest_error=’Guest error message’ user_error=’User error message’ ]


Ammonia is a strong base – it combines with acids to form salts:


NH3 + HCl –> NH4Cl


But ammonia also can act as a weak acid. Remember, an acid is a proton donor, as in this reaction with lithium, where the ammonia molecule donated one hydrogen atom:


2 Li + 2 NH3 –> 2 LiNH2 + H2


In this experiment, we make a stink and then we see something that will make us go ooooooh… and aaaaw. How fun is that? But you need to follow the instructions carefully and perform your experiment safely. Promise?


Ammonia will be generated by the combination of ammonium chloride and sodium carbonate. The amount of ammonia generated in this experiment is not a large amount. However, you really should experience this particular stink.


Materials:


  • 3 test tubes and rack
  • sodium carbonate (MSDS)
  • ammonium chloride (MSDS)
  • copper sulfate (MSDS)
  • sodium hydrogen sulfate (NaHSO4) (MSDS) Sodium hydrogen sulfate is very toxic. Respect it, handle it carefully and responsibly. Do not take it for granted.
  • water
  • test tube stopper
  • measuring spoon
  • gloves, goggles

NOTE: Be very careful when handling the sodium hydrogen sulfate – it’s highly corrosive and dangerous when wet.  Handle this chemical only with gloves, and be sure to read over the MSDS before using.


A chemical reaction is going to occur when the ammonium chloride, sodium chloride, and another chemical reaction is going to occur when the copper sulfate is added. These compounds are the reactants in our chemical reaction, and the blue liquid, CuCl (copper chloride), at the end of the experiment, will be our product. This experiment displays two types of reactions, a decomposition reaction when we combine ammonium chloride and sodium chloride, and a double replacement reaction when we add copper sulfate to the mixture.


C1000: Experiments 19-21


Download Student Worksheet & Exercises


When we combine ammonium chloride and sodium carbonate, ammonia will be produced. We will add copper sulfate to that mixture, producing two chemical compounds with totally different properties from those exhibited by the original chemicals.


Two chemical reactions will occur in this experiment:


(1)   When you add ammonium chloride and sodium chloride to the water, a decomposition reaction will occur that produces ammonia gas, carbon dioxide gas, and sodium chloride dissolved in water. It is identified as a decomposition reaction because the reactants breakdown into elements or simpler compounds.


NaHCO3 + 2NH4Cl –> NH3 + CO2 + NaCl + 2H2O


sodium carbonate + ammonium chloride –> ammonia + carbon dioxide + sodium chloride + water


(2)   The next reaction takes place when copper sulfate is added to the sodium chloride and water. The products of this reaction are sodium sulfate and copper chloride (the blue color). This reaction is identified as a double replacement reaction due to the fact that the two reactants break apart and recombine, the reactants trading parts, recombining to form two other different compounds with properties completely different than those of the reactants.


NaCl + CuSO4 –> NaSO4 + CuCl


sodium chloride + copper sulfate –> sodium sulfate + copper chloride


Big suggestion here: All chemical vapors are best experienced by “wafting”, a procedure that brings the vapor to you, instead of sticking your nose in the test tube, bringing you to the vapors. Please get in the habit of smelling properly. If ammonia vapors can bring unconscious people back to consciousness, you should probably make sure you are sniffing safely.


Reminder: Always wash your hands or gloves, and your chemistry tools, when switching from one chemical to another to avoid contamination that could affect the experiment adversely.


Store: Put all chemicals away in their proper places to keep them organized and ready to be used again. All tools should be put away as well, but make sure hat they have been cleaned and dried before storing them. A rule of thumb in chemistry is always wash something three times.


Disposal: Pour liquids down the drain using plenty of water. Throw solid waste into the outside garbage to prevent filling the house with bad smells.


[/am4show]


This experiment is just for advanced students. If you guessed that this has to do with electricity and chemistry, you’re right! But you might wonder how they work together. Back in 1800, William Nicholson and Johann Ritter were the first ones to split water into hydrogen and oxygen using electrolysis. (Soon afterward, Ritter went on to figure out electroplating.) They added energy in the form of an electric current into a cup of water and captured the bubbles forming into two separate cups, one for hydrogen and other for oxygen.

This experiment is not an easy one, so feel free to skip it if you need to. You don’t need to do this to get the concepts of this lesson but it’s such a neat and classical experiment (my students love it) so you can give it a try if you want to. The reason I like this is because what you are really doing in this experiment is ripping molecules apart and then later crashing them back together.

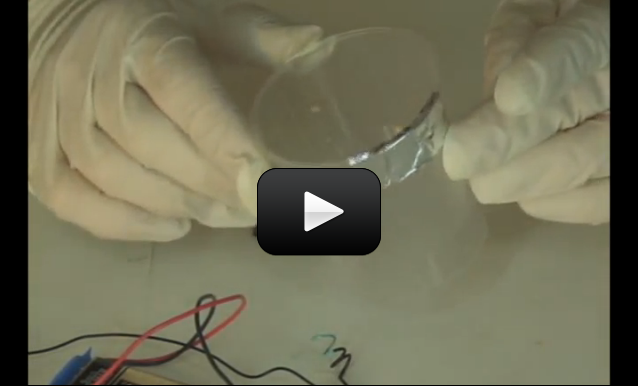
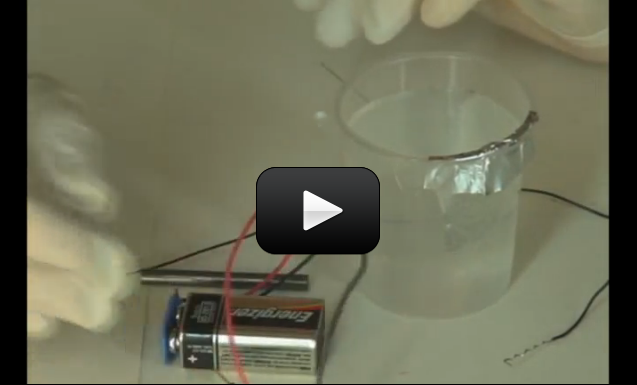
Have fun and please follow the directions carefully. This could be dangerous if you’re not careful. The image shown here is using graphite from two pencils sharpened on both ends, but the instructions below use wire.  Feel free to try both to see which types of electrodes provide the best results.

[am4show have='p8;p9;p11;p38;p92;p40;p76;p91;p58;' guest_error='Guest error message' user_error='User error message' ]

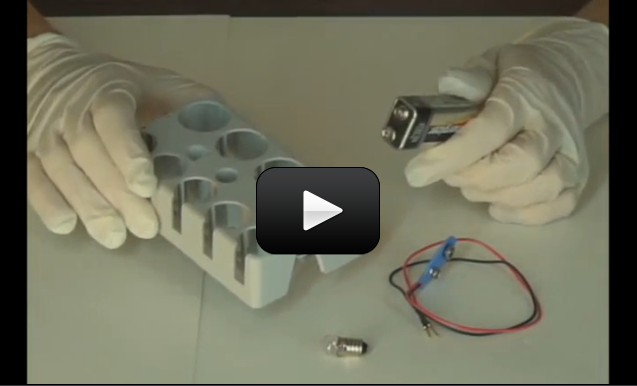
You will need:

  • 2 test tubes or thin glass or plastic something closed at one end. I do not recommend anything wider than a half inch in diameter.
  • 2 two wires, one needs to be copper, at least 12 inches long. Both wires need to have bare ends.
  • 1 cup
  • sodium sulfate OR salt
  • Water
  • One 9 volt battery
  • Long match or a long thin piece of wood (like a popsicle stick) and a match
  • Rubber bands
  • Masking tape

Download Student Worksheet & Exercises
1. Fill the cup with water.

2. Put a tablespoon of salt or sodium sulfate into the water and stir it up. (The salt allows the electricity to flow better through the water.)

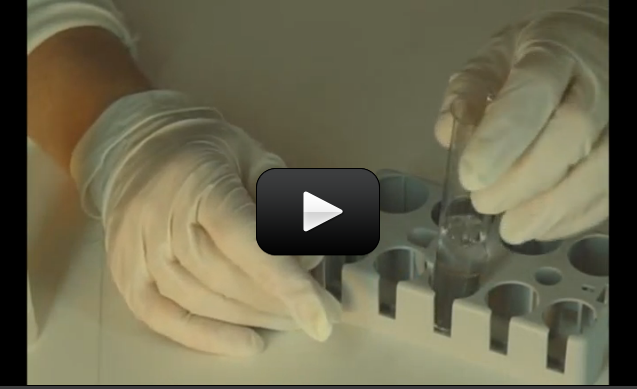
2. Put one wire into the test tube and rubber band it to the test tube so that it won’t come out (see picture).

3. Use the masking tape to attach both wires to the battery. Make sure the wire that is in the test tube is connected to the negative (-) pole of the battery and that the other is connected to the positive (+) pole. Don’t let the bare parts of the different wires touch. They could get very hot if they do.

4. Fill the test tube to the brim with the salt water.

5. This is the tricky part. Put your finger over the test tube, turn it over and put the test tube, open side down, into the cup of water. (See picture.)

6. Now put the other wire into the water. Be careful not to let the bare parts of the wires touch.

7. You should see bubbles rising into the test tube. If you don’t see bubbles, check the other wire. If bubbles are coming from the other wire either switch the wires on the battery connections or put the wire that is bubbling into the test tube and remove the other. If you see no bubbles check the connections on the battery.

8. When the test tube is half full of gas (half empty of salt water depending on how you look at it) light the long match or the wooden stick. Then take the test tube out of the water and let the water drain out. Holding the test tube with the open end down, wait for five seconds and put the burning stick deep into the test tube (the flame will probably go out but that’s okay). You should hear an instant pop and see a flash of light. If you don’t, light the stick again and try it another time. For some reason, it rarely works the first time but usually does the second or third.

A water molecule, as you saw before, is two hydrogen atoms and one oxygen atom. The electricity encouraged the oxygen to react with the copper wire leaving the hydrogen atoms with no oxygen atom to hang onto. The bubbles you saw were caused by the newly released hydrogen atoms floating through the test tube in the form of hydrogen gas. Eventually that test tube was part way filled with nothing but pure hydrogen gas.

But how do you know which bubbles are which? You can tell the difference between the two by the way they ignite (don’t’ worry – you’re only making a tiny bit of each one, so this experiment is completely safe to do with a grown up).

It takes energy to split a water molecule. (On the flip side, when you combine oxygen and hydrogen together, it makes water and a puff of energy. That’s what a fuel cell does.) Back to splitting the water molecule - as the electricity zips through your wires, the water molecule breaks apart into smaller pieces: hydrogen ions (positively charged hydrogen) and oxygen ions (negatively charged oxygen). Remember that a battery has a plus and a minus charge to it, and that positive and negative attract each other.

So, the positive hydrogen ions zip over to the negative terminal and form tiny bubbles right on the wire. Same thing happens on the positive battery wire. After a bit of time, the ions form a larger gas bubble. If you stick a cup over each wire, you can capture the bubbles and when you’re ready, ignite each to verify which is which.

If the match burns brighter, the gas is oxygen. If you hear a POP!, the gas is hydrogen. Oxygen itself is not flammable, so you need a fuel in addition to the oxygen for a flame. In one case, the fuel is hydrogen, and hence you hear a pop as it ignites. In the other case, the fuel is the match itself, and the flame glows brighter with the addition of more oxygen.

When you put the match to it, the energy of the heat causes the hydrogen to react with the oxygen in the air and “POP”, hydrogen and oxygen combine to form what? That’s right, more water. You have destroyed and created water! (It’s a very small amount of water so you probably won’t see much change in the test tube.)

The chemical equations going on during this electrolysis process look like this:

A reduction reaction is happening at the negatively charged cathode. Electrons from the cathode are sticking to the hydrogen cations to form hydrogen gas:

2 H+(aq) + 2e- --> H2(g)

2 H2O(l) + 2e- --> H2(g) + 2 OH-(aq)

The oxidation reaction is occurring at the positively charged anode as oxygen is being generated:

2 H2O(l)  --> O2(g) + 4 H+(aq) + 4e-

4 OH-(aq) --> O2(g) + 2 H2O(l) + 4 e-

Overall reaction:

2 H2O(l)  --> 2 H2(g) + O2(g)

Note that this reaction creates twice the amount of hydrogen than oxygen molecules. If the temperature and pressure for both are the same, you can expect to get twice the volume of hydrogen to oxygen gas (This relationship between pressure, temperature, and volume is the Ideal Gas Law principle.)

This is the idea behind vehicles that run on sunlight and water.  They use a solar panel (instead of a 9V battery) to break apart the hydrogen and oxygen and store them in separate tanks, then run them both back together through a fuel cell, which captures the energy (released when the hydrogen and oxygen recombine into water) and turns the car's motor. Cool, isn't it?

Note: We're going to focus on Alternative Energy in Unit 12 and create all sorts of various energy sources including how to make your own solar battery, heat engine, solar & fuel cell vehicles (as described above), and more!

Exercises

  1. Why are bubbles forming?
  2. Did bubbles form at both wires, or only one? What kind of bubbles are they?
  3. What would happen if you did this experiment with plain water? Would it work? Why or why not?
  4. Which terminal (positive or negative) produced the hydrogen gas?
  5. Did the reaction create more hydrogen or more oxygen?

[/am4show]