Let’s see how much you’ve picked up with these experiments and the reading – answer as best as you can. (No peeking at the answers until you’re done!) Just relax and see what jumps to mind when you read the question. You can also print these out and jot down your answers in your science notebook.
[am4show have=’p8;p9;p14;p41;’ guest_error=’Guest error message’ user_error=’User error message’ ]


Energy Exercises

1. Everything in the universe can be categorized as what two things?


2. What is energy?


3. What is work?


4. If someone carries a lawn chair to their roof to watch the meteor showers, is work done on the chair?


5. What if the chair falls off the roof? Is work done on the chair then?


6. If someone pushes a train with all their might, but the train doesn’t move, is work done?


7. What are two units used to measure work?


8. What is power?


9. What are two units to measure power?


10. Where does all the energy you get from food originate from?


Simple Machines/Levers Exercises

1. Can you name the six simple machines?


2. It is easier to move things using a lever but what has to happen to lessen the force needed to move the load?


3. Describe a first-class lever. Can you give an example?


4. Describe a second-class lever. Can you give an example?


5. Describe a third-class lever. Can you give an example?


For Advanced Students, we have more advanced energy questions in addition:


[/am4show][am4show have=’p9;p41;’ guest_error=’Guest error message’ user_error=’User error message’ ]


Energy Calculations

Work = Force x Distance
Power = Work / Time


1. A mouse that weighs 4 ounces, jumps, step by step, up a 2 meter tall flight of stairs. What kind of work did that little guy do? (1 newton is 4 ounces)


2. If it took him 3 minutes (180 seconds) to do it, what power did he exert?


3. Bob’s car breaks down. He needs to push on the car with a force of 1000 Newtons to get the car to go 30 meters (about 100 feet). How much work does he do?


4. If Bob takes 5 seconds to do it, how much power does he use?


5. Just for fun, let’s convert that to horsepower. 1 Watt = .001 horsepower


[/am4show] Need answers?


Let’s see how much you’ve picked up with these experiments and the reading – answer as best as you can. (No peeking at the answers until you’re done!) Just relax and see what jumps to mind when you read the question. You can also print these out and jot down your answers in your science notebook.
[am4show have=’p8;p9;p14;p41;’ guest_error=’Guest error message’ user_error=’User error message’ ]


1. If I’m talking about simple machines, what does load mean?


2. So what does effort mean when it comes to simple machines?


3. With the pulleys, as your effort got less and less, what happened to the amount of string you had to pull?


4. What is mechanical advantage?


For Advanced Students:

Warning: the following questions are “mathy”. Don’t worry about these if it gets in the way of your enjoyment or understanding of the lesson.


[/am4show][am4show have=’p9;p41;’ guest_error=’Guest error message’ user_error=’User error message’ ]


5. If a lever had a mechanical advantage of 10 and you wanted to lift a 50 pound watermelon, how many pounds of force would you have to use for the effort?


6. If a pulley had a mechanical advantage of 500 and you wanted to lift a 2000 pound hippo, how many pounds of force would you have to use for the effort?


7. Same hippo different units. Newtons are the official unit of force. So to do this officially, a 2000 pound hippo would take about 9000 Newtons to lift. If you lift that hippo 2 meters, how much work did you do? Remember, work is force x distance.


8. One last question. This one’s a little tricky. So if you lifted the hippo 2 meters, how much chain (because string’s not going to cut it) did you pull?


[/am4show] Need answers?


Let’s see how you did! If you didn’t get a few of these, don’t let it stress you out – it just means you need to play with more experiments in this area. We’re all works in progress, and we have our entire lifetime to puzzle together the mysteries of the universe!


Here’s printer-friendly versions of the exercises and answers for you to print out: Simply click here for K-8 and here for K-12.


[am4show have=’p8;p9;p14;p41;’ guest_error=’Guest error message’ user_error=’User error message’ ]


Answers to Energy Exercises:

1. Matter and energy.
2. The ability of an object or system to do work on another object or system. Energy is defined in the physics books as the ability to do work.
3. Work is moving an object against a force over a distance. Work = force x distance
4. Yes. The chair has been moved a distance, against the force of gravity.
5. Nope, the chair moves a distance, but it moves with the force of gravity. Work is moving something a distance against a force. In this case, the chair does not move against a force. No work is done.
6. Nope again! There’s no distance moved so…no work done.
7. Joules and calories.
8. The amount of work done in a given amount of time. Power = work divided by time.
9. Watts and horsepower.
10. The sun. You are powered by the sun!


Answers to Simple Machines/Levers Exercises

1. The six machines are the inclined plane, the wheel and axle, the lever, the pulley, the wedge, and the screw.
2. The distance that the effort moves is much greater than the distance the load moves.
3. A first-class lever is a lever in which the fulcrum is located in between the effort and the load. Some examples are see-saw, a hammer (when it’s used to pull nails), scissors, and pliers.
4. In a second-class lever, the load is between the fulcrum and the effort. Some examples are a wheel-barrow, a door, a stapler, and a nut-cracker.
5. The third-class lever has the effort between the load and the fulcrum. A few examples of this are tweezers, fishing rods, your jaw, and your arm


For Advanced Students:

[/am4show][am4show have=’p9;p41;’ guest_error=’Guest error message’ user_error=’User error message’ ]


Answers to Energy Calculations

1. work = force x distance so
work = 1 newton x 2 meters
work = 2 Joules


2. Power = work/time
power = 2/180
power = .01 Watts


3. work = force x distance
work = 1000 x 30
work = 30,000 Joules (go Bob!)


4. power = work x time
power = 30,000/5
power = 6000 Watts (Wow! Big Bob!)


5. 6000 Watts x .001 = 6 horsepower (No Viper, but pretty impressive!)


[/am4show]


Let’s see how you did! If you didn’t get a few of these, don’t let it stress you out – it just means you need to play with more experiments in this area. We’re all works in progress, and we have our entire lifetime to puzzle together the mysteries of the universe!


Here’s printer-friendly versions of the exercises and answers for you to print out: Simply click here for K-8 and here for K-12.


Answers:
[am4show have=’p8;p9;p14;p41;’ guest_error=’Guest error message’ user_error=’User error message’ ]
1. The load is what you are lifting or moving.
2. Effort is the force needed to lift the load.
3. As the effort got less, the amount of string (distance) got greater and greater.
4. Mechanical advantage is the factor by which a mechanism multiplies the force put into it.


[/am4show][am4show have=’p9;p41;’ guest_error=’Guest error message’ user_error=’User error message’ ]


For Advanced Students:

5. 5 pounds. The lever has a mechanical advantage of 10 so it multiplies the force by 10. So 5 x 10 = 50. (By the way, when you cut up that watermelon invite me over!)
6. 4 pounds. 4 x 500 = 2000
7. 18,000 Joules of work. 9000 Newtons x 2 meters = 18,000 Joules.
8. 1000 meters (3280 ft) of chain!!!


[/am4show]


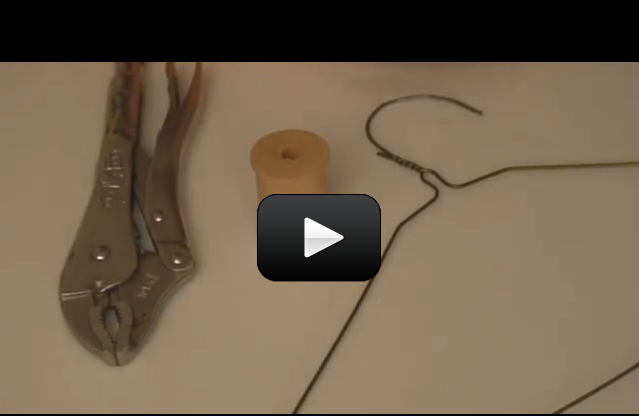
These homemade pulleys work great as long as they glide freely over the coat hanger wire (meaning that if you give them a spin, they keep spinning for a few more seconds).  You can adjust the amount of friction in the pulley by adjusting the where the metal wire bends after it emerges from the pulley.

[am4show have='p8;p9;p14;p41;p88;p92;' guest_error='Guest error message' user_error='User error message' ] All you need is a wire coathanger, a thread spool, and a pair of vice grips... and the video below.


Download Student Worksheet

Cut a wire coat-hanger at the lower points (at the base of the triangular shape) and use the hook section to make your pulley. Thread both straight ends through a thread spool, crossing in the middle, and bend wire downwards to secure spool in place. Be sure the spool turns freely. Use hook for easy attachment. (These pulleys work well for the return-pulley system experiment in this section.)
If you still have trouble, you can purchase pulleys from the hardware store, or more inexpensively, from a farm supply store. (We get ours from the chicken coup section – no kidding!) If you really want to go hog-wild with pulleys, get a bunch and clip them onto climbing-rated carabineer. [/am4show]

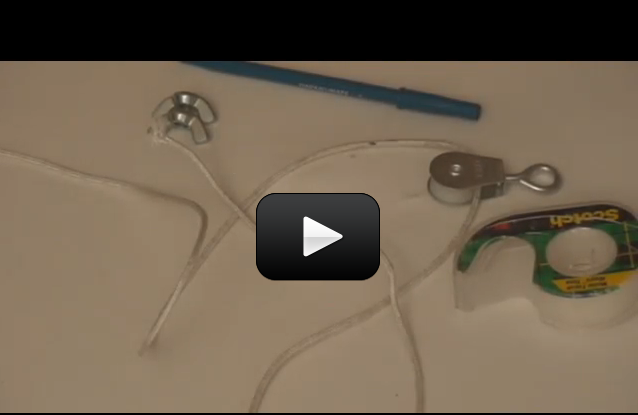
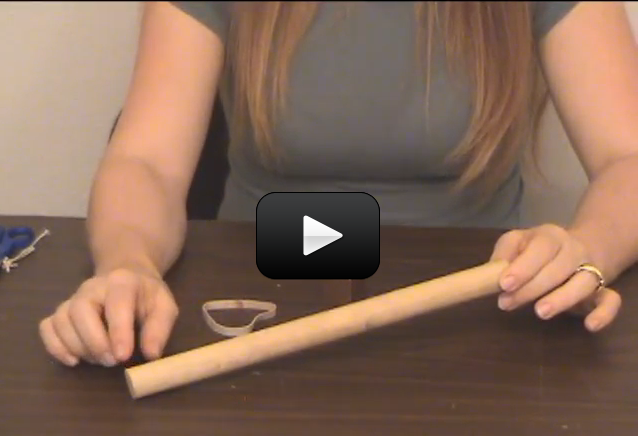
Silly as our application for this experiment may sound, we use this system to keep pens handy near the shopping list on the fridge.  It’s saved us from many pen-searches over the years!

We install these at various places around the house (by the telephone, fridge, front door, anywhere that you usually need a pen at the last minute), and have even seen them at the counters of local video-rental stores.

[am4show have='p8;p9;p14;p41;p88;p92;' guest_error='Guest error message' user_error='User error message' ]

Download Student Worksheet

Troubleshooting: It’s important to note that the weight needs to slide freely both up and down the length of the cord (which is why fishing line is a great choice – the surface of the line is very low friction). Another important tip: the weights you use must weigh more than the object at the end of the string plus the force of friction in the lines (and the pulley).  Hollow, metal objects work great like nuts (for bolts).

You’ll need to practice to find just the right balance point: where the pen flies up to its resting position when you let go of the pen.

This is a great addition to any tree house or playground structure!  Hang a loop of rope from a tree branch (don't forget to thread the pulleys onto the rope before you tie the knot!  Connect one pulley to the basket handle made from a circle of short rope.  Tie a length of rope to the basket handle, then up through one tree pulley, down through the basket pulley, and up through the second tree pulley. Thread a 6" length of PVC pipe onto the end and tie the rope back onto itself to form a handle.

[/am4show]

Simple machines make our lives easier. They make it easier to lift, move and build things. Chances are that you use simple machines more than you think. If you have ever screwed in a light bulb, put the lid on a jam jar, put keys on a keychain, pierced food with a fork, walked up a ramp, or propped open a door, you've made good use of simple machines. A block and tackle setup is also a simple machine.

Block and tackle refers to pulleys and rope (in that order). One kid can drag ten adults across the room with this simple setup – we've done this class lots of times with kids and parents, and it really works! Be careful with this experiment - you'll want to keep your fingers away from the rope and don't pull too hard (kids really get carried away with this one!)

If you haven't already, make sure you try out the broomstick version of this activity first.

[am4show have='p8;p9;p14;p41;p88;p92;' guest_error='Guest error message' user_error='User error message' ] Materials:
  • Rope
  • pulleys
  • chain link fence (or a broom)
  • three people
Cut off about 12" of rope and circle a loop around a strong support, like a chain link fence. Before you tie a knot, thread three pulleys onto the rope… and now tie it off.

Make another circle of rope and add three more pulleys onto it. Loop the rope over the handle of a mop or broom. Thread the rest of the nylon rope through zigzag fashion first through one pulley on the fence, then through a pulley on the mop, then to an open pulley back on the fence, then another free pulley on the mop, etc… Knot the end of the rope to the mop. You should have one free end of rope left.

Attach a kid to the free end of the rope by adding a handle.  You can thread a rope through a 6" piece of PVC pipe and tie the rope back on itself.  Attach adults to the mop, holding it straight out in front of their chest.  The adults' job is to resist the pull they will feel as the kid pulls with his end of the rope.


Download Student Worksheet [/am4show]

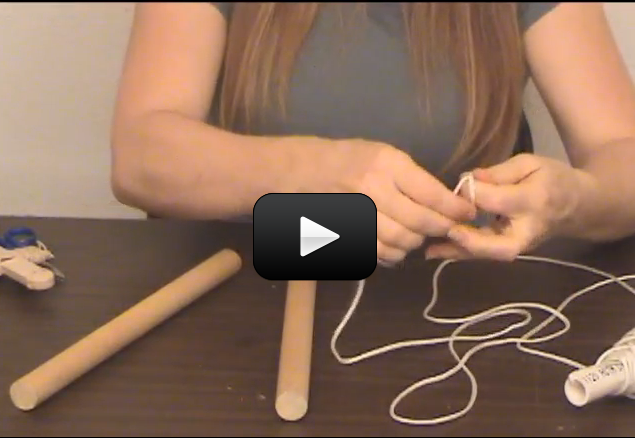
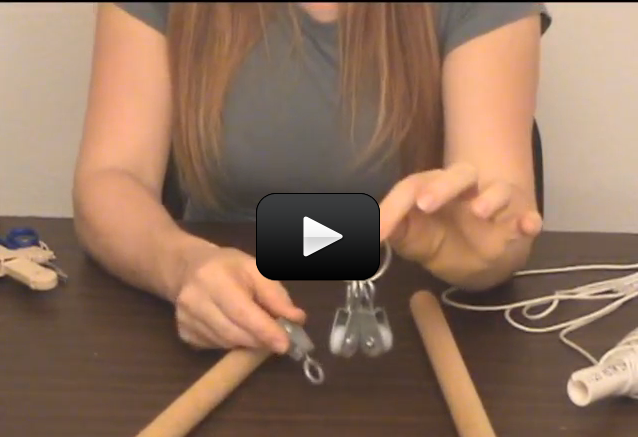
We're going to be using pulleys to pull two (or more) kids with one hand. You will be using something called ‘Mechanical Advantage’, which is like using your brains instead of brute strength. When you thread the rope around the broom handles, you use 'mechanical advantage' to leverage your strength and pull more than you normally could handle.

How can you possibly pull with more strength than you have? Easy - you trade ‘force’ for ‘distance’ - you can pull ten people with one hand, but you have to pull ten feet of rope for every one foot they travel.

Here's what you do: [am4show have='p8;p9;p14;p41;p88;p92;' guest_error='Guest error message' user_error='User error message' ]
  • nylon rope (at least 50')
  • two strong dowels (like the handle from a broomstick)
  • friends and you

Download Student Worksheet

Have two people face each other and each hold a smooth pipe or strong dowel (like a mop or broom) horizontally straight out in front of their chest.   Tie a length of strong nylon rope (slippery rope works best to minimize friction) near the end of the mop.

Drape the rope over the second handle (broom), loop around the bottom, then back to the top of the broom.  You're going to zigzag the rope back and forth between the mop and broom until you have four strings on each handle.

Attach a third person to the free end of the rope.  Make a quick handle for a third person: Thread a 6" length of PVC pipe onto the end and tie the rope back onto itself to form a handle.

The two people hold the dowels will not be able to resist the pull you give when pulling on the end of the rope! Be careful with this one - there's a lot of force going through your rope, and that's usually the first thing to break. If everyone pulls gently, you don't have to worry.

Troubleshooting Tip: If you’re finding there’s just too much friction between the rope and the broomstick (meaning that the rope doesn’t slide smoothly over the broom handles, then click here to learn how to upgrade to pulleys. [/am4show]

Are you curious about pulleys? This set of experiments will give you a good taste of what pulleys are, how to thread them up, and how you can use them to lift heavy things.

We'll also learn how to take data with our setup and set the stage for doing the ultra-cool Pulley Lift experiments.

Are you ready? [am4show have='p8;p9;p14;p41;p75;p85;p88;p92;' guest_error='Guest error message' user_error='User error message' ] For this experiment, you will need:

  • One pulley (from the hardware store... get small ones that spin as freely as possible. You’ll need three single pulleys or if you can find one get a double pulley to make our later experiment easier.)
  • About four feet of string
  • 2 paper cups
  • many little masses (about 50 marbles, pennies, washers etc.)
  • Yardstick or measuring tape
  • A scale (optional)
  • 2 paper clips
  • Nail or some sort of sharp pokey thing
  • Table
Download Student Worksheet & Exercises

Advanced students: Download your Simple Pulley Experiments

1. Take a look at the video to see how to make your “mass carriers”. Use the nail to poke a hole in both sides of the cup. Be careful to poke the cup...not your finger! Thread about 4 inches of string or a pipe cleaner through both holes. Make sure the string is a little loose. Make two of these mass carriers. One is going to be your load (what you lift) and the other is going to be your effort (the force that does the lifting).

2. Dangle the pulley from the table (check out the picture).

3. Bend your two paper clips into hooks.

4. Take about three feet of string and tie your paper clip hooks to both ends.

5. Thread your string through the pulley and let the ends dangle.

6. Put 40 masses (coins or whatever you’re using) into one of the mass carriers. Attach it to one of the strings and put it on the floor. This is your load.

7. Attach the other mass carrier to the other end of the string (which should be dangling a foot or less from the pulley). This is your effort.

8. Drop masses into the effort cup. Continue dropping until the effort can lift the load.

9. Once your effort lifts the load, you can collect some data. First allow the effort to lift the load about one foot (30 cm) into the air. This is best done if you manually pull the effort until the load is one foot off the ground. Measure how far the effort has to move to lift the load one foot.

10. When you have that measurement, you can either count the number of masses in the load and the effort cup or if you have a scale, you can get the mass of the load and the effort.

11. Write your data into your pulley data table in your science journal.

Double Pulley Experiment

You need:

Same stuff you needed in Experiment 1, except that now you need two pulleys.


1. Attach the string to the hook that’s on the bottom of your top pulley.

2. Thread the string through the bottom pulley.

3. Thread the string up and through the top pulley.

4. Attach the string to the effort.

5. Attach the load to the bottom pulley.

6. Once you get it all together, do the same thing as before. Put 40 masses in the load and put masses in the effort until it can lift the load.

7. When you get the load to lift, collect the data. How far does the effort have to move now in order to lift the load one foot (30 cm)? How many masses (or how much mass, if you have a scale) did it take to lift the load?

8. Enter your data into your pulley table in your science journal.

Triple Pulley Experimentitem7

You Need

Same stuff as before If you have a double pulley or three pulleys you can give this a shot. If not, don’t worry about this experiment.

Do the same thing you did in experiments 1 and 2 but just use 3 pulleys. It’s pretty tricky to rig up 3 pulleys so look carefully at the pictures. The top pulley in the picture is a double pulley.

1. Attach the string to the bottom pulley. The bottom pulley is the single pulley.item8
2. Thread the string up and through one of the pulleys in the top pulley. The top pulley is the double pulley.

3. Take the string and thread it through the bottom pulley.

4. Now keep going around and thread it again through the other pulley in the top (double) pulley.

5. Almost there. Attach the load to the bottom pulley.

6. Last, attach the effort to the string.

7. Phew, that’s it. Now play with it!

Take a look at the table and compare your data. If you have decent pulleys, you should get some nice results. For one pulley, you should have found that the amount of mass it takes to lift the load is about the same as the amount of mass of the load. Also, the distance the load moves is about the same as the distance the effort moves.

All you’re really doing with one pulley, is changing the direction of the force. The effort force is down but the load moves up.

Now, however, take a look at two pulleys. The mass needed to lift the load is now about half the force of the load itself! The distance changed too. Now the distance you needed to move the effort, is about twice the distance that the load moves. When you do a little math, you notice that, as always, work in equals work out (it won’t be exactly but it should be pretty close if your pulleys have low friction).

What happened with three pulleys? You needed about 1/3 the mass and 3 times the distance right? With a long enough rope, and enough pulleys you can lift anything! Just like with the lever, the pulley, like all simple machines, does a force and distance switcheroo.

The more distance the string has to move through the pulleys, the less force is needed to lift the object. The work in, is equal to the work out (allowing for loss of work due to friction) but the force needed is much less.

Exercises Answer the questions below:
  1. What is the load and effort of a pulley? Draw a pulley and label it.
  2. What is the best way to say what a simple machine helps us do?
    1. Do work without changing force applied
    2. Change the direction or strength of a force
    3. Lift heavy shipping containers
    4. None of these
  3.  Name one other type simple machine and an example:
[/am4show]

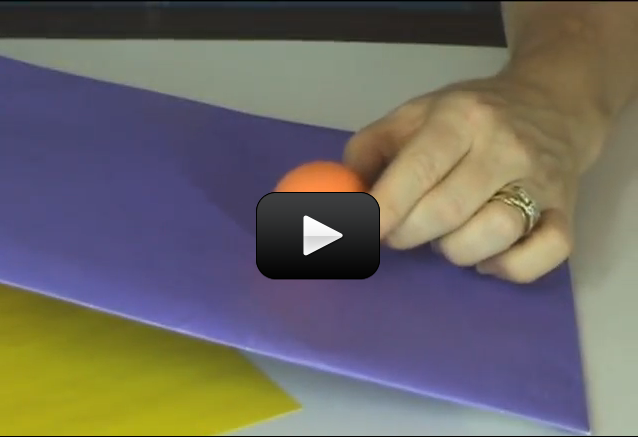
What’s an inclined plane? Jar lids, spiral staircases, light bulbs, and key rings. These are all examples of inclined planes that wind around themselves.  Some inclined planes are used to lower and raise things (like a jack or ramp), but they can also used to hold objects together (like jar lids or light bulb threads).


Here’s a quick experiment you can do to show yourself how something straight, like a ramp, is really the same as a spiral staircase.


[am4show have=’p8;p9;p14;p41;p151;p75;p85;p88;p92;’ guest_error=’Guest error message’ user_error=’User error message’ ]


Here’s what you need to find:


  • sheet of paper
  • short dowel or cardboard tube from a coat hanger
  • tape
  • ruler

Find a short dowel or use a cardboard tube from a coat-hanger.  Roll a sheet of paper around the tube beginning at the short side and roll toward the triangle point, keeping the base even as it rolls (in the video, I just rolled it, so only use the dowel if you have trouble keeping it rolled evenly.)


Notice that the inclined plane (hypotenuse) spirals up as a tread as you roll. Remind you of screw threads?  Those are inclined planes. If you have trouble figuring out how to do this experiment, just watch the video clip below:


Download Student Worksheet & Exercises


Inclined planes are simple machines. It’s how people used to lift heavy things (like the top stones for a pyramid).


Here’s another twist on the inclined plane: a wedge is a double inclined plane (top and bottom surfaces are inclined planes). You have lots of wedges at home: forks, knives, and nails just name a few.


When you stick a fork in food, it splits the food apart. You can make a simple wedge from a block of wood and drive it under a heavy block (like a tree stump or large book) with a kid on top.


Exercises


  1. What is one way to describe energy?
    1. The amount of atoms moving around at any given moment
    2. Electrons flowing from one area to another
    3. The ability to do work
    4. The square root of the speed of an electron
  2. Work is when something moves when:
    1. Force is applied
    2. Energy is used
    3. Electrons are lost or gained
    4. A group of atoms vibrate
  3. Name two simple machines:
  4. Name one example of a simple machine:

[/am4show]


Parts of the Lever

Levers, being simple machines, have only three simple parts. The load, the effort, and the fulcrum. Let’s start with the load. The load is basically what it is you’re trying to lift. The books in the last experiment where the load. Now for the effort. That’s you. In the last experiment, you were putting the force on the lever to lift the load. You were the effort. The effort is any kind of force used to lift the load. Last for the fulcrum. It is the pivot that the lever turns on. The fulcrum, as we’ll play with a bit more later, is the key to the effectiveness of the lever.


There are three types of levers. Their names are first-class, second-class and third-class. I love it when it’s that simple. Kind of like Dr. Seuss’s Thing One and Thing Two. The only difference between the three different levers is where the effort, load and fulcrum are.


[am4show have=’p8;p9;p14;p41;p88;p92;’ guest_error=’Guest error message’ user_error=’User error message’ ]


Are you ready for some ‘vintage Aurora’ video? We thought you’d want to check out one of the first videos she ever made (in her basement with the auto-focus stuck in the ON position). Enjoy!


Download Student Worksheet & Exercises


Advanced students: Download your First, Second, and Third Class Levers


First-Class Lever

A first-class lever is a lever in which the fulcrum is located in between the effort and the load. This is the lever that you think of whenever you think of levers. The lever you made in Experiment 1 is a first-class lever. Examples of first-class levers are the see-saw, a hammer (when it’s used to pull nails), scissors (take a look, it’s really a double lever!), and pliers (same as the scissors, a double lever).


First Class Lever Experiment

For this experiment, you’ll need:


  1. A nice strong piece of wood. 3 to 8 feet long would be great if you have it.
  2. A brick, a thick book or a smaller piece of wood (for the fulcrum)
  3. Books, gallons of water or anything heavy that’s not fragile

Be careful with this. Don’t use something that’s so heavy someone will get hurt. Also, be sure not to use something so heavy that you break the wooden lever. Last but not least, be sure to keep your head and face away from the lever. I’ve seen folks push down on the lever and then let go. The lever comes up fast and can pop you pretty hard.


1. Put your fulcrum on the ground.


2. Put your lever on the fulcrum. Try to get your fulcrum close to the middle of the lever.


3. Put some weight on one end of the lever.


4. Now push down on the other side of the lever. Try to remember how hard (how much force) you needed to use to lift the heavy object.


5. Move the fulcrum under the lever so that it is closer to the heavy object.


6. Push down on the other side of the lever again. Can you tell the difference in the amount of force?


7. Move the fulcrum closer still to the heavy object. Feel a difference now?


8. Feel free to experiment with this. Move the fulcrum farther away and closer to the object. What conclusions can you draw?


What you may have found, was that the closer the fulcrum is to the heavy object, the less force you needed to push with to get the object to move. Later we will look at this in greater detail, but first let me tell you about the other types of levers.


Second-Class Lever

The second-class lever is a little strange. In a second-class lever, the load is between the fulcrum and the effort. A good example of this is a wheel-barrow. The wheel is the fulcrum, the load sits in the wheel-barrow bucket and the effort is you. Some more examples would be a door (the hinge is the fulcrum), a stapler, and a nut-cracker.


Second-class Lever Experiment

You need:


  1. A nice strong piece of wood. 3 to 8 feet long would be great if you have it.
  2. A brick, a thick book or a smaller piece of wood (for the fulcrum)
  3. Books, gallons of water or anything heavy that’s not fragile

Again, be careful with this. Don’t use something that’s so heavy someone will get hurt. Also, be sure not to use something so heavy that you break the wooden lever. Last but not least, be sure to keep your head and face away from the lever. I’ve seen folks push down on the lever and then let go. The lever comes up fast and can pop you pretty hard.


1. Put your fulcrum, the book or the brick, whatever you’re using on a nice flat spot.


2. Put the end of your lever on the fulcrum.


3. Put the books or gallon jugs or whatever you’re using for a load, in the middle of the lever.


4. Now, put yourself (the effort) on the opposite end of the lever from the fulcrum.


5. Lift


6. Experiment with the load. Move it towards the fulcrum and lift. Then move it toward the effort and lift. Where is it harder(takes more force) to lift the load, near the fulcrum or far? Where does the load lift the greatest distance, near the fulcrum or far?


Third-Class Lever

This fellow is the oddest of all. The third-class lever has the effort between the load and the fulcrum. Imagine Experiment 1 but this time the fulcrum is at one end of the board, the books are on the other end and you’re in the middle. Kind of a strange way to lift books huh? A few examples of this are tweezers, fishing rods (your elbow or wrist is the fulcrum), your jaw (the teeth crush the load which would be your hamburger), and your arm (the muscle connects between your elbow (fulcrum) and your load( the rest of your arm or whatever you’re lifting)). Your skeletal and muscular system is, in fact, a series of levers!


Third-class Lever Experiment

You need:


  1. A nice strong piece of wood. 3 to 8 feet long would be great if you have it.
  2. A brick, a thick book or a smaller piece of wood (for the fulcrum)
  3. Books, gallons of water or anything heavy that’s not fragile

Again, be careful with this. Don’t use something that’s so heavy someone will get hurt. Also, be sure not to use something so heavy that you break the wooden lever. Last but not least, be sure to keep your head and face away from the lever. I’ve seen folks push down on the lever and then let go. The lever comes up fast and can pop you pretty hard.


1. Put your fulcrum on the ground in a nice flat place.


2. Put your lever on the fulcrum so that the fulcrum is at the very end of the lever.


3. Put your load on the lever at the end farthest from the fulcrum.


4. Now, put yourself (the effort) in the middle of the lever.


5. Lift. You may need someone to hold down the lever on the fulcrum


6. Experiment with the effort (you). Move towards the fulcrum and lift the load Then move toward the load and lift. Where is it harder(takes more force) to lift the load, near the fulcrum or far? Where does the load lift the greatest distance, near the fulcrum or far?


We’ve had a lot of fun levering this and levering that but now we have to get to the point of all this simple machine stuff. Work equals force times distance, right? Well, what have you been doing all this time with these levers? You’ve been moving something (the load) a distance against a force (gravity). You’ve been doing work. You’ve been exerting energy. See how it all ties in nicely?


In experiments 1,2 and 3, I wanted you to notice how much force you exerted and how much the load moved. You may have noticed that when the force was small (it was very easy to lift) the load moved a very small distance. On the other hand, when the force was large (hard to lift), the load moved a greater distance. Let me point your attention to one more thing and then we’ll play with this.


When the force used to lift the load was small, you moved the lever a large distance. When the force used to lift the load was great you moved the lever a small distance. Remember, work=force x distance. There is work done on both sides of the lever. The effort (you in this case) pushes the lever a distance against a force…work is done. The load also moves a distance against a force so there too…work is done.


Now, here’s the key to this that I hope you can see in the next experiment. Work in is equal to work out. The work you do on one side of the lever (work in), is equal to the work that happens to the load (work out). Let’s do a quick bit of math for an example. Phillip wants to move a 10 kg (22 lb.)box. He uses a lever and notices that when he lifts the box .1meter (4 inches) he has to push the lever down 1 meter with a force of 1 kg. Now let’s do some math. (Officially we should convert kilograms (a unit of mass) to Newtons (a unit of force) so that we can work in Joules which is a unit of work. However, we’ll do it this way so you can see the relationship more easily.)


Phillip’s work (the work in) = 1 kg x 1 m = 1


Work on the bowling ball (the work out) = 10 kg x .1 m = 1


Work in equals work out! Later in this energy unit, you’ll learn about energy efficiency. At that point, you’ll see that you never get all the energy you want from the energy you put in. Some energy is lost to sound and some to heat. A lever is incredibly efficient but you may still see, in your measurements, that the energy in is greater than the energy you get out.


For Advanced Students:

[/am4show][am4show have=’p9;p41;’ guest_error=’Guest error message’ user_error=’User error message’ ]


Speaking of your measurements…let’s make some. Open up your science journal and record the type of lever, weight, and location information for your different trial runs. Take a look at your data – can you figure out how much weight you’d need to lift your parents?


Let’s see if we can figure this out. For a 10′ long beam with the fulcrum in the exact center, you can lift as much as you weigh. For example, if you weigh 100 pounds, you can lift some sitting on the other end, as long as they weigh 100 pounds or less. If you slide the beam and move the fulcrum so that the longer end is on your side, you can lift more than you weigh.


So if there’s 7 feet of beam on Alice’s side and only 3 feet on Bob’s end, you can easily figure this out with a little math (and principles of torque). Here’s what you do:


(Alice’s Weight) * (Distance from Alice to the Fulcrum) = (Alice’s Lifting Ability) * (Distance from Bob to the Fulcrum)


If Alice weighs 100 pounds and when standing on the 7-foot end of the see-saw, she barely can lift Bob, let’s find out how much Bob weighs.


(100 pounds) (7 feet) = (Alice’s Lifting Ability) * (3 feet)


700 / 3 = Alice’s Lifting Ability, and since she can just barely lift Bob…


Bob weighs 233 pounds!


Now can you figure out how much lever arm distance you need to lift your parents? If Mom and Dad together weigh 300 pounds, and you have a 10′ long beam and you weigh 100 pounds, let’s find the fulcrum distance you’d need to lift them. Let’s put your algebra to use here:


Let’s make ‘x’ the distance from you to the fulcrum. This makes the distance from your parents to the fulcrum 10′ – x. (If you’re 4 feet from the fulcrum, that means your parents are 6′, right?)


(100 pounds) (x) = (300 pounds) (10′ – x)


100 x = 3000 – 300 x


400 x = 3000


x = 3000 / 400


Solve for x and you’ll find that the distance from you to the fulcrum is 7.5 feet!


Exercises Answer the questions below:


  1. What is the best definition for a simple machine?
    1. A machine with less than three parts
    2. A machine with a simple name
    3. A machine that changes the direction or amount of a force
    4. A machine that helps you do work quickly
  2. What are the three parts of a lever? Circle all that apply:
    1. Fulcrum
    2. Weight
    3. Load
    4. Effort
  3. Name two examples of levers that you could find in your house:
  4. What are the types of levers called?
    1. Three tiers
    2. First, second, and third class
    3. Poor, rich, and middle
    4. Forty-five and ninety-nine percenters

    [/am4show]

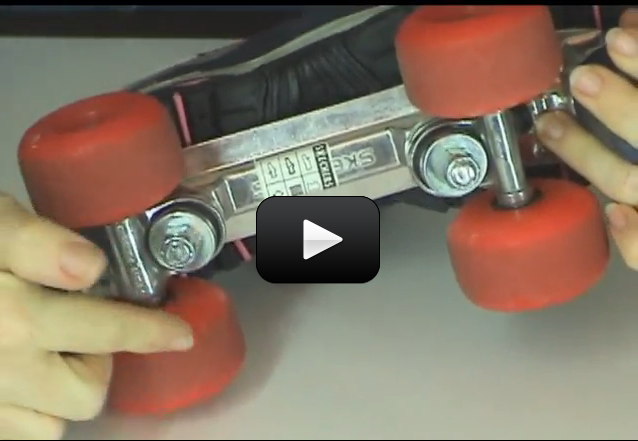
This isn't strictly a 'levers' experiment, but it's still a cool demonstration about simple machines, specifically how pulleys are connected with belts.

Take a rubber band and a roller skate (not in-line skates, but the old-fashioned kind with a wheel at each corner.) Lock the wheels on one side together by wrapping the rubber band around one wheel then the other.  Turn one wheel and watch the other spin.

Now crisscross the rubber band belt by removing one side of the rubber band from a wheel, giving it a half twist, and replacing it back on the wheel.  Now when you turn one wheel, the other should spin the opposite direction. Here's a quick video on what to expect:

[am4show have='p8;p9;p14;p41;p88;p92;' guest_error='Guest error message' user_error='User error message' ]


Download Student Worksheet [/am4show]

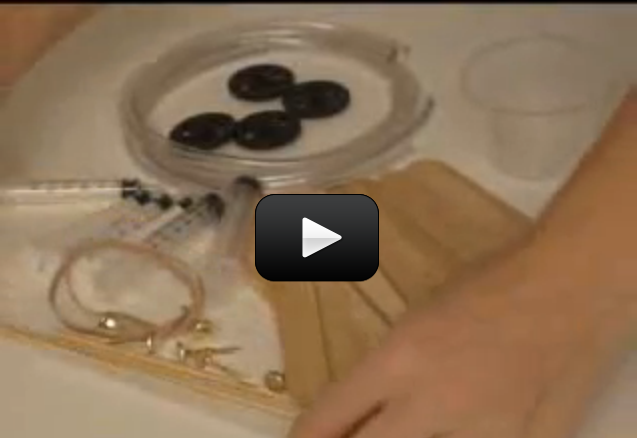
When people mention the word “hydraulics”, they could be talking about pumps, turbines, hydropower, erosion, or river channel flow.  The term “hydraulics” means using fluid power, and deals with machines and devices that use liquids to move, lift, drive, and shove things around.


Liquids behave in certain ways: they are incompressible, meaning that you can’t pack the liquid into a tighter space than it already is occupying.


[am4show have=’p8;p9;p14;p41;p75;p88;p92;’ guest_error=’Guest error message’ user_error=’User error message’ ]


If you’ve ever filled a tube partway with water and moved it around, you’ve probably noticed that the water level will remain the same on either side of the tube.


However, if you add pressure to one end of the tube (by blowing into the tube), the water level will rise on the opposite side. If you decrease the pressure (by blowing across the top of one side), the water level will drop on the other side.


In physics, this is defined through Pascal’s law, which tells us how the pressure applied to one surface can be transmitted to the other surface. As liquids can’t be squished, whatever happens on one surface affects what occurs on the other.  Examples of this effect include siphons, water towers, and dams. Scuba divers know that as they dive 30 feet underwater, the pressure doubles. This effect is also show in hydraulics – and more importantly, in the project we’re about to do!


But first, let’s understand what’s happening with liquids and pressure:


Here’s an example: If you fill a glass full to the brim with water, you reach a point where for every drop you add on top, one drop will fall out.  You simply can’t squish any more water molecules into the glass without losing at least the same amount. Excavators, jacks, and the brake lines in your car use hydraulics to lift huge amounts of weight, and the liquid used to transfer the force is usually oil at 10,000 psi.


Air, however, is compressible.  When car tires are inflated, the hose shoves more and more air inside the tire, increasing the pressure (amount of air molecules in the tire).  The more air you stuff into the tire, the higher the pressure rises.  When machines use air to lift, move, spin, or drill, it’s called “pneumatics”. Air tools use compressed air or pure gases for pneumatic power, usually pressurized to 80-100 psi.


Different systems require either hydraulics or pneumatics.  The advantage to using hydraulics lies in the fact that liquids are not compressible. Hydraulic systems minimize the “springy-ness” in a system because the liquid doesn’t absorb the energy being transferred, and the working fluids can handle much heavier loads than compressible gases.  However, oil is flammable, very messy, and requires electricity to power the machines, making pneumatics the best choice for smaller applications, including air tools (to absorb excessive forces without injuring the user).


We’re going to build our own hydraulic-pneumatic machine.  Here’s what you need to do:


Materials:


  • plastic cup
  • 20 tongue-depressor-size popsicle sticks
  • 6 syringes (anything in the 3-10mL size range will work)
  • 6 brass fasteners
  • 5’ of flexible tubing (diameter sized to fit over the nose of your syringes)
  • four wheels (use film canister lids, yogurt container lids, milk jug lids, etc.)
  • 4 rubber bands
  • two naked (unwrapped) straws
  • skewers that fit inside your straws
  • hot glue gun (with glue sticks)
  • sharp scissors or razor (get adult help)
  • drill with small drill bits (you’ll be drilling a hole large enough to fit the stem of a brass fastener)

earthmover


Let’s play with these different ideas right now and really “feel” the difference between hydraulics and pneumatics. Connect two syringes with a piece of flexible tubing.  Cut the tubing into three equal-sized pieces and use one to experiment with.  Shove the plunger on one syringe to the “empty”, and leave the other in the “filled” position before connecting the tubing.  What happens when you push or lift one of the plungers? Is it quick to respond, or is there “slop” in the system?


Now remove both plungers and, leaving the tubing attached, fill the system with water to the brim on both ends (this is a good bath-time activity!).  Keep the open ends of the syringes at the same level as you fill them.  What happens if you lower one of the syringes? What happens when you raise it back up?  Is there now air in your system?


Fill your syringe-tube system up with water again, keeping the plungers at the same height as you work.  Insert one of the plungers into one of the syringes and play with the levels of the syringes again, lifting one and lowering the other.  Now what happens, or doesn’t happen?


Why does that work? Because both syringes are open to the atmosphere, they both have equal amounts of air pressure pushing down on the surface of the water.  When you raise one syringe higher than the other, you have increased the elevation head of higher syringe, which works to equalize the water levels in the two syringes (thus shoving water out of the lower syringe).  Elevation head is due to the fluid’s weight (gravitational force) acting on the fluid and is related to the potential energy of the raised syringe (which increased with elevation).


Now connect your plungers into a fully hydraulic system:  Push the plunger all the way down to expel the water from one of the syringes (water should leak all over the place from the open syringe).  Now add the second plunger to the open syringe and push the plunger down halfway.  What happens?  You have just made a hydraulic system!


Are you ready to build it into a three-axis machine?  Then click the play button below:


Download Student Worksheet


[/am4show]


We’re going to use everyday objects to build a simple machine and learn how to take data. Sadly, most college students have trouble with these simple steps, so we’re getting you a head start here. The most complex science experiments all have these same steps that we’re about to do… just on a grander (and more expensive) scale. We’re going to break each piece down so you can really wrap your head around each step. Are you ready to put your new ideas to the test?


This experiment is for Advanced Students.


[am4show have=’p9;p41;p75;p85;p88;p92;’ guest_error=’Guest error message’ user_error=’User error message’ ]
You need:


  • A wooden ruler or a paint stick for the lever
  • Many pennies, quarters, or washers (many little somethings of the same mass)
  • A spool, eraser, pencil (anything that can be your fulcrum)
  • A ruler (to be your um….ruler)
  • Paper cups
  • Optional: A scale that can measure small amounts of mass (a kitchen scale is good)


Download Student Worksheet & Exercises


1. Tape one paper cup to each end of lever. (This allows for an easy way to hold the pennies on the lever.)


2. Set your fulcrum on the table and put your lever (ruler or paint stick) on top of it. Try to get the ruler to balance on the fulcrum.


3. Put five pennies on one side of your lever.


4. Now, put pennies, one at a time on the other side of your lever, this is your effort. Keep adding pennies until you get your lever to come close to balancing. Try to keep your fulcrum in the same place on your lever. You may even want to tape it there.


5. Count the pennies on the effort side and count the pennies on the load side. If you have a scale, you can weigh them as well. With the fulcrum in the middle you should see that the pennies/mass on both sides of the lever are close to equal.


6. This part’s a little tricky. Measure how high the lever was moved. On the load side, measure how far the lever moved up and on the effort side measure how far the lever moved down. Be sure to do the measuring at the very ends of the lever.


7. Write your results in your science journal as shown in the video.


8. Remove the pennies and do it all over again, this time move the fulcrum one inch (two centimeters) closer to the load side.


9. Continue moving the fulcrum closer to the load until it gets too tough to do. You’ll probably be able to get it an inch or two (two to four centimeters) from the load.


10. If you didn’t use a scale feel free to stop here. Don’t worry about the “work in” and “work out” parts of the table. Take a look at your table and check out your results. Can you draw any conclusions about the distance the load moved, the distance the effort moved, and the amount of force required to move it?


11. If you used a scale to get the masses you can find out how much work you did. Remember that work=force x distance. The table will tell you how to find work for the effort side (work in) and for the load side (work out). You can multiply what you have or if you’d like to convert to Joules, which is a unit of work, feel free to convert your distance measurements to meters and your mass measurements to Newtons. Then you can multiply meters times Newtons and get Joules which is a unit of work.


1 inch = .025 meters


1 cm = .01 meter


1 ounce =0.278 Newtons


1 gram = 0.0098 Newtons


By taking a look at your data and by all the other work we did this lesson, you can see the beautiful switcheroo of simple machines. Simple machines sacrifice distance for force. With the lever, the farther you had to push the lever, the less force had to be used to move the load.


The work done by the effort is the same as the work done on the load. By doing a little force/distance switcheroo, moving the load requires much less force to do the work. In other words, it’s much easier. Anything that makes work easier gets a thumbs up by me! Hooray for simple machines!


Exercises


  1. What is work?
    1. Force against an object
    2. Force over distance
    3. 9 hours and sweat
    4. Energy applied to an object
  2. What is the unit we use to measure energy?
    1. Newton
    2. Watt
    3. Joule
    4. Horsepower
  3. Describe a first class lever using one example.

[/am4show]


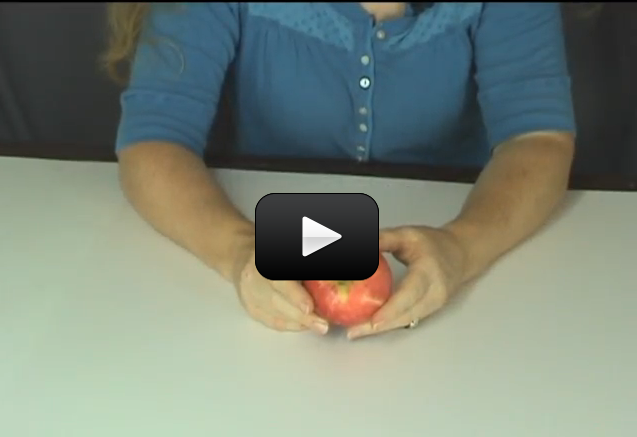
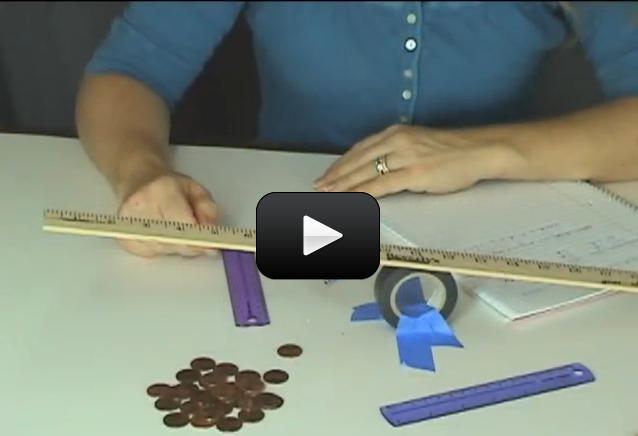
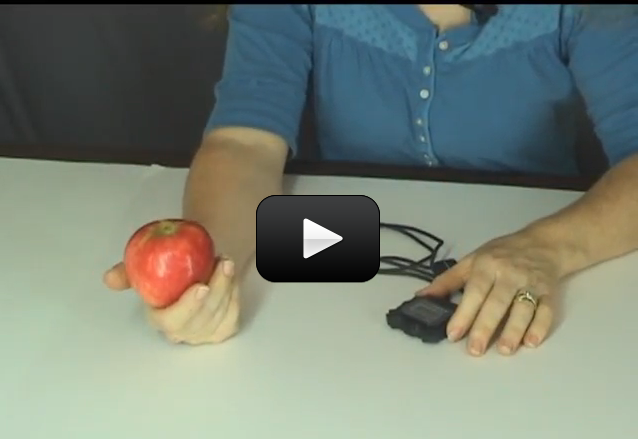
This experiment is for Advanced Students. We’re going to really get a good feel for energy and power as it shows up in real life. For this experiment, you need:


  • Something that weighs about 100 grams or 4 ounces, or just grab an apple.
  • A meter or yard stick

This might seem sort of silly but it’s a good way to get the feeling for what a Joule is and what work is.
[am4show have=’p8;p9;p14;p41;p88;p92;’ guest_error=’Guest error message’ user_error=’User error message’ ]


Download Student Worksheet & Exercises


1. Grab your 100 gram object, put it on a table.


2. Now lift it off the table straight up until you lift it one meter (one yard).


3. Lift it up and down 20 times.


A 100 gram object takes about one Newton of force to lift. Since it took one Newton of force to lift that object, how much work did we do? Remember work = force x distance so in this case work = 1 Newton x 20 meters or work = 20 Joules.


You may ask “but didn’t we move it 40 meters, 20 meters up and 20 down?” That’s true, but work is moving something against a force. When you moved the object down you were moving the object with a force, the force of gravity. Only in lifting it up, are you actually moving it against a force and doing work. Four Joules are about 1 calories so we did 5 calories of work.


“Wow, I can lift an apple 20 times and burn 5 calories! Helloooo weight loss!” Well…not so fast there Richard Simmons. When we talk about calories in nutrition we are really talking about kilo calories. In other words, every calorie in that potato chip is really 1000 calories in physics. So as far as diet and exercise goes, lifting that apple actually only burned .005 calories of energy,…rats.


It is interesting to think of calories as the unit of energy for humans or as the fuel we use. The average human uses about 2000 calories (food calories that is, 2,000,000 actual calories) a day of energy. Running, jumping, sleeping, eating all uses calories/energy. Running 15 minutes uses 225 calories. Playing soccer for 15 minutes uses 140 calories. (Remember those are food calories, multiply by 1000 to get physics calories). This web site has a nice chart for more information: Calories used in exercise.


Everything we eat refuels that energy tank. All food has calories in it and our body takes those calories and converts them to calories/energy for us to use. How did the food get the energy in it? From the sun! The sun’s energy gives energy to the plants and when the animals eat the plants they get the energy from the sun as well.


So, if you eat a carrot or a burger you are getting energy from the sun! Eating broccoli gives you about 50 calories. Eating a hamburger gives you about 450 calories! We use energy to do things and we get energy from food. The problem comes when we eat more energy than we can use. When we do that, our body converts the energy to fat, our body’s reserve fuel tank. If you use more energy then you’ve taken in, then your body converts fat to energy. That’s why exercise and diet can help reduce your weight.


Let’s take the concept of work a little bit farther. If Bruno carries a 15 pound bowling ball up a 2 meter (6 foot) flight of stairs, how much work does he do on the bowling ball? It takes 66 Newtons of force to lift a 15 pound bowling ball 1 meter. Remember work = force x distance.


So, work = 66 Newtons x 2 meters. In this case, Bruno does 132 Joules of work on that bowling ball. That’s interesting, but what if we wanted to know how hard poor Bruno works? If he took a half hour to go up those stairs he didn’t work very hard, but if he did it in 1 second, well then Bruno’s sweating!


That’s the concept of power. Power is to energy like miles per hour is to driving. It is a measure of how much energy is used in a given span of time. Mathematically it’s Power = work/time. Power is commonly measured in Watts or Horsepower. Let’s do a little math and see how hard Bruno works.


In both cases mentioned above Bruno, does 132 Joules of work, but in the first case he does the work in 30 minutes (1800 seconds) and in the last case he does it in 1 second. Let’s first figure out Bruno’s power in Watts. A Watt is 1 Joule/second so:


For the half hour Bruno’s Power = 132 Joules/1800 seconds = .07 Watts


For the second Bruno’s Power = 132 joules/1 second = 132 Watts


You can see that the faster you exert energy the more power you use. Another term for power is horsepower. You may have heard the term horsepower in car ads. The more powerful car can exert more energy faster, getting the car moving faster. A Dodge Viper has 450 horsepower which can accelerate a 3,300 pound car from 0 to 60 mph in 4.1 seconds…WOW!


One horsepower is 745 Watts or one Watt is .001 horsepower. So converting Watts to horsepower poor Bruno exerts:


.07 x .001 = .00007 horsepower over the half hour


132 x .001 = .132 horsepower over the second (not exactly a Dodge Viper!)


Exercises


  1. If something has a weight of 2 Newtons and is moved half a meter, how many Joules of energy are used? Show your work.
  2. What is the source of all this energy we’re working with here?
  3. It doesn’t count as work when you move the apple back down. Why not?

[/am4show]


We’re going to practice measuring and calculating real life stuff (because science isn’t just in a textbook, is it?) When I taught engineering classes, most students had never analyzed real bridges or tools before – they only worked from the textbook. So let’s jump out of the words and into action, shall we? This experiment is for Advanced Students.


Before we start, make sure you’ve worked your way through this experiment first!


[am4show have=’p8;p9;p14;p41;p88;p92;’ guest_error=’Guest error message’ user_error=’User error message’ ]
For this experiment, you need:


  1. Meter or yard stick
  2. A stopwatch or timer
  3. Object

Here’s what you do:


Download Student Worksheet & Exercises


1. Grab your 100 gram object, put it on a table.


2. Now lift it off the table straight up until you lift it one meter (one yard).


3. Start the timer and at the same time start lifting the object up and down 20 times.


4. Stop the timer when you’re done with the 20 lifts.


So, do you have the power of the Dodge Viper? Hmmm, probably not but let’s take a look.


First of all figure out how much work you did. Work = force x distance so take the force you used and multiply that by the distance you moved it. In this case, you can multiply 1 Newton x 20 meters and get 20 Joules of work.


Now figure out how much power you used. Power is work divided by time so take your work (20 Joules) and divide it by how much time it took you to do that work.


For example, if you lifted the block 20 times (doing 20 Joules of work) in 5 seconds, you did 20 Joules/5 seconds = 4 Watts of power. To convert Watts to horsepower we multiply by .001 so in this example, you did 4 x .001 = .004 horsepower. Not exactly vroom vroom!


Exercises


  1. What is work?
    1. Force divided by distance
    2. Force times distance
    3. Energy required for power
    4. Kinetic and potential energy
  2. What is power?
    1. Work divided by time
    2. Work multiplied by time
    3. Energy used in an exercise
    4. Calories over time
  3. How do we measure work? Name one unit.
  4. How do we measure power? Name one unit.

[/am4show]


A super-fast, super-cool car that uses the pent-up energy inside a mouse trap spring to propel a homemade car forward. While normally this is reserved for high school physics classes, it really is a fun and inexpensive experiment to do with kids of all ages.

This is a great demonstration of how energy changes form. At first, the energy was  stored in the spring of the mousetrap as elastic potential energy, but after the trap is triggered, the energy is transformed into kinetic energy as rotation of the wheels.

Remember with the First Law of Thermodynamics: energy can’t be created or destroyed, but it CAN change forms. And in this case, it goes from elastic potential energy to kinetic energy.

There’s enough variation in design to really see the difference in the performance of your vehicle. If you change the size of the wheels for example, you’ll really see a difference in how far it travels. If you change the size of the wheel axle, your speed is going to change. If you alter the size of the lever arm, both your speed and distance will change. It's fun to play with the different variables to find the best vehicle you can build with your materials!

Here's what you need to do this project:

[am4show have='p8;p9;p100;' guest_error='Guest error message' user_error='User error message' ]
Materials:

  • Mousetrap (NOT a rat trap)

  • Foam block or piece of cardboard

  • Four old CDs

  • Thin string or fishing line

  • Wood dowel or long, straight piece from a wire coat hanger (use pliers to straighten it)

  • Straw

  • Two wood skewers (that fit inside straw)

  • Hot glue gun

  • Duct tape

  • Scissors

  • Four caps to water bottles

  • Drill

  • Razor with adult help


Since the directions for this project are complex, it’s really best to watch the instructions on the video. Here are the highlights:

1. Tape the dowel to the outside of the wire on the mousetrap car (see image below). When the mousetrap spans closed, the dowel whips through the air along with it in an arc.

2. Attach a length of fishing line to the other end of the dowel. Don’t cut the fishing line yet.

3. Attach one straw near each end of a block of foam using hot glue.

4. Insert a skewer into each straw. Insert a wheel onto each end of the skewer. This is your wheel-axel assembly.

5. The wheels on one side should be close to the straw, the wheels on the other end should have a 1/2” gap.

6. Thread the end of the fishing line around the wheels with the gap as shown in the video.

7. Load the mousetrap car by spinning the back wheels as you set the trap.

8. Trigger the mousetrap with a pen (never use your fingers!). The dowel pulls the fishing line, unrolling it from the axel and spinning the wheels as it opens.

What’s Going On?


Energy has a number of different forms; kinetic, potential, thermal, chemical, electrical, electrochemical, electromagnetic, sound and nuclear. All of which measure the ability of an object or system to do work on another object or system.

In the physics books, energy is the ability to do work. Work is the exertion of force over a distance. A force is a push or a pull.

So, work is when something gets pushed or pulled over a distance against a force. Mathematically:

Work = Force x Distance or W = F d

Let me give you a few examples: If I was to lift an apple up a flight of stairs, I would be doing work. I would be moving the apple against the force of gravity over a distance. However, if I were to push against a wall with all my might, and if the wall never moved, I would be doing no work because the wall never moved. (There was a force, but no distance.)

Another way to look at this, is to say that work is done if energy is changed. By pushing on the non-moving wall, no energy is changed in the wall. If I lift the apple up a flight of stairs however, the apple now has more potential energy then it had when it started. The apple’s energy has changed, so work has been done.

All the different forms of energy can be broken down into two categories: potential and kinetic energy.

My students have nicknamed potential energy the “could” energy. The battery “could” power the flashlight. The light “could” turn on. I “could” make a sound. That ball “could” fall off the wall. That candy bar “could” give me energy.

Potential energy is the energy that something has that can be released. For example, the battery has the potential energy to light the bulb of the flashlight if the flashlight is turned on and the energy is released from the battery. Your legs have the potential energy to make you hop up and down if you want to release that energy (like you do whenever it’s time to do science!). The fuel in a gas tank has the potential energy to make the car move.

[/am4show]


trebuchet23This experiment is for Advanced Students. For ages, people have been hurling rocks, sticks, and other objects through the air. The trebuchet came around during the Middle Ages as a way to break through the massive defenses of castles and cities. It’s basically a gigantic sling that uses a lever arm to quickly speed up the rocks before letting go. A trebuchet is typically more accurate than a catapult, and won’t knock your kid’s teeth out while they try to load it.


Trebuchets are really levers in action. You’ll find a fulcrum carefully positioned so that a small motion near the weight transforms into a huge swinging motion near the sling. Some mis-named trebuchets are really ‘torsion engines’, and you can tell the difference because the torsion engine uses the energy stored in twisted rope or twine (or animal sinew) to launch objects, whereas true trebuchets use heavy counterweights.


[am4show have=’p9;p41;p88;p92;p103;’ guest_error=’Guest error message’ user_error=’User error message’ ]


This is a serious wood-construction project. If you have access to scrap wood and basic tools (and glue!), you have everything you need to build this project. You will need to find heavy objects (like rocks or marbles) for the weights.


We want kids to discover that science isn’t in the special parts that come with a kit, but rather in the imagination and skill of the kid building it. We strive to avoid parts that are specially made just for a kit, molded plastic pieces, etc. and instead use parts that any kid could buy from the store. This means that kids can feel free to change things around, use their own ideas to add improvements and whatever else their imagination can come up with. So on this note, let’s get started.


WARNING: This project requires the use of various hand tools. These tools should only be used with adult supervision, and should not be used by children under 12 years of age.


Tools you’ll need:


  •   Hammer
  •   Electric drill with ¼” bit
  •   Hot glue gun & glue sticks
  •   Measuring tape or ruler
  •   Hand saw & clamp (or miter box)
  •   Scissors
  •   Screwdriver (flathead) or wood chisel

Materials:


  • 7 pieces of ½” x ½” x 24″ pieces of wood stock
  • 2 pieces of ¾” x 24″ wood
  • 1 piece of 3″ x 24″ wood
  • 18″ Wooden dowel
  • Screw eye
  • Nails
  • String
  • Clear tube
  • Rubber mesh

Note: wood pieces may be slightly larger or smaller than specified. Just use your best judgment when sizing.


From ½” x ½” x 24″ pieces of wood stock cut:


  • 3 pieces 5″ long
  • 2 pieces 9″ long
  • 3 pieces 3-1/2″ long
  • 4 pieces 5-1/2″ long

From the dowel cut:


  • 2 pieces 7″ long
  • 1 piece 4″ long

From the 3″ x 24″ flat piece of wood cut:


  • 2 pieces 3″ long (one of these has a 1″ square notch in it)
  • 2 pieces 5″ long
  • 1 piece 4-1/2″ long

AND…


  • String should be cut into 2 pieces 14-16″ long
  • The pouch is cut from the rubber mesh and is 5″ x 1-1/2″


Advanced Students: Download your Student Worksheet Lab here!


[/am4show]


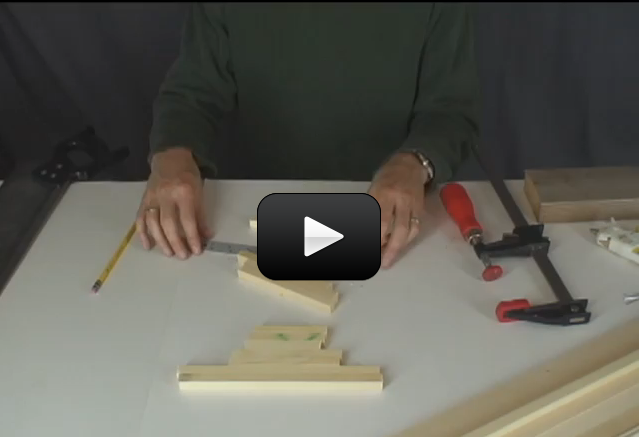
By the use of a pulley (otherwise known as a block and tackle), car mechanics lift 600 lb car engines with one hand! Cranes that lift steel girders and thousand pound air conditioning units are basically pulleys! This video gets you started on the right foot. We’ll outline what’s coming up for this week and how to get the most out of our lesson together. Enjoy!


So what is this lever thing anyway? Well, at it’s most basic level, it’s a stick and a rock…pretty simple machine huh? The lever is made up of two parts, the lever (the stick part) and the fulcrum (the rock part). Believe it or not, using this very simple machine you can lift hundreds of pounds with your bare hands and very little effort. Let’s try it.


This video gets you started on the right foot. We’ll outline what’s coming up for this week and how to get the most out of our lesson together. Enjoy!


[am4show have=’p8;p9;p14;p41;’ guest_error=’Guest error message’ user_error=’User error message’ ]


[/am4show]