Dissection in biology provides a hands-on education above and beyond reading a textbook. By seeing, touching and exploring different organs, muscles and tissues inside an animal and seeing how they work together allows you to really understand your own body and appreciate the amazing world around us. And it's not hard  - you can dissect a grasshopper right at home using this inexpensive specimen with a dissection guide and simple dissection tools! Many doctors, surgeons and veterinarians report that their first fascination with the body started with a biology dissection class.

Materials:

[am4show have='p8;p9;p28;p55;p153;p65;p78;p86;p87;' guest_error='Guest error message' user_error='User error message' ]


Procedure

  1. Observe the external anatomy of your grasshopper. See if you can locate the following:
    1. Head
      1. Antennae
      2. Eyes (compound and simple)
      3. Mouth
        1. Labrum
        2. Mandibles
        3. Maxillae
        4. Labium
        5. Labial palps
    2. Thorax
      1. Legs
        1. Femur
        2. Tibia
        3. Tarsus
        4. Spurs
      2. Wings (front and hind)
      3. Pronotum
    3. Abdomen
      1. Tympanum
      2. Spiracles
      3. Ovipositors (female specimen only)
  2. Using your scissors, detach each part of the grasshopper’s mouth
  3. Using your scissors, remove a section of the exoskeleton from the grasshopper
    1. Remove the wings and legs from the right side of the grasshopper
    2. Cut from the end of the abdomen up to the head of the grasshopper, making your cut just to the right of the mid dorsal line
    3. Cut down the right side of the exoskeleton on either end of your first cut
    4. Pin the exoskeleton to your dissection tray
  4. Look for the following organs:
    1. Heart
    2. Ovaries (female specimen only)
    3. Digestive tract
      1. Esophagus
      2. Crop
      3. Stomach
      4. Gastric caeca
      5. Intestine
      6. Rectum
    4. Malpighian tubules


[/am4show]


Dissection in biology provides a hands-on education above and beyond reading a textbook. By seeing, touching and exploring different organs, muscles and tissues inside an animal and seeing how they work together allows you to really understand your own body and appreciate the amazing world around us. And it's not hard  - you can dissect a worm right at home using an inexpensive specimen with a dissection guide and simple dissection tools! Many doctors, surgeons and veterinarians report that their first fascination with the body started with a biology dissection class.

In today’s dissection, we’ll be looking at an earthworm. Earthworms play an important role in their ecosystem--when they tunnel through dirt they mix nutrients which helps make the soil healthy and able to support plant life.

Materials:

[am4show have='p8;p9;p28;p55;p153;p65;p78;p86;p87;' guest_error='Guest error message' user_error='User error message' ]


Procedure:

  1. Observe the external anatomy of your earthworm. See if you can locate the following:
    1. Anterior and posterior ends
    2. Prostomium
    3. Anus
    4. Septa
    5. Clitellum
    6. Dorsal and ventral surfaces
    7. Bristles
    8. Genital pores
  2. Pin each end of the worm to the tray with the dorsal side facing up
  3. Begin a cut about an inch below the clitellum, and cut up toward the mouth (be careful not to cut too deep and damage the internal organs)
    1. Pin the skin flaps of the worm to the tray
  4. Look for the following organs:
    1. Mouth
    2. Pharynx
    3. Esophagus
    4. Crop
    5. Gizzard
    6. Intestine
    7. Hearts
    8. Dorsal blood vessel
    9. Ventral blood vessel
    10. Ventral nerve cord
    11. Brain
    12. Seminal vesicles
    13. Seminal receptacle

[/am4show]


Dissection in biology provides a hands-on education above and beyond reading a textbook. By seeing, touching and exploring different organs, muscles and tissues inside an animal and seeing how they work together allows you to really understand your own body and appreciate the amazing world around us. And it’s not hard – you can dissect a crayfish right at home using an inexpensive specimen with a dissection guide and simple dissection tools! Many doctors, surgeons and veterinarians report that their first fascination with the body started with a biology dissection class.

In today’s dissection, we’ll be looking at a crayfish. Crayfish are members of the phylum Arthropoda. There are many things that make crayfish interesting: they dwell at the bottom of streams, rivers, and ponds; they feed on just about anything that comes their way (that’s why they’re called freshwater scavengers); and they have many appendages that help them save energy.

Materials

[am4show have='p8;p9;p28;p55;p153;p65;p78;p86;p87;' guest_error='Guest error message' user_error='User error message' ]

Procedure

  1. Observe the external anatomy of your crayfish. See if you can locate the following:
    1. Head
    2. Thorax
    3. Abdomen
    4. Cephalothorax (region where the head is fused to the thorax)
    5. Chelipeds (claws)
    6. Jointed walking legs
    7. Swimmerets (see if you can figure out whether your crayfish is
    8. male or female)
    9. Mouth
    10. Anus
    11. Antennae
    12. Telson
  2. Remove a section of the carapace
    1. Cut 1: Cut up the length of the crayfish--from the bottom edge of the cephalothorax to just below the eyes
      1. Keep your cut parallel to the table
    2. Cut 2: Cut straight down each end of your first cut
    3. Cut 3: Cut the length of each side of the abdomen using the same technique you used in cuts 1 and 2
    4. Remove the exoskeleton
  3. Look for the following organs:
    1. Gills (connected to the walking legs)
    2. Heart
    3. Esophagus
    4. Digestive gland
    5. Cardiac stomach
    6. Pyloric stomach
    7. Intestine
    8. Anus
    9. Green glands
    10. Nerve cord
    11. Gonads

[/am4show]


cheetahImagine a little box of spoons. Now, imagine on moving day that that box of spoons is put into a bigger box with all of the silverware. Now, imagine that that box of silverware is placed into an even bigger box with all of the kitchen stuff.


Now, imagine that the box of kitchen stuff is placed in the moving truck with all of the stuff from your house. In the end the within the truck is all of the stuff from your house, within kitchen box are all of the things from the kitchen, and within the spoon box are just the spoons.


In the same way, we will group organisms according to their physical appearance into hierarchical categories.


[am4show have=’p8;p9;p28;p55;’ guest_error=’Guest error message’ user_error=’User error message’ ]


In this unit we’re going to discuss invertebrates by naming what characteristics they have, and placing them in categories accordingly. For example, jellyfish are placed in the Cnidarian category due to their radial symmetry and stinging cells.


Meanwhile Cnidarians are placed in the invertebrate category due to their lack of a backbone. Furthermore, invertebrates are placed in the animal category because they are multicellular, eukaryotic (having cells containing true nuclei), and heterotrophic (required to eat molecules to survive: do not produce their own food).


In this way, we classify animals; we place them in categories according to physical characteristics (modern biology classifies organisms according to DNA similarity) they have (radial symmetry, stinging cells, and lack of backbone, for example).


As you can see, the largest box or category, “animals”, is much larger than the tiny category “jellyfish”. The number of organisms in each category gets progressively fewer as you classify things from animals in general, to jellyfish in particular. The categories follow this structure:


  • Kingdom: The domain in which living organisms are classified.
  • Phylum: The subdivision in which all classes below have the same body plan.
  • Class: Organisms that share one or more attributes.
  • Order: Containing one or more families.
  • Family: Organisms descended from the same ancestors sharing relatively similar characteristics.
  • Genus: Groups of species that are structurally similar or phylogenetically related.
  • Species: Organisms capable of mating with one another.

An easy way to remember the order of the hierarchy is to think of this mnemonic: Kings Play Cards On Funny Green Stools—each first letter stands for the first letter of a level in the hierarchy (Kingdom, phylum, etc).


For example the classification of the jellyfish the Portuguese Man-O-War (shown):


  • Kingdom: Animalia (Multicellular, heterotrophic, eukaryotic)
  • Phylum: Cnidaria (Radial symmetry, stinging cells)
  • Class: Hydrozoa (very small predatory animals, mostly saltwater, solitary and colonial)
  • Order: Siphonophora (Colonies of specialized cells which could not survive on their own and resemble one organism)
  • Family: Physaliidae (Organisms of the genus Physalia)
  • Genus: Physalia (Colonies of specialized cells which float on the Indian or Pacific Oceans via gas-filled bladders)
  • Species: P. physalis(Portuguese Man-O-War)

And that’s it! To get a better handle on this (it’s confusing at first!), here’s a simple activity you can do that’s fun and easy. Here’s what you need:


  • Card stock
  • Printer
  • Ziploc bags

Here’s what you do:


  1. Print out the Challenge: Classifying Invertebrates file. You’ll want to print several copies the cards on card stock. You should have enough so that each team (or each student) gets a complete set of cards. They can be stored in zipper-type bags for future use.
  2. Work in teams to correctly classify the invertebrates. You can compare your answers to the key shown below.
  3. For more of a challenge, time yourselves to see which team (or student) can complete the classification fastest. One player shuffles the cards and places them in a pile, then serves at the times for the other team.
  4. When you’re ready for answers, print out the Answer Key.

 [/am4show]


Some insects are just too small! Even if we try to carefully pick them up with forceps, they either escape or are crushed. What to do?


Answer: Make an insect aspirator! An insect aspirator is a simple tool scientists use to collect bugs and insects that are too small to be picked up manually. Basically it’s a mini bug vacuum!


[am4show have=’p8;p9;p28;p55;p153;p65;p69;p86;p87;’ guest_error=’Guest error message’ user_error=’User error message’ ]


Download Student Worksheet & Exercises


Here’s what we’ll need:


  • A small vial or test tube with a (snug fitting) two-holed rubber stopper.
  • Two short pieces of stiff plastic tubing. We’ll call them tube A and tube B.
  • Fine wire mesh (very small holes because this is what will stop the bugs from going into your mouth!)
  • A cotton ball.
  • One to two feet of flexible rubber tubing.
  • Duct tape or a rubber band.

Here’s how we make it:


  • Insert the tube A and Tube B into the stopper such that the stopper is in the middle of both pieces.
  • Bend both A and B plastic tubing 90 degrees away from each other. Their ends should be pointing away from each other.
  • Cut a square of mesh large enough to the end of the plastic tubing. Tape (or rubber-band) the mesh over bottom of tube A only. Remember, if you cover both of the tubes the bugs won’t be able to enter the aspirator.
  • Insert a small amount of cotton ball into the other side of tube A (not enough to block airflow, just enough to help filter the dust and particles entering the vial.
  • Cut another piece of mesh and cover the other end of Tube A. Secure that mesh with another piece of tape/rubber band.
  •  Fit the rubber tubing over the top of tube B (the bent side).
  • Fit the stopper into the vial/test tube.

How it works: To use the aspirator, hold the end of the rubber tubing near the insects you want to collect, and suck through the top of tube A. The vacuum you create sucks the insects into the vial/test tub (make sure they can fit in the tube!).


Troubleshooting: The bugs aren’t being pulled into the vial! In that case the suction may not be strong enough. Remove the cotton ball and try again. If it still is not working check to make sure the aspirator is air-tight (is the stopper fitting snuggly into the vial? Are there cracks/holes around or in the plastic tubes?).


TIP: I kept eating bugs! Make sure your wire mesh is very fine (the holes are smaller than the bugs you’re trying to collect). Otherwise you may be ordering a lunch you don’t want!


Exercises


  1. Why don’t we use a large vacuum to suck up the bugs?
  2.  Why do we need a small mesh covering on the end of the straw that we suck on?
  3.  Why do we need to be careful about catching ants?
  4.  What insects did you catch that you rarely see?
  5.  What familiar insects did you catch? (answers may vary).

[/am4show]


Unsurprisingly, often the most interesting critters found in soil are the hardest to find! They’re small, fast, and used to avoiding things that search for them. So, how do we find and study these tiny insects? With a Berlese Funnel (Also called the Tullgren funnel)!


[am4show have=’p8;p9;p28;p55;p86;p87;’ guest_error=’Guest error message’ user_error=’User error message’ ]


The funnel separates the insects from the soil with heat. A light bulb heats the soil at one end of a funnel and causes the insects to migrate, through mesh, to a preservative liquid at the other end of the funnel. Originally Antonio Berlese used a hot water bottle to provide the heat. Later, Albert Tullgren modified the funnel to work with a light bulb. Thus, we now call it the Berlese Funnel, the Tullgren Funnel, or the Berlese-Tullgren Funnel.


Download Student Worksheet & Exercises


An ultraviolet lamp used to attract night flying insects. The simplest set up is to hang a white sheet on a line and hang a portable black light on one side of the sheet. Insects will land on the sheet and can be tallied, identified or collected.


To make a larger, more permanent model, here’s what you need:


  • 1 gallon tractor funnel.
  • Clothespins.
  • A light fixture that fits on top of the funnel and has a reflective interior.
  • A bucket that has a smaller diameter than the top of the funnel. The funnel needs to be suspended from the bucket so the insects can fall into the jar.
  • A clean jam-jar.
  • Rubbing alcohol.
  • ¼ inch wire mesh.
  • Light bulb. The wattage has to be high enough to heat the soil, but not so high that it will light the funnel on fire. Best to do it by trial and error with lots of supervision.
  • Soil. The best will be from a compost pile.

Here’s how you make the funnel:


  1. Cut a large hole in the side of the bucket. This will allow you to retrieve the jar without disassembling the apparatus. Naturally, the hole should be larger than the jar.
  2. Fit the wire mesh so that it covers the bottom third of the funnel.
  3. Fit the funnel on top of the bucket.
  4. Fit the light fixture (with the light bulb in it) on top of the funnel with the clothespin.
  5.  Place the jar underneath the funnel (with or without the rubbing alcohol depending on if you want the specimens dead or alive).

How to use the funnel: Simply turn on the light and wait. Check the vial every fifteen minutes or so for an hour. After you have finished remember to turn off the light! Also, remember that some of the specimens may be very small and best observed under a microscope. For the best results do it in the morning or on a cold day.


How the funnel works:  Figure 1 shows the funnel in action. The light (G) creates heat. The insects in the soil don’t like heat, so they move from the soil (D) through the funnel (C) into the jar (B). The jar is filled with rubbing alcohol (A) preserves the specimens. The wire (not shown in the figure) keeps most of the soil from falling into the jar.


Troubleshooting: What if there still aren’t any bugs after an hour? If this happens, don’t panic. Ask yourself these questions:


  • Is the light strong enough? If the light is not strong enough (i.e. generating enough heat), then the soil will not get hot enough to push the insects into the jar. The funnel works by creating a gradient of heat which the bugs move down into the jar. If the light isn’t creating that gradient, no critters will feel like moving.
  • Is it hot today? If the sun is out and making everything hot, then the light will not make enough of a difference in heat—there will not be a heat gradient to move down. If so, don’t worry; just try again the next morning.
  • Is there a problem with the funnel? Is the nozzle of the funnel too far from the mouth of the jar? Make sure that the specimens are falling into the jar and not around it. Is the mesh wire too fine? You want mesh that will keep most of the soil in the funnel, but not so fine that it will stop the bugs from getting through.
  • Lastly, are there any bugs in the soil? Not just any dirt will do for this project. You need soil rich with life! The best place to find this type of soil is near/in a compost pile (after it has become soil).

Exercises


  1. Why are some insects difficult to find in soil?
  2.  Why does the Berlese Funnel work to find insects?
  3.  What if the insects do not respond to the heat lamp in your experiment?
  4.  What types of insects were you able to find using the Funnel?

[/am4show]


The way animals and plants behave is so complicated because it not only depends on climate, water availability, competition for resources, nutrients available, and disease presence but also having the patience and ability to study them close-up.


We’re going to build an eco-system where you’ll farm prey stock for the predators so you’ll be able to view their behavior. You’ll also get a chance to watch both of them feed, hatch, molt, and more! You’ll observe closely the two different organisms and learn all about the way they live, eat, and are eaten.


[am4show have=’p8;p9;p28;p55;p153;p65;p69;p78;p86;p87;’ guest_error=’Guest error message’ user_error=’User error message’ ]


This experiment comes in two parts. The materials you need for both parts are:


  • four 2-liter soda bottles, empty and clean
  • 2 bottle caps
  • one plastic lid that fits inside the soda bottle
  • small piece of fruit to feed fruit flies
  • aluminum foil
  • plastic container with a snap-lid (like an M&M container or film can)
  • scissors and razor with adult help
  • tape
  • ruler
  • predators: spiders OR praying mantis OR carnivorous plants (if you’re using carnivorous plants, make sure you do this Carnivorous Greenhouse experiment first so you know how to grow them successfully)
  • soil, twigs, small plants

Fruit Fly Trap

In order to build this experiment, you first need prey. We’re going to make a fruit fly trap to start your prey farm, and once this is established, then you can build the predator column. Here’s what you need to do to build the prey farm:


Download Student Worksheet & Exercises


Did you know that fruit flies don’t really eat fruit? They actually eat the yeast that growing on the fruit. Fruit flies actually bring the yeast with them on the pads of their feet and spread the yeast to the fruit so that they can eat it. You can tell if a fruit fly has been on your fuit because yeast has begun to spread on the skin.


When you have enough fruit flies to transfer to the predator-prey column, put the entire fruit fly trap in the refrigerator for a half hour to slow the flies down so you can move them.


If you find you’ve got way too many fruit flies, you might want to trap them instead of breed them. Remove the foil buckets every 4-7 days or when you see larvae on the fruit, and replace with fresh ones and toss the fruit away. Don’t toss the larvae in the trash, or you’ll never get rid of them from your trash area! Put them down the drain with plenty of water.


Predator-Prey Column

You can use carnivorous plants, small spiders, or praying mantises. If you use plants, choose venus flytraps, sundews, or butterworts and make sure your soil is boggy and acidic. You can add a bit of activated charcoal to the soil if you need to change the pH. Since the plants like warm, humid environments, keep the soil moist enough for water to fog up the inside on a regular basis. You know you’ve got too much moisture inside if you find algae on the plants and dirt. (If this happens, poke a couple of air holes.) Don’t forget to only use distilled water for the carnivorous plants!


Keep the column out of direct sunlight so you don’t cook your plants and animals.


Exercises


  1. What shape is the head of the mantis?
  2.  How many eyes does a praying mantis have?
  3.  How else has the mantis head evolved to stalk their prey?
  4.  How does a praying mantis hold its food?
  5.  Do fruit flies eat fruit?
  6.  How do predators and prey change over time?

[/am4show]


What grows in the corner of your windowsill? In the cracks in the sidewalk? Under the front steps? In the gutter at the bottom of the driveway? Specifically, how  doe these animals build their homes and how much space do they need? What do they eat? Where do fish get their food? How do ants find their next meal?


These are hard questions to answer if you don’t have a chance to observe these animals up-close. By building an eco-system, you’ll get to observe and investigate the habits and behaviors of your favorite animals. This column will have an aquarium section, a decomposition chamber with fruit flies or worms, and a predator chamber, with water that flows through all sections. This is a great way to see how the water cycle, insects, plants, soil, and marine animals all work together and interact.


[am4show have=’p8;p9;p28;p55;p65;p78;p86;p87;’ guest_error=’Guest error message’ user_error=’User error message’ ]


Here’s what you need:


  • four (or more) 2-liter soda bottles, empty and clean and with caps
  • scissors
  • tape
  • razor with adult help
  • ruler
  • soil
  • water
  • plants or seeds
  • compost or organic/food scraps
  • spiders, snails, fruit flies, etc

Here’s what you do:


Download Student Worksheet & Exercises


You can easily incorporate the Water Cycle Column, the Terraqua Column, the Predator-Prey Column, Worm Column, and the Fruit Fly Trap into your Eco-Column. If you want to make your Eco-Column more permanent, seal it together with silicone sealant, making sure you have enough drainage holes and air holes in the right places first.


Exercises


  1. What are parts of the eco system?
  1. Give an example of each.
  1. What do decomposers do?
  1. How do fruit flies breed?
  1. How does the precipitation funnel function in this eco column?

[/am4show]


I have to admit, one of my all-time favorite animals is the octopus. It’s not only an invertebrate, but amazingly intelligent and can be poisonous (like the blue-ring Octopus shown here) or not.


The octopus is an animal because it’s multi-cellular (more than one cell, so amoeba and protists are not animals), it’s moveable (not like a fungus), and a heterotroph (not a plant). Their life cycle starts with a single cell that divides and leads into a multi-celled adult.


All molluscs have a muscular foot on the bottom, and there are three basic shapes: gastropods (snails and slugs), bivalves (oysters and clams), and cephalopods (octpous and squid).


The Indonesian Mimic Octopus, Thaumoctopus mimicus. This fascinating creature was discovered in 1998 off the coast of Sulawesi in Indonesia, the mimic octopus is the first known species to take on the characteristics of multiple species. This octopus is able to copy the physical likeness and movement of more than fifteen different species, including sea snakes, lionfish, flatfish, brittle stars, giant crabs, sea shells, stingrays, jellyfish, sea anemones, and mantis shrimp.


This animal is so intelligent that it is able to discern which dangerous sea creature to impersonate that will present the greatest threat to its current possible predator. For example, scientists observed that when the octopus was attacked by territorial damselfishes, it mimicked the banded sea snake, a known predator of damselfishes.


Invertebrates are organisms without backbones. Let’s look at two very simple types of invertebrates; Sponges and Cnidarians. Sponges (Phylum Porifera), found in oceans all over the world, are made up of colonies of specialized cells—some help push water through the sponge, some help it feed, some are responsible for reproduction, etc.


They feed by filtering water through its pores. They have flagella on the inside that drive the water through and pick up particulates in the water. In this sense, they are known as sessile filter feeders. Sponges are attached to the ground below them—they are sessile (unable to move). However, sponges can move around at certain times in their lifespan.


Scientists use to think they were plants, but we know now that they are in fact animals. Besides their specialized cells, sponges do not have any organs, nerves, or even true tissues. They are held together through the cooperation of the colony.


Cnidarians (don’t pronounce the ‘c’, so it sounds more like “nay-DAR-ee-ons”) also are radially symmetrical. This means they have a circular body plan such that any way you cut them in half the sides will be equal. There are two basic body forms; polyp and medusa. The polyp is a cup-shaped body—with the mouth facing upward (sea anemones, for example). The medusa is bell-shaped and has a downward-facing mouth (jellyfish, for example). Some can even start in the medusa stage and then move into the hydra stage.


Painful stinging cells, called nematocysts, make the phylum Cnidaria especially notable. Jellyfish and sea anemones are just two examples of these painful creatures. The nematocysts are, in fact, long hollow threads that are used to trap prey. Additionally, these nematocysts are triggered externally, so even if you come across a dead jellyfish don’t step on it!


A Cnidarian with a polyp body plan, a sea anemone, and a Cnidarian with a medusa body plan, a jellyfish. Notice the upward facing mouth of the polyp, and the downward facing one of the jellyfish.


Cnidarians, unlike sponges, have true tissues. They digest their food in a gastrovascular cavity—a large cavity containing digestive enzymes. The digestive cavity also has circulatory functions. Cnidarians, like sponges, can form colonies. Colonies of polyps form the jellyfish the Portuguese Man-O-War. Similarly, colonies of cnidarians form on calcium carbonate skeletons to make coral reefs.


Here we’re going to discuss the differences between three types of worms; flatworms, roundworms, and segmented worms. The word “worm” is not, in fact, a scientific name. It’s an informal way of classifying animals with long bodies and no appendages (no including snakes). They are bilaterally symmetrical (the right and left sides mirror each other). Worms live in salt and fresh water, on land, and inside other organisms as parasites.


The differences between the three types of worms we will discuss depend on the possession of a body cavity and segments. Flatworms have neither a body cavity nor segments. Roundworms only have a body cavity, and segmented worms have both a body cavity and segments.


Flatworms (Phylum Platyhelminthes) have incomplete digestive systems. That means that their digestive system has only one opening. The gas exchange occurs on the surface of their bodies. There are no blood vessels or nervous systems in flatworms. Some are non-parasitic, like the Sea flat worm, and some are parasitic, like the tapeworm.


[am4show have=’p8;p9;p28;p55;p78;p86;p87;’ guest_error=’Guest error message’ user_error=’User error message’ ]


Roundworms (Phylum Nematoda) have body cavities—as contrasted with flatworms which do not. The body cavity allows roundworms to have complete digestive tracts (both a mouth and an anus). The mouth and anus are connected by a gut—where the food is digested. They also have a simple nervous system and brain.
Roundworms can be parasites of plants and animals. In dogs they are often know to cause heart problems. In humans roundworm parasites can sometimes cause a swelling disease called elephantitis.


Annelids or Segmented Worms (Phylum Annalida) the most developed of the three, have both a body cavity and segments. Their body cavity helps give them structure—it serves as a hydroskeleton. By “segmented” it’s meant that they are divided into repeating units. They can be non-parasitic (i.e. earthworms) or parasitic (i.e. leeches). Interestingly, the giant red leech only eats giant earthworms.


Worm Column

If you’re fascinated by worms but frustrated that you can’t see them do their work underground, then this worm column is just the ticket for you. By using scrap materials from the recycling bin, you’ll be able to create a transparent worm farm. here’s what you need:


  • two 2-liter soda bottles, empty and clean
  • one brown paper grocery bag
  • 20 red worms
  • newspaper, old leaves, peat moss, and/or straw for worm bedding
  • last night’s dinner, organic scraps, plant material for worm food

Here’s what you do:


Download Student Worksheet & Exercises


Things to Compare with your Worms:


  1. Look at the worms under the magnifying glass.
  2. Measure the lengths of the worms.
  3. Make note of:
    1. The outer layer of the worms: Is it hard? Is it segmented? What are other observations that can be made?
    2. Do they have legs?
    3. Do they have antenna?
    4. What are the main differences?
    5. What are the main similarities?

Garden Worm Tower

Here’s how you can make your own worm tower right in your garden:


Build your own worm farm and watch them turn food scraps into soil!

Materials:


  • 2 polystyrene boxes with lids the same size. (Let’s call them Bin A and Bin B.)
  • A sheet of insect screen to fit the bottom of the boxes
  • Newspaper clippings
  • Garden soil
  • Food scraps (half-eaten fruits and veggies, stale biscuits and cakes, crushed egg shells, coffee grounds)
  • Water
  • Worms (Either “Tiger”, “reds”, or “blues”; ask for them at your local garden store)


Build the farm:


  1. Punch evenly spaced holes in the bottom of Bin A.
  2. Place the insect screen on the bottom of Bin A (this is so that the worms don’t fall out).
  3. Fill Bin A ¾ full with wet newspaper clippings.
  4. Add a layer of garden soil to Bin A.
  5. Add the worms.
  6. Place Bin A in Bin B. Make sure there’s enough room in Bin B when Bin A’s placed in it to collect the worm pee and waste. Be sure to empty and clean Bin B every couple days.
  7. Add food to bin A! Start off small. You don’t want to over-feed the worms. Start out with a couple scraps in the corner and see how long it takes for them to disappear—that should give you a good idea of how much to feed your worms.

Earthworm Dissection

You can dissect a earthworm right at home using this inexpensive earthworm specimen and simple dissection tools!


Exercises


  1. What are three types of worms?
  2.  What are the characteristics of each?
  3.  What are the elements of a complete digestive system?
  4.  What are some benefits of worms in gardening?

[/am4show]


Echinoderms, meaning “spiny skin”, are radial symmetric marine animals. They are found at all depths—both shallow and deep water. They play important roles in their ecosystems. Despite appearances, they do not have skeletons. The “spiny skin” is, in fact, skin covering a spiny endoskeleton (internal skeleton).
How do echinoderms move? How do they feed themselves?


Echinoderms have a water vascular system responsible for gas exchange, movement, and feeding. This system is an internal network of fluid-filled canals. Depending on the species, they have various ways of getting food into their water vascular systems. Some are filter feeders, while others (such as starfish) are predatory. They use this system in place of gills, heart, and a closed circulatory system. Although they do not have brains, they do have nerve nets responsible for receiving and processing sensory information.
What about their reproduction? They reproduce sexually—with sperms and eggs. Some species provide brainless parental care.


Here’s a super-short quick snippet about starfish:


Echinoderms are found worldwide, and play important roles in their environments. Primarily, they are strong links in the food chain. For example, they control the growth of algae on coral reefs (making it easier for the reefs to filter-feed), and they serve as food for other organisms (otters, for example).


Starfish Dissection

You can do this dissection at home! Here’s a very inexpensive starfish dissection guide and starfish specimen and simple dissection to


ols!


Arthropods, organisms in the phylum arthropoda, are organisms with segmented bodies and appendages on at least one segment. They use these appendages for defense, feeding, sensory perception, and locomotion. We usually see them everyday: fly on the wall, or perhaps moth by the light. The phylum is incredibly divers and the organisms within it have developed numerous adaptations to deal with environments from your kitchen counter to the Amazon!


Arthropoda is the largest phylum in the animal kingdom. Examples of Arthropods include: scorpions, crabs centipedes, insects, and crayfish.


Arthropods are covered my hard external skeletons. When they grow they shed these skeletons in a process called molting. For gas exchange aquatic arthropods have gills, while terrestrial (land-based) arthropods have either a tracheal systems or book lungs. Tracheal systems are air sacs fed by pores in the exoskeleton. Book lungs are gills modified to extract oxygen from air.


Six classes of crustaceans are recognized in the word, and almost fifty two thousand species. Most of them are aquatic. Interestingly, they have a brain in the form of ganglia (connections between nerve cells).


In the phylum Mirapoda (Centipedes and Millipedes), over thirteen thousand species exist! All of them live on land. Some species have fewer than ten legs, while some can have over seven hundred and fifty!


Spiders (a type of Arachnid) are found in the class Araneae and the subphylum Chelicerata. This subphylum includes scorpions, mites, and ticks as well as spiders. Arachnids characteristically have four pairs of legs, a pair of chelicerae (see table at the end of this section), and a body organized into the cephalothorax (a fusion of the head, thorax, and abdomen). There are eleven subgroups of Arachnids.


Insects are not only the most diverse subgroup of arthropods, but with over a million discovered species it is the most diverse group of animals on earth. Although they can’t all be as beautiful as a butterfly, they all play important roles in their ecosystems—just think of where we would be without bees!


The segmented exoskeletons of insects have a hard, inner layer called the cuticle, and a water-resistant outside layer called the exocuticle. Insects are divided into two major groups: winged insects and wingless insects. Air is taken in through structures called spirials, and delivered directly to the body.


Sea angels used to be known as a pteropod (small swimming sea slugs), but now are recognized as pelagic marine opisthobranch gastropod molluscs. Sea angels, also called cliones, live all over the world, both in polar and equatorial seas. Sea butterflies are similar to sea angels, but they also have a shell. Some sea angels even eat sea butterflies, which are slower and larger than themselves!


Sea angels are transparent, gelatinous, and unusually small (the average size is only an inch). Since sea angels are simultaneous hermaphrodites, their fertilization occurs internally and eggs are released to float with the ocean currents until they hatch on their own.


Although sea angels usually enjoy slow movement, as they only beat their winds once a second, they can also put on a burst of speed if they’re catching dinner.


If you have ever gone searching though tide-pools at the beach, you’ve probably seen your fair share of Mollusks. This is because mollusks live mainly in the sea (in the intertidal zone), although some live in freshwater.


Mussels, scallops snails, oysters (from which we get pearls!), and clams are only a few examples of types of mollusks. The mollusk body plan generally involves a muscular foot for locomotion, a body housing organs, a head with eyes or tentacles, and a mantle (which creates the shell). Usually, they absorb oxygen from the water using gills.


Only mollusks have a structure called a radula. Radulae (the plural of radula) are composed mostly of chitin, and can be as simple as a structure used to scrape algae off rocks, to the beaks of octopuses.


Insects are not only the most diverse subgroup of arthropods, but with over a million discovered species it is the most diverse group of animals on earth. Although they can’t all be as beautiful as a butterfly, they all play important roles in their ecosystems—just think of where we would be without bees!


The segmented exoskeletons of insects have a hard, inner layer called the cuticle, and a water-resistant outside layer called the exocuticle. Insects are divided into two major groups: winged insects and wingless insects. Air is taken in through structures called spirials, and delivered directly to the body.


Most insects reproduce sexually and are oviparous (hatch from eggs after the eggs are laid), although some insects reproduce asexually.


You can grow your own butterflies using a premade kit from Home Training Tools!


Dissection in biology provides a hands-on education above and beyond reading a textbook. By seeing, touching and exploring different organs, muscles and tissues inside an animal and seeing how they work together allows you to really understand your own body and appreciate the amazing world around us. And it's not hard  - you can dissect a clam right at home using this inexpensive clam specimen with a dissection guide and simple dissection tools! Many doctors, surgeons and veterinarians report that their first fascination with the body started with a biology dissection class.

Materials:

[am4show have='p8;p9;p28;p55;p153;p65;p78;p86;p87;' guest_error='Guest error message' user_error='User error message' ]


Procedure:

  1. Place clams, one at a time, into boiling water; just long enough that they are easily opened.
  2. Take the clams out and snip the abductor muscles so the clams lie flat.
  3. Refer to diagrams (click on links above) and locate the following:
    1. Abductor muscles
    2. Gills
    3. Mantel
    4. Excurrent siphon
    5. Incurrent siphon
    6. Stomach
    7. Foot
    8. Mouth
    9. Intestine

Questions to Consider:

  1. Is it easier to see the parts in the diagram or the real clam? Why?
  2. Do the skewers enter more easily into the incurrent siphon or the excurrent siphon? Why?
  3. Where do the siphons end?
  4. Measure the diameter of the clam, the size of their stomach, and the size of their gills, on several clams.
    1. Are they all the same?
    2. How great are the distances?
    3. Can this data be graphed?

[/am4show]


Dissection in biology provides a hands-on education above and beyond reading a textbook. By seeing, touching and exploring different organs, muscles and tissues inside an animal and seeing how they work together allows you to really understand your own body and appreciate the amazing world around us. And it’s not hard – you can dissect a starfish right at home using an inexpensive specimen with a dissection guide and simple dissection tools! Many doctors, surgeons and veterinarians report that their first fascination with the body started with a biology dissection class.

In today’s dissection, we’ll be looking at a starfish. Starfish are members of the phylum Echinoderm. There are many things that make starfish interesting: their rays are symmetrical around their center (this is called radial symmetry), they use seawater instead of blood to transport nutrients through their bodies (this is called a water vascular system), and they move around using tube feet on the underside of their bodies.

Materials

[am4show have='p8;p9;p28;p55;p153;p65;p69;p86;p87;' guest_error='Guest error message' user_error='User error message' ]

Procedure

  1. Observe the external anatomy of your starfish. See if you can locate the following:
    1. Madreporite (sieve plate)
    2. The spiny skin on the top side of the starfish
    3. Tube feet
    4. Ambulacral grooves
    5. Mouth
  2. Remove a large piece of skin from one of the starfish’s rays
    1. Using your scissors, snip off a small piece of the tip of one ray
      1. Choose a ray that does not attach near the madreporite
    2. Take the point of the scissors, place it into the opening you created in step 2.1.1 above, and carefully cut up the length of the ray, around the center of the starfish, and back down the length of the ray
      1. Make your cut parallel to the table
      2. Do not cut around the madreporite, rather keep your cut to the inside of the madreporite
  3. Look for the following organs:
    1. Digestive glands
    2. Pyloric stomach and pyloric ducts
    3. Cardiac stomach
    4. Gonads (ovaries or testes)
  4. Identify the parts of the water vascular system:
    1. Madreporite
    2. Stone canal
    3. Ring canal
    4. Radial canal
    5. Ampullae
    6. Tube feet

[/am4show]


Photo courtesy of ShelteringMemory.wordpress.com
Quadrants are an archeologist’s best friend. Basically, they’re large, wooden frames scientists—especially archeologists—use to keep track of exactly where they find things during a dig.


A “dig” is what archeologists call the process of uncovering artifacts. You can also use this tool in the backyard when investigating a field of bugs, insects, and other invertebrates!


The quadrant is divided into smaller sections by pieces of string tied at regular intervals. Where the string intersects, it creates square sections that can be easily labeled and referred to in a research notebook.


This way, when the scientists return to their labs they can remember exactly where they found everything—a very important part of the science of archeology!


[am4show have=’p8;p9;p28;p55;’ guest_error=’Guest error message’ user_error=’User error message’ ]


Here’s how archaeologists make before their next dig (I’ll show you how to make a quicker version in a minute):


  • 20 feet of cheap, ¾ inch PVC piping (there’s no need to get the good stuff—the cheapest you can find will work).
  • PVC elbows
  • PVC glue (work in a well ventilated area).
  • A saw.
  • String.
  • Drill with a small bit.
  • Tape measure.

Let’s make it!


  1. Cut the pipe into four 39 inch pieces.
  2. On a flat surface, create a square with the PVC using the elbows and the glue. Make sure that the square is in one plane.
  3.  Drill holes in the pipes at the midpoint, and at ½ and ¾. Drill all the way through. Connect the opposing holes with string. You should end up with 16 equal sections.

And now… they excavate!


Now, this is usually overkill for most kid archaeologists. To make a simpler version, substitute sticks or yardsticks for the PVC pipe, and secure the string grid around the rulers. If you really want, you can simply lay the string on the ground and skip the frame altogether.


[/am4show]


Some animals glow under ultraviolet light.  Jellyfish are a prime example of these glowing animals.  Under normal conditions, worms do not glow.


However, scientists have been able to genetically alter some worms so that they will glow under an ultraviolet light.  To do this, scientists engage in genetic engineering.  They inject the gene that makes jellyfish glow into the worm.


Even though jellyfish and worms are very different animals, their genes, like the genes of most living things, are actually quite similar.  So, the worms with the injected gene will glow just like jellyfish do.


[am4show have=’p8;p9;p28;p55;’ guest_error=’Guest error message’ user_error=’User error message’ ]


A glowing worm is kind of cool, but what is the actual scientific benefit to this?  It turns out that glowing worms can actually tell scientists quite a lot about what’s going on inside the worm.  Observers can actually see the nervous system in action, so they can observe how nerve cells communicate with each other.  This is far more powerful than a dissection, because the observer is able to see how things work while the worm is alive.  The function, rather than just the structure, of the animal can be observed.  This technique, of adding a gene to make an organism glow and then looking at how a certain body system works, has been used with other organisms besides worms.


It is important to point out that these glowing worms are not the same as the animal commonly called a glowworm.  Glowworms are actually not worms at all (although they do look somewhat like worms.)  They are actually insects in the larval stage which have the property of bioluminescence, which is defined as the ability to emit, or give off light.  In glowworms, the bioluminescence is generally the result of a chemical reaction between the waste product of the larva and oxygen.  When the insect undergoes metamorphosis and reaches the adult stage, it will no longer exhibit bioluminescence.


[/am4show]


A biological net is one of the essential tools of a field biology researcher — you! A bio-net allows you to safely and gently gather samples. Whether you’re studying butterflies or tadpoles a bio-net is the tool to have! Important safety note: Do both of these with parental supervision. Many of the steps are tricky and involve sharp objects.


[am4show have=’p8;p9;p28;p55;p69;’ guest_error=’Guest error message’ user_error=’User error message’ ]


What you need (these materials are not listed int he main shopping list, as this project is a little more involved):


  • 1-meter x 2-meter fly-wire screen netting (gauge = 0.6mm spaces)
  • 4 strips (20cm x 1m) of heavy canvas
  • 2 broom handles
  • Nails
  • Thread
  • Hammer
  • Sewing machine
  • Ironing board with iron

How to make a two-handled bio-net:


Basically, you’re going to create a square net of fly-wire, frame it with the strips of canvas, then attach the broom handles to either side. Your final product should look like this:


  1. Fold the fly-wire in half so it’s 1m X 1m.
  2. Fold the edges of the canvas strips under so there’s a smooth edge to each of the sides of the strips. About 1cm each side should work.
  3. Sew two of the strips to the top and bottom of the fly-wire square.
  4. Sew the other two to the sides of the fly-wire, but leave enough space for the broom handles to slip in.
  5. Slip the broom handles into the sleeves you just created. Use the nails to firmly attach the canvas sleeves to the handles. These are the handles of the bio-net. Voilà!

How to make a single handled sampling net:


What you need:


  • 4 (60cm X 30cm) pieces of fly-wire netting (250um mesh)
  • 1.5m piece of bias tape
  • 1m (or longer) broom handle
  • Thread
  • Scissors
  • Sewing machine
  • 3 wire coat hangers
  • Drill with 0.5com wood bit
  • Pliers
  • Binding

Let’s make the net!


  1. Cut the netting into four triangles (50cm high with 30cm bases) (1).
  2. Sew them together into a single net.
  3. Sew a 1.5m strip of bias tape onto the net. Don’t sew both sides. Leave the outside flap un-sewn so that you can sip the wire in (2).
  4. Drill a hole in one of the ends of the broom handle.
  5. Remove the hooks from the hangers.
  6. Untwist the hangers and slip into the bias-tape sleeve.
  7. Sew the bias tape sleeve closed.
  8. Twist the tops of the hangers together into a stem and insert into the hole in the broom handle.
  9. Bend the hanger hooks into a “U” and use it to bind the net to the handle.
  10. Bind the U to the broom with the binding (5).

[/am4show]


Let’s see how much you’ve picked up with these experiments and the reading – answer as best as you can. (No peeking at the answers until you’re done!) Just relax and see what jumps to mind when you read the question. You can also print these out and jot down your answers in your science notebook.


[am4show have=’p8;p9;p28;p55;’ guest_error=’Guest error message’ user_error=’User error message’ ]


  1. What is the difference between invertebrates and vertebrates?
  2. Are sponges colonies of cells? If so, are all the cells the same type?
  3. What are sessile filter feeders?
  4. Would you want to touch an organism with nematocysts? Why or why not?
  5. What is the difference between a polyp and a medusa?
  6. What are two differences between sponges and Cnidarians?
  7. Name two examples of Cnidarian colonies.
  8. What are some of the differences between flatworms, roundworms, and segmented worms?
  9. What is an incomplete digestive system?
  10. Which part of a segmented worm serves as its hydroskeleton?
  11. Which invertebrate has a radula, and what is it used for?
  12. Do Echinoderms have exoskeletons?
  13. Give two examples of Echinoderms.
  14. What role doe nerve nets play in Echinoderms?
  15. Which phylum molts its exoskeleton in order to grow?
  16. What are three examples of arthropods?
  17. Do arthropods only use book lungs to breath?
  18. What are the two major groups of insects?
  19. How do most insects reproduce?

[/am4show]


Let’s see how you did! If you didn’t get a few of these, don’t let it stress you out – it just means you need to play with more experiments in this area. We’re all works in progress, and we have our entire lifetime to puzzle together the mysteries of the universe!


Here’s printer-friendly versions of the exercises and answers for you to print out: Simply click here for printable questions and answers.


Answers:
[am4show have=’p8;p9;p28;p55;’ guest_error=’Guest error message’ user_error=’User error message’ ]


  1. What is the difference between invertebrates and vertebrates? Vertebrates are animals with backbones while invertebrates do not have a backbone.
  2. Are sponges colonies of cells? If so, are all the cells the same type? Yes, sponges are colonies of cells. No, they are not all the same type—they are specialized to perform different functions such as filter food, and attach the sponge to the ocean bottom.
  3. What are sessile filter feeders? Organisms, such as sponges, which filter their food out of the water, and are attached to the substrate beneath them—they do not move.
  4. Would you want to touch an organism with nematocysts? Why or why not? No way! Nematocysts are the stinging cells found on Cnidarians!
  5. What is the difference between a polyp and a medusa? A polyp has an upward facing mouth while medusa’s mouths face downward.
  6. What are two differences between sponges and Cnidarians? Cnidarians have real tissue, and have a body cavity.
  7. Name two examples of Cnidarian colonies. Coral reefs and Portuguese Men-O-War.
  8. What are some of the differences between flatworms, roundworms, and segmented worms? Flatworms have neither a body cavity nor segments. Roundworms only have a body cavity, and segmented worms have both a body cavity and segments.
  9. What is an incomplete digestive system? It is a digestive system with only one opening—a mouth.
  10. Which part of a segmented worm serves as its hydroskeleton? Its body cavity.
  11. Which invertebrate has a radula, and what is it used for? Mollusks have radula, and it is used for feeding.
  12. Do Echinoderms have exoskeletons? No, they have endoskeletons.
  13. Give two examples of Echinoderms. Starfish, sea urchin, sea cucumber, etc.
  14. What role doe nerve nets play in Echinoderms? They act as a type of brain—receiving and processing information.
  15. Which phylum molts its exoskeleton in order to grow? Arthropoda.
  16. What are three examples of arthropods? Crabs, lobsters, scorpions, spiders, mites, ticks, etc.
  17. Do arthropods only use book lungs to breath? No, aquatic arthropods use gills and some terrestrial arthropods use tracheal systems.
  18. What are the two major groups of insects? Winged insects, and wingless insects.
  19. How do insects breathe? Through structures called spirials.
  20. How do most insects reproduce? Through sexual reproduction that results in eggs (oviparous).

[/am4show]


When you hear “roach” you might not immediately think of something that would make a good pet, but not all roaches are like the cockroaches you might have seen in your house!


Species such as the Orange Spotted Roach (Blaptica dubia) make excellent insect pets: they don’t cost much, they have an interesting life cycle and habits, and they do not require much effort to care for. Their average lifespan is about 18 months and you’ll be able to learn more about their fascinating life cycle (from egg to adult) if you allow them to breed!


A pet roach isn’t a pest?


It may seem like all roaches are pests, but of 4,000 species, only 4 or 5 live in homes and are considered pests (such as the American cockroach). Most roaches live in tropical environments far from domesticated areas. They are very different from the kind of household pest you might think of when you hear “roach.”


You might think roaches would make pretty boring pets, but they are surprisingly fast and fun to watch. You can learn a lot about insect anatomy and what makes roaches unique by taking care of them. The species that make good pets do not smell, are not noisy, cannot fly, and generally are very easy to clean up after. They typically are most active at night, because they prefer a dark environment like they have on the floor of the rainforest. They love to hide during the day, but will come out to eat.


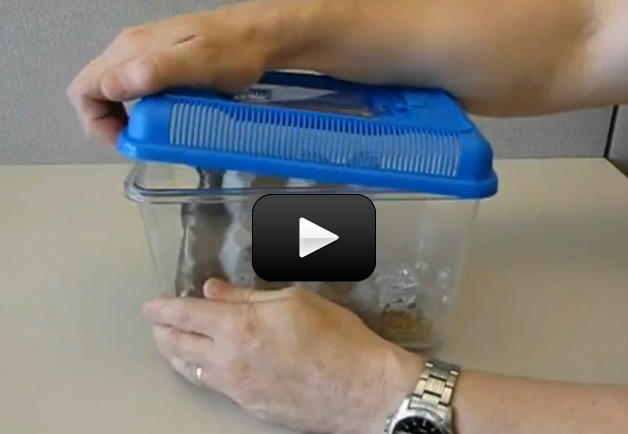
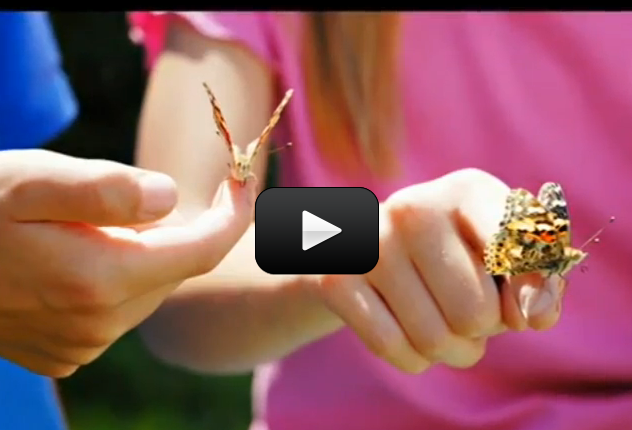
Can I touch them?  They are meant to be pets, and are perfectly safe to handle. A good environment for roaches is a small aquarium or plastic cage with cardboard egg cartons for them to hang out in. You might try picking up one of the egg cartons where a roach is hiding, then either hold the carton so the roach can crawl around on it or let the roach crawl in to your hands. Hold out your hand, keeping your fingers together and flat. Let the roach crawl on you, then slowly lift out your hand and cup it slightly. Remember to wash your hands afterwards, using warm water and soap. Although these insects don’t cause diseases in humans, they may be carrying harmful bacteria, so it is important to wash your hands so that you don’t get sick.


How long do they live? It varies, but species like Orange Spotted Roaches have a lifespan of 18-24 months. The female gives live birth, usually to 20-30 babies at a time. The babies reach maturity in 3-4 months after they are born. While they are growing into adults, they will molt – shedding their outer hard shell, or exoskeleton, and then growing a bigger one.


Will my roaches breed? If you get one male and one female, there is a good chance that they will breed under the right circumstances. If you do not want baby roaches, keep the temperature of the habitat around 70 degrees, or normal room temperature. Adult Orange Spotted Roaches will be fine at this temperature, but they will not mate because their young need higher temperatures to survive. If you would like to see the complete life cycle, you will need to ensure that their habitat has enough heat and humidity.


Feeding Time: What does a pet roach eat? They are omnivores – they eat plants and meat. So a good basic diet contains protein from plants and animals and fiber from grains. You can buy special roach food for them and then to supplement their diet give them fresh fruits and vegetables once a week. Try putting a slice of apple, banana, orange, carrot, potato, or zucchini, or a few spinach leaves in a shallow plastic dish and put it in their habitat. This will provide vitamins and minerals for your pets. Be sure to take the uneaten produce out of the habitat within 48 hours to prevent mold from growing, or attracting ants or fruit flies. A great roach diet would be dry food every day and a fresh food supplement once a week.


Be sure to keep their water dish full. Roaches can live a long time without food, but usually only survive three days without water. The water dish also helps make their habitat more moist and humid. For easiest care, use water absorbent crystals that hold water. You can keep an airtight container of prepared water crystals in a cool place, and add another crystal to the water dish whenever needed (usually every 2-3 days).


If the habitat is hot and humid, the roaches will be more active, which means they will also eat and drink more.


Cleaning Time: You should periodically clean out your pet roach’s habitat to make sure there is no mold growing. Cleaning out the habitat takes only a few minutes and will prevent any bad odors coming from your insects. When is the right time to clean the habitat? When you see small dark roach droppings starting to collect on the bottom, you should clean the habitat out. Usually about once a month is a good time. The minimum should be once every other month.


To clean out the habitat, first remove the roaches. Place them in a container that has smooth sides to prevent them from climbing out. Pick up the roaches one at a time and transfer them to the carton or other container. If a roach is hiding in an egg carton, carefully lift out the carton, then let the roach crawl off into the container or onto your hand. Wash your hands with soap and warm water after touching the roaches.


Take the food and water dishes out, as well as the egg cartons, and place them on paper towels. Rinse the container out and then wash it with a solution of 10 parts warm water to 1 part bleach. Rinse the container again and dry it thoroughly. Place the food and water dishes back in the container. If the cardboard egg cartons seem clean, put them back into the container. Don’t use foam egg cartons. You can also use cardboard tubes in different sizes (mailing tubes, toilet paper tubes, or wrapping paper tubes cut down to shorter lengths) so the roaches can crawl in them. When you’re finished cleaning, throw the used egg cartons away as well as the paper towels. Transfer your roaches back to their habitat, using a flat hand so they can crawl off.


Building a Roach Ranch: If you decide to get a pet roach, you can create a habitat to be as simple or creative as you like. If you wish to make a more natural-looking habitat for your pet roaches to enjoy, you can buy peat moss or coconut husk mulch from a pet store (in the Reptile section). Put in a layer of moss or mulch (about one inch), then add pieces of bark for the roaches to climb on and hide under. This type of Roach Ranch will be similar to the Orange Spotted Roaches’ natural environment in the rainforests of South America.


You can make a Roach Ranch out of cardboard, which can easily be thrown away when it gets dirty. Make a multi-level mansion for your roaches by cutting 3-4 identical shapes (square, rectangle, L-shape) from cardboard. Put separators in between each level – use stacked cardboard strips that are one inch wide and several inches long. Each level should be separated about ½” or three strips of cardboard stacked together. Use Elmer’s glue to attach the separators and flat levels, and let it dry completely (may take up to 24 hours) before putting it in your roach habitat. Add cardboard tubes or crumpled newspaper to complete your Roach Ranch. Remember that it will be easier to clean if roach droppings can fall freely to the ground. When you clean your habitat, check to see if your Roach Ranch is staying clean. Throw away any parts that have been well-used and add new cardboard material for the roaches to climb.
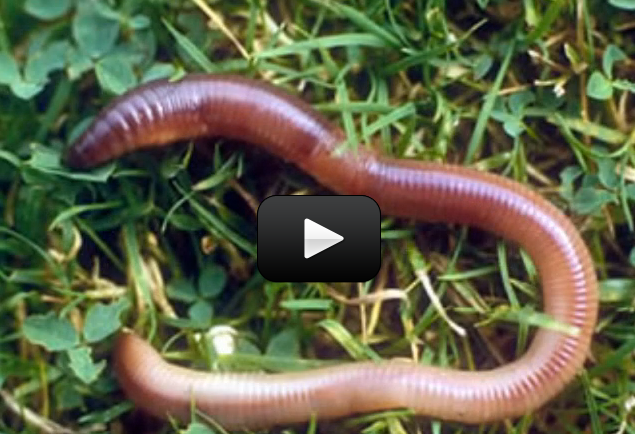
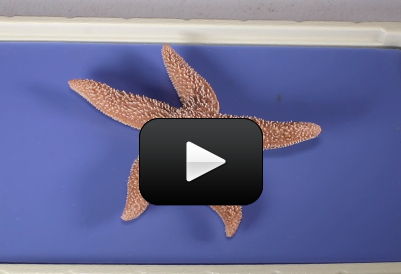
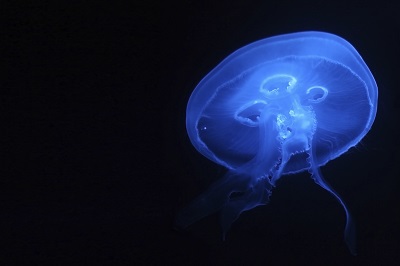
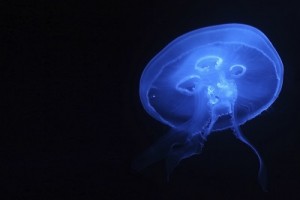