If a particle moves in only one dimension, like a train on as straight track, it’s easy to answer the question about where it is because there’s only one component to it: “13m North” or “-3.6 feet.” It’s a single number with units and a positive or negative sign… that’s it. Pretty simple, right?


Well, the truth is that most objects move in two or three dimensions, and so we need more information to tell us where that object is, so we use vectors. We’re going to focus on objects moving in a two dimensional plane.


[am4show have=’p9;p58;’ guest_error=’Guest error message’ user_error=’User error message’ ]


Click here to go to next lesson on Two Dimensional Motion.

[/am4show]


We’re going to study particles (or projectiles) that move in two dimensions. This can be a cannon ball after being fired, a baseball after being thrown, a golf ball after being hit, a soccer ball after being kicked, or any other situation you can think of where an object is under the influence of only gravity after the initial force applied to move the object. (Usually we ignore wind resistance when we do these types of problems.)


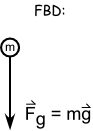
The FBD of projectiles is simply a downward pointing arrow to indicate the weight. If it looks strange to have a force not in the direction of the object’s travel path, just remember that a force isn’t needed to sustain motion… it’s actually the opposite! Objects stop moving because of the forces applied to it. The FBD are always a snapshot of the forces acting on the object in that moment. The object can be moving in one direction and the force acting in another.


A projectile is a particle that is only experiencing gravity, and in most cases, gravity is only acting in one direction. Gravity doesn’t influence the horizontal motion (if we accounted for air resistance, then there would be a force in this direction as well), only the vertical motion. That’s why the ball falls to the ground when you throw it.


This means that a bullet fired horizontally from a gun experiences a constant horizontal velocity and a downward vertical acceleration. A bullet fired from a gun pointed up at a 45 degree angle also experiences a constant horizontal velocity and a downward vertical acceleration. A bullet fired from a gun in outer space away from any gravitational influences would travel up at a 45 degree path away from the gun and experience constant horizontal and vertical velocity.


[am4show have=’p9;p58;’ guest_error=’Guest error message’ user_error=’User error message’ ]


The path a projectile makes is parabolic, meaning that it follows the shape of a parabola. The horizontal motion of the projectile is independent of the vertical motion. You’ll need to think about each component as separate and independent.


2-D Kinematic Equations

vx = vxo + axt
vy = vyo + ayt


x = xo + vxot + 1/2 axt2
y = yo + vyot + 1/2 ayt2


vx2 = vxo2 + 2 ax (x – xo)
vy2 = vyo2 + 2 ay (y – yo)


We can transform the above equations into a set of equations specifically for projectile motion by setting the acceleration in the x direction equal to zero for constant velocity (ax = 0) and setting the acceleration in the y direction equal to gravity (ay = -g) and rewrite to get:


vx = vxo
vy = vyo – gt


x = xo + vxot
y = yo + vyot – 1/2 gt2


vy2 = vyo2 – 2 g (y – yo)


Click here to go to next lesson on Using Trigonometry with Physics.

[/am4show]


Now let’s do a set of physics problems so you can really see how to solve these. The first one shows you how to not only calculate an angle buried in a trig function, but also that you don’t need fancy equations to solve a problem and that you really have to understand what the problem is asking for, so you don’t waste time calculating stuff you don’t need.


[am4show have=’p9;p58;’ guest_error=’Guest error message’ user_error=’User error message’ ]


Click here to go to next lesson on Soccer Ball Science.

[/am4show]


This problem will show you how a soccer ball can also be a projectile, and how by knowing a couple of simple things, you can find out everything you need about the problem, including how far and how high the ball traveled in addition to its time of flight.


[am4show have=’p9;p58;’ guest_error=’Guest error message’ user_error=’User error message’ ]


Click here to go to next lesson on P-Shooter Launcher.

[/am4show]


This is a simple, fun, and sneaky way of throwing tiny objects. It’s from one of our spy-kit projects. Just remember, keep it under-cover. Here’s what you need:


  • a cheap mechanical pencil
  • two rubber bands
  • a razor with adult help

[am4show have=’p8;p9;p15;p42;p88;p92;’ guest_error=’Guest error message’ user_error=’User error message’ ]


Advanced students: Download your P-Shooter Lab here.


[/am4show]


Click here to go to next lesson on Pirate Problem.

Okay now, back to work! Here’s a neat problem involving a pirate ship and a cannon ball. I seriously doubt pirates would be able to calculate this kind of problem when being fired at by a fortress, but you might have a captain that had a good sense based on experience of how far and fast that cannon ball could travel.


[am4show have=’p9;p58;’ guest_error=’Guest error message’ user_error=’User error message’ ]


Click here to go to next lesson on Easy to Build Catapult.

[/am4show]


When you drop a ball, it falls 16 feet the first second you release it. If you throw the ball horizontally, it will also fall 16 feet in the first second, even though it is moving horizontally… it moves both away from you and down toward the ground. Think about a bullet shot horizontally. It travels a lot faster than you can throw (about 2,000 feet each second). But it will still fall 16 feet during that first second. Gravity pulls on all objects (like the ball and the bullet) the same way, no matter how fast they go.


What if you shoot the bullet faster and faster? Gravity will still pull it down 16 feet during the first second, but remember that the surface of the Earth is round. Can you imagine how fast we’d need to shoot the bullet so that when the bullet falls 16 feet in one second, the Earth curves away from the bullet at the same rate of 16 feet each second?


Answer: that bullet needs to travel nearly 5 miles per second. (This is also how satellites stay in orbit – going just fast enough to keep from falling inward and not too fast that they fly out of orbit.)


Catapults are a nifty way to fire things both vertically and horizontally, so you can get a better feel for how objects fly through the air. Notice when you launch how the balls always fall at the same rate – about 16 feet in the first second.  What about the energy involved?


When you fire a ball through the air, it moves both vertically and horizontally (up and out). When you toss it upwards, you store the (moving) kinetic energy as potential energy, which transfers back to kinetic when it comes whizzing back down. If you throw it only outwards, the energy is completely lost due to friction.


The higher you pitch a ball upwards, the more energy you store in it. Instead of breaking our arms trying to toss balls into the air, let’s make a simple machine that will do it for us. This catapult uses elastic kinetic energy stored in the rubber band to launch the ball skyward.


[am4show have=’p8;p9;p15;p42;p151;p75;p85;p88;p92;’ guest_error=’Guest error message’ user_error=’User error message’ ]


Here’s what you need:


  • 9 tongue-depressor size popsicle sticks
  • four rubber bands
  • one plastic spoon
  • ping pong ball or wadded up ball of aluminum foil (or something lightweight to toss, like a marshmallow)
  • hot glue gun with glue sticks


Download Student Worksheet & Exercises


catapult1What’s going on? We’re utilizing the “springy-ness” in the popsicle stick to fling the ball around the room. By moving the fulcrum as far from the ball launch pad as possible (on the catapult), you get a greater distance to press down and release the projectile. (The fulcrum is the spot where a lever moves one way or the other – for example, the horizontal bar on which a seesaw “sees” and “saws”.)


Troubleshooting: These simple catapults are quick and easy versions of the real thing, using a fulcrum instead of a spring so kids don’t knock their teeth out. After making the first model, encourage kids to make their own “improvements” by handing them additional popsicle sticks, spoons, and glue sticks (for the hot glue guns).


If they get stuck, you can show them how to vary their models: glue a second (or third, fourth, or fifth) spoon onto the first spoon for multi-ammunition throws, increase the number of popsicle sticks in the fulcrum from 7 to 13 (or more?), and/or use additional sticks to lengthen the lever arm. Use ping pong balls as ammo and build a fort from sheets, pillows, and the backside of the couch.


Want to make a more advanced catapult? 

This catapult requires a little more time, materials, and effort than the catapult design above, but it’s totally worth it. This device is what most folks think of when you say ‘catapult’. I’ve shown you how to make a small model – how large can you make yours?


This project lends itself well to taking data and graphing your results: you and your child can jot down the distance traveled along with time aloft with further calculations for high school students for velocity and acceleration. My university students would also calculate statistics, percent error, and more. My students also mapped out the material properties of the ‘cantilevered beam’ as well as model the popsicle stick as a spring (to determine the spring constant (k) for your calculations from Hooke’s Law). You can take this project as far as you want, depending on the interest and ability of kids.


Materials:


  • plastic spoon
  • 14 popsicle sticks
  • 3 rubber bands
  • wooden clothespin
  • straw
  • wood skewer or dowel
  • scissors
  • hot glue gun


Try different ball weights (ping pong, foil crumpled into a ball, whiffle balls, marshmallows, etc) and chart out the results: make a data table that shows what ball you tried and how far it went. You can also use a stopwatch to time how long your ball was in the air.


You can also graph your results: make a chart where you plot each data point on a graph that has distance on the vertical axis and time on the horizontal axis.


Advanced Teaching Tips: For high school and college-level physics classes, you can easily incorporate these launchers into your calculations for projectile motion. Offer students different ball weights (ping pong, foil crumpled into a ball, and whiffle balls work well) and chart out the results.


Exercises Answer the questions below:


  1. How is gravity related to kinetic energy?
    1. Gravity creates kinetic energy in all systems.
    2. Gravity explains how potential energy is created.
    3. Gravity pulls an object and helps its potential energy convert into kinetic energy.
    4. None of the above
  2. If you could use your catapult to launch your ball of foil into orbit, how high would it have to go?
    1. Above the atmosphere
    2. High enough to slingshot around the moon
    3. High enough so that when it falls, the earth curves away from it
    4. High enough so that it is suspended in empty space
  3. Where is potential energy the greatest on the catapult?

[/am4show]


Click here to go to next lesson on Two Body Problems.

Two body problems are more common than you might think. Here's a two-dimensional two body problem that is a good review of Newton's Second Law that also includes friction calculations.

[am4show have='p9;p58;' guest_error='Guest error message' user_error='User error message' ]


This is a more advanced catapult design that uses more sticks, but it still shoots a good distance :

When you drop a ball, it falls 16 feet the first second you release it. If you throw the ball horizontally, it will also fall 16 feet in the first second, even though it is moving horizontally… it moves both away from you and down toward the ground. Think about a bullet shot horizontally. It travels a lot faster than you can throw (about 2,000 feet each second). But it will still fall 16 feet during that first second. Gravity pulls on all objects (like the ball and the bullet) the same way, no matter how fast they go.

What if you shoot the bullet faster and faster? Gravity will still pull it down 16 feet during the first second, but remember that the surface of the Earth is round. Can you imagine how fast we’d need to shoot the bullet so that when the bullet falls 16 feet in one second, the Earth curves away from the bullet at the same rate of 16 feet each second?

Answer: that bullet needs to travel nearly 5 miles per second. (This is also how satellites stay in orbit – going just fast enough to keep from falling inward and not too fast that they fly out of orbit.)

Catapults are a nifty way to fire things both vertically and horizontally, so you can get a better feel for how objects fly through the air. Notice when you launch how the balls always fall at the same rate – about 16 feet in the first second.  What about the energy involved?

When you fire a ball through the air, it moves both vertically and horizontally (up and out). When you toss it upwards, you store the (moving) kinetic energy as potential energy, which transfers back to kinetic when it comes whizzing back down. If you throw it only outwards, the energy is completely lost due to friction.

The higher you pitch a ball upwards, the more energy you store in it. Instead of breaking our arms trying to toss balls into the air, let's make a simple machine that will do it for us. This catapult uses elastic kinetic energy stored in the rubber band to launch the ball skyward.

[am4show have='p8;p9;p15;p42;p151;p75;p85;p88;p92;' guest_error='Guest error message' user_error='User error message' ] Here's what you need:
  • 9 tongue-depressor size popsicle sticks
  • four rubber bands
  • one plastic spoon
  • ping pong ball or wadded up ball of aluminum foil (or something lightweight to toss, like a marshmallow)
  • hot glue gun with glue sticks


Download Student Worksheet & Exercises

catapult1What’s going on? We’re utilizing the “springy-ness” in the popsicle stick to fling the ball around the room. By moving the fulcrum as far from the ball launch pad as possible (on the catapult), you get a greater distance to press down and release the projectile. (The fulcrum is the spot where a lever moves one way or the other – for example, the horizontal bar on which a seesaw “sees” and “saws”.)

Troubleshooting: These simple catapults are quick and easy versions of the real thing, using a fulcrum instead of a spring so kids don’t knock their teeth out. After making the first model, encourage kids to make their own “improvements” by handing them additional popsicle sticks, spoons, and glue sticks (for the hot glue guns).

If they get stuck, you can show them how to vary their models: glue a second (or third, fourth, or fifth) spoon onto the first spoon for multi-ammunition throws, increase the number of popsicle sticks in the fulcrum from 7 to 13 (or more?), and/or use additional sticks to lengthen the lever arm. Use ping pong balls as ammo and build a fort from sheets, pillows, and the backside of the couch.

Want to make a more advanced catapult? 

This catapult requires a little more time, materials, and effort than the catapult design above, but it's totally worth it. This device is what most folks think of when you say 'catapult'. I've shown you how to make a small model - how large can you make yours?

This project lends itself well to taking data and graphing your results: you and your child can jot down the distance traveled along with time aloft with further calculations for high school students for velocity and acceleration. My university students would also calculate statistics, percent error, and more. My students also mapped out the material properties of the 'cantilevered beam' as well as model the popsicle stick as a spring (to determine the spring constant (k) for your calculations from Hooke's Law). You can take this project as far as you want, depending on the interest and ability of kids.

Materials:
  • plastic spoon
  • 14 popsicle sticks
  • 3 rubber bands
  • wooden clothespin
  • straw
  • wood skewer or dowel
  • scissors
  • hot glue gun


Try different ball weights (ping pong, foil crumpled into a ball, whiffle balls, marshmallows, etc) and chart out the results: make a data table that shows what ball you tried and how far it went. You can also use a stopwatch to time how long your ball was in the air.

You can also graph your results: make a chart where you plot each data point on a graph that has distance on the vertical axis and time on the horizontal axis.

Advanced Teaching Tips: For high school and college-level physics classes, you can easily incorporate these launchers into your calculations for projectile motion. Offer students different ball weights (ping pong, foil crumpled into a ball, and whiffle balls work well) and chart out the results.

Exercises Answer the questions below:

  1. How is gravity related to kinetic energy?
    1. Gravity creates kinetic energy in all systems.
    2. Gravity explains how potential energy is created.
    3. Gravity pulls an object and helps its potential energy convert into kinetic energy.
    4. None of the above

  2. If you could use your catapult to launch your ball of foil into orbit, how high would it have to go?
    1. Above the atmosphere
    2. High enough to slingshot around the moon
    3. High enough so that when it falls, the earth curves away from it
    4. High enough so that it is suspended in empty space

  3. Where is potential energy the greatest on the catapult?


[/am4show]

Click here to go to next lesson on Advanced Catapult.


Since you've worked so hard, I thought you'd enjoy making a marshmallow launcher just for fun. You can calculate the horizontal and vertical acceleration based on the time of flight, you can also figure out the initial speed based on how far it went, or you can just make it and have fun with it. Here it is:

[am4show have='p9;p58;' guest_error='Guest error message' user_error='User error message' ]


Click here to go to next lesson on Calculus and What It's Useful For.

[/am4show]

So now let’s look ahead and sneak a peek into your future. Are you nervous about taking Calculus? Or if you have, have you wondered what Calculus could possibly be useful for? Here’s a two part video that shows you what Calculus is (and will even have you doing it before the end of the second video!) and how it’s used all the time in physics. Sir Isaac Newton was so frustrated that he couldn’t solve his physics problems with the math that was already developed at that time (algebra) that he set them aside to invent a branch of mathematics that could support his work in science, and that’s where Calculus came from. Here’s how we use it today in physics…


[am4show have=’p9;p58;’ guest_error=’Guest error message’ user_error=’User error message’ ]


Click here to go to next lesson on Rabbit Problem.

[/am4show]


Now that you know what functions are, here’s how to solve the rabbit problem:


[am4show have=’p9;p58;’ guest_error=’Guest error message’ user_error=’User error message’ ]


Click here to go to next lesson on Trebuchet.

[/am4show]


trebuchet23This experiment is for Advanced Students. For ages, people have been hurling rocks, sticks, and other objects through the air. The trebuchet came around during the Middle Ages as a way to break through the massive defenses of castles and cities. It’s basically a gigantic sling that uses a lever arm to quickly speed up the rocks before letting go. A trebuchet is typically more accurate than a catapult, and won’t knock your kid’s teeth out while they try to load it.


Trebuchets are really levers in action. You’ll find a fulcrum carefully positioned so that a small motion near the weight transforms into a huge swinging motion near the sling. Some mis-named trebuchets are really ‘torsion engines’, and you can tell the difference because the torsion engine uses the energy stored in twisted rope or twine (or animal sinew) to launch objects, whereas true trebuchets use heavy counterweights.


[am4show have=’p9;p41;p88;p92;p103;’ guest_error=’Guest error message’ user_error=’User error message’ ]


This is a serious wood-construction project. If you have access to scrap wood and basic tools (and glue!), you have everything you need to build this project. You will need to find heavy objects (like rocks or marbles) for the weights.


We want kids to discover that science isn’t in the special parts that come with a kit, but rather in the imagination and skill of the kid building it. We strive to avoid parts that are specially made just for a kit, molded plastic pieces, etc. and instead use parts that any kid could buy from the store. This means that kids can feel free to change things around, use their own ideas to add improvements and whatever else their imagination can come up with. So on this note, let’s get started.


WARNING: This project requires the use of various hand tools. These tools should only be used with adult supervision, and should not be used by children under 12 years of age.


Tools you’ll need:


  •   Hammer
  •   Electric drill with ¼” bit
  •   Hot glue gun & glue sticks
  •   Measuring tape or ruler
  •   Hand saw & clamp (or miter box)
  •   Scissors
  •   Screwdriver (flathead) or wood chisel

Materials:


  • 7 pieces of ½” x ½” x 24″ pieces of wood stock
  • 2 pieces of ¾” x 24″ wood
  • 1 piece of 3″ x 24″ wood
  • 18″ Wooden dowel
  • Screw eye
  • Nails
  • String
  • Clear tube
  • Rubber mesh

Note: wood pieces may be slightly larger or smaller than specified. Just use your best judgment when sizing.


From ½” x ½” x 24″ pieces of wood stock cut:


  • 3 pieces 5″ long
  • 2 pieces 9″ long
  • 3 pieces 3-1/2″ long
  • 4 pieces 5-1/2″ long

From the dowel cut:


  • 2 pieces 7″ long
  • 1 piece 4″ long

From the 3″ x 24″ flat piece of wood cut:


  • 2 pieces 3″ long (one of these has a 1″ square notch in it)
  • 2 pieces 5″ long
  • 1 piece 4-1/2″ long

AND…


  • String should be cut into 2 pieces 14-16″ long
  • The pouch is cut from the rubber mesh and is 5″ x 1-1/2″


Advanced Students: Download your Student Worksheet Lab here!


[/am4show]


Click here to go to next lesson on Helpful Hints.

Physics can really trip you up if you're not careful! You can to remember all kinds of things, including triangles, significant figures, vectors, units, and so much more. Here's a video on some helpful hints to keep in mind as you go along:


Yay! You've completed this section! Now it's your turn to solve your own set of physics problems:

Click here to download your problem set for projectile motion.


Vectors are different from scalar numbers because they also include information about direction. Velocity, acceleration, force, and displacement are all vectors. Speed, time, and mass are all scalar quantities. Acceleration can be either a scalar or a vector, although in physics it’s usually considered a vector. For example, a car traveling at 45 mph is a speed, whereas a car traveling 45 mph NW is a vector. When you draw a vector, it’s an arrow that has a head and a tail, where the head points in the direction the force is pulling or the object is moving.


The coordinate system you use can be a compass (north, south, east and west) which is good for problems involving maps and geography, rectangular coordinates (x and y axes) which is good for most problems with objects traveling in two directions, or polar coordinates (radius and angle) which is good for objects that spin or rotate.


We have to get really good at vectors and modeling real world problems down on paper with them, because that’s how we’ll break things down to solve for our answers. If you’re already comfortable with vectors, feel free to skip ahead to the next lesson. If you find you need to brush up or practice a little more, this section is for you.


[am4show have=’p9;p58;’ guest_error=’Guest error message’ user_error=’User error message’ ]


The next four videos are a review of what we’ve covered so far with vectors. If you jumped here without going through the first two sections on 1-D Kinematics or Newton’s Laws, watch these four videos now to get an overview of vector components, resultants, trigonometry, resolution, and component addition. If you’ve already worked through these, then skip down to the section on relative velocity and start there.


Here’s a basic introduction to scalars and vectors:


Click here to go to next lesson on Resultants.

[/am4show]


A resultant is the vector sum of all of the vectors, usually force vectors. You can’t just add the numbers (magnitudes) together! You have to account for the direction that you’re pushing the box in. Here’s what you need to know about vector diagrams and how to add vectors together:


[am4show have=’p9;p58;’ guest_error=’Guest error message’ user_error=’User error message’ ]


Click here to go to next lesson on Components.

[/am4show]


A vector in two dimensions has components in both directions. Here’s how to add vectors together to get a single resultant vector using component addition as well as trigonometry (the law of cosines and the law of sines):


[am4show have=’p9;p58;’ guest_error=’Guest error message’ user_error=’User error message’ ]


Click here to go to next lesson on Pythagorean Theorem.

[/am4show]


Vectors can be added together using the Pythagorean theorem if they are at right angles with each other (which components always are). Here’s more practice is how to do both rectangular and polar coordinate system components of a vector:


[am4show have=’p9;p58;’ guest_error=’Guest error message’ user_error=’User error message’ ]


Click here to go to next lesson on Relative Motion.

[/am4show]


deals with problems where one object moves with respect to another. For example, an airplane might be traveling at 300 knots according to its airspeed indicator, but since it has a 20 knot headwind, the speed you see the airplane traveling at is actually 280 knots. You’ve seen this in action if you’ve ever noticed a bird flapping its wings but not moving forward on a really windy day. In that case, the velocity of the wind is equal and opposite to the bird’s velocity, so it looks like the bird’s not moving.


But what if the airplane encounters a crosswind? Something that’s not straight-on light a head or tail wind? Here’s how you break it down with vectors:


[am4show have=’p9;p58;’ guest_error=’Guest error message’ user_error=’User error message’ ]


Click here to go to next lesson on Boat Problem.

[/am4show]


These types of problems aren’t limited to airplanes, though. Have you ever gone in a boat and drifted off course? Here’s what was happening from a physics point of view:


[am4show have=’p9;p58;’ guest_error=’Guest error message’ user_error=’User error message’ ]


Click here to go to next lesson on Crossing a River.

[/am4show]


These types of boat problems usually ask for the following information to be calculated: what is the resultant velocity of the boat, how much time does it take to cross the river, and what distance does the boat drift off course due to the wind? Let’s practice this type of problem again so you really can get the hang of it.


[am4show have=’p9;p58;’ guest_error=’Guest error message’ user_error=’User error message’ ]


Click here to go to next lesson on Hot Air Balloon.

[/am4show]


Where else might you encounter this type of problem in the real world? Air balloons! A hot air balloon is pretty much at the mercy of the winds, so it's easy to calculate the component forces and velocities to determine the path of travel. Let's try one...

[am4show have='p9;p58;' guest_error='Guest error message' user_error='User error message' ]


Wow! If you followed all that, you have a good working understanding of how to use math (like vectors and equations) to solve real world problems! Don't forget - the most important thing you do is READING and UNDERSTANDING the problem. Don't get hooked by shiny equations and spiffy calculations, when sometimes the answer is as simple as dividing one number by another. I can't tell you how many students make this physics stuff way harder than it has to be because they're sure they have to use fancy stuff to get the right answer. They waste time they could have spend doing fun stuff (like science experiments!) struggling over getting equations to fit together without understanding what those equations represent in the first place.

Click here to go to next lesson on Projectile Motion.

[/am4show]