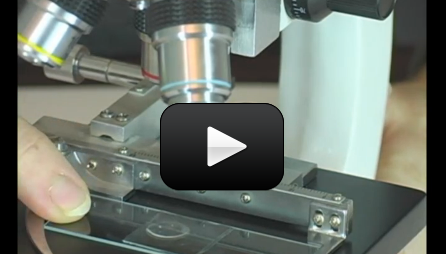
Make sure you’ve completed the How to Use a Microscope and also the Wet Mount activities before you start here!
If your critter is hard to see, you can use a dye to bring out the cell structure and make it easier to view. There are lots of different types of stains, depending on what you’re looking at.
The procedure is simple, although kids will probably stain not only their specimens, but the table and their fingers, too. Protect your surfaces with a plastic tablecloth and use gloves if you want to.
We’re going to use an iodine stain, which is used in chemistry as an indicator (it turns dark blue) for starch. This makes iodine a good choice when looking at plants. You can also use Lugol’s Stain, which also reacts with starch and will turn your specimen black to make the cell nuclei visible. Methylene blue is a good choice for looking at animal cells, blood, and tissues.
In addition to your specimen, you’ll need to get out your slides, microscope, cover slips, eye dropper, tweezers, iodine (you can use regular, non-clear iodine from the drug store), and a scrap of onion. If you can find an elodea leaf, add it to your pile (check with your local garden store). Here’s what you do:
Please login or register to read the rest of this content.
We don’t have the program available by grade, so we ask that you request us to unlock an entire grade for you. Can you send us an email? aurora@superchargedscience.com and let us know which level you’d like!
Staining is listed for 3rd grade, but we don’t have access to the video, is this correct?
I went to the beach and I saw a jellyfish