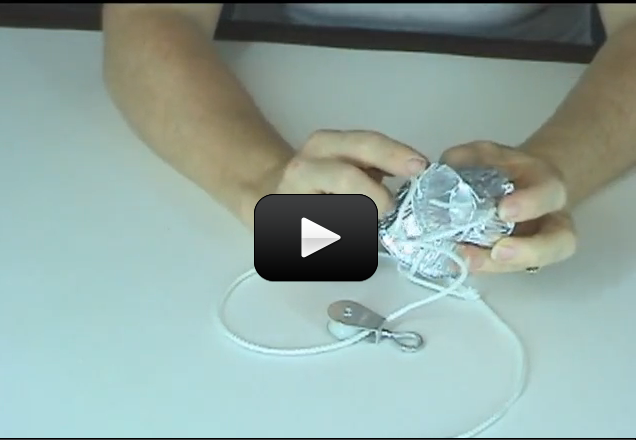
Are you curious about pulleys? This set of experiments will give you a good taste of what pulleys are, how to thread them up, and how you can use them to lift heavy things.

We'll also learn how to take data with our setup and set the stage for doing the ultra-cool Pulley Lift experiments.

Are you ready? [am4show have='p8;p9;p14;p41;p75;p85;p88;p92;' guest_error='Guest error message' user_error='User error message' ] For this experiment, you will need:

  • One pulley (from the hardware store... get small ones that spin as freely as possible. You’ll need three single pulleys or if you can find one get a double pulley to make our later experiment easier.)
  • About four feet of string
  • 2 paper cups
  • many little masses (about 50 marbles, pennies, washers etc.)
  • Yardstick or measuring tape
  • A scale (optional)
  • 2 paper clips
  • Nail or some sort of sharp pokey thing
  • Table
Download Student Worksheet & Exercises

Advanced students: Download your Simple Pulley Experiments

1. Take a look at the video to see how to make your “mass carriers”. Use the nail to poke a hole in both sides of the cup. Be careful to poke the cup...not your finger! Thread about 4 inches of string or a pipe cleaner through both holes. Make sure the string is a little loose. Make two of these mass carriers. One is going to be your load (what you lift) and the other is going to be your effort (the force that does the lifting).

2. Dangle the pulley from the table (check out the picture).

3. Bend your two paper clips into hooks.

4. Take about three feet of string and tie your paper clip hooks to both ends.

5. Thread your string through the pulley and let the ends dangle.

6. Put 40 masses (coins or whatever you’re using) into one of the mass carriers. Attach it to one of the strings and put it on the floor. This is your load.

7. Attach the other mass carrier to the other end of the string (which should be dangling a foot or less from the pulley). This is your effort.

8. Drop masses into the effort cup. Continue dropping until the effort can lift the load.

9. Once your effort lifts the load, you can collect some data. First allow the effort to lift the load about one foot (30 cm) into the air. This is best done if you manually pull the effort until the load is one foot off the ground. Measure how far the effort has to move to lift the load one foot.

10. When you have that measurement, you can either count the number of masses in the load and the effort cup or if you have a scale, you can get the mass of the load and the effort.

11. Write your data into your pulley data table in your science journal.

Double Pulley Experiment

You need:

Same stuff you needed in Experiment 1, except that now you need two pulleys.


1. Attach the string to the hook that’s on the bottom of your top pulley.

2. Thread the string through the bottom pulley.

3. Thread the string up and through the top pulley.

4. Attach the string to the effort.

5. Attach the load to the bottom pulley.

6. Once you get it all together, do the same thing as before. Put 40 masses in the load and put masses in the effort until it can lift the load.

7. When you get the load to lift, collect the data. How far does the effort have to move now in order to lift the load one foot (30 cm)? How many masses (or how much mass, if you have a scale) did it take to lift the load?

8. Enter your data into your pulley table in your science journal.

Triple Pulley Experimentitem7

You Need

Same stuff as before If you have a double pulley or three pulleys you can give this a shot. If not, don’t worry about this experiment.

Do the same thing you did in experiments 1 and 2 but just use 3 pulleys. It’s pretty tricky to rig up 3 pulleys so look carefully at the pictures. The top pulley in the picture is a double pulley.

1. Attach the string to the bottom pulley. The bottom pulley is the single pulley.item8
2. Thread the string up and through one of the pulleys in the top pulley. The top pulley is the double pulley.

3. Take the string and thread it through the bottom pulley.

4. Now keep going around and thread it again through the other pulley in the top (double) pulley.

5. Almost there. Attach the load to the bottom pulley.

6. Last, attach the effort to the string.

7. Phew, that’s it. Now play with it!

Take a look at the table and compare your data. If you have decent pulleys, you should get some nice results. For one pulley, you should have found that the amount of mass it takes to lift the load is about the same as the amount of mass of the load. Also, the distance the load moves is about the same as the distance the effort moves.

All you’re really doing with one pulley, is changing the direction of the force. The effort force is down but the load moves up.

Now, however, take a look at two pulleys. The mass needed to lift the load is now about half the force of the load itself! The distance changed too. Now the distance you needed to move the effort, is about twice the distance that the load moves. When you do a little math, you notice that, as always, work in equals work out (it won’t be exactly but it should be pretty close if your pulleys have low friction).

What happened with three pulleys? You needed about 1/3 the mass and 3 times the distance right? With a long enough rope, and enough pulleys you can lift anything! Just like with the lever, the pulley, like all simple machines, does a force and distance switcheroo.

The more distance the string has to move through the pulleys, the less force is needed to lift the object. The work in, is equal to the work out (allowing for loss of work due to friction) but the force needed is much less.

Exercises Answer the questions below:
  1. What is the load and effort of a pulley? Draw a pulley and label it.
  2. What is the best way to say what a simple machine helps us do?
    1. Do work without changing force applied
    2. Change the direction or strength of a force
    3. Lift heavy shipping containers
    4. None of these
  3.  Name one other type simple machine and an example:
[/am4show]

Have a question ?

Tell us what you're thinking...

Comments

18 Responses to “Simple Pulley Experiments”

  1. violet639 says:

    Can you use marbles in one cup in pennies in the other?

  2. Sue Forster says:

    i have done this experiment with my brothers and sisters and with large pulleys and it worked fine

  3. You’re going to laugh, because the pulleys I used in the video are from a chicken coup! The kind from the hardware store should work, as will some shower curtain pulleys if they are strong enough.

  4. karen heard says:

    We had quite a bit of problems with this experiment. Mainly with the string not staying in the groove of the pulley and the friction of the system being outrageously large. Where did you get the pulleys in your video and have you done this experiment with fishing line. The pulleys I purchased looked like fishing line would get wedged in the space between the pulley and the metal holder.

  5. Margaret Gustafson says:

    Thank you. We’ll get this figured out. The kids are excited about e-science camp and are really looking forward to it after wrapping this unit up.

  6. If you use a single-strand (like fishing line) or a braided line (like clothesline or nylon) that can help. I am sorry you are having trouble, but remember, use this as a way to keeping the kids learning that science is something like this! 🙂

  7. Margaret Gustafson says:

    Now we are having problems with the string twisting. Is there a particular kind of string that is less likely to twist?

  8. Great job! Remember, kids are learning all the time, and by encouraging them to look at their results and redoing the experiment, you’re also teaching them about resilience and observation, two important qualities real scientists must have. 🙂

  9. Margaret Gustafson says:

    Going to have the kids try again tomorrow. After reading your comment and watching the video again, I think it may have been a combination of mixing up the lift and load buckets along with poor quality string that had a bit of stretch to it. I’ll send you a photo if the kids continue having issues. Thanks!

  10. Hmmm…. that sounds suspicious. My guess is that you have something strung up backwards, or are putting the weight on the wrong point. Can you send me a photo of your experiment?

  11. Margaret Gustafson says:

    The kids used good pulleys from the hardware store by the way.

  12. Margaret Gustafson says:

    I’m not sure why the kids got the results they did. It makes no sense to me. For example, it took 26 pennies to lift 15 for the single pulley. It took 51 to lift 15 on the double pulley, and it took 85 to lift 15 on the triple. ?????? Any suggestions, thoughts, comments on what possibly went wrong here?

  13. Excellent! You’ve just mastered the main concepts that I teach my 2nd year engineering students…. 🙂

  14. Nazliatul Aniza Nordin says:

    Hi Aurora!

    I learned that you have to trade force for distance. Like when you have the double pulley you have to pull it further for it to be easier. Like the see-saw too. It is easier to lift it when the fulcrum is nearer to the load.

    Dayini (12) 🙂

  15. That looks great! What did you learn?

  16. Nazliatul Aniza Nordin says:

    Hi Aurora!

    For the single pulley:
    It took 64 coins to lift the load (40 coins)

    For the double pulley:
    It took 49 coins to lift the load (40 coins)

    Does this look correct to you?

    Thank you!
    -Dayini (12) 🙂

  17. I am sorry you had trouble – are there any suggesting you’d recommend?

  18. Carolyn Norville says:

    This was difficult because we had to cut the string every 2 minutes.It was frustrating for me because we could not get the rope in the cup we tried and tried but,it would not go it took us about 25 minutes to get done. We had to watch your video over and over and go back to the beginning!Then we finaly got it after it took us about 10 minutes for the sencond pulley system!!!!!!!!!!!!!!!!!!!!!!!!!!!!!!!!!!!!!!!!!!!!!!!!!!!!!!!!!!!!!!!!!!!!!!!!!!!!!!!!!!!!!!!